Epson XP-330 Quick Guide and Warranty - Page 4
Scanning to Facebook
 |
View all Epson XP-330 manuals
Add to My Manuals
Save this manual to your list of manuals |
Page 4 highlights
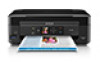
Scanning to Facebook You can scan documents or photos and upload them to Facebook and other online destinations, such as photo-sharing sites, web servers, or network folders using Easy Photo Scan. For additional details on uploading photos, see your online User's Guide. Starting Easy Photo Scan Windows® 10.10: Click , and select All Apps. Select Epson Software and click Easy Photo Scan. Select your product and click OK, if necessary. Windows 8.x: Navigate to the Apps screen and select Easy Photo Scan. Select your product and click OK, if necessary. Windows (other versions): Click or Start, and select All Programs or Programs. Select Epson Software and click Easy Photo Scan. Select your product and click OK, if necessary. OS X: Open the Applications folder, click Epson Software, and click Easy Photo Scan. Select your product and click OK, if necessary. Scanning a Photo Click the Scan icon to open your scanning program, then click Scan in the scanning program's window to scan the original. The scanned image appears in the Easy Photo Scan window. Repeat for each photo you want to upload. Uploading to Facebook 1. Once you have finished scanning your images, click the Facebook icon on the destination bar. 2. Log in to your Facebook account and select an album for the uploaded photos, then select an image format and any options. You can save your settings for future uploads. 3. Click Send to upload the photos to Facebook. 4 Scanning to Facebook
-
 1
1 -
 2
2 -
 3
3 -
 4
4 -
 5
5 -
 6
6 -
 7
7 -
 8
8 -
 9
9 -
 10
10 -
11
-
12
-
13
-
14
-
15
-
16
 |
 |
