Epson TM-T88IV UB-U06 Users Manual - Page 4
Unpacking, Procedure - driver
 |
View all Epson TM-T88IV manuals
Add to My Manuals
Save this manual to your list of manuals |
Page 4 highlights
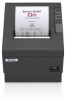
Unpacking Make sure you have these items. If any item is missing or damaged, please contact your dealer for assistance. UB-U06 This manual Procedure If a UB-BOARD is currently installed in your printer, you need to remove it first before you can install the new UB-U06 board. Disconnect the power supply from the printer and follow the steps below. 1. Removing the current UB-BOARD from the printer. Remove the two screws that secure the UB-BOARD; then pull the UB-BOARD to remove it. You will use the screws when installing the UB-U06. CAUTION: Put the UB-BOARD into an anti-static bag for storage to prevent damage from static electricity. 2. Installing the UB-U06 enclosed in the package Hold the UB-U06 as shown in the illustration below. Push the UB-U06 in gently until you feel the connector fit into the place. connector of the UB-U06 connector of the TM printer 3. Setting the UB-U06 Secure the UB-U06 with the two screws. 4. Setting the printer settings Change the printer settings following the printer manual. 5. Installing the USB Plus Power cable Connect the rectangle-shaped side of the connector of the USB Plus Power cable to the UB-U06 USB Plus Power up-stream connector. Connect the square-shaped side of the connector of the USB Plus Power cable to the down-stream connector of the host computer. CAUTION: Be sure not to use any cable not specified for the USB Plus Power. An improper cable can damage the UB-U06 and cause an electric shock. USB Plus Power up-stream connector 6. Installing the Software Install the device driver for the UB-U06. Please ask your dealer how to install it. 4
-
 1
1 -
 2
2 -
 3
3 -
 4
4
 |
 |
