Epson SureColor S70675 High Production Edition Alignment Guide - Page 14
gray part is hidden after completing step 3., path as shown
 |
View all Epson SureColor S70675 High Production Edition manuals
Add to My Manuals
Save this manual to your list of manuals |
Page 14 highlights
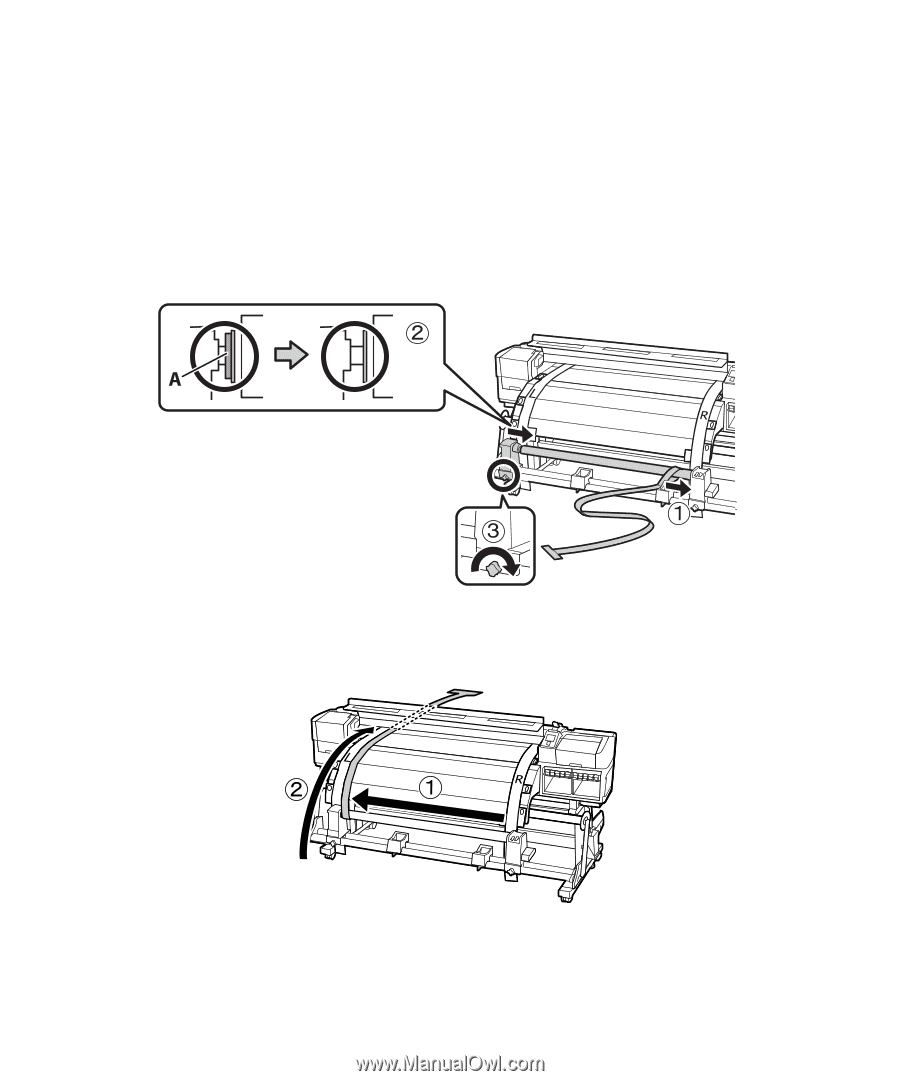
14 | Adjusting the Take-up Reel 2. Load the roll core with the alignment tool onto the roll holder: • Place the core on the right roll holder and press it in until part A is hidden. • Move the left roll holder over to hold the roll core in place, then turn the roll holder screw on the left to lock it into place. • If you are installing the optional heavy roll media system, rotate the handle until part A (the light gray part) is hidden after completing step 3. 3. From the front of the printer, move the alignment tool to the left side and feed it through the paper path as shown:
-
 1
1 -
2
-
3
-
4
-
5
-
6
-
7
-
8
-
 9
9 -
 10
10 -
 11
11 -
 12
12 -
 13
13 -
 14
14 -
 15
15 -
 16
16 -
 17
17 -
 18
18 -
 19
19 -
20
-
21
-
22
-
23
-
24
-
25
-
26
-
27
-
28
-
29
-
30
-
31
-
32
-
33
-
34
-
35
-
36
-
37
-
38
-
39
-
40
-
41
-
42
-
43
-
44
-
45
-
46
-
47
-
48
-
49
-
50
-
51
-
52
-
53
-
54
-
55
-
56
-
57
-
58
-
59
-
60
 |
 |
14
|
Adjusting the Take-up Reel
2.
Load the roll core with the alignment tool onto the roll holder:
•
Place the core on the right roll holder and press it in until part
A
is hidden.
•
Move the left roll holder over to hold the roll core in place, then turn the roll holder screw on the
left to lock it into place.
•
If you are installing the optional heavy roll media system, rotate the handle until part
A
(the light
gray part) is hidden after completing step 3.
3.
From the front of the printer, move the alignment tool to the left side and feed it through the paper
path as shown: