Epson ColorWorks/SecurColor C3400 Technical Reference Guide TRG
Epson ColorWorks/SecurColor C3400 Manual
 |
View all Epson ColorWorks/SecurColor C3400 manuals
Add to My Manuals
Save this manual to your list of manuals |
Epson ColorWorks/SecurColor C3400 manual content summary:
- Epson ColorWorks/SecurColor C3400 | Technical Reference Guide TRG - Page 1
Technical Reference Guide Product Overview Describes features and general specifications for the product. Setup how to handle the product. Maintenance of the TM-C3400 Describes to administrator for necessary information to administer TM-C3400 in the system such as distributing driver or installing - Epson ColorWorks/SecurColor C3400 | Technical Reference Guide TRG - Page 2
to this product, or (excluding the U.S.) failure to strictly comply with Seiko Epson Corporation's operating and maintenance instructions. • Seiko Epson Corporation shall not be liable against any damages or problems arising from the use of any options or any consumable products other than those - Epson ColorWorks/SecurColor C3400 | Technical Reference Guide TRG - Page 3
For Safety Key to Symbols The symbols in this manual are identified by their level of importance, as defined below. Read the following carefully before handling the product. You must follow warnings carefully to avoid - Epson ColorWorks/SecurColor C3400 | Technical Reference Guide TRG - Page 4
this equipment, do not continue to use it. Continued use may lead to fire. Unplug the power cord immediately and contact your dealer or a Seiko Epson service center for advice. • If you open the DIP switch cover, be sure to close the cover and tighten the screw after adjusting the DIP switch - Epson ColorWorks/SecurColor C3400 | Technical Reference Guide TRG - Page 5
Different connections may cause equipment damage or fire. • Do not connect cables in ways other than those mentioned in this manual. Different connections may cause equipment damage or fire. • Be sure to set this equipment on a firm, stable, horizontal surface. The product may break or cause - Epson ColorWorks/SecurColor C3400 | Technical Reference Guide TRG - Page 6
systems and development and design of printer applications for developers. Manual Content The manual is made up of the following sections: Chapter 1 Product Overview Chapter 2 Setup Chapter 3 Application Development Information Chapter 4 Handling Chapter 5 Maintenance of the TM-C3400 6 - Epson ColorWorks/SecurColor C3400 | Technical Reference Guide TRG - Page 7
Contents ■ For Safety ...3 Key to Symbols ...3 Warnings ...4 Cautions ...5 ■ Restriction of Use ...5 ■ About this Manual ...6 Aim of the Manual ...6 Manual Content ...6 ■ Contents...7 Product Overview 11 ■ Features...11 ■ Product Configuration...13 Interface ...13 Color ...13 Accessories ...13 ■ - Epson ColorWorks/SecurColor C3400 | Technical Reference Guide TRG - Page 8
Settings ...109 Media Loading Settings ...111 Media Position Detection...113 Panel Button Settings ...115 Sensor Adjustment ...117 Setting EPSON Status Monitor 3 ...119 Setting the Post-Printing Movements 125 Application Development Information 131 ■ Overview...131 ■ Printer Driver ...131 - Epson ColorWorks/SecurColor C3400 | Technical Reference Guide TRG - Page 9
■ Setting Check Modes ...198 Self-test Mode ...198 Status Sheet Printing (Ethernet interface model only 200 ■ Head Cleaning ...201 Manual Head Cleaning...201 Manual Head Cleaning during printing 201 Nozzle Check ...202 ■ Cleaning the Autocutter 203 ■ Changing the Interface for Ethernet Model 204 - Epson ColorWorks/SecurColor C3400 | Technical Reference Guide TRG - Page 10
■ Troubleshooting ...208 Lighting and Flashing the Error LED 208 Maintenance of the TM-C3400 209 ■ Necessary Information for an Administrator of the Printer 210 Printer Driver Functions ...210 Destination for the Printer Driver Setting 211 Printer Setting ...212 Installing - Epson ColorWorks/SecurColor C3400 | Technical Reference Guide TRG - Page 11
describes features and specifications of the product. Features The TM-C3400 is a 3-color ink jet printer that offers high dpi dpi: dots per 25.4 mm (dots per inch) ∗ Each color has 4 gradations • Supports printing on various types of paper ∗ Roll paper, Fan-fold paper ∗ Receipt, Black Mark Receipt, - Epson ColorWorks/SecurColor C3400 | Technical Reference Guide TRG - Page 12
Reliability • Pigment ink for excellent light-fastness and water-resistance. • High reliability system to prevent missing dots with auto nozzle check system installed. Software • Windows® printer driver is available. • The printer driver has the built-in barcode font, and available from .NET - Epson ColorWorks/SecurColor C3400 | Technical Reference Guide TRG - Page 13
) • Paper ejection tray • Power switch cover • Paper feed guide (for fanfold paper: attached on the rear of the fanfold paper cover) • AC Adapter (Model: PS-180) • AC cable • USB cable (USB interface model only) • Instruction sheet • User's Manuals (for printer and AC adapter) • The AC adapter is - Epson ColorWorks/SecurColor C3400 | Technical Reference Guide TRG - Page 14
Parts Name and Function Front Release lever Paper ejection guide Control panel Paper ejection tray Paper ejection table Paper ejection guide lock Roll paper cover Ink cartridge cover Power switch Power switch cover Control panel Power LED Error LED Ink LED Paper LED CUT button FEED - Epson ColorWorks/SecurColor C3400 | Technical Reference Guide TRG - Page 15
Inlet (AC Adapter) AC Adapter Ethernet Interface Model Power connector Cable hook Inlet (AC Adapter) AC Adapter Chapter 1 Product Overview Fanfold paper cover Paper feed guide Fanfold paper guide 1 USB connector Status sheet button Ethernet Connector Connector cover 15 - Epson ColorWorks/SecurColor C3400 | Technical Reference Guide TRG - Page 16
Power Switch CAUTION Before turning on the printer, be sure to check that the AC adapter is connected to the power supply. • When DIP switch 1 is OFF, the power is turned on after the POWER button has been pressed while the power is OFF. • When DIP switch 1 is OFF, the power is turned off after - Epson ColorWorks/SecurColor C3400 | Technical Reference Guide TRG - Page 17
Chapter 1 Product Overview Button FEED button • Feeds the paper continuously when media position detection is set to "No Detection". ∗ The paper is fed by 15 mm if FEED button is pressed once. ∗ If the FEED button is held down, the paper is continuously fed until the button is released. (6 seconds - Epson ColorWorks/SecurColor C3400 | Technical Reference Guide TRG - Page 18
INK (ink) LED: Red • Flashes when the ink is low or waste ink in the ink cartridge is nearly full. • Lights when it is time to replace the ink cartridge, when the ink cartridge is not installed or is not correctly installed, and when waste ink in the ink cartridge is full. • Lights off when ink in - Epson ColorWorks/SecurColor C3400 | Technical Reference Guide TRG - Page 19
Chapter 1 Product Overview Status/Error Indications The printer status is displayed with combination of lighting and flashing of LEDs. When an error occurs, you can find out the cause and the remedy from the LED indication for the error. / : Lights / : Flashes LED Power Error Ink Paper : Off -: - Epson ColorWorks/SecurColor C3400 | Technical Reference Guide TRG - Page 20
/ : Lights / : Flashes LED Power Error Ink Paper - - - - - - - - - - : Off -: No change Status Paper size error Paper path error Paper jam error Paper type error Ink end Waste ink cartridge is full Ink cartridge is not loaded Ink cartridge is not loaded correctly Ink cartridge cover is - Epson ColorWorks/SecurColor C3400 | Technical Reference Guide TRG - Page 21
is performed after printing each page to check that dot missing has not occurred. When dot missing is detected, the following screen of the EPSON Status Monitor 3 is displayed. Select the next operation from [Restart printing] (printing the next data) and [Reprint] (reprinting after dot missing is - Epson ColorWorks/SecurColor C3400 | Technical Reference Guide TRG - Page 22
[Reprint] (reprinting after dot missing is resolved by the auto head cleaning). When customer want to select this mode, do NOT uncheck [Use EPSON Status Monitor 3] of [Driver Preferences] in [Driver Utilities] tab. • Anti-missing Read Mode Does not perform missing dots check after printing each page - Epson ColorWorks/SecurColor C3400 | Technical Reference Guide TRG - Page 23
. 1 • When you want to select [High Reliability Mode (Reprint)] or [Economy Mode for Low Print Volume (Reprint)], do not uncheck [Use EPSON Status Monitor 3] of [Driver Prefer- ences] in [Driver Utilities] tab. When an unrecoverable missing dot occurs, the printer operates differently for each - Epson ColorWorks/SecurColor C3400 | Technical Reference Guide TRG - Page 24
In the Missing Dot Acceptable Print Mode, it takes long to complete printing because missing dots check is performed after printing each page. The EPSON Status Monitor 3 appears each time of printing until the missing dot error is resolved. (The window may not appear depending on the printer driver - Epson ColorWorks/SecurColor C3400 | Technical Reference Guide TRG - Page 25
depending on the printer driver version. See the following: ∗ Printer Driver Ver1.1.0.0 or earlier The procedure is not displayed in the EPSON Status Monitor 3. Check the LED indication. ("Unrecoverable nozzle clogging error (Missing Dot Acceptable Print Mode)" on page 19) ∗ Printer Driver Ver1 - Epson ColorWorks/SecurColor C3400 | Technical Reference Guide TRG - Page 26
port setting and network setting of the printer. Monitoring the printer EPSON Status Monitor 3 Displayed on front of the application while printing. USB model USB Replacement Service Service installed as a resident program on the computer When the TM-C3400 is replaced for service or other reason, - Epson ColorWorks/SecurColor C3400 | Technical Reference Guide TRG - Page 27
Purpose Name Specifications EpsonNet Simple Viewer The user can check status of EPSON printer on network with this. The setting can not be executed. kit for monitoring the printer via network. This is the sample programs for using TM-C3400. (VB.NET, C++ is prepared for all programs. VB 6.0, C# is - Epson ColorWorks/SecurColor C3400 | Technical Reference Guide TRG - Page 28
128, identification rate GS1 DataBar Omnidirectional, GS1 DataBar Truncated, ANSI rank D GS1 DataBar Limited, GS1 DataBar Expanded (based on Seiko Epson Corporation standard) Two-dimensional code printing PDF417, QR code, Maxi Code, S1 DataBar Stacked, GS1 DataBar Stacked Omnidirectional, GS1 - Epson ColorWorks/SecurColor C3400 | Technical Reference Guide TRG - Page 29
Microsoft Windows Server 2003 R2 SP2 (32 bit/ 64 bit) Computer Must support the following computers that run the above operating systems. • PC/AT the minimum requirements of the OS. • The printers on the network is supported up to 64 printers. In that case, if the minimum requirements above - Epson ColorWorks/SecurColor C3400 | Technical Reference Guide TRG - Page 30
Printing Specifications Printable area Print speed Roll paper Fanfold paper 360 × 180 dpi (horizontal × vertical) 360 × 360 dpi (horizontal × vertical) 720 × 360 dpi (horizontal × vertical) Minimum width 26 mm, Maximum width 104 mm Minimum width 46 mm, Maximum width 104 mm Printing width 56 mm: - Epson ColorWorks/SecurColor C3400 | Technical Reference Guide TRG - Page 31
Chapter 1 Product Overview Paper Specifications The following is the type and the size of paper specified for this printer. When using paper other than specified paper, paper feed accuracy, barcode detection accuracy, printing quality may be degraded or frequent paper jam may occur. As for black - Epson ColorWorks/SecurColor C3400 | Technical Reference Guide TRG - Page 32
Receipt This is continuous paper. Paper type Form Paper width Paper length Paper thickness Roll paper core External diameter Winding direction Plain Media, Fine Media, PET Film Roll paper 30 to 108 mm 15 to 1117.6 mm 0.085 to 0.151 mm Outside diameter: 44.1 mm Maximum 101.6 mm Printing face must be - Epson ColorWorks/SecurColor C3400 | Technical Reference Guide TRG - Page 33
Black Mark Receipt Center of black marks Center of paper width Chapter 1 Product Overview Center of paper width Paper feeding direction Black mark length Interval of black marks Perforation position 0.5 mm or more (When using fanfold paper) Black mark width 1 Black - Epson ColorWorks/SecurColor C3400 | Technical Reference Guide TRG - Page 34
Paper type Form Paper width Paper length Black mark width Black mark length Black mark centering position Black mark interval Paper thickness Pitch of perforated line: Form of perforated line Number of folds Plain Media, Fine Media, PET Film Fanfold paper 50 to 108 mm 15 to 304.8 mm 13 mm or - Epson ColorWorks/SecurColor C3400 | Technical Reference Guide TRG - Page 35
Full-page Label Backing paper width Chapter 1 Product Overview 1 Label width Backing paper Label area Edge cutoff Edge cutoff Paper type Form Backing paper width Label width Label length Edge cutoff on left/right side Paper thickness Roll paper core External diameter Winding direction Plain - Epson ColorWorks/SecurColor C3400 | Technical Reference Guide TRG - Page 36
Die-cut Label Backing paper width Gap between Label length labels Edge R Edge cutoff Label width Backing paper Label area Edge cutoff Paper type Form Backing paper width Label width Label length Gap between labels Edge cutoff on left/right side Label edge R Paper thickness Roll paper core - Epson ColorWorks/SecurColor C3400 | Technical Reference Guide TRG - Page 37
Chapter 1 Product Overview Paper type Fine Media Form Roll paper Backing paper width 30 to 112 mm Label width 25.4 to 108 mm Label length 25.4 to 1117.6 mm (To use a label with a label length of 25.4 mm or less, see descriptions for Black Mark Die-cut Label.) Gap between labels 3 to 6 mm - Epson ColorWorks/SecurColor C3400 | Technical Reference Guide TRG - Page 38
Paper type Form Backing paper width Label width Label length Gap between labels Edge cutoff on left/right side Label edge R Paper thickness Roll paper core External diameter Winding direction Synthetic Media Label Roll paper 30 to 112 mm 25.4 to 108 mm With the roll paper core of 44.1 mm or more: - Epson ColorWorks/SecurColor C3400 | Technical Reference Guide TRG - Page 39
Black Mark Die-cut Label Center of black marks Center of paper width Black mark length Chapter 1 Product Overview Center of paper width Paper feeding direction Interval of black marks Perforation position 2 mm or more (When using fanfold paper) Black mark width 1 - Epson ColorWorks/SecurColor C3400 | Technical Reference Guide TRG - Page 40
Paper type Form Backing paper width Label width Label length Gap between labels Edge cutoff on left/right side Label edge R Black mark width Black mark length Black mark centering position Black mark interval Paper thickness Roll paper core External diameter Winding direction Plain Media Roll paper - Epson ColorWorks/SecurColor C3400 | Technical Reference Guide TRG - Page 41
Chapter 1 Product Overview Paper type Fine Media Label Form Roll paper Backing paper width 30 to 112 mm Label width 25.4 to 108 mm Label length 25.4 to 1117.6 mm (For the label length of 15 to less than 25.4 mm, use paper whose outer edges are removed only on the right and left.) Gap - Epson ColorWorks/SecurColor C3400 | Technical Reference Guide TRG - Page 42
Paper type Form Backing paper width Label width Label length Gap between labels Edge cutoff on left/right side Label edge R Black mark width Black mark length Black mark centering position Black mark interval Paper thickness Roll paper core External diameter Winding direction Synthetic Media Label - Epson ColorWorks/SecurColor C3400 | Technical Reference Guide TRG - Page 43
Chapter 1 Product Overview Paper type Plain Media Label, Fine Media Label Form Fanfold paper Backing paper width 50 to 112 mm Label width 46 to 108 mm Label length 15 to 301.8 mm Gap between labels 3 to 6 mm Edge cutoff on left/right side 2 ± 0.5 mm Label edge R 2 mm or less Black - Epson ColorWorks/SecurColor C3400 | Technical Reference Guide TRG - Page 44
Wrist Band Center of paper width Center of black marks Center of paper width Paper feeding direction Black mark length Interval of black marks Black mark width Black mark paper Paper type Specified original paper Form Backing paper width Black mark width Black mark - Epson ColorWorks/SecurColor C3400 | Technical Reference Guide TRG - Page 45
Print Area and Cutting Position Receipt / Roll paper Top margin: Left and right margin: 2.0 mm (typical value) 2.0 mm (typical value) Bottom margin: 2.0 mm (typical value) Paper width Center of paper width Auto-cut position 2.0 mm Chapter 1 Product Overview Paper feeding direction 1 11.0 - Epson ColorWorks/SecurColor C3400 | Technical Reference Guide TRG - Page 46
Full-page Label / Roll paper Top margin (inside the label): Left and right margin (inside the label): Bottom margin (inside the label): 2.0 mm (typical value) 2.0 mm (typical value) 2.0 mm (typical value) Center of paper width Paper width Auto-cut position 2.0 mm Paper feeding direction 11.0 - Epson ColorWorks/SecurColor C3400 | Technical Reference Guide TRG - Page 47
Chapter 1 Product Overview Die-cut Label / Roll paper Top margin (inside the label): Left and right margin (inside the label): Bottom margin (inside the label): 2.0 mm (typical value) 2.0 mm (typical value) 2.0 mm (typical value) 2.0 mm 1.5 mm Center of paper width Auto-cut position Paper width - Epson ColorWorks/SecurColor C3400 | Technical Reference Guide TRG - Page 48
Black Mark Receipt / Roll paper Top margin: Left and right margin: Bottom margin: 2.0 mm (typical value) 2.0 mm (typical value) 2.0 mm (typical value) Paper width Center of paper width Auto-cut position 2.0 mm Paper feeding direction 11.0 mm or more 15.0 mm or more (When auto-cutting) Auto- - Epson ColorWorks/SecurColor C3400 | Technical Reference Guide TRG - Page 49
Black Mark Receipt / Fanfold paper Top margin: Left and right margin: Bottom margin: 2.0 mm (typical value) 2.0 mm (typical value) 2.0 mm (typical value) Center of paper width Perforated line Auto-cut position Paper width 2.0 mm 0.5 to 1.0 mm 2.0 mm Chapter 1 Product Overview Paper feeding - Epson ColorWorks/SecurColor C3400 | Technical Reference Guide TRG - Page 50
Black Mark Die-cut Label / Roll paper Top margin (inside the label): Left and right margin (inside the label): Bottom margin (inside the label): 2.0 mm (typical value) 2.0 mm (typical value) 2.0 mm (typical value) 2.0 mm 1.5 mm Center of paper width Auto-cut position Paper width Paper feeding - Epson ColorWorks/SecurColor C3400 | Technical Reference Guide TRG - Page 51
Chapter 1 Product Overview Black Mark Die-cut Label / Fanfold paper Top margin (inside the label): Left and right margin (inside the label): Bottom margin (inside the label): 2.0 mm (typical value) 2.0 mm (typical value) 2.0 mm (typical value) 1.5 to 3.0 mm 0.5 to 1.0 mm 2.0 mm Center of paper - Epson ColorWorks/SecurColor C3400 | Technical Reference Guide TRG - Page 52
Wrist Band / Roll paper Top margin: Left and right margin: Bottom margin: 2.0 mm (typical value) 2.0 mm (typical value) 2.0 mm (typical value) Paper width Center of paper width Auto-cut position 2.0 mm Paper feeding direction 288.1 mm 292.1 mm Auto-cut position 2.0 mm 2.0 mm Print area - Epson ColorWorks/SecurColor C3400 | Technical Reference Guide TRG - Page 53
Chapter 1 Product Overview Paper Ejection Tray Black Mark Receipt Paper type Paper form Plain Media, Fine Media, PET Film Fanfold paper Paper size Width 76 to 105 mm × length 54 to 148 mm Paper thickness 0.119 to 0.151 mm Black Mark Paper type Plain Media, Fine Media Die-cut Label Paper - Epson ColorWorks/SecurColor C3400 | Technical Reference Guide TRG - Page 54
Electrical Characteristics Power supply Input voltage (rated) Frequency (rated) Power Operating consumption Stand-by When power is OFF Power supplied by AC adapter accessory (PS-180) North America / Japan: AC 100 to 125V () Other countries: AC 100 to 240V 50 Hz to 60 Hz Approximately 26W - Epson ColorWorks/SecurColor C3400 | Technical Reference Guide TRG - Page 55
Chapter 1 Product Overview Reliability Life MTBF MCBF Print head 6,000 million shots/nozzle Paper feed mechanism 1,500,000 pages or the number of pages that reaches the following paper length fed. • Plain Media: 150 km • Fine Media: 75 km • PET Film: 50 km • Continuous label paper (Plain - Epson ColorWorks/SecurColor C3400 | Technical Reference Guide TRG - Page 56
) 700 to 1060 hPa (approximately 0 to 2500 m above sea level) Acoustic noise During operation (including using the autocutter) Approximately54 dB (ANSI Bystander position) (Based on Epson evaluation conditions including the use of the autocutter) 56 - Epson ColorWorks/SecurColor C3400 | Technical Reference Guide TRG - Page 57
External Dimensions • Height: 261 mm • Width: 255 mm • Depth: 275 mm 255 261 Chapter 1 Product Overview 300 275 1 457 (when the paper ejection tray is extended) 388 (when the paper ejection tray is shortend) 300 [Unit: mm] 57 - Epson ColorWorks/SecurColor C3400 | Technical Reference Guide TRG - Page 58
Power Supply Unit (PS-180) 136 68 32 [Unit: mm] Electric characteristics Case specifications Input conditions Input voltage (rated): 100 to 240V AC Frequency (rated): 50/60 Hz ± 3 Hz Power consumption (rated): 100VA Output conditions Output voltage (rated): 24VDC ± 5% Output current (rated): - Epson ColorWorks/SecurColor C3400 | Technical Reference Guide TRG - Page 59
• Drivers for TM printers (APD, OPS/JavaPOS) of Seiko Epson Corporation cannot be used for this printer. The TM-C3400 printer driver can . (This does not affect other printer drivers that are not for the TM-C3400.) To keep the existing settings, you must save the settings before executing the - Epson ColorWorks/SecurColor C3400 | Technical Reference Guide TRG - Page 60
move this printer after ink charging, check the colors by performing a test print. If the colors of printouts are not normal, perform head cleaning. See "Manual Head Cleaning" on page 201 for how to perform head cleaning. • When printing image data, white lines (lines shown in white) or black lines - Epson ColorWorks/SecurColor C3400 | Technical Reference Guide TRG - Page 61
Chapter 2 Setup Setup This chapter describes setup and installation of the product and peripherals. When You Use This Printer for the First Time Do not turn on the printer power until installation of the printer driver is completed. Ink charging and media position detection setting are necessary - Epson ColorWorks/SecurColor C3400 | Technical Reference Guide TRG - Page 62
move this printer after ink charging, check the colors by performing a test print. • If the colors of printouts are not normal, perform head cleaning. See Manual Head Cleaning on page 201 for how to perform head cleaning. • If you turn the printer off without using the power switch, the print head - Epson ColorWorks/SecurColor C3400 | Technical Reference Guide TRG - Page 63
Chapter 2 Setup Flow of Setup This chapter consists of the following sections along with the setup flow of the product and peripherals. 1. Installing the Printer (page 64) 2. Connecting the Power Supply Unit (PS-180) (page 65) 3. Loading/Replacing the Ink Cartridge (page 66) 4. Connecting the - Epson ColorWorks/SecurColor C3400 | Technical Reference Guide TRG - Page 64
Installing the Printer Install the printer in an appropriate location with sufficient space around it. Important Notes on Installation 261 100 275 255 [Unit: mm] • The printer must be installed horizontally. • Leave enough space in front of the printer for the ink cartridge cover and the roll paper - Epson ColorWorks/SecurColor C3400 | Technical Reference Guide TRG - Page 65
Setup Connecting the Power Supply Unit (PS-180) Use the PS-180 or an equivalent product as the power supply unit. WARNING • Always use the EPSON PS-180 or an equivalent product as the power supply unit. Using a nonstandard power supply can result in electric shock or fire. • Should a fault ever - Epson ColorWorks/SecurColor C3400 | Technical Reference Guide TRG - Page 66
, and then install the ink cartridge. See Loading/Replacing the Roll Paper on page 79 for how to load the roll paper. • Always use the EPSON SJIC15P as the ink cartridge. • Do not open the package of the ink cartridge until you are ready to load it in the printer. 1 Load - Epson ColorWorks/SecurColor C3400 | Technical Reference Guide TRG - Page 67
Chapter 2 Setup 6 Close the ink cartridge cover. When the ink cartridge is loaded for the first time, it takes approximately 8 minutes for ink charging. Do not open the roll cover or the ink cartridge cover of the printer, or press the Power switch or the FEED button. The INK LED (red) turns off. - Epson ColorWorks/SecurColor C3400 | Technical Reference Guide TRG - Page 68
Connecting the Printer to the Host Computer For USB Interface Model Connect the printer to the host computer by the USB cable. • Do not turn the power on until the printer driver is installed. • Make sure to use the USB cable included with the printer. Insert the USB cable to the USB connector on - Epson ColorWorks/SecurColor C3400 | Technical Reference Guide TRG - Page 69
Chapter 2 Setup For Ethernet Interface Model Connect the printer to a network by a LAN cable via a hub. CAUTION • When LAN cables are installed outdoors, make sure devices without proper surge protection are cushioned by being connected through devices that do have surge protection. Otherwise, - Epson ColorWorks/SecurColor C3400 | Technical Reference Guide TRG - Page 70
the printer driver. • Installation using Easy setup: Described in this manual. • Installation from the printer driver file: Not described in this manual. Execute the installer of the printer driver, and follow the instructions on the screen to install the printer driver. For Ethernet interface - Epson ColorWorks/SecurColor C3400 | Technical Reference Guide TRG - Page 71
2 Click [Local] for USB interface model. Chapter 2 Setup 3 Click [Install]. 4 Make sure of the connection to the computer when the following window appears, then turn the power on. 2 5 Click [Exit]. This is the end of driver installation. 71 - Epson ColorWorks/SecurColor C3400 | Technical Reference Guide TRG - Page 72
For Ethernet Interface Model When the network setting such as IP address setting on TM-C3400 was already made, the setting is applied. The setting can not be changed. Follow the steps below to install the printer driver and execute the - Epson ColorWorks/SecurColor C3400 | Technical Reference Guide TRG - Page 73
printer, go to step 9. 2 6 The method for acquiring IP address is displayed. Select the method you want to take, and click [Next]. When you select "Manual", enter the IP address. 73 - Epson ColorWorks/SecurColor C3400 | Technical Reference Guide TRG - Page 74
7 Checking the settings is displayed. If the settings are correct, click [Next]. If you want to change IP address setting, click [Back]. 8 Completed notice of the communication setting is displayed. Click [Next]. 74 - Epson ColorWorks/SecurColor C3400 | Technical Reference Guide TRG - Page 75
9 Enter the Printer Name and click [Next]. Do not check the box of [Print test page]. Chapter 2 Setup 10Select which installed printer driver to use as a default printer, and click 2 [Next]. The printer driver will be installed after clicking [Next]. 75 - Epson ColorWorks/SecurColor C3400 | Technical Reference Guide TRG - Page 76
11Click [Finish]. It terminates "EpsonNet EasyInstall". 12Click [Exit]. This is the end of driver installation and network setting. 76 - Epson ColorWorks/SecurColor C3400 | Technical Reference Guide TRG - Page 77
Chapter 2 Setup Setting the DIP Switches Change the DIP switch settings in the following cases. • When attaching the power switch cover to prevent the power switch from being pressed • When switching the paper type between roll paper and fanfold paper (The default setting is roll paper) • When - Epson ColorWorks/SecurColor C3400 | Technical Reference Guide TRG - Page 78
Function of the DIP Switches SW Function 1 Operation of the power switch 2 Internal use 3 Paper selection 7 Internal use 8 Buzzer volume ON OFF Reset Power ON/OFF Fixed to OFF (Do not change) Fanfold paper Roll paper Fixed to OFF (Do not change) High Low Factory settings OFF - Epson ColorWorks/SecurColor C3400 | Technical Reference Guide TRG - Page 79
: 1 to 5 1. Removing the paper (page 80) 2. Setting for media position detection (page 82) 3. Removing the paper feed guide (page 83) 4. Adjusting roll paper guide/paper ejection guide (page 84) 5. Loading the paper and turning on the printer (page 87) Before loading or replacing the roll paper - Epson ColorWorks/SecurColor C3400 | Technical Reference Guide TRG - Page 80
1. Removing the paper This procedure is not required when the paper is initially loaded to the printer. For roll paper 1 Press down the release lever, and pull it to the front to open the roll paper cover. Remove the roll paper or the roll paper core if any. 2 Close the roll paper cover. 80 - Epson ColorWorks/SecurColor C3400 | Technical Reference Guide TRG - Page 81
For fanfold paper 1 Open the fanfold paper cover. Chapter 2 Setup 2 Remove the remaining paper. 2 81 - Epson ColorWorks/SecurColor C3400 | Technical Reference Guide TRG - Page 82
2. Setting for media position detection This procedure is not required when media position detection is not changed. When paper remains in the printer, media position detection cannot be set. Be sure to remove the paper before turning on the printer. 1 Turn the power on. 2 Remove the paper in the - Epson ColorWorks/SecurColor C3400 | Technical Reference Guide TRG - Page 83
the printer or the paper type is not changed (roll paper/fanfold paper). Attach the paper feed guide to the printer only when using the fanfold paper. Be sure to remove the paper feed guide when using the roll paper. 1 Press down the release lever, and pull it to the front to - Epson ColorWorks/SecurColor C3400 | Technical Reference Guide TRG - Page 84
width is not changed. 1 Press down the release lever, and pull it to the front to open the roll paper cover. 2 Unlock the roll paper guide. 3 Push the paper guide on the left in the direction of the arrow, and load the roll paper with the printing side up. 84 - Epson ColorWorks/SecurColor C3400 | Technical Reference Guide TRG - Page 85
4 Lock the roll paper guide. Chapter 2 Setup 5 Release the lock of the paper ejection guide with a fine-tipped object. 2 6 Align the paper ejection guide with the roll paper width. 85 - Epson ColorWorks/SecurColor C3400 | Technical Reference Guide TRG - Page 86
7 Lock the paper ejection guide. 8 Close the roll paper cover. 86 - Epson ColorWorks/SecurColor C3400 | Technical Reference Guide TRG - Page 87
Chapter 2 Setup 5. Loading the paper and turning on the printer Steps 1 to 3 below are not necessary after performing Step 4. Adjusting roll paper guide/paper ejection guide on page 84. 1 Press down the release lever, and pull it to the front to open the roll paper cover. 2 2 Load the roll paper - Epson ColorWorks/SecurColor C3400 | Technical Reference Guide TRG - Page 88
3 Close the roll paper cover while aligning the roll paper with the paper ejection guide. 4 Turn the power on. The roll paper is automatically fed. When paper set operation at the paper cover close is set as "Media Loading Method ( - Epson ColorWorks/SecurColor C3400 | Technical Reference Guide TRG - Page 89
: 1 to 5 1. Removing the paper (page 90) 2. Setting for media position detection (page 92) 3. Attaching the paper feed guide (page 93) 2 4. Adjusting paper ejection guide/fanfold paper guide (page 95) 5. Loading the fanfold paper and turning on the printer (page 97) Make sure that the DIP switch - Epson ColorWorks/SecurColor C3400 | Technical Reference Guide TRG - Page 90
1. Removing the paper This procedure is not required when the paper is initially loaded to the printer. For roll paper 1 Press down the release lever, and pull it to the front to open the roll paper cover. Remove the roll paper or the roll paper core if any. 2 Close the roll paper cover. 90 - Epson ColorWorks/SecurColor C3400 | Technical Reference Guide TRG - Page 91
For fanfold paper 1 Open the fanfold paper cover. Chapter 2 Setup 2 Remove the paper left. 2 91 - Epson ColorWorks/SecurColor C3400 | Technical Reference Guide TRG - Page 92
2. Setting for media position detection This procedure is not required when media position detection is not changed. • When paper remains in the printer, media position detection cannot be set. Be sure to remove the paper before turning on the printer. • The changed setting of the media position - Epson ColorWorks/SecurColor C3400 | Technical Reference Guide TRG - Page 93
required when paper type (roll paper/fanfold paper) is not changed. Make sure to attach the paper feed guide when using fanfold paper. 1 Open the fanfold paper cover and take out the paper feed guide. 2 2 Press down the release lever, and pull it to the front to open the roll paper cover - Epson ColorWorks/SecurColor C3400 | Technical Reference Guide TRG - Page 94
3 Insert the paper feed guide into the grooves inside of the roll paper cover to attach it. 4 Close the roll paper cover. 94 - Epson ColorWorks/SecurColor C3400 | Technical Reference Guide TRG - Page 95
Chapter 2 Setup 4. Adjusting paper ejection guide/fanfold paper guide This procedure is not required when paper type (roll paper/fanfold paper) is not changed. 1 Release the lock of the paper ejection guide with a fine-tipped object. 2 Slide the paper ejection guide as wide as possible. 2 3 Lock the - Epson ColorWorks/SecurColor C3400 | Technical Reference Guide TRG - Page 96
4 Open the fanfold paper cover and release the lock of the fanfold paper guide. 5 Align the fanfold paper guide with the fanfold paper width. 6 Lock the fanfold paper guide. 96 - Epson ColorWorks/SecurColor C3400 | Technical Reference Guide TRG - Page 97
Chapter 2 Setup 5. Loading the fanfold paper and turning on the printer 1 Turn the power on. 2 After the Power LED stops flashing and lights, insert the paper into the paper slot with the print surface facing upward until it is pulled into inside the printer (approximately 100 mm). The paper is - Epson ColorWorks/SecurColor C3400 | Technical Reference Guide TRG - Page 98
4 Close the fanfold paper cover. This is the end of loading of the fanfold paper. 98 - Epson ColorWorks/SecurColor C3400 | Technical Reference Guide TRG - Page 99
Chapter 2 Setup Attaching/Adjusting the Paper Ejection Tray If you attach the paper ejection tray, you can temporarily store the printed paper in the tray. Follow the steps below to install/adjust the ejection tray. • Paper may not stay in the paper ejection tray depending on the paper curl and - Epson ColorWorks/SecurColor C3400 | Technical Reference Guide TRG - Page 100
3 Slide the bottom tray to align it with the paper length. 4 Lock the paper ejection tray. 100 - Epson ColorWorks/SecurColor C3400 | Technical Reference Guide TRG - Page 101
Chapter 2 Setup Attaching the Power Switch Cover Attaching the power switch cover prevents accidental pressing of the power switch. Before attaching the power switch cover, set DIP switch 1 to ON. (For details, see "Setting the DIP switches"Function of the DIP Switches on page 78.) The printer power - Epson ColorWorks/SecurColor C3400 | Technical Reference Guide TRG - Page 102
To switch the power switch by inserting a long, thin object into a hole Attach the power switch cover after punching the hole in it. The hole cannot be punched in the power switch cover after it is attached to the printer. 1 Punch a hole in the power switch cover by pushing the middle of it with a - Epson ColorWorks/SecurColor C3400 | Technical Reference Guide TRG - Page 103
Settings • Notification Settings • Media Loading Settings • Media Position Detection • Panel Button Settings • Sensor Adjustment Driver setting • Setting for EPSON Status Monitor 3 • Settings For Handling Media After Print 2 Post-Printing Verification Settings The following are the modes when - Epson ColorWorks/SecurColor C3400 | Technical Reference Guide TRG - Page 104
3 Select [Maintenance And Utilities] tab and click [Post-Printing Verification Settings]. 4 The [Post-Printing Verification Settings] window is displayed. Select [PostPrinting Verification Settings] and click [Next]. 5 Select the setting mode. See Post-Printing Verification Settings on page 21 for - Epson ColorWorks/SecurColor C3400 | Technical Reference Guide TRG - Page 105
6 Setting is completed. Click [OK] to finish. Chapter 2 Setup Void image registration Specifies the print image on High Reliability Mode (Void Image Print) or Economy Mode for 2 Low Print Volume (Void Image Print) when dots are missing. The default void printing is all-in- black printing with - Epson ColorWorks/SecurColor C3400 | Technical Reference Guide TRG - Page 106
4 The [Post-Printing Verification Settings] window is displayed. Select [Void Image Registration] and click [Next]. 5 Click [Browse] to select the image to print. Click [Register] to register the image to print. Click [Cancel] to terminate without performing the [Void Image Registration]. A bitmap - Epson ColorWorks/SecurColor C3400 | Technical Reference Guide TRG - Page 107
6 The void image registration is completed. Click [OK]. Chapter 2 Setup Void image test print Perform a test print of the image to print when dot missing occurs in the High Reliability Mode 2 (Void Image Print) or Economy Mode for Low Print Volume (Void Image Print). 1 Turn the printer on. 2 - Epson ColorWorks/SecurColor C3400 | Technical Reference Guide TRG - Page 108
5 Click [Test Print] to start test print. Click [Cancel] to terminate without performing test print. 6 Click [OK] to finish the test print. 108 - Epson ColorWorks/SecurColor C3400 | Technical Reference Guide TRG - Page 109
Error Selects notification setting at a paper size or type error. Lights Error LED and Paper LED when detecting an error, and notifies error if EPSON Status Monitor 3 is in active. (Default setting is [No Error Notification]. The user does not need to change when using with default setting.) Follow - Epson ColorWorks/SecurColor C3400 | Technical Reference Guide TRG - Page 110
5 Select notification setting, and click [OK]. Click [Cancel] to terminate without performing the [Notification Settings]. Beep Notification Setting an Error LED Notification Setting at Ink Low Notification Setting at a Paper Size/Type Error 6 Setting is completed. Click [OK] to finish. 110 - Epson ColorWorks/SecurColor C3400 | Technical Reference Guide TRG - Page 111
Chapter 2 Setup Media Loading Settings Sets paper feed movement to the print starting position when turning the printer power on or the roll paper cover is closed. The following is the movements to feed the paper to the print starting position when turning the printer power on or the roll paper - Epson ColorWorks/SecurColor C3400 | Technical Reference Guide TRG - Page 112
4 The [Media Loading Method Settings] window is displayed. Select your choice and click [Next]. 5 Sets paper feed to the print starting position and click [OK]. Click [Cancel] to terminate without performing the [Media Loading Method Settings]. Paper Set Operation at the Start up Paper Set - Epson ColorWorks/SecurColor C3400 | Technical Reference Guide TRG - Page 113
Chapter 2 Setup Media Position Detection The following 3 types of media position detection is set on this printer. This is set from [Media Position Detection] on [Maintenance And Utilities] tab. The printer's media position detection setting can be checked using Self-test Mode. For details, see - Epson ColorWorks/SecurColor C3400 | Technical Reference Guide TRG - Page 114
Paper type to use No Detection Black Mark - Fan-fold Receipt Media Black Mark Die-cut - Label Detect Blackmarks on Die-cut Labels - √ √: Used, -: Not Used Detect Blackmarks on Continuous Paper Detect Margins Between Labels √ - - - 114 - Epson ColorWorks/SecurColor C3400 | Technical Reference Guide TRG - Page 115
this printer. Panel Button Printer Operating Operation Caused by Panel Button Settings Feed Button Not printing Printing Paper feed Enable / Disable Manual Head Cleaning during Enable / Disable printing Cut Button - Paper cut Enable / Disable Follow the steps below to make the setting - Epson ColorWorks/SecurColor C3400 | Technical Reference Guide TRG - Page 116
5 Select Enable/Disable the panel button, and click [OK]. Click [Cancel] to terminate without performing the [Panel Button Settings]. Media feed when not printing Manual Head Cleaning during printing Cut Button 6 Setting is completed. Click [OK] to finish. 116 - Epson ColorWorks/SecurColor C3400 | Technical Reference Guide TRG - Page 117
Chapter 2 Setup Sensor Adjustment The threshold for the sensor can be adjusted when the sensor does not detect the label gap and black mark for the paper to be used. Follow the steps below to make adjustment. 1 Load the paper to the printer. 2 Turn the printer on. 3 Display the printer driver - Epson ColorWorks/SecurColor C3400 | Technical Reference Guide TRG - Page 118
7 The [Sensor Adjustment] window is displayed. Select the sensor to be adjusted and click [Next]. 8 Select [Start Adjustment]/[Default] and click [OK]. Click [Cancel] to terminate without performing the [Sensor Adjustment]. Adjusts the Label Gap Detection Sensor Adjusts the Black Mark Detection - Epson ColorWorks/SecurColor C3400 | Technical Reference Guide TRG - Page 119
error window is displayed. [Not use] is set by default setting; however, if a fatal error occurs, an error window can be displayed. Use/Not use EPSON Status Monitor 3 [Not use EPSON Status Monitor 3] is set by default setting. [Notification Settings for Fatal Errors] is displayed on the - Epson ColorWorks/SecurColor C3400 | Technical Reference Guide TRG - Page 120
4 The [Driver Preferences] window is displayed. Check the box of [Use EPSON Status Monitor 3] and click [OK]. 5 [EPSON Status Monitor 3] and [Monitoring Preferences] are displayed in [EPSON Status Monitor 3 Settings] on the Driver Utilities window. 120 - Epson ColorWorks/SecurColor C3400 | Technical Reference Guide TRG - Page 121
Status Monitor 3] at any time. (See Displaying the icon on page 124 for how to display the icon.) 2 Display window for EPSON Status Monitor 3 Icon on task tray • The following items can be set in [Monitoring preferences]. Selecting error indications: (See Error notification setting for [Not - Epson ColorWorks/SecurColor C3400 | Technical Reference Guide TRG - Page 122
Status Monitor 3 is enabled, [Notification Settings for Fatal Errors] is not displayed. (Disable EPSON Status Monitor 3 by referring to Use/Not use EPSON Status Monitor 3 on page 119.) 4 The [Notification Settings for Fatal Errors] window is displayed. Select the items you want to display when an - Epson ColorWorks/SecurColor C3400 | Technical Reference Guide TRG - Page 123
window.) 3 Select [Driver Utilities] tab and click [Monitoring Preferences]. When EPSON Status Monitor 3 is disabled, the [Monitoring Preferences] is not displayed. (Enable EPSON Status Monitor 3 by referring to Use/Not use EPSON Status Monitor 3 on page 119.) 4 The [Monitoring Preferences] window - Epson ColorWorks/SecurColor C3400 | Technical Reference Guide TRG - Page 124
Displaying the icon Keeps icon on the task tray so that user can check as needed. The icon is not displayed when default setting. Follow the steps below to display the icon. 1 Turn the printer on. 2 Display the printer driver window. (See How to Use the Printer Driver on page 160 for how to display - Epson ColorWorks/SecurColor C3400 | Technical Reference Guide TRG - Page 125
Chapter 2 Setup Setting the Post-Printing Movements The following post-printing movement can be set on this printer. Sets from [Settings For Handing Paper After Print] on [General] of the printer driver. • Auto Cut: After Every Page/Only After Last Page/After Specified Number of Pages After - Epson ColorWorks/SecurColor C3400 | Technical Reference Guide TRG - Page 126
Setting [Settings For Handing Paper After Print] depending on the paper type and paper cutting Sets "post-printing movements" depending on the type of the paper and how the paper is cut. For USB Interface Model (except shared printer) Paper type to use Receipt Full-page Label Die-cut Label Roll - Epson ColorWorks/SecurColor C3400 | Technical Reference Guide TRG - Page 127
Black Mark Backing paper is not cut - √ Die-cut Label Cuts the backing paper - √ by pressing CUT button √ - Tears along perforated - - - √ √: Used, -: Not Used line manually 2 127 - Epson ColorWorks/SecurColor C3400 | Technical Reference Guide TRG - Page 128
from another application before user cuts the paper and paper jam may occur by drawing the paper into the printer. Set [Auto Cut] or cut manually by pressing CUT button to prevent paper jam. Printer Diver Settings Printer Operating No Auto Cut Paper type to use Paper cutting method Auto Cut - Epson ColorWorks/SecurColor C3400 | Technical Reference Guide TRG - Page 129
paper is not cut* - - - √ Black Mark Die-cut Label Cuts the backing paper - √ √ - by pressing CUT button 2 Tears along perforated line manually* - - - √ * If the printing is performed when the user is peeling the label, paper is suddenly fed backward and drawn into the printer - Epson ColorWorks/SecurColor C3400 | Technical Reference Guide TRG - Page 130
130 - Epson ColorWorks/SecurColor C3400 | Technical Reference Guide TRG - Page 131
" on page 160 for details.) ❏ Various utilities and user's manuals are available. ❏ Dedicated sample program for TM-C3400 is available. Use this as reference to develop the application. ❏ EpsonNet SDK is available. This is used for EPSON network printer. On this printer, this is used to check - Epson ColorWorks/SecurColor C3400 | Technical Reference Guide TRG - Page 132
. Operation is checked for the sample program using the EpsonNet SDK; however, EpsonNet SDK does not support C#, VB6.0 and VB.NET officially. Combination with each language is not 100% confirmed. ❏ Structure of TM-C3400 sample program The following is the structure, model and language to use for - Epson ColorWorks/SecurColor C3400 | Technical Reference Guide TRG - Page 133
Level Program name Chapter 3 Application Development Information Specification Printer Model Language USB Ethernet C++ C# VB.NET VB6.0 Basic Step 5 Notifying the When the condition of the printer status from the p r i n t e r i s c ha n g e d , eve n t i s printer to the caused by SNMP - Epson ColorWorks/SecurColor C3400 | Technical Reference Guide TRG - Page 134
SDK EpsonNet SDK is the API for the Epson network printer, and also supported by this printer. The network setting is ini" of the EpsonNet SDK needs to be edited before installing it. See below for instructions on editing it. Item Set contents Value Default TCPIP Set to use the EpsonNet SDK for - Epson ColorWorks/SecurColor C3400 | Technical Reference Guide TRG - Page 135
Chapter 3 Application Development Information Setting Procedure When the EpsonNet SDK has already been installed, uninstall it first. Follow the steps below to make the setting for the EpsonNet SDK, and then install it again. 1 Edit "setting.ini" in the Install Disk of the EpsonNet SDK. 2 Install - Epson ColorWorks/SecurColor C3400 | Technical Reference Guide TRG - Page 136
c34ps_xx.exe TM-C3400 Printer Setting Guide EpsonNet Simple Viewer ensvxx.exe EpsonNet Simple Viewer User's Manual EpsonNet Config encwxxx.exe None EpsonNet SDK for Windows EpsonNet-SDK-Verxxx-E.zip EpsonNet SDK for Windows TM-C3400 Reference USB Replacement Service UsbRepSv_32_xxx.exe - Epson ColorWorks/SecurColor C3400 | Technical Reference Guide TRG - Page 137
Simple Viewer This is to check the network settings and the statuses for more than one EPSON printers in the network. • Some EPSON printers are not supported. • See EpsonNet Simple Viewer User's Manual for details. EpsonNet Config The network setting and changes are available for more than one - Epson ColorWorks/SecurColor C3400 | Technical Reference Guide TRG - Page 138
the printer via network. Sample Program This is the sample programs to use TM-C3400 by using EpsonNet SDK. (VB.NET, C++ is prepared for all programs. VB 6.0, C# is prepared for some programs.) Download Drivers, utilities, and manuals can be downloaded from one of the following URLs. For customers in - Epson ColorWorks/SecurColor C3400 | Technical Reference Guide TRG - Page 139
Printer Driver and Utility Function List Printer Driver Driver Utility Easy setup [Driver Utilities] tab [Maintenance And Utilities] tab EPSON Status Monitor 3 Install Package Install Assistant EpsonNet Config EpsonNet Web Config Printer Setting EpsonNet Simple Viewer EpsonNet SDK Printer - Epson ColorWorks/SecurColor C3400 | Technical Reference Guide TRG - Page 140
Setting of the Printer Referring the setting value Driver Driver Utility Easy setup [Driver Utilities] tab [Maintenance And Utilities] tab EPSON Status Monitor 3 Install Package Install Assistant EpsonNet Config EpsonNet Web Config Printer Setting EpsonNet Simple Viewer EpsonNet SDK Basic IP - Epson ColorWorks/SecurColor C3400 | Technical Reference Guide TRG - Page 141
EpsonNet Web Config Acquiring Network TCP/IP Basic (wired) Link Speed & Duplex √√√√ Port Type √√√√ Basic IP Address Settings (Manual/Auto) Set Using Automatic Private IP Addressing √√√√ 3 √√√√ (APIPA) Set Using PING √√√√ IP Address √√√√ Subnet Mask √√√√ Default Gateway √√√√ DNS - Epson ColorWorks/SecurColor C3400 | Technical Reference Guide TRG - Page 142
EpsonNet Web Config Setting EpsonNet Config Acquiring Acquiring Setting TCP/IP SNMP Time Access Control Bonjour Use Bonjour Bonjour Name Bonjour Printer Name UPnP Enable universal plug and play function Device name Location Basic Read Only Read/Write IP Trap 1/2 Enable IP Trap - Epson ColorWorks/SecurColor C3400 | Technical Reference Guide TRG - Page 143
Chapter 3 Application Development Information Setting EpsonNet Config Acquiring Setting EpsonNet Web Config Acquiring Timeout Basic LPR √√√√ RAW (Port9100) √√√√ Administrator User recogni- User recognition function (administrator X X √ √ setting tion name) Installation place (location) - Epson ColorWorks/SecurColor C3400 | Technical Reference Guide TRG - Page 144
/ √ X √ √ Type Error LED Notification Setting at Ink Low √X√√ FEED button (Media feed when not printing) Enabled/disabled FEED button √X√√ FEED button Enabled/disabled FEED button (Manual head cleaning during printing) √XXX CUT button Enabled/disabled CUT button √X√√ 144 - Epson ColorWorks/SecurColor C3400 | Technical Reference Guide TRG - Page 145
Chapter 3 Application Development Information Setting Printer Setting Acquiring Acquiring Printer Utility Driver Setting Item Setting Post-Printing Verification Settings USB Serial Number Settings Sensor Adjustment Missing Dot Operation Settings √X√√ Void Image Registration √X√√ Displays - Epson ColorWorks/SecurColor C3400 | Technical Reference Guide TRG - Page 146
Acquiring Printer Status EPSON Status Monitor 3 EpsonNet Web Config EpsonNet Simple Viewer EpsonNet SDK Ink Status Error Self printing Printer status Ink color Ink Levels Communication error Autocutter error - Epson ColorWorks/SecurColor C3400 | Technical Reference Guide TRG - Page 147
Chapter 3 Application Development Information EPSON Status Monitor 3 EpsonNet Web Config EpsonNet Simple Viewer EpsonNet SDK Warning It is the time to replace the ink cartridge. Maintenance requirement is near. Disposal - Epson ColorWorks/SecurColor C3400 | Technical Reference Guide TRG - Page 148
in the Print Preview function. For this function, see "Print Preview" on page 189. When Extremely High Reliability and Safety are Required Epson recommends the following functions: • Missing dot detection with the auto nozzle check system of the printer driver. ("Post-Printing Verification Settings - Epson ColorWorks/SecurColor C3400 | Technical Reference Guide TRG - Page 149
the three color inks ends. When the ink ends, the INK LED lights. Follow the steps below to replace the ink cartridge. • Always use the EPSON SJIC15P as the ink cartridge. • Do not open the package of the ink cartridge until you are ready to load it in the printer. • When - Epson ColorWorks/SecurColor C3400 | Technical Reference Guide TRG - Page 150
3 Pull out the empty ink cartridge to remove it. CAUTION Do not leave the printer without ink cartridge. Otherwise, the print head may dry and clog. 4 Shake new ink cartridge package 4 or 5 times before opening it and take out the ink cartridge from the package. 5 Push the ink cartridge gently - Epson ColorWorks/SecurColor C3400 | Technical Reference Guide TRG - Page 151
Chapter 4 Handling Replacing the Paper Replaces the paper. The method to replace the paper is different depending on the type of the paper. WARNING Do not open the roll paper cover or touch the paper during printing. Otherwise, the printer may be damaged. • Use paper that meets the printer - Epson ColorWorks/SecurColor C3400 | Technical Reference Guide TRG - Page 152
roll paper with the printing side up while pulling it a little. 3 Close the roll paper cover while aligning the roll paper with the paper ejection guide. 4 Turn the power on. The roll paper is automatically fed. When paper set operation at the paper cover close is set as "Media Loading Method - Epson ColorWorks/SecurColor C3400 | Technical Reference Guide TRG - Page 153
Replacing the Fanfold Paper 1 Open the fanfold paper cover. Chapter 4 Handling 2 Remove the remaining paper. 4 3 Turn the power on. 153 - Epson ColorWorks/SecurColor C3400 | Technical Reference Guide TRG - Page 154
4 Insert the paper with the printing side up until it is automatically drawn in (approximately 100 mm). The fanfold paper is automatically fed. When paper set operation at the paper cover close is set as "Media Loading Method (with Cutting)" of [Media Loading Settings] on [Maintenance And Utilities] - Epson ColorWorks/SecurColor C3400 | Technical Reference Guide TRG - Page 155
6 Close the fanfold paper cover. Chapter 4 Handling This is the end of replacing the fanfold paper. 4 155 - Epson ColorWorks/SecurColor C3400 | Technical Reference Guide TRG - Page 156
Ejection Angle of Printed Paper Make sure paper is ejected straight from the paper ejection guides, as shown in the illustration. If paper is not ejected straight due to such causes as an obstruction, the print result may be distorted. 156 - Epson ColorWorks/SecurColor C3400 | Technical Reference Guide TRG - Page 157
Chapter 4 Handling Removing Jammed Paper Follow the steps below to remove the jammed paper when a paper jam error occurs. For Roll Paper 1 Turn the power off. 2 Press down the release lever, and pull it to the front to open the roll paper cover. 3 Remove the jammed paper. 4 4 Load the paper. (See " - Epson ColorWorks/SecurColor C3400 | Technical Reference Guide TRG - Page 158
For Fanfold Paper 1 Turn the power off. 2 Press down the release lever, and pull it to the front to open the roll paper cover. 3 Remove the jammed paper. 4 Open the fanfold paper cover. 158 - Epson ColorWorks/SecurColor C3400 | Technical Reference Guide TRG - Page 159
5 Remove the fanfold paper. Chapter 4 Handling 6 Close the roll paper cover, and then load the paper. (See "Replacing the Fanfold Paper" on page 153) 4 159 - Epson ColorWorks/SecurColor C3400 | Technical Reference Guide TRG - Page 160
] on [Start] menu, and click [Control Panel]. • For Windows Server 2003 R2: Click [Printers and Faxes] on [Start] menu. 2 Right-click [EPSON TM-C3400], and click [Printing References]. The printer driver screen is displayed. The barcode printing position is moved based on the amount of margin. 160 - Epson ColorWorks/SecurColor C3400 | Technical Reference Guide TRG - Page 161
Chapter 4 Handling Registering User Defined Media If the paper size to use is not in Media Layout, register the user defined media. The registered layout will be stored in [Favorite Setting] to use from application of users. Registering User Defined Media 1 Click [Add/Del] of [Media Layout] on [ - Epson ColorWorks/SecurColor C3400 | Technical Reference Guide TRG - Page 162
Favorite Setting [Favorite Setting] is the function to administer print setting of the printer driver into one. The setting from [Main] and [Page Layout] tab such as Media Type, Media Layout (including User Defined Media) are included. [Main] tab Favorite Setting [Page Layout] tab 162 - Epson ColorWorks/SecurColor C3400 | Technical Reference Guide TRG - Page 163
Chapter 4 Handling Features • When printing from application, the print setting registered on [Favorite Setting] can be selected as default setting. It is recommended to register the setting in favorite setting after executing print setting by clicking [Save As Favorite Setting]. • A number of - Epson ColorWorks/SecurColor C3400 | Technical Reference Guide TRG - Page 164
Registering print setting on [Favorite Setting] 1 Set the printer driver depending on paper to print. Set settings on [Main] and [Page Layout] tab. Select from Media Layout when using User Defined Media. 2 Click [Save As Favorite Setting] to display [Save/Delete Favorite Setting]. The current - Epson ColorWorks/SecurColor C3400 | Technical Reference Guide TRG - Page 165
the following. • User Defined Media • Registering barcode font • Replacing font on .NET environment The user definition is set on each client computer. When a number of TM-C3400 printer drivers are installed in one computer, these are used mutually. 4 165 - Epson ColorWorks/SecurColor C3400 | Technical Reference Guide TRG - Page 166
Barcode Printing The printer driver has the built-in barcode font. Barcode printing is available if the barcode is not created on the application side. Setting the barcode font Barcode print settings can be changed on [Barcode and 2D Symbol] on [Driver Utilities] tab. 1 Change settings of the - Epson ColorWorks/SecurColor C3400 | Technical Reference Guide TRG - Page 167
Chapter 4 Handling • Type: Select a barcode type from the following. The displayed items are changed accordingly. UPC-A JAN8(EAN) Codabar GS1-128M GS1 DataBar Truncated GS1 DataBar Limited UPC-E Code39 Code93 GS1-128 GS1 DataBar ExpandedM JAN13(EAN) ITF Code128 GS1 DataBar Omnidirectional GS1 - Epson ColorWorks/SecurColor C3400 | Technical Reference Guide TRG - Page 168
, Rotate 180° Rotate 90°, Rotate 270° Normal, Rotate 180° Rotate 90°, Rotate 270° Available 4 dot 2.5 6 dot 2.5 4 dot 2.5 6 dot 2.5 3 dot 2.5 6 dot 2.5 (*2) 3 dot 2.5 6 dot 2.5 (*2) - - - - - - - - 4 dot 2.5 - (*2) - 4 dot 2.5 - (*2) - - : Not supported 168 - Epson ColorWorks/SecurColor C3400 | Technical Reference Guide TRG - Page 169
Chapter 4 Handling *1 : The values for the Rotation Settings in the table are those when [Orientation] in [Page Layout] tab is se to "Portrait." When it is set to "Landscape," the description is changed as below. "Normal, Rotate 180 Degrees" ➔ "Rotate 90 Degrees, Rotate 270 Degrees" "Rotate 90 - Epson ColorWorks/SecurColor C3400 | Technical Reference Guide TRG - Page 170
2 Click [Add]. The selected barcode font is saved and the font name is added to the font list. • The barcode font can be registered up to 30. • The barcode font setting can be overwritten by clicking [Save] after selecting the font name from the font list and changing the setting. • The barcode font - Epson ColorWorks/SecurColor C3400 | Technical Reference Guide TRG - Page 171
Chapter 4 Handling UPC-E ❏ Normal • Specify the data of 11 to 12 digits. • For data of 6 digits, the specified data is not changed, and a check digit is automatically added. • For data of 7 digits, the 2nd to 7th digits become the data characters, and a check digit is automatically added. • For - Epson ColorWorks/SecurColor C3400 | Technical Reference Guide TRG - Page 172
ITF ❏ A maximum of 256 digits can be specified. ❏ When data of odd digit number is specified, "0" is automatically added to the head. Codabar ❏ A maximum of 256 digits can be specified. ❏ When the start code is not specified, 'A' is automatically added as a start code. ❏ When the stop code is not - Epson ColorWorks/SecurColor C3400 | Technical Reference Guide TRG - Page 173
by inputting data you want to convert into symbols. When [Auto Convert to Minimize Entire Symbol Width] is unchecked, a code set must be manually specified. When code set C is specified, assume a generated two-digit number as an ASCII character decimal number and specify the corresponding ASCII - Epson ColorWorks/SecurColor C3400 | Technical Reference Guide TRG - Page 174
GS1-128 ❏ Specify the data of 2 to 255 digits. ❏ '()' is the delimiter for the application identifiers. (printed as the HRI character, but not encoded.) ❏ The start codes (CODE A, CODE B, CODE C) and the stop code are added automatically. ❏ A symbol character FNC1, that is described after the start - Epson ColorWorks/SecurColor C3400 | Technical Reference Guide TRG - Page 175
Chapter 4 Handling GS1-128M ❏ Specify the data of 38 to 66 digits. ❏ '()' is the delimiter for the application identifiers. (printed as the HRI character, but not encoded.) ❏ The start codes (CODE A, CODE B, CODE C) and the stop code are added automatically. ❏ A symbol character FNC1, which is - Epson ColorWorks/SecurColor C3400 | Technical Reference Guide TRG - Page 176
GS1 DataBar Omnidirectional/GS1 DataBar Truncated/GS1 DataBar Limited ❏ The first application identifier '01' is not included in the data. ❏ When printing the HRI characters, the first application identifier '01' is printed as '(01)' before the packing identification code. ❏ A check digit need not - Epson ColorWorks/SecurColor C3400 | Technical Reference Guide TRG - Page 177
Chapter 4 Handling GS1 DataBar Expanded ❏ Specify the data of 2 to 255 digits. ❏ '()' is the delimiter for the application identifiers. (printed as the HRI character, but not encoded.) ❏ Be sure to include all the application identifiers in the data. ❏ When the first data is '01' after deleting - Epson ColorWorks/SecurColor C3400 | Technical Reference Guide TRG - Page 178
Printing the barcode in cyan only When the printed barcode is difficult to read, make settings to print it in cyan only. The barcode may not be read depending on your environment. Check it before using. 1 Select [Advanced] in [Print Settings]-[Color Corrections] in [General] tab. 2 Click the [ - Epson ColorWorks/SecurColor C3400 | Technical Reference Guide TRG - Page 179
Chapter 4 Handling 2D Symbol Font Settings The printer driver has the built-in 2D symbol font. 2D symbol printing is available if the 2D symbol is not created on the application side. Setting the 2D Symbol font 2D symbol printing settings can be changed on [Barcode and 2D Symbol] on [Driver - Epson ColorWorks/SecurColor C3400 | Technical Reference Guide TRG - Page 180
• Hexadecimal Entry Mode: Turn on the check box when the data for 2D symbol is specified on Hexadecimal Entry Mode. • Composite: Turn on the check box to print the 2D symbol with a composite symbol. Separate the data specified to a composite symbol and a 2D symbol with "\ |" or "| \". Describe - Epson ColorWorks/SecurColor C3400 | Technical Reference Guide TRG - Page 181
Chapter 4 Handling • AztecCode ∗Type: ∗Number of Layers: ∗Cell Size: ∗Error Correction Area: • DataMatrix ∗Cell Size: ∗Number of Cells: • DataMatrix(Rectangle) ∗Cell Size: ∗Number of Vertical Cells: ∗Number of Horizontal Cells: Select a mode for AztecCode. Select the number of layers for AztecCode - Epson ColorWorks/SecurColor C3400 | Technical Reference Guide TRG - Page 182
, PET Film, Wrist Band Speed Quality feed With Paper feed No Paper feed With 4 dot - (*2) - 4 dot - - Paper 4 dot - (*2) - feed - : Not supported. *1 : Whether paper feed is performed during printing 2D symbol can be checked in [Display Media Feed Position] - [Display Print Preview] in - Epson ColorWorks/SecurColor C3400 | Technical Reference Guide TRG - Page 183
No Paper feed With Paper feed 6 dot 8 dot 6 dot 8 dot 5 dot 6 dot 5 dot 6 dot - - - - - - - - 6 dot (*2) 7 dot - 6 dot (*2) 7 dot - - : Not supported. *1 : Whether paper feed is performed during printing 2D symbol can be checked in [Display Media Feed Position] - [Display Print - Epson ColorWorks/SecurColor C3400 | Technical Reference Guide TRG - Page 184
Specifying the 2D symbol data See the following description to specify the 2D symbol data. For the composite symbol and the HRI character, see "Specifying the barcode data" on page 170. PDF417 ❏ Calculated automatically when the digit number and the line number are 0. ❏ To specify other number than - Epson ColorWorks/SecurColor C3400 | Technical Reference Guide TRG - Page 185
the full range mode and the compact mode. DataMatrix ❏ Supports the ECC200 versions - square and rectangular. Printing method Specify the selected 2D symbol font, specified point and language to the printing data, and print it. - Epson ColorWorks/SecurColor C3400 | Technical Reference Guide TRG - Page 186
Barcode and 2D Symbol Font Printing on .NET Environment Since .NET Framework supports only True Type font and Open Type font, the barcode and 2D symbol font which are registered in the printer driver can not be printed - Epson ColorWorks/SecurColor C3400 | Technical Reference Guide TRG - Page 187
Chapter 4 Handling Printing barcode and 2D symbol Sets specified number of point, language of the replaced True Type font by barcode and 2D symbol font to the print data. • The number of point for barcode and 2D symbol is specified, check it from [Barcode and 2D Symbol] on [Driver Utilities]. The - Epson ColorWorks/SecurColor C3400 | Technical Reference Guide TRG - Page 188
Functions of the Printer Driver The printer driver has "Main", "Page Layout", "Driver Utilities" and "Maintenance And Utilities" tabs to change various settings and for adjustments. [Main] tab Favorite Selects one of the registered print settings from the list. This is the default setting when - Epson ColorWorks/SecurColor C3400 | Technical Reference Guide TRG - Page 189
Chapter 4 Handling Print Preview If this function is checked, the print preview window is displayed when printing is performed from an application, allowing you to check the print result image before printing. Displays the print preview before printing if this check box is turned on. To improve 2D - Epson ColorWorks/SecurColor C3400 | Technical Reference Guide TRG - Page 190
And Utilities] tab. According to the paper specification (such as the color of black mark is light, etc.), this adjustment should be performed. Platen Vacuum Manual Adjustment When this is checked, [Change Vacuum Setting] becomes active. Clicking [Change Vacuum Setting] displays the [Platen Vacuum - Epson ColorWorks/SecurColor C3400 | Technical Reference Guide TRG - Page 191
Monitor 3 is not being used, when a fatal error occurs in the printer, an error window can be displayed. • Not displayed when [Use EPSON Status Monitor 3] on the [Driver Preferences] window is unchecked. • "An administrator, a member of Administrator Group, a user with raised privilege, and a member - Epson ColorWorks/SecurColor C3400 | Technical Reference Guide TRG - Page 192
reliability mode (Void Image Test Print)] or [Economy Mode for Low Print Volume (Void Image Print)] on [Driver Preferences] is grayed out when [Use EPSON Status Monitor 3] on [Driver Preferences] of [Driver Utilities] is not selected. • The dots may be missing due to mis-reading when "Anti-missing - Epson ColorWorks/SecurColor C3400 | Technical Reference Guide TRG - Page 193
threshold for the sensor can be adjusted when the sensor does not detect the label gap and black mark for the paper to be used. Manual Head Cleaning Head cleaning can be performed. The result of the head cleaning can be checked by the nozzle 4 check pattern printing. See - Epson ColorWorks/SecurColor C3400 | Technical Reference Guide TRG - Page 194
Media Feed Position Adjustment Performs the paper feed adjustment for the cut position and the print position. Make this adjustment when the cut/print position is not aligned. Print Head Alignment Adjusts misalignment of vertical lines, barcodes and paper feed during bi-directional printing. This is - Epson ColorWorks/SecurColor C3400 | Technical Reference Guide TRG - Page 195
of the [Start] menu. • For Windows Server 2003 R2: Click [Add or Remove Programs] in [Control Panel] from the [Start] menu. 3 Select [EPSON Printer Software], and click [Uninstall/Change]. 4 The uninstallation screen is displayed. Select the printer driver to be unin- 4 stalled from the [Printer - Epson ColorWorks/SecurColor C3400 | Technical Reference Guide TRG - Page 196
Network Utility] in the [Utilities] tab. [EPSON Network Utility] may be used on other EPSON printers. In that case, uncheck it. 6 Click [OK]. (5) (6) 7 The uninstallation confirmation screen is displayed. Click [Yes]. 8 The confirmation screen to delete the personal setting information - Epson ColorWorks/SecurColor C3400 | Technical Reference Guide TRG - Page 197
you have set the TM-C3400 as the usual printer, another printer becomes the usual printer and is displayed after uninstalltion. Click [OK]. 10"Uninstallation complete." is displayed. Click [OK]. If the printer driver is still displayed in the printer model list in [EPSON Printer Software] even after - Epson ColorWorks/SecurColor C3400 | Technical Reference Guide TRG - Page 198
Setting Check Modes Besides the ordinary print mode, the printer has the self-test mode and allows you to print the status sheet (Ethernet interface model only) to check the various settings of the printer. Self-test Mode Printing errors such as dot missing can be checked on self-test mode. In - Epson ColorWorks/SecurColor C3400 | Technical Reference Guide TRG - Page 199
Chapter 4 Handling Status Specification Firmware Version WSN00180 or later Economy Mode for Low Print Volume supported. Earlier than WSN00180 Economy Mode for Low Print Volume not supported. Post-Printing Verification Setting Aamc Boff Aamr Boff Anti-missing Color Mode Anti-missing Read - Epson ColorWorks/SecurColor C3400 | Technical Reference Guide TRG - Page 200
status sheet button and holding the button down for 20 seconds or more. EPSON Network Status Sheet 1. MAC Address 2. HW/SW Version 3. Network Status XX Base Half 4. Port Type Auto Auto/MDI/MDI-X 5. Get IP Address Manual Auto/Manual 6. IP Address XXX . XXX . XXX . XXX 7. Subnet Mask XXX - Epson ColorWorks/SecurColor C3400 | Technical Reference Guide TRG - Page 201
is pressed. This feature is factory set to invalid. Please enable printer driver. (See "Panel Button Settings" on page 115) • If the problem starts head cleaning manual paper feed button is pressed during printing, a few seconds Be sure if the paper feed button again. • This feature can be copied to - Epson ColorWorks/SecurColor C3400 | Technical Reference Guide TRG - Page 202
And Utilities] tab and sets the media position detection based on the loaded paper. 5 Click [Nozzle Check]. 6 Click [Print]. 7 Check the printed nozzle pattern. Execute Manual Head Cleaning when it is clogged. 202 - Epson ColorWorks/SecurColor C3400 | Technical Reference Guide TRG - Page 203
Chapter 4 Handling Cleaning the Autocutter Adhesive from labels may stick to the fixed blade of the autocutter, which may prevent the autocutter from cutting paper cleanly. If this happens, follow the steps below to clean the autocutter. 1 Turn off the printer, and unplug the AC cable from the inlet - Epson ColorWorks/SecurColor C3400 | Technical Reference Guide TRG - Page 204
Changing the Interface for Ethernet Model For the Ethernet interface model, the Ethernet interface can be changed to the USB interface. For the USB interface model, the interface cannot be changed. • Keep the removed parts so that they will not be lost. • Use the USB cable included in the product - Epson ColorWorks/SecurColor C3400 | Technical Reference Guide TRG - Page 205
Chapter 4 Handling 4 Remove the short USB cable attached to the printer. 5 Connect the printer and the host computer with the USB cable. When changing the interface from USB to Ethernet, reverse the steps above. 4 205 - Epson ColorWorks/SecurColor C3400 | Technical Reference Guide TRG - Page 206
Removing the AC Adapter The AC adapter installed in the printer can be removed. CAUTION When removing the AC adapter, turn the printer power on and make sure that the POWER LED is off. Ink may leak if powered off without using the power switch. Removing the AC Adapter 1 Disconnect the AC cable - Epson ColorWorks/SecurColor C3400 | Technical Reference Guide TRG - Page 207
Chapter 4 Handling Installing the AC Adapter 1 Place the printer with the bottom up. 2 Connect the connector of the AC adapter to the printer, and store the cable to the bottom of the printer. 3 Insert the plug side of the AC adapter to the printer. 4 Push in the cable side of the AC adapter to the - Epson ColorWorks/SecurColor C3400 | Technical Reference Guide TRG - Page 208
in drying print head and clogging. 1 Turn the power off. 2 Confirm that POWER LED is off. 3 Remove the paper. 4 Pack the printer upright. Troubleshooting Lighting and Flashing the Error LED Recover from the error as follows when Error LED is lightening and flashing. ( For LED lighting/flashing - Epson ColorWorks/SecurColor C3400 | Technical Reference Guide TRG - Page 209
Chapter 5 Maintenance of the TM-C3400 Maintenance of the TM-C3400 This chapter describes the necessary information for an administrator of the TM-C3400, such as how to distribute the printer driver and add/replace the printer, to manage the printer in the system. Necessary information for an - Epson ColorWorks/SecurColor C3400 | Technical Reference Guide TRG - Page 210
for the administrator of the printer. The TM-C3400 requires that the paper type and TM-C3400 operation should be set in the printer. Some User defined setting • Printer driver operation setting • Settings for the EPSON Status Monitor 3 ❏ Saving/importing the printer driver settings • The - Epson ColorWorks/SecurColor C3400 | Technical Reference Guide TRG - Page 211
Chapter 5 Maintenance of the TM-C3400 Destination for the Printer Driver Setting Following printer driver settings can setting file Usage: Exporting/importing as a printer setting file The settings for Manual Head Cleaning during printing set in Panel Button Settings are not saved. Maintenance - Epson ColorWorks/SecurColor C3400 | Technical Reference Guide TRG - Page 212
Printer Setting Make a printer setting in the following cases. • When a new printer is installed • When the paper type is changed The media position detection setting is necessary. (See "2. Setting for media position detection" on page 82.) • When printer maintenance, such as Head Cleaning or Print - Epson ColorWorks/SecurColor C3400 | Technical Reference Guide TRG - Page 213
Chapter 5 Maintenance of the TM-C3400 Setting items of the printer driver and the Printer Setting Items that can be set by both the printer driver and the Printer Setting Items that can be set only by the printer driver * The settings for Manual Head Cleaning during printing that can be set in Panel - Epson ColorWorks/SecurColor C3400 | Technical Reference Guide TRG - Page 214
in one printer driver, the same setting is applied to other TM-C3400 printer drivers. Item Contents Separate setting Common setting Print setting - √ Printer driver operation set- ting - √ - EPSON Status Monitor 3 - √ - EPSON Log File * - - √ *Only applied in Windows - Epson ColorWorks/SecurColor C3400 | Technical Reference Guide TRG - Page 215
Chapter 5 Maintenance of the TM-C3400 Adding a printer driver using the install package When adding a printer driver using the install package created with the Install Assistant, the setting list of [Favorite - Epson ColorWorks/SecurColor C3400 | Technical Reference Guide TRG - Page 216
3. Install the install package for printer driver B. The "Favorite Setting"list in the install package is for User Definition B; therefore, the setting list is overwritten and User Definition A is deleted. "Current Settings" for printer driver A is Driver B Package not changed from User Definition - Epson ColorWorks/SecurColor C3400 | Technical Reference Guide TRG - Page 217
Chapter 5 Maintenance of the TM-C3400 Creating the install package The following steps are recommended to create the install package. 1 Register all the print settings of the printer driver on the - Epson ColorWorks/SecurColor C3400 | Technical Reference Guide TRG - Page 218
Using One Network Printer with Multiple Client Computers To use one network printer with multiple client computers, create an Install Package for the printer, and install it to the client computers. Install Package Client Computer Client Computer Client Computer Client Computer Printer - Epson ColorWorks/SecurColor C3400 | Technical Reference Guide TRG - Page 219
Manager]. 5 Turns off the printer. 6 Run an install package. (For the procedure for running an install package, refer to "TM-C3400 Install Assistant User's Manual".) Printer Driver is Already Installed (Windows 2000) When the printer driver is already installed in the Windows 2000 environment, the - Epson ColorWorks/SecurColor C3400 | Technical Reference Guide TRG - Page 220
. • For the USB interface model, creates the install package for each printer driver setting. ❏ Printer Setting (For details, see the Printer Setting User's Manual.) • Makes the settings to the printer. The settings can be copied from the setting file or from the master printer to multiple printers - Epson ColorWorks/SecurColor C3400 | Technical Reference Guide TRG - Page 221
to create the install package/BSF file. ❏ BSF file • This is the setting file for the printer driver. • This file is created with the TM-C3400 printer driver. • Make sure of the following points when installing multiple printer drivers on one com- puter. Include the user definitions of all the - Epson ColorWorks/SecurColor C3400 | Technical Reference Guide TRG - Page 222
Distribution Method for USB Interface Model The general flow of the distribution method is described below. Client Computer 1. Install the driver. Double-click Install Package Auto-install Driver Favorite User Definition A 2. Make the printer setting. Printer setting file Printer Printer - Epson ColorWorks/SecurColor C3400 | Technical Reference Guide TRG - Page 223
Chapter 5 Maintenance of the TM-C3400 Distribution Method for the Ethernet Interface Model The general flow of the distribution method is described below. 1. Make the printer network setting. Administrator's Computer EpsonNet - Epson ColorWorks/SecurColor C3400 | Technical Reference Guide TRG - Page 224
Distribution Method for the Shared Printer The general flow of the distribution method is described below. 1. Install the driver. Print Server TM-C3400 Printer Driver 2.Make the setting from BSF file. BSF File Driver Favorite User Definition A 3. Make the printer setting. Printer Setting - Epson ColorWorks/SecurColor C3400 | Technical Reference Guide TRG - Page 225
Chapter 5 Maintenance of the TM-C3400 Setup Procedure The setup procedure from the printer installation to ready-to-print status is described below. 1 Install the printer. (page 64) 2 Connect the power - Epson ColorWorks/SecurColor C3400 | Technical Reference Guide TRG - Page 226
8 Install the printer driver (the install package) on the client computer, and make the settings for it. 9 For the USB interface model, install the Printer Setting to the client computer. 10For the Ethernet interface model, install Printer Setting on a computer that can access the printer ( - Epson ColorWorks/SecurColor C3400 | Technical Reference Guide TRG - Page 227
Chapter 5 Maintenance of the TM-C3400 Examples of Usage This section describes some examples of how to distribute the printer driver and set the printer The steps of preparation for an - Epson ColorWorks/SecurColor C3400 | Technical Reference Guide TRG - Page 228
USB interface model Case 1: Connect one printer to one client computer. Install Package Favorite User Definition A Client Computer-1 Driver Favorite User Definition A Printer-1 Printer setting A Media Printer setting file Printer setting A Preparation : Install the Install Assistant, the - Epson ColorWorks/SecurColor C3400 | Technical Reference Guide TRG - Page 229
Chapter 5 Maintenance of the TM-C3400 Case 2: Connect two printers to one client computer and print on different media. Install Package MediaA Favorite User Definition A User Definition B Install Package MediaB Favorite - Epson ColorWorks/SecurColor C3400 | Technical Reference Guide TRG - Page 230
Distribution : ➀ Prepare the client computer and the printers. ➁ Copy the install package MediaA, and double click its icon. The printer driver for Printer-1 is automatically installed and set. "Current Settings" in the "Favorite Setting" list is User Defenition A. ➂ Connect Printer-1, and turn it - Epson ColorWorks/SecurColor C3400 | Technical Reference Guide TRG - Page 231
Chapter 5 Maintenance of the TM-C3400 Ethernet Interface Model Case 3: Connect one printer to two client computers. Client Computer-1 Install Package-1 Favorite User Definition A IP Address-1 Printer setting file A Printer setting A - Epson ColorWorks/SecurColor C3400 | Technical Reference Guide TRG - Page 232
Case 4: Connect two Ethernet model printers to two client computers and print on the same media. Install Package-1 Favorite User Definition A IP Address-1 Install Package-2 Favorite User Definition A IP Address-2 Printer setting file A Printer setting A Client Computer -1 Driver Favorite User - Epson ColorWorks/SecurColor C3400 | Technical Reference Guide TRG - Page 233
Chapter 5 Maintenance of the TM-C3400 Distribution : ➀ Prepare the client computers, the printers, and the administrator's computer for the network connection (possible to use also as a client computer). ➁ Connect Printer-1 and - Epson ColorWorks/SecurColor C3400 | Technical Reference Guide TRG - Page 234
Case 5: Connect two Ethernet models to two client computers and print on different media. Install Package-1 Favorite User Definition A IP Address-1 Install Package-2 Favorite User Definition B IP Address-2 Printer setting file A Printer setting A Printer setting file B Printer setting B Client - Epson ColorWorks/SecurColor C3400 | Technical Reference Guide TRG - Page 235
Chapter 5 Maintenance of the TM-C3400 Distribution : ➀ Prepare the client computers, the printers, and the administrator's computer for network communication (possible to use also as a client computer). ➁ Connect Printer-1 and Printer-2 - Epson ColorWorks/SecurColor C3400 | Technical Reference Guide TRG - Page 236
Maintenance This section describes the following contents. ❏ Adding a client computer (for the Ethernet interface model) (page 236) ❏ Adding a printer (page 237) ❏ Adding a paper type/changing the print setting (page 238) ❏ Replacing the printer (page 238) Adding a Client Computer (for the Ethernet - Epson ColorWorks/SecurColor C3400 | Technical Reference Guide TRG - Page 237
Chapter 5 Maintenance of the TM-C3400 Adding a Printer Follow the steps below to add a printer to print on the same media as the existing printer. USB interface model ❏ Preparation • BSF file - Epson ColorWorks/SecurColor C3400 | Technical Reference Guide TRG - Page 238
the application on the client computer. USB interface model Two procedures are available for replacing a USB model printer. ❏ Installing "USB Replacement Service" as a resident program on the client computer. (Recom- mended) ❏ Matching the USB serial numbers of the printers. Use this procedure if - Epson ColorWorks/SecurColor C3400 | Technical Reference Guide TRG - Page 239
Chapter 5 Maintenance of the TM-C3400 USB Replacement Service "USB Replacement Service" is a program that detects when a new Connect the new printer to the client computer and turn on the printer. "USB Replacement Service" will detect the connection of the new printer and set a new printer port for - Epson ColorWorks/SecurColor C3400 | Technical Reference Guide TRG - Page 240
❏ Procedure for replacing the printer ➀ Connect the new printer to the administrator computer and turn on the printer. ➁ Configure the existing printer settings in the printer. The USB serial number in the printer setting file for the existing printer will be the USB serial number of the new printer - Epson ColorWorks/SecurColor C3400 | Technical Reference Guide TRG - Page 241
details, see the EpsonNet Simple Viewer User's Manual.) Acquirable information • Model name/IP address/Location/MAC address/Administrator name/Status details is included in the information. • Information of network printers other than the TM-C3400 can also be acquired. However, the information may - Epson ColorWorks/SecurColor C3400 | Technical Reference Guide TRG - Page 242
name/Ver.) / None ❏ Your application information: • Windows service operation / Normal EXE operation ❏ EPSON application status: EpsonNet Simple Viewer / EpsonNet SDK for Windows / Printer Setting / Other (Application name) ❏ Phenomenon of the problem (or content of the question): ❏ System
-
 1
1 -
 2
2 -
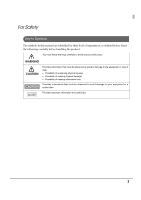 3
3 -
 4
4 -
 5
5 -
 6
6 -
 7
7 -
8
-
9
-
10
-
11
-
12
-
13
-
14
-
15
-
16
-
17
-
18
-
19
-
20
-
21
-
22
-
23
-
24
-
25
-
26
-
27
-
28
-
29
-
30
-
31
-
32
-
33
-
34
-
35
-
36
-
37
-
38
-
39
-
40
-
41
-
42
-
43
-
44
-
45
-
46
-
47
-
48
-
49
-
50
-
51
-
52
-
53
-
54
-
55
-
56
-
57
-
58
-
59
-
60
-
61
-
62
-
63
-
64
-
65
-
66
-
67
-
68
-
69
-
70
-
71
-
72
-
73
-
74
-
75
-
76
-
77
-
78
-
79
-
80
-
81
-
82
-
83
-
84
-
85
-
86
-
87
-
88
-
89
-
90
-
91
-
92
-
93
-
94
-
95
-
96
-
97
-
98
-
99
-
100
-
101
-
102
-
103
-
104
-
105
-
106
-
107
-
108
-
109
-
110
-
111
-
112
-
113
-
114
-
115
-
116
-
117
-
118
-
119
-
120
-
121
-
122
-
123
-
124
-
125
-
126
-
127
-
128
-
129
-
130
-
131
-
132
-
133
-
134
-
135
-
136
-
137
-
138
-
139
-
140
-
141
-
142
-
143
-
144
-
145
-
146
-
147
-
148
-
149
-
150
-
151
-
152
-
153
-
154
-
155
-
156
-
157
-
158
-
159
-
160
-
161
-
162
-
163
-
164
-
165
-
166
-
167
-
168
-
169
-
170
-
171
-
172
-
173
-
174
-
175
-
176
-
177
-
178
-
179
-
180
-
181
-
182
-
183
-
184
-
185
-
186
-
187
-
188
-
189
-
190
-
191
-
192
-
193
-
194
-
195
-
196
-
197
-
198
-
199
-
200
-
201
-
202
-
203
-
204
-
205
-
206
-
207
-
208
-
209
-
210
-
211
-
212
-
213
-
214
-
215
-
216
-
217
-
218
-
219
-
220
-
221
-
222
-
223
-
224
-
225
-
226
-
227
-
228
-
229
-
230
-
231
-
232
-
233
-
234
-
235
-
236
-
237
-
238
-
239
-
240
-
241
-
242
 |
 |

Technical Reference Guide
Describes features and general specifications for the product.
Describes setup and installation of the product and peripherals.
Describes how to control the printer and necessary information
when you develop applications.
Describes how to handle the product.
Describes to administrator for necessary information to administer
TM-C3400 in the system such as distributing driver or installing
new printer or replacing the printer.
M00008308
Rev.I
Setup
Application Development Information
Handling
Product Overview
Maintenance of the TM-C3400