Dynex DX-40L150A11 Firmware Installation Guide (English)
Dynex DX-40L150A11 Manual
 |
View all Dynex DX-40L150A11 manuals
Add to My Manuals
Save this manual to your list of manuals |
Dynex DX-40L150A11 manual content summary:
- Dynex DX-40L150A11 | Firmware Installation Guide (English) - Page 1
instructions for TV Models: DX‐15L150A11, DX‐19L150A11, DX‐22L150A11, DX‐ service with a bit rate lower than 256kbps. If the instructions provided below do not help, call Dynex Customer Support at (800) 305‐2204 for assistance. First: Download the update file 1. Determine the Model number of your TV - Dynex DX-40L150A11 | Firmware Installation Guide (English) - Page 2
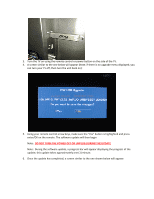
3. Turn the TV on using the remote control or power button on the side of the TV. 4. A screen similar to the one below will appear (Note: if there is no upgrade menu displayed; you can turn your TV off, then turn the unit back on): 5. Using your remote control arrow keys, make sure the "Yes" button - Dynex DX-40L150A11 | Firmware Installation Guide (English) - Page 3
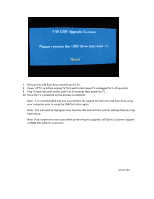
TV. 8. Power off TV, and then unplug TV from wall socket (keep TV unplugged for 5‐10 seconds). 9. Plug TV back into wall socket, wait 5 to 10 seconds then power on TV. 10. Once the TV is powered while performing this upgrade, call Dynex Customer Support at (800) 305‐2204 for assistance. January 2011
-
 1
1 -
 2
2 -
 3
3
 |
 |
Firmware update: Download/Install instructions for TV Models: DX
‐
15L150A11,
DX
‐
19L150A11, DX
‐
22L150A11, DX
‐
40L150A11
System requirements: a computer with an open USB port, USB 2.0 flash drive (stick), broadband
internet access and operating software of Windows XP, Windows Vista, Windows 7 or Mac OS 10.3 or
newer. This option is not recommended with dial
‐
up or DSL service with a bit rate lower than 256kbps. If
the instructions provided below do not help, call Dynex Customer Support at (800) 305
‐
2204 for
assistance.
First: Download the update file
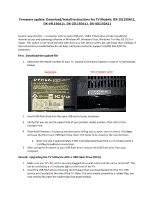
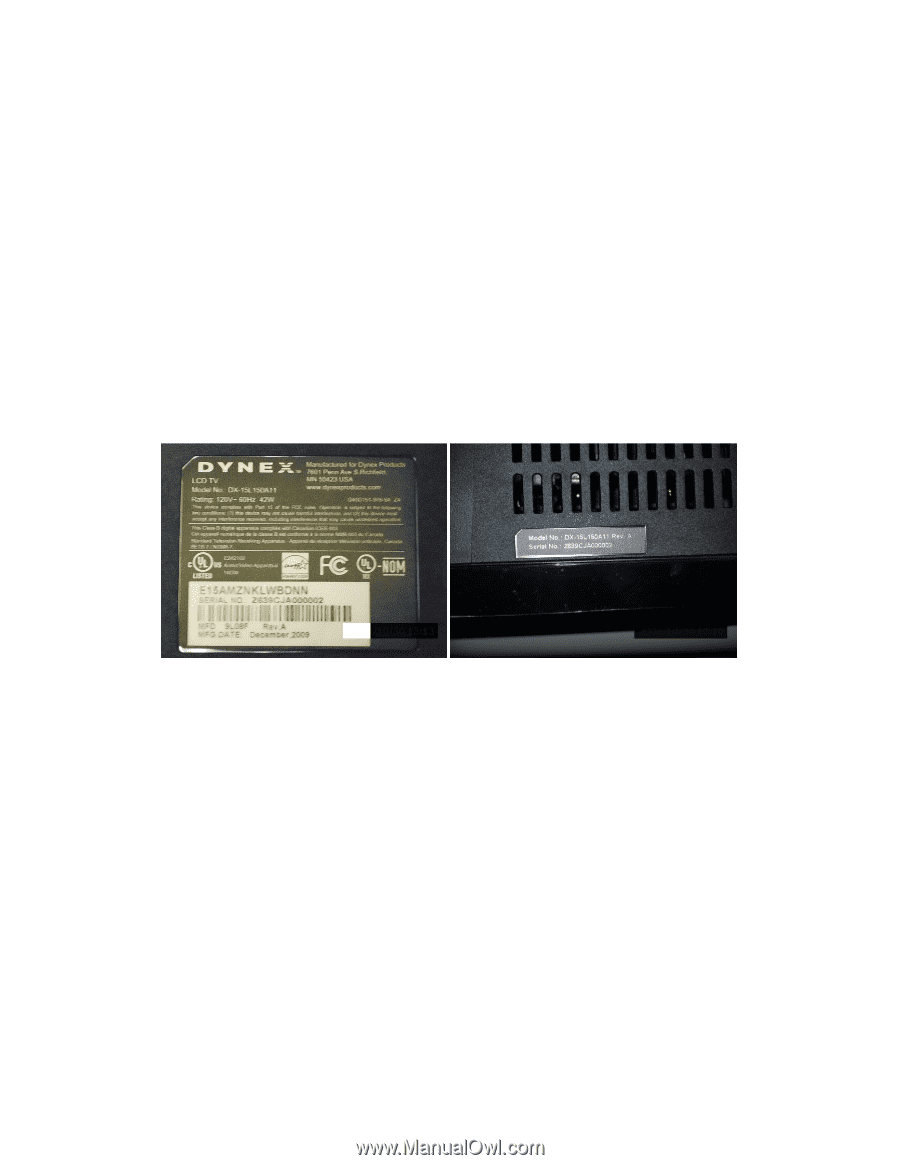
1.
Determine the Model number of your TV located on the back, bottom or side of TV (see photos
below)
Side or Bottom Label
Back
Label
2.
Insert USB flash drive into the open USB port on your computer.
3.
Verify that you are on the support tab of your product model number; then click on the
firmware link.
4.
Download firmware; if a pop
‐
up window opens telling you to open, save or cancel, click
Save
and save the file to your USB flash drive.
Note: File needs to be saved on the root directory.
a.
Note: File size is approximately 3 MB. Estimated download time is 1
‐
2 minutes (with a
1.5 Mbps broadband connection).
5.
After saving the firmware to your USB flash drive; remove the USB flash drive from your
computer.
Second: Upgrading the TV Software with a USB Flash Drive (Stick)
1.
Make sure you TV’s AC cord is securely plugged into a wall outlet and the unit is turned off. This
can be verified by a
red
indicator light on the front of the TV.
2.
Insert the USB flash drive containing the firmware that was downloaded into the TV’s USB
service port located on the side of the TV. Note: This port maybe covered by a rubber flap, you
may need to flip open the rubber flap (See photo below).