Dell U2419H Users Guide - Page 29
Organizing Your Cables, Removing the Monitor Stand, Connect, ing Your Monitor
 |
View all Dell U2419H manuals
Add to My Manuals
Save this manual to your list of manuals |
Page 29 highlights
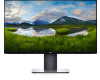
Organizing Your Cables After attaching all necessary cables to your monitor and computer, (see Connecting Your Monitor for cable attachment) organize all cables as shown above. Removing the Monitor Stand CAUTION: To prevent scratches on the LCD screen while removing the stand, make sure that the monitor is placed on a soft, clean surface. NOTE: The procedure below is applicable for the default stand. If you purchased any other stand, see the documentation shipped with the stand to set it up. To remove the stand: 1 Place the monitor on a soft cloth or cushion. 2 Press and hold the stand-release button. 3 Lift the stand up and away from the monitor. 3 2 Setting Up the Monitor | 29
-
 1
1 -
2
-
3
-
4
-
5
-
6
-
7
-
8
-
9
-
10
-
11
-
12
-
13
-
14
-
15
-
16
-
17
-
18
-
19
-
20
-
21
-
22
-
23
-
 24
24 -
 25
25 -
 26
26 -
 27
27 -
 28
28 -
 29
29 -
 30
30 -
 31
31 -
 32
32 -
 33
33 -
 34
34 -
35
-
36
-
37
-
38
-
39
-
40
-
41
-
42
-
43
-
44
-
45
-
46
-
47
-
48
-
49
-
50
-
51
-
52
-
53
-
54
-
55
-
56
 |
 |

Setting Up the Monitor
|
29
Organizing Your Cables
After attaching all necessary cables to your monitor and computer, (see
Connect-
ing Your Monitor
for cable attachment) organize all cables as shown above.
Removing the Monitor Stand
CAUTION: To prevent scratches on the LCD screen while removing the
stand,
make sure that the monitor is placed on a soft, clean surface.
NOTE:
The procedure below is applicable for the default stand. If you purchased
any other stand, see the documentation shipped with the stand to set it up.
To remove the stand:
1
Place the monitor on a soft cloth or cushion.
2
Press and hold the stand-release button.
3
Lift the stand up and away from the monitor.
2
3