Dell S1709WFP User's Guide - Page 12
Operating the Monitor
 |
View all Dell S1709WFP manuals
Add to My Manuals
Save this manual to your list of manuals |
Page 12 highlights
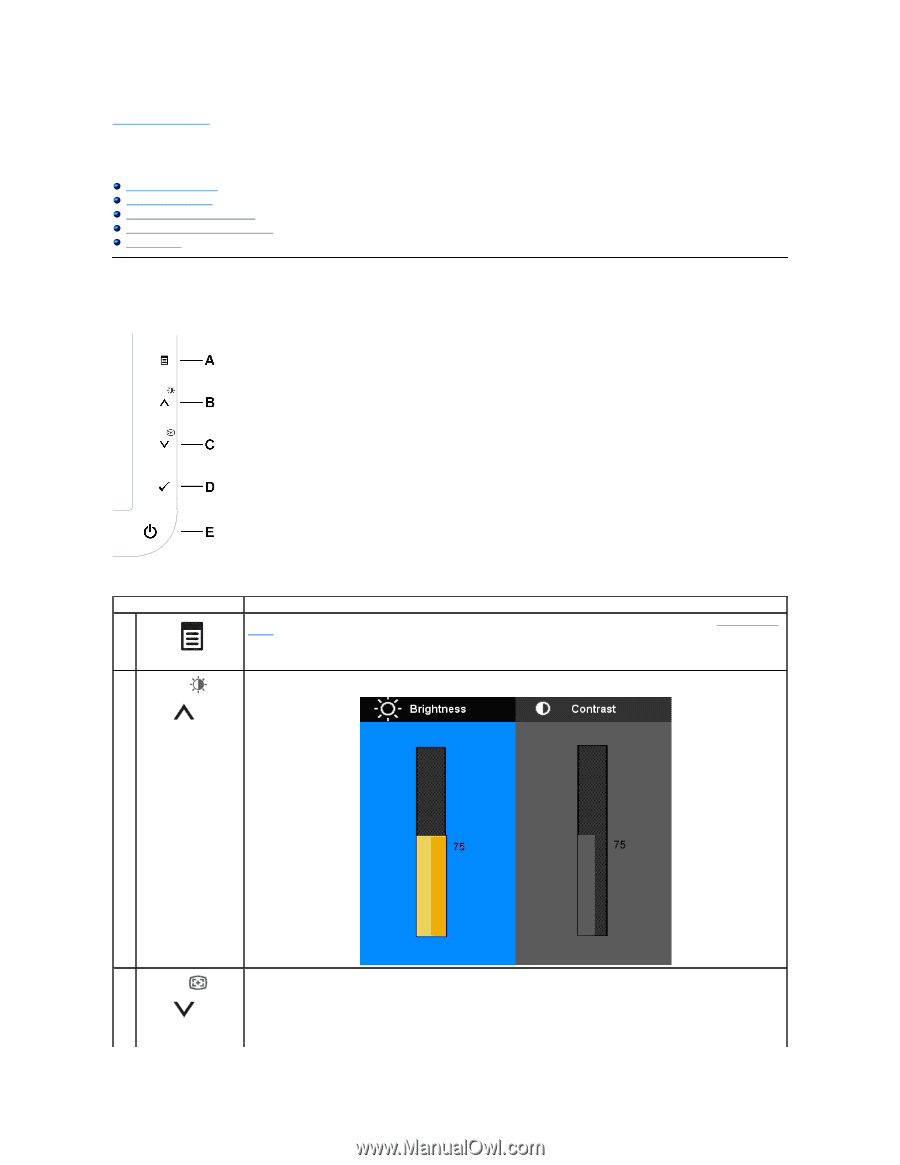
Back to Contents Page Operating the Monitor Dell™ S1709W Flat Panel Monitor User's Guide Using the Front Panel Using the OSD Menu Setting the Optimal Resolution Using the Dell Soundbar (Optional) Using the Tilt Using the Front Panel Use the buttons on the front of the monitor to adjust the image settings. The following table describes the front panel buttons: Front panel Button A Description Use the Menu button to open and exit the on-screen display (OSD), and exit from menus and sub-menus. See Using the OSD Menu. OSD Menu/Exit B Use this button to directly access the "Brightness/Contrast" menu or to increase the values of the selected menu option. Brightness/Contrast Hot Key C Use this button to activate automatic setup/adjustment or to decrease the values of the selected menu option. Auto Adjustment allows the monitor to self-adjust to the incoming video signal. After using Auto Adjustment, you can further tune your monitor by using the Pixel Clock and Phase controls under Image Settings. Auto Adjust The following dialog appears on a black screen as the monitor automatically adjusts to the current input:
-
 1
1 -
2
-
3
-
4
-
5
-
6
-
 7
7 -
 8
8 -
 9
9 -
 10
10 -
 11
11 -
 12
12 -
 13
13 -
 14
14 -
 15
15 -
 16
16 -
 17
17 -
18
-
19
-
20
-
21
-
22
-
23
-
24
-
25
-
26
-
27
 |
 |