Dell OptiPlex Tower 7010 Owners Manual - Page 41
Hard drive, 2.5-inch hard drive, Removing the 2.5-inch hard drive assembly
 |
View all Dell OptiPlex Tower 7010 manuals
Add to My Manuals
Save this manual to your list of manuals |
Page 41 highlights
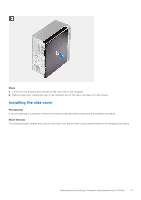
Steps 1. Position the front bezel to align the tabs on the bezel with the slots on the chassis. 2. Press the bezel until the tabs clicks into place. Next steps 1. Install the side cover. 2. Follow the procedure in after working inside your computer. Hard drive 2.5-inch hard drive Removing the 2.5-inch hard drive assembly Prerequisites 1. Follow the procedure in before working inside your computer. 2. Remove the side cover. Removing and installing Customer Replaceable Units (CRUs) 41
-
 1
1 -
2
-
3
-
4
-
5
-
6
-
7
-
8
-
9
-
10
-
11
-
12
-
13
-
14
-
15
-
16
-
17
-
18
-
19
-
20
-
21
-
22
-
23
-
24
-
25
-
26
-
27
-
28
-
29
-
30
-
31
-
32
-
33
-
34
-
35
-
 36
36 -
 37
37 -
 38
38 -
 39
39 -
 40
40 -
 41
41 -
 42
42 -
 43
43 -
 44
44 -
 45
45 -
 46
46 -
47
-
48
-
49
-
50
-
51
-
52
-
53
-
54
-
55
-
56
-
57
-
58
-
59
-
60
-
61
-
62
-
63
-
64
-
65
-
66
-
67
-
68
-
69
-
70
-
71
-
72
-
73
-
74
-
75
-
76
-
77
-
78
-
79
-
80
-
81
-
82
-
83
-
84
-
85
-
86
-
87
-
88
-
89
-
90
-
91
-
92
-
93
-
94
-
95
-
96
-
97
-
98
-
99
-
100
-
101
-
102
-
103
-
104
-
105
-
106
-
107
-
108
-
109
-
110
-
111
-
112
-
113
-
114
-
115
-
116
-
117
-
118
-
119
-
120
-
121
-
122
-
123
-
124
 |
 |

Steps
1.
Position the front bezel to align the tabs on the bezel with the slots on the chassis.
2.
Press the bezel until the tabs clicks into place.
Next steps
1.
Install the
side cover
.
2.
Follow the procedure in
after working inside your computer
.
Hard drive
2.5-inch hard drive
Removing the 2.5-inch hard drive assembly
Prerequisites
1.
Follow the procedure in
before working inside your computer
.
2.
Remove the
side cover
.
Removing and installing Customer Replaceable Units (CRUs)
41