Dell D630 Service Manual - Page 16
Remove the new drive from its packaging.
 |
UPC - 019801087219
View all Dell D630 manuals
Add to My Manuals
Save this manual to your list of manuals |
Page 16 highlights
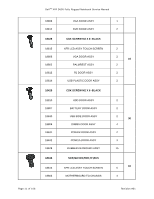
DellTM XFR D630 Fully Rugged Notebook Service Manual 5. Remove the compartment cover from the computer. 6. Locate the tab on the hard disk drive and pull it back to disconnect the hard disk drive from the motherboard. 7. Continue to utilize the tab to assist in removing the hard disk drive from the compartment. NOTICE: When the hard drive is not in the computer, store it in protective antistatic packaging. 8. Remove the new drive from its packaging. Save the original packaging for storing or shipping the hard drive. NOTICE: Use firm and even pressure to slide the drive into place. If you use excessive force, you may damage the connector. Page 16 of 106 Revision A01
-
 1
1 -
2
-
3
-
4
-
5
-
6
-
7
-
8
-
9
-
10
-
 11
11 -
 12
12 -
 13
13 -
 14
14 -
 15
15 -
 16
16 -
 17
17 -
 18
18 -
 19
19 -
 20
20 -
 21
21 -
22
-
23
-
24
-
25
-
26
-
27
-
28
-
29
-
30
-
31
-
32
-
33
-
34
-
35
-
36
-
37
-
38
-
39
-
40
-
41
-
42
-
43
-
44
-
45
-
46
-
47
-
48
-
49
-
50
-
51
-
52
-
53
-
54
-
55
-
56
-
57
-
58
-
59
-
60
-
61
-
62
-
63
-
64
-
65
-
66
-
67
-
68
-
69
-
70
-
71
-
72
-
73
-
74
-
75
-
76
-
77
-
78
-
79
-
80
-
81
-
82
-
83
-
84
-
85
-
86
-
87
-
88
-
89
-
90
-
91
-
92
-
93
-
94
-
95
-
96
-
97
-
98
-
99
-
100
-
101
-
102
-
103
-
104
-
105
-
106
 |
 |

Dell
TM
XFR D630 Fully Rugged Notebook Service Manual
Page 16 of 106
Revision A01
5.
Remove the compartment cover from the computer.
6.
Locate the tab on the hard disk drive and pull it back to disconnect the hard disk drive from
the motherboard.
7.
Continue to utilize the tab to assist in removing the hard disk drive from the compartment.
NOTICE:
When the hard drive is not in the computer, store it in protective antistatic packaging.
8.
Remove the new drive from its packaging.
Save the original packaging for storing or shipping the hard drive.
NOTICE:
Use firm and even pressure to slide the drive into place. If you use excessive force, you
may damage the connector.