DELPHI SA10162 Installation Guide
DELPHI SA10162 Manual
 |
View all DELPHI SA10162 manuals
Add to My Manuals
Save this manual to your list of manuals |
DELPHI SA10162 manual content summary:
- DELPHI SA10162 | Installation Guide - Page 1
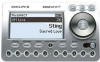
: SKYFi2 Vehicle Adaptor Kit Setup 2 SKYFi2 Installation 6 XM Antenna Setup 11 SKYFi2 Home Adaptor Kit Setup 15 Warranty 18 Warning: This manual and the SKYFi2 Satellite Radio Receiver User Guide contain important safety and operating information. Please read and follow the instructions in - DELPHI SA10162 | Installation Guide - Page 2
certified the Delphi XM SKYFi2 Satellite Radio Receiver for use in any aircraft (neither portable nor permanent installation). Therefore, Delphi cannot support this type of application or installation. SKYFi2 Vehicle Adaptor Kit (SA10102) Setup Your Delphi XM SKYFi2 Vehicle Adaptor Kit contains the - DELPHI SA10162 | Installation Guide - Page 3
devices to the SKYFi2 Vehicle Adaptor Kit. Connecting any incorrect input devices may damage the system and/ or the external electronic device. It is recommended that you use only the 12V to 6V conversion power adaptor that came with your SKYFi2 Vehicle Adaptor Kit. Figure 2. Connect accessories - DELPHI SA10162 | Installation Guide - Page 4
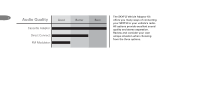
4 Audio Quality Good Better Best The SKYFi2 Vehicle Adaptor Kit offers you many ways of connecting your SKYFi2 to your vehicle's radio. Cassette Adaptor: All options provide excellent sound quality and stereo separation. Direct Connect: Review and consider your own unique situation when - DELPHI SA10162 | Installation Guide - Page 5
if a require special antenna lead adaptors.) radio. This FM modulator is turned on cassette slot is available in the vehicle. whenever the cassette adaptor or any other audio cable is unplugged from the SKYFi2 Cradle. See the SKYFi2 Satellite Radio Receiver User Guide for more details. - DELPHI SA10162 | Installation Guide - Page 6
: If using the wireless FM modulator or the Delphi FM Direct Adaptor, set the SKYFi2 Receiver and the FM radio to the same frequency. See the SKYFi2 User Guide section on "Listening to XM Using Any FM Radio." Warning: Do not install the mount where it or SKYFi2 could block your vision or usage of - DELPHI SA10162 | Installation Guide - Page 7
3. Turn off the radio and SKYFi2 5. The SKYFi2 Vehicle Adaptor Kit b. Vent mount: Assemble the 7 Receiver. your vehicle. Do not install the rotated in one of two possible SKYFi2 Receiver and the SKYFi2 mount on a leather surface. orientations depending on the Vehicle Adaptor Kit. design - DELPHI SA10162 | Installation Guide - Page 8
the angle of your SKYFi2 Vehicle Adaptor after it is installed. This mount uses a strong adhesive that is not eas- ily repositioned when installed, so use care when choosing the location of and placing the mount. Do not install this mount on a leather surface. Install the mount only if - DELPHI SA10162 | Installation Guide - Page 9
mount. To vehicle dashboard Figure 4. Attach vehicle mount to back of SKYFi2 as shown. 6. Clip the SKYFi2 vehicle cradle 9 onto the vent or swivel mount (figures 3 and 4). 7. Reassemble the system as in step 2. 8. Attach the antenna as explained on page 11 and route the antenna cable as - DELPHI SA10162 | Installation Guide - Page 10
surface at a 4. As necessary, use a mild household 90-degree angle. Do not use cleaner to clean the dashboard sharp tools that could damage surface. the vehicle's interior. Caution: Never use a commercial heat gun or a paint-stripping gun. This can damage the unit or your - DELPHI SA10162 | Installation Guide - Page 11
of your XM Antenna allows mounting on many types of vehicles. Trunk mounting of the antenna is an alternative only for hard- or soft-top convertibles with nonmetallic rooftops. All other vehicles should have roof mounting. Important: Do not install antenna inside the 11 vehicle passenger - DELPHI SA10162 | Installation Guide - Page 12
as close to the location cannot be identified, contact quality must be assumed by the user. vehicle's FM antenna as possible. your local retailer installation depart- • If the vehicle has roof racks or skid Note that the FM antenna may be ment for additional guidance. ribs, you may mount the - DELPHI SA10162 | Installation Guide - Page 13
mounted at the front or middle of the roof, route the cable along the door jamb and into the vehi- cle. (See figure 6.) In some vehicles, you may route the cable through the same grommet that carries power window and power lock wires. Figure 6. Route XM Antenna through windshield as shown. - DELPHI SA10162 | Installation Guide - Page 14
through; instead, route the cable under the weather seal near the bottom of the door. • For antennas mounted at the rear of the roof, route the cable into the trunk as shown in figure 7. existing wiring channels when possible. Rear Mounting Option Figure 7. Route XM Antenna wiring as shown. - DELPHI SA10162 | Installation Guide - Page 15
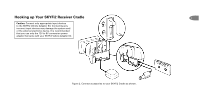
SKYFi2 Home Adaptor Kit (SA10103) Setup Your Delphi XM SKYFi2 Home Kit contains the following components: SKYFi2 Home Stand XM High-gain Indoor/Outdoor Home Antenna with 25 ft. cable 6V AC power adaptor Audio cable Hooking up Your 15 SKYFi2 Receiver Home Stand Note: See SKYFi2 User Guide - DELPHI SA10162 | Installation Guide - Page 16
all connections. Note: The Delphi SA10006 Antenna Extension Cable (sold separately) is designed to work with the SKYFi2 Home Adaptor Kit and provides an additional 50 feet of cable length to the standard XM Home Antenna. Figure 9. Connect the SKYFi2 Home Stand to power, antenna, and home stereo as - DELPHI SA10162 | Installation Guide - Page 17
position that gives 17 For best reception, aim the home antenna by following these instructions: 1. Press the "menu" button on the SKYFi2 Receiver. 2. Use the scroll wheel to select the "Antenna Aiming" option. Press the "XM" button to confirm selection. the strongest signal strength (at least - DELPHI SA10162 | Installation Guide - Page 18
any (i) deviation from ("Delphi") warrants all Portable XM any Product that does not conform to this Delphi's operating instructions as printed in Satellite Radio Accessory Products sold by warranty. Products may be repaired or Delphi's catalog or on any packaging, Delphi (each "Product") to - DELPHI SA10162 | Installation Guide - Page 19
information consequential damages. So the above limi- is required from Delphi, you may call Delphi tations or exclusions may not apply to you. at: 1.877.GO DELPHI (1.877.463.3574). If This warranty gives you specific legal warranty service is needed at any time during rights. You may also have - DELPHI SA10162 | Installation Guide - Page 20
Troy, Michigan 48098-5090 U.S.A. Customer Service: [1] 877.GO DELPHI www.delphi.com Printed on Recycled Paper ©2004 Delphi Corporation. All rights reserved. DPSS-04-E-065 The SKYFi2 name, XM name, TuneSelect, and related logos are trademarks of XM Satellite Radio Inc. All other trademarks are the
-
 1
1 -
 2
2 -
 3
3 -
 4
4 -
 5
5 -
 6
6 -
 7
7 -
8
-
9
-
10
-
11
-
12
-
13
-
14
-
15
-
16
-
17
-
18
-
19
-
20
 |
 |
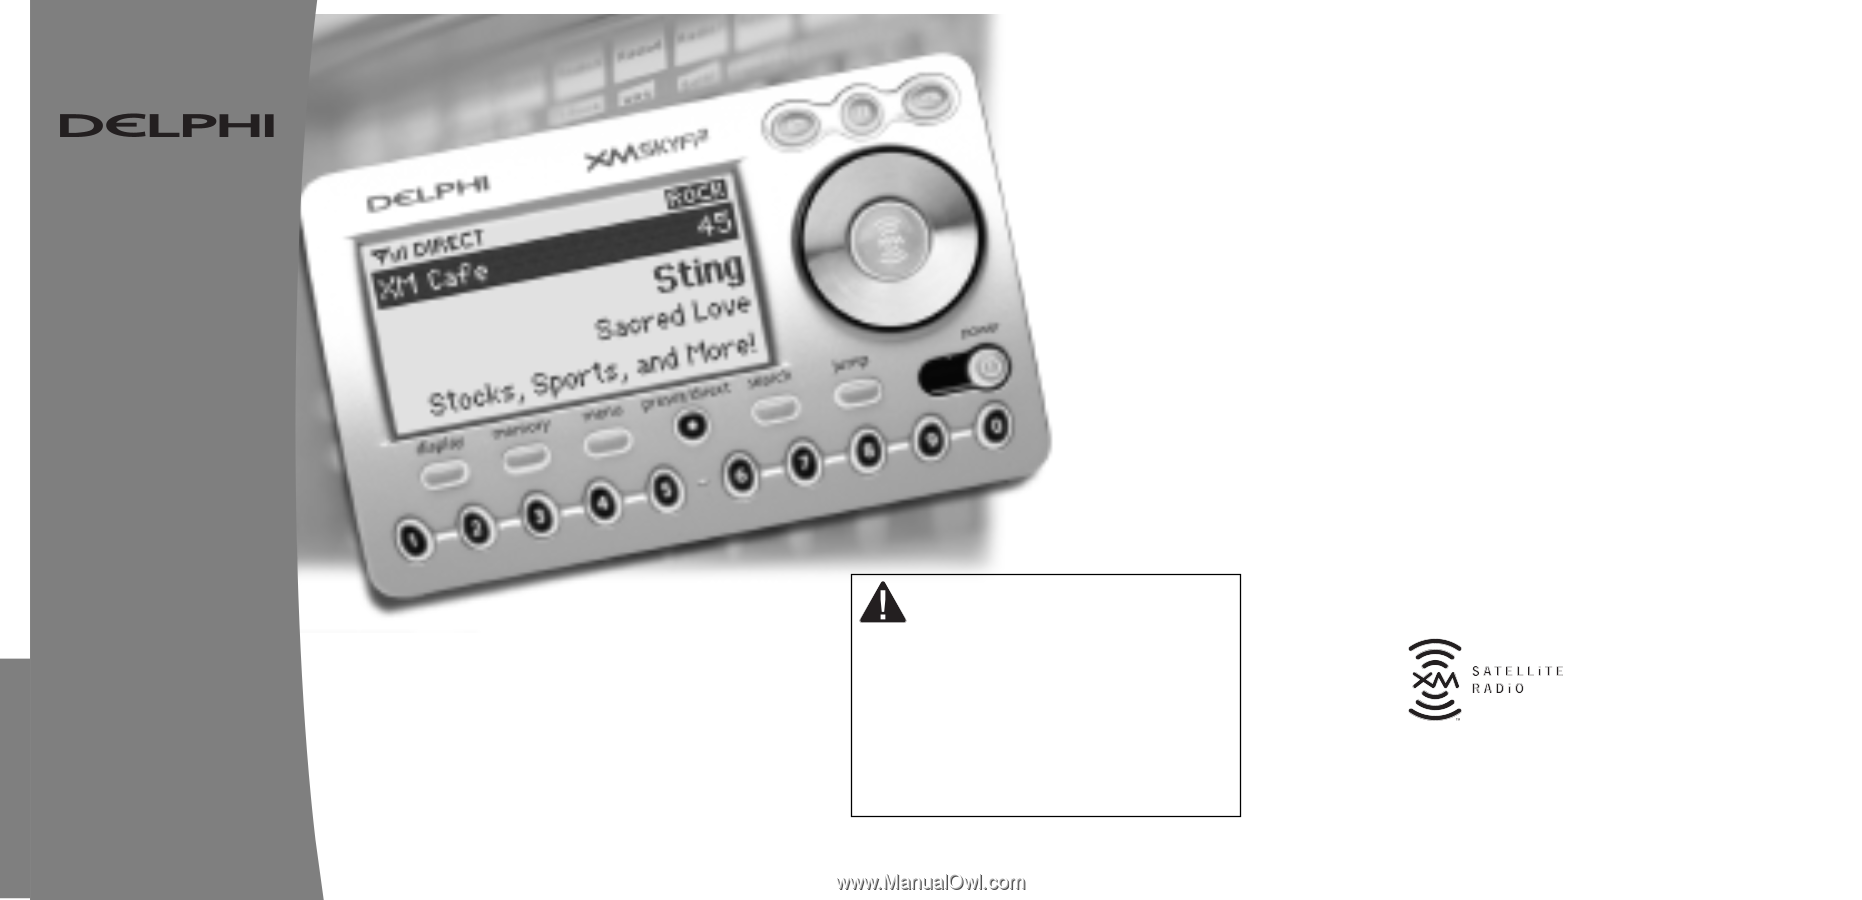
Guide
Installation
SKYFi2
™
Home and Vehicle Kits
Contents:
SKYFi2 Vehicle Adaptor Kit Setup · · · · · · · · · · · · 2
SKYFi2 Installation· · · · · · · · · · · · · · · · · · · · · · · · · 6
XM Antenna Setup
· · · · · · · · · · · · · · · · · · · · · · · · 11
SKYFi2 Home Adaptor Kit Setup
· · · · · · · · · · · · 15
Warranty · · · · · · · · · · · · · · · · · · · · · · · · · · · · · · · · · 18
Warning:
This manual and the
SKYFi2
Satellite Radio Receiver User Guide
contain
important safety and operating information.
Please read and follow the instructions in
these manuals. Failure to do so could result
in personal injury, death, and/or damage to
your SKYFi2 Receiver, accessories, and/or to
your vehicle or other property.