D-Link DWR-2101 Product Manual 1
D-Link DWR-2101 Manual
 |
View all D-Link DWR-2101 manuals
Add to My Manuals
Save this manual to your list of manuals |
D-Link DWR-2101 manual content summary:
- D-Link DWR-2101 | Product Manual 1 - Page 1
Version 4.00 | 9/29/2022 User Manual 5G Wi-Fi 6 Mobile Hotspot DWR-2101 - D-Link DWR-2101 | Product Manual 1 - Page 2
trademarks or registered trademarks of their respective companies. Copyright © 2021 by D-Link Corporation, Inc. All rights reserved. This publication may not be reproduced, in whole or in part, without prior expressed written permission from D-Link Corporation, Inc. D-Link DWR-2101 User Manual i - D-Link DWR-2101 | Product Manual 1 - Page 3
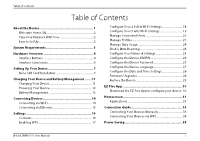
28 Firmware Upgrades 28 Restore the Device 29 EZ-Five App 30 Download the EZ-Five App to configure your device . 30 Homescreen 31 Applications 32 Connection Guide 33 Connecting Your Devices Manually 33 Connecting Your Devices via WPS 34 Power Saving 35 D-Link DWR-2101 User Manual ii - D-Link DWR-2101 | Product Manual 1 - Page 4
to the Web-based User Interface 43 Related Topics 43 Hotspot Homepage 44 Settings Wizard 45 Accessing the Settings Wizard 45 48 Viewing Your SIM Card Information 48 SSID Settings (2.4 G/5G 49 Changing Your SSID Settings 49 WPS Settings 50 Enabling WPS Link DWR-2101 User Manual iii - D-Link DWR-2101 | Product Manual 1 - Page 5
an SMS 60 Firmware Upgrade 61 Checking Your Firmware 61 Upgrading Your Firmware 61 Account Configuration Troubleshooting 65 Networking Basics 66 Check your IP address 66 Statically Assign an IP address 67 Technical Specifications 69 Regulatory Information 71 D-Link DWR-2101 User Manual - D-Link DWR-2101 | Product Manual 1 - Page 6
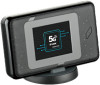
Section 1 - About the Device About the Device Meet the DWR-2101, the world's first 5G and Wi-Fi 6 harnessing mobile hotspot. Bring revolutionary 5G speeds into your home and unleash the full power of Wi-Fi for your plane. Never go anywhere without your Wi-Fi again. D-Link DWR-2101 User Manual 1 - D-Link DWR-2101 | Product Manual 1 - Page 7
, easy, and convenient. Simply insert your 5G or 4G/LTE nano SIM card to set up your very own mobile Wi-Fi network. The DWR-2101 5G Wi-Fi 6 Mobile Hotspot gives you instant connectivity, all in a powerful yet portable device, that fits easily into your bag or pocket. D-Link DWR-2101 User Manual 2 - D-Link DWR-2101 | Product Manual 1 - Page 8
-based Configuration Utility Requirements A compatible Nano SIM card with mobile data service. Subject to services and service terms available from your carrier. Computer with the following: of Java installed. Visit www.java.com to download the latest version. D-Link DWR-2101 User Manual 3 - D-Link DWR-2101 | Product Manual 1 - Page 9
Section 3 - Hardware Overview Hardware Overview Interface Buttons # Connector Description 1 Power Button Press the power button to power the device on. D-Link DWR-2101 User Manual 4 - D-Link DWR-2101 | Product Manual 1 - Page 10
Section 3 - Hardware Overview # Connector Description 1 Reboot Button Short press this button to reboot device Long press (over 3 seconds) this button to factory reset D-Link DWR-2101 User Manual 5 - D-Link DWR-2101 | Product Manual 1 - Page 11
2 LAN Port Description Use this latch to remove the back cover of the device to access the SIM card and the battery. Gigabit RJ-45 port for data. # Connector Description 1 Type-C Port Port to connect a Type-C USB cable for PC connections or for charging. D-Link DWR-2101 User Manual 6 - D-Link DWR-2101 | Product Manual 1 - Page 12
Setting Up Your Device Nano SIM Card Installation Note: The DWR-2101 is only compatible with Nano SIM cards. 1. Make sure the DWR-2101 is powered off. 2. Remove the battery cover on the back of the device by gently prying it up from the case using the corner notch. D-Link DWR-2101 User Manual 7 - D-Link DWR-2101 | Product Manual 1 - Page 13
Section 4 - Setting Up Your Device 3. Insert the Nano SIM card into the Nano SIM card slot, following the orientation diagram next to the slot for proper positioning. D-Link DWR-2101 User Manual 8 - D-Link DWR-2101 | Product Manual 1 - Page 14
Section 4 - Setting Up Your Device 4. Replace the back cover. Ensure that the back cover is aligned correctly. D-Link DWR-2101 User Manual 9 - D-Link DWR-2101 | Product Manual 1 - Page 15
Section 4 - Setting Up Your Device 5. Press and hold the power button for three seconds to turn on the device. Note: AlwaysunplugandturnoffthedevicebeforeinstallingorremovingtheNanoSIMcard.NeverinsertorremovetheNanoSIMcard while the device is in use. D-Link DWR-2101 User Manual 10 - D-Link DWR-2101 | Product Manual 1 - Page 16
top of the DWR-2101. 2. Connect the other end of the Type-C USB cable to your computer, or connect it to a Type-C 5 V / 2 A power adapter to charge your device. While the battery is charging, the battery charging icon will be displayed on the lock screen of the unit. D-Link DWR-2101 User Manual 11 - D-Link DWR-2101 | Product Manual 1 - Page 17
Section 5 - Charging Your Device and Battery Management Powering Your Device Press the Power Button to power the device on or off. D-Link DWR-2101 User Manual 12 - D-Link DWR-2101 | Product Manual 1 - Page 18
. Note: Charge the battery only with a Type-C USB cable (included in the packaging) and a Type-C 5 V / 2 A adapter (not included in the packaging). Improper chargingmethodsofthedeviceandtheuseofanincompatiblechargermaycausedamagetoyourdeviceandvoid its warranty. D-Link DWR-2101 User Manual 13 - D-Link DWR-2101 | Product Manual 1 - Page 19
Section 6 - Connecting Devices Connecting Devices Connecting via Wi-Fi You can find your Wi-Fi Name and Password at any time through the device's interface. 1. Swipe your finger on the prompt to unlock the DWR-2101. D-Link DWR-2101 User Manual 14 - D-Link DWR-2101 | Product Manual 1 - Page 20
SSID icon on the homepage. 3. Tap the SSID password visible toggle to see the password. Connecting via Ethernet Use an Ethernet cable to connect the DWR-2101 to your Ethernet capable device. D-Link DWR-2101 User Manual 15 - D-Link DWR-2101 | Product Manual 1 - Page 21
7 - Settings Settings The Settings application allows you to configure and customize your DWR-2101. Here, you can enable/disable WPS, Wi-Fi networks, manage connected users Language Configure the Date and Time Settings Firmware Upgrades Restore the Device Contents D-Link DWR-2101 User Manual 16 - D-Link DWR-2101 | Product Manual 1 - Page 22
- Enter the WPS PIN (either a 4 digit or an 8 digit number), then tap . Then press the WPS button on the Wi-Fi device within 120 seconds. D-Link DWR-2101 User Manual 17 - D-Link DWR-2101 | Product Manual 1 - Page 23
to connect to. The Bandwidth menu allows you to change the channel width being used by your DWR-2101. A wider megahertz channel may increase performance, but could cause interference with other Wi-Fi devices. hide your SSID from Wi-Fi search results, tap Hide SSID. D-Link DWR-2101 User Manual 18 - D-Link DWR-2101 | Product Manual 1 - Page 24
to connect to. The Bandwidth menu allows you to change the channel width being used by your DWR-2101. A wider megahertz channel may increase performance, but could cause interference with other Wi-Fi devices. hide your SSID from Wi-Fi search results, tap Hide SSID. D-Link DWR-2101 User Manual 19 - D-Link DWR-2101 | Product Manual 1 - Page 25
The Connected Users page shows you all the devices currently connected to the DWR-2101. To blacklist a device: a. Tap next to the devices name. b. Tap OK to confirm. To view blacklisted devices, tap . To unblock a blacklisted device: a. Tap next to the devices name. D-Link DWR-2101 User Manual 20 - D-Link DWR-2101 | Product Manual 1 - Page 26
your device, you'll need to enter it to proceed. Swipe your display to navigate to Settings on your homescreen. Tap Settings. Tap Profile Management. D-Link DWR-2101 User Manual 21 - D-Link DWR-2101 | Product Manual 1 - Page 27
Name for your reference. Tap to proceed. Different Internet Service Providers (ISP) use different APNs. Please contact your ISP for their details including the username and password that they use (if applicable). Tap to proceed after you've inputted the information. D-Link DWR-2101 User Manual 22 - D-Link DWR-2101 | Product Manual 1 - Page 28
Section 7 - Settings Use the default PdpType (IPv4v6). Tap to proceed. Confirm your profile information on the screen. Tap to finish the setup. D-Link DWR-2101 User Manual 23 - D-Link DWR-2101 | Product Manual 1 - Page 29
on your homescreen. Tap Settings. Tap Data Roaming. Tap Data Roaming to enable data roaming. International carrier fees may apply - please check with your Internet Service Provider for more details. D-Link DWR-2101 User Manual 24 - D-Link DWR-2101 | Product Manual 1 - Page 30
. To search for a network, tap Search mode. a. Choose Auto to search for a network automatically. Tap to save. b. Choose Manual to search for a network manually. i. Tap to commence the search. ii. Choose your network from the list of search results. iii. Tap to save. D-Link DWR-2101 User Manual 25 - D-Link DWR-2101 | Product Manual 1 - Page 31
will need the PUK code to unlock the SIM card if you enter the wrong passcode for your SIM PIN 3 times. Please contact your Internet Service Provider for the PUK code. D-Link DWR-2101 User Manual 26 - D-Link DWR-2101 | Product Manual 1 - Page 32
it to proceed. Swipe your display to navigate to Settings on your homescreen. Tap Settings. Tap Language. Choose your device language from the list of supported languages. Tap to save. D-Link DWR-2101 User Manual 27 - D-Link DWR-2101 | Product Manual 1 - Page 33
to Settings on your homescreen. Tap Settings. Tap FW upgrade. This page gives you the most updated information regarding the firmware version that your device is running. Tap Checking for updates... to check if there is a firmware upgrade available for your device. D-Link DWR-2101 User Manual 28 - D-Link DWR-2101 | Product Manual 1 - Page 34
display to navigate to Settings on your homescreen. Tap Settings. Tap Restore Default. Tap Restore to restore all device settings to the original factory settings. D-Link DWR-2101 User Manual 29 - D-Link DWR-2101 | Product Manual 1 - Page 35
Store or Google Play by searching for EZ-Five or by scanning the QR code below. Open the EZ-Five app to configure your device. D-Link DWR-2101 User Manual 30 - D-Link DWR-2101 | Product Manual 1 - Page 36
as Battery level What network you're connected to Storage capacity Time and date Swipe from left to right on the lockscreen at the indicator to unlock the device. If you've set a password for the device, you will need to enter the password to unlock the screen. D-Link DWR-2101 User Manual 31 - D-Link DWR-2101 | Product Manual 1 - Page 37
to measure and troubleshoot your Internet speed. Running an Internet speed test can tell you the exact speeds that you're getting with your network connection, giving you statistics on how fast your DWR-2101 is downloading and uploading data to the Internet. D-Link DWR-2101 User Manual 32 - D-Link DWR-2101 | Product Manual 1 - Page 38
may vary for different Wi-Fi devices. See the instructions for your Wi-Fi device for more information. Tap Next. Tap Manual. Enter in the displayed wireless network settings on your Wi-Fi device - you can choose between using the 2.4 GHz or the 5 GHz network. D-Link DWR-2101 User Manual 33 - D-Link DWR-2101 | Product Manual 1 - Page 39
to enter it to proceed. Tap Connection Guide. Go to the Wi-Fi settings screen on your Wi-Fi device. Operations may vary for different Wi-Fi devices. See the instructions for your Wi-Fi device for more Then press the WPS button on the Wi-Fi device within 120 seconds. D-Link DWR-2101 User Manual 34 - D-Link DWR-2101 | Product Manual 1 - Page 40
application allows you to set power saving options for the DWR-2101. You can set options such as the screen off time and enable the DWR-2101 to automatically shut off your Wi-Fi. Setting the Screen c. 60 seconds d. 120 seconds e. 10 minutes Tap to confirm your choice. D-Link DWR-2101 User Manual 35 - D-Link DWR-2101 | Product Manual 1 - Page 41
Section 11 - Power Saving Enabling Automatic Wi-Fi Shut Down You can enable the DWR-2101 to turn off it's Wi-Fi on a set timer in order to save power. Press choices to select a timeout interval. a. 10 minutes b. 20 minutes c. 30 minutes Tap to confirm your choice. D-Link DWR-2101 User Manual 36 - D-Link DWR-2101 | Product Manual 1 - Page 42
SSID SSID The SSID application allows you to modify the Wi-Fi network settings for the DWR-2101. You can set the SSID network name, password and security for the 2.4 GHz and 5 , tap 2.4G SSID. Tap to save. b. To modify the 5 GHz SSID name, tap 5G SSID. Tap to save. D-Link DWR-2101 User Manual 37 - D-Link DWR-2101 | Product Manual 1 - Page 43
4G Password. Tap to save. b. To modify the 5 GHz password, tap 5G Password. Tap to save. Changing the SSID Security Press the power button to wake settings, tap 5G Security. You can choose between None (Open), WPA-PSK, WPA2-PSK, and WPA3/WPA2 mixed mode. Tap to save. D-Link DWR-2101 User Manual 38 - D-Link DWR-2101 | Product Manual 1 - Page 44
to enter it to proceed. Swipe your display to navigate to SMS on your homescreen. Tap SMS. Tap and tap Delete on the confirmation screen. D-Link DWR-2101 User Manual 39 - D-Link DWR-2101 | Product Manual 1 - Page 45
associated with the device. It is useful for support diagnosis for troubleshooting. a. IMEI b. LAN MAC Address c. Software Version d. MiFi Software Version e. D-Link Firmware Version f. Phone number associated with the SIM card g. LAN IP Address h. WAN IP Address D-Link DWR-2101 User Manual 40 - D-Link DWR-2101 | Product Manual 1 - Page 46
unlock your device, you'll need to enter it to proceed. Swipe your display to navigate to About on your homescreen. Tap About. Tap Help. D-Link DWR-2101 User Manual 41 - D-Link DWR-2101 | Product Manual 1 - Page 47
troubleshoot your Internet speed. Running an Internet speed test can tell you the exact speeds that you're getting with your network connection, giving you statistics on how fast your DWR-2101 speed indicates how fast your device is uploading data to the Internet. D-Link DWR-2101 User Manual 42 - D-Link DWR-2101 | Product Manual 1 - Page 48
wirelessly or via an Ethernet cable to the DWR-2101. Open a web browser and enter 192.168.0.1 in the address bar to access the DWR-2101's Web-based User Interface. Once you have reached Account Configuration for more details. Account Configuration Related Topics D-Link DWR-2101 User Manual 43 - D-Link DWR-2101 | Product Manual 1 - Page 49
- Hotspot Homepage Hotspot Homepage The DWR-2101 Web-based User Interface homepage is the first page you see when you connect to your DWR-2101. It shows you an at-a- glance overview regarding the DWR-2101, such menu bar, and click OK when prompted by the dialog box. D-Link DWR-2101 User Manual 44 - D-Link DWR-2101 | Product Manual 1 - Page 50
Settings Wizard page will guide you through the steps required to configure the basic settings of your DWR-2101, such as the options are the same. Click the SSID Settings - 2.4G or SSID Settings - 5G buttons to configure each section. a. Wi-Fi Enable: Click the toggle to Link DWR-2101 User Manual 45 - D-Link DWR-2101 | Product Manual 1 - Page 51
mobile service provider, you may have to inputoptionalsettingsbeforeuse.Ifso,youmayneedtocontactyour serviceproviderregardingthesedetails. Configuring your APN Settings Open a web browser and enter 192.168.0.1 in the address bar to access the DWR-2101 your settings. D-Link DWR-2101 User Manual 46 - D-Link DWR-2101 | Product Manual 1 - Page 52
Pin Lock Settings Open a web browser and enter 192.168.0.1 in the address bar to access the DWR-2101's web-based user interface. Enter in your username and password, then click Login. Navigate to SIM pin code in the PIN Code field. Click Update to save your settings. D-Link DWR-2101 User Manual 47 - D-Link DWR-2101 | Product Manual 1 - Page 53
the SIM card's subscription to the Global System for Mobile Communications (GSM) standard or the Universal Mobile Telecommunications System (UMTS) standard. It is used for routing calls to the subscriber. SIM ICCID is your SIM card's globally unique serial number. D-Link DWR-2101 User Manual 48 - D-Link DWR-2101 | Product Manual 1 - Page 54
Section 22 - SSID Settings (2.4 G/5G) SSID Settings (2.4 G/5G) The SSID Settings (2.4G/5G) page allows you to view your Wi-Fi security settings. In this section you have channel decides how much data can pass through at what speed. Click Update to save your settings. D-Link DWR-2101 User Manual 49 - D-Link DWR-2101 | Product Manual 1 - Page 55
a web browser and enter 192.168.0.1 in the address bar to access the DWR-2101's web-based user interface. Enter in your username and password, then click Login. Navigate to WPS Settings from the menu bar. Click Via the WPS button. Click WPS to start a WPS connection. D-Link DWR-2101 User Manual 50 - D-Link DWR-2101 | Product Manual 1 - Page 56
the DWR-2101's web-based user interface. Enter in your username and password, then click Login. Navigate to WPS Settings from the menu bar. Click Device PIN. Enter the WPS PIN of your connecting device into the PIN Code field. Click Connect to start a WPS connection. D-Link DWR-2101 User Manual 51 - D-Link DWR-2101 | Product Manual 1 - Page 57
a web browser and enter 192.168.0.1 in the address bar to access the DWR-2101's web-based user interface. Enter in your username and password, then click Login DWR-2101. Click OK to save your settings. To delete the MAC filter, click the Delete button on the same row. D-Link DWR-2101 User Manual 52 - D-Link DWR-2101 | Product Manual 1 - Page 58
Backhaul (IPv4)/Choose Backhaul (IPv6): Click the toggle to connect to or disconnect from IPv4 Support/IPv6 Support. The function needs to be connected in order to enable IPv4 Support/IPv6 Support. c. Current State: Shows the status of the connection from the ISP. D-Link DWR-2101 User Manual 53 - D-Link DWR-2101 | Product Manual 1 - Page 59
by default. Open a web browser and enter 192.168.0.1 in the address bar to access the DWR-2101's web-based user interface. Enter in your username and password, then click Login. Navigate to WWAN WWAN Primary DNS. j. WWAN Secondary DNS: Shows the WWAN Secondary DNS. D-Link DWR-2101 User Manual 54 - D-Link DWR-2101 | Product Manual 1 - Page 60
Configuring the NAT Settings Open a web browser and enter 192.168.0.1 in the address bar to access the DWR-2101's web-based user interface. Enter in your username and password, then click Login. Navigate to NAT Settings interface. Type in an IP address for the DMZ IP. D-Link DWR-2101 User Manual 55 - D-Link DWR-2101 | Product Manual 1 - Page 61
address you want to allow port forwarding on. b. Private Port: Select the port number or numbers for your service on your local network. Enter a single port or a range. If entering multiple ports, separate port numbers address, click the Modify button on the same row. D-Link DWR-2101 User Manual 56 - D-Link DWR-2101 | Product Manual 1 - Page 62
and enter 192.168.0.1 in the address bar to access the DWR-2101's web-based user interface. Enter in your username and password, then click Login. Navigate to Firewall Setting from the menu bar. Click the toggle to enable firewall. Click Update to save your settings. D-Link DWR-2101 User Manual 57 - D-Link DWR-2101 | Product Manual 1 - Page 63
Edit Firewall Entries Open a web browser and enter 192.168.0.1 in the address bar to access the DWR-2101's web-based user interface. Enter in your username and password, then click Login. Navigate to Firewall firewall entry, click the Modify button on the same row. D-Link DWR-2101 User Manual 58 - D-Link DWR-2101 | Product Manual 1 - Page 64
your LAN Settings Open a web browser and enter 192.168.0.1 in the address bar to access the DWR-2101's web-based user interface. Enter in your username and password, then click Login. Navigate to LAN Settings lease time expires. Click Update to save your settings. D-Link DWR-2101 User Manual 59 - D-Link DWR-2101 | Product Manual 1 - Page 65
to your DWR-2101 by your Internet Service Provider. The messages are listed in order by date. Viewing Your Messages Open a web browser and enter 192.168.0.1 in the address bar to access the DWR-2101's web-based be less than 160 characters. Click Send to send your SMS. D-Link DWR-2101 User Manual 60 - D-Link DWR-2101 | Product Manual 1 - Page 66
is running will be shown in the Current Version field. The New Version field shows the latest version of firmware available for the device. If the two fields are the different, then it is recommended that you run a firmware upgrade. Click Start Firmware Upgrade. D-Link DWR-2101 User Manual 61 - D-Link DWR-2101 | Product Manual 1 - Page 67
in the address bar to access the DWR-2101's web-based user interface. Enter in your username and password, then click Login. Navigate to Account Configuration from the menu bar. Enter the Session Timeout time in minutes. Click Update Timeout to save your settings. D-Link DWR-2101 User Manual 62 - D-Link DWR-2101 | Product Manual 1 - Page 68
menu bar. Software version states the version of software that the device is running. MiFi Software version states the version of firmware that the device is running. D-Link Firmware version states the version of firmware that the Web-based User Interface is running. D-Link DWR-2101 User Manual 63 - D-Link DWR-2101 | Product Manual 1 - Page 69
Device Open a web browser and enter 192.168.0.1 in the address bar to access the DWR-2101's web-based user interface. Enter in your username and password, then click Login. Click Factory Reset from the menu bar. Click OK on the prompt to factory reset your DWR-2101. D-Link DWR-2101 User Manual 64 - D-Link DWR-2101 | Product Manual 1 - Page 70
the white latch by sliding the latch switch up. Use the gap next to the battery latch switch as leverage to gently pull the battery out of its compartment. Remember to slide the latch switch down to lock the battery back in place before replacing the battery cover. D-Link DWR-2101 User Manual 65 - D-Link DWR-2101 | Product Manual 1 - Page 71
36 - Networking Basics Networking Basics Check your IP address After you install your new D-Link adapter, by default, the TCP/IP settings should be set to obtain an IP router. Some firewall software programs may block a DHCP request on newly installed adapters. D-Link DWR-2101 User Manual 66 - D-Link DWR-2101 | Product Manual 1 - Page 72
. Step 2 Right-click on the Local Area Connection which represents your network adapter and select Properties. Step 3 Highlight Internet Protocol (TCP/IP) and click Properties. D-Link DWR-2101 User Manual 67 - D-Link DWR-2101 | Product Manual 1 - Page 73
(192.168.0.1). The Secondary DNS is not needed or you may enter a DNS server from your ISP. Step 5 Click OK twice to save your settings. D-Link DWR-2101 User Manual 68 - D-Link DWR-2101 | Product Manual 1 - Page 74
Battery status Wi-Fi & security status Wi-Fi clients 4G LTE/5G 4x4 internal antenna 2 x internal Wi-Fi antennas Functionality 5G NR Sub 6 GHz: n1/3/20/28/78/n77 LTE FDD: B1/3/7/8/20/28 LTE TDD: B38/46 WCDMA: B1/B8 IEEE 802.11n/g/b/ac/ax2 2.4 - 2.483 GHz 5.15 - 5.85 GHz WPA3TM D-Link DWR-2101 - D-Link DWR-2101 | Product Manual 1 - Page 75
management Touchscreen Web UI Physical DC 5 V / 2 A ± 5% Rechargeable 5260 mAh Li-ion battery 119 x 72 x 23.5 mm (4.7 x 2.8 x 0.9 in) 235 g (0.52 lb) strength, and the conditions of your mobile broadband subscription. A 5G subscription is required in order to achieve D-Link DWR-2101 User Manual 70 - D-Link DWR-2101 | Product Manual 1 - Page 76
countries, except in France where restrictive use applies. This device may not be used for setting up outdoor radio links in France and in some areas the RF output power may be limited to 10 mW EIR P in the of the device. The maximum SAR value is 1.186W/kg (head/body) D-Link DWR-2101 User Manual 71 - D-Link DWR-2101 | Product Manual 1 - Page 77
±2 dBm 23 ±2 dBm 23+_2 dBm 23 ±2 dBm 18.18 dBm 17.82 dBm 17.76 dBm 17.66 dBm 19.9 dBm 19.66 dBm D-Link DWR-2101 User Manual 72 - D-Link DWR-2101 | Product Manual 1 - Page 78
this distance. Hereby,[D-LinkCorporation]declaresthattheradioequipmenttype[DWR-2101]isincompliancewithDirective2014/53/EU. Thefulltext of the EU declaration of conformity is available at the following Internet address: http://www.dlink.com/uk/en/support/codec D-Link DWR-2101 User Manual 73 - D-Link DWR-2101 | Product Manual 1 - Page 79
dichiara che questo prodotto, i relativi accessori e il software sono conformi alla direttiva 2014/53/UE. Il testo completo della dichiarazione di conformità UE e il firmware del prodotto sono disponibili per il download dalla pagina del prodotto su www.dlink.com. D-Link DWR-2101 User Manual 74 - D-Link DWR-2101 | Product Manual 1 - Page 80
dlink.com. D-Link Corporation täten vakuuttaa, että tämä tuote, lisävarusteet ja ohjelmisto ovat direktiivin 2014/53/EU vaatimusten mukaisia. Täydellinen EU-vaatimustenmukaisuusvakuutus samoin kuin tuotteen laiteohjelmisto ovat ladattavissa osoitteesta www.dlink.com. D-Link DWR-2101 User Manual 75 - D-Link DWR-2101 | Product Manual 1 - Page 81
/EU. Hela texten med EU-försäkran om överensstämmelse och produkt-firmware kan hämtasfrån produktsidan på www.dlink.com. Hér með lýsir D-Link Corporation því yfir að þessi vara, fylgihlutir og hugbúnaður eru outlet should be near the device and easily accessible. D-Link DWR-2101 User Manual 76 - D-Link DWR-2101 | Product Manual 1 - Page 82
-to-peer communication between two client devices without an Access Point. Access points will support DFS (Dynamic Frequency Selection) and TPC (Transmit Power Control) functionality as required when operating Gerät eine 2,4 GHz und / oder 5 GHz Verbindung nutzt. D-Link DWR-2101 User Manual 77 - D-Link DWR-2101 | Product Manual 1 - Page 83
de 5 GHz au sein de l'UE. Merci de vous référer au guide d'utilisation ou de la fiche technique afin de vérifier si votre produit utilise 2.4 el manual o la ficha de producto para comprobar si el producto utiliza las bandas inalámbricas de 2.4 GHz y/o la de 5 D-Link DWR-2101 User Manual 78 - D-Link DWR-2101 | Product Manual 1 - Page 84
richieste per operare a 5 Ghz nell'Unione europea. Ti invitiamo a fare riferimento al manuale del prodotto o alla scheda tecnica per verificare se il tuo prodotto utilizza le frequenze 2,4 GHz Control) functionaliteit zoals vereist bij gebruik in 5 GHz binnen de EU. D-Link DWR-2101 User Manual 79 - D-Link DWR-2101 | Product Manual 1 - Page 85
Do not attempt to service the product and never disassemble the product. For some products with a user replaceable battery, please read and follow the instructions in the user manual. Do not spill verwenden Sie dazu ausschließlich ein trockenes fusselfreies Tuch. D-Link DWR-2101 User Manual 80 - D-Link DWR-2101 | Product Manual 1 - Page 86
d'intervenir sur le produit et ne le démontez jamais. Pour certains produits contenant une batterie remplaçable par l'utilisateur, veuillez lire et suivre les consignes contenues dans le manuel d'utilisation antes de limpiarlo y utilice solo un paño seco sin pelusa. D-Link DWR-2101 User Manual 81 - D-Link DWR-2101 | Product Manual 1 - Page 87
alcuni prodotti dotati di batteria sostituibile dall'utente, leggere e seguire le istruzioni riportate nel manuale dell'utente. Non versare cibi o liquidi sul prodotto e non spingere mai alcun voordat u het reinigt en gebruik uitsluitend een droge pluisvrije doek. D-Link DWR-2101 User Manual 82 - D-Link DWR-2101 | Product Manual 1 - Page 88
this manner you help to conserve the environment and protect human health. D-Link and the Environment At D-Link, we understand and are committed to reducing any impact our operations and products entsprechende Informationen im Internet unter www.dlinkgreen.com. D-Link DWR-2101 User Manual 83 - D-Link DWR-2101 | Product Manual 1 - Page 89
apagar o desenchufar los productos D-Link cuando no se estén utilizando. Al hacerlo, contribuirá a ahorrar energía y a reducir las emisiones de CO2. Para obtener más información acerca de nuestros productos y embalajes ecológicos, visite el sitio www.dlinkgreen.com. D-Link DWR-2101 User Manual 84 - D-Link DWR-2101 | Product Manual 1 - Page 90
D-Link producten uit te schakelen of uit de stekker te halen wanneer u ze niet gebruikt. Door dit te doen bespaart u energie en beperkt u de CO2-emissies. Breng een bezoek aan www.dlinkgreen.com voor meer informatie over onze milieuverantwoorde producten en verpakkingen. D-Link DWR-2101 User Manual - D-Link DWR-2101 | Product Manual 1 - Page 91
. Společnost D-Link doporučuje, abyste své výrobky značky D-Link vypnuli nebo vytáhli ze zásuvky vždy, když je nepoužíváte. Pomůžete tak šetřit energii a snížit emise CO2. Více informací o našich ekologických výrobcích a obalech najdete na adrese www.dlinkgreen.com. D-Link DWR-2101 User Manual 86 - D-Link DWR-2101 | Product Manual 1 - Page 92
anbefaler at du alltid slår av eller frakobler D-Link-produkter når de ikke er i bruk. Ved å gjøre dette hjelper du å spare energi og å redusere CO2-utslipp. For mer informasjon angående våre miljøansvarlige produkter og forpakninger kan du gå til www.dlinkgreen.com. D-Link DWR-2101 User Manual 87 - D-Link DWR-2101 | Product Manual 1 - Page 93
D-Link-tuotteesi virtalähteestä tai sammutat ne aina, kun ne eivät ole käytössä. Toimimalla näin autat säästämään energiaa ja vähentämään hiilidioksiidipäästöjä. Lue lisää ympäristöystävällisistä D-Link-tuotteista ja pakkauksistamme osoitteesta www.dlinkgreen.com. D-Link DWR-2101 User Manual 88 - D-Link DWR-2101 | Product Manual 1 - Page 94
que desligue os seus produtos D-Link quando estes não se encontrarem em utilização. Com esta acção ajudará a poupar energia e reduzir as emissões de CO2. Para saber mais sobre os nossos produtos e embalagens responsáveis a nível ambiental visite www.dlinkgreen.com. D-Link DWR-2101 User Manual 89
-
 1
1 -
 2
2 -
 3
3 -
 4
4 -
 5
5 -
 6
6 -
 7
7 -
8
-
9
-
10
-
11
-
12
-
13
-
14
-
15
-
16
-
17
-
18
-
19
-
20
-
21
-
22
-
23
-
24
-
25
-
26
-
27
-
28
-
29
-
30
-
31
-
32
-
33
-
34
-
35
-
36
-
37
-
38
-
39
-
40
-
41
-
42
-
43
-
44
-
45
-
46
-
47
-
48
-
49
-
50
-
51
-
52
-
53
-
54
-
55
-
56
-
57
-
58
-
59
-
60
-
61
-
62
-
63
-
64
-
65
-
66
-
67
-
68
-
69
-
70
-
71
-
72
-
73
-
74
-
75
-
76
-
77
-
78
-
79
-
80
-
81
-
82
-
83
-
84
-
85
-
86
-
87
-
88
-
89
-
90
-
91
-
92
-
93
-
94
 |
 |

Version 4.00 | 9/29/2022
User Manual
5G Wi-Fi 6 Mobile Hotspot
DWR-2101