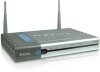
D-Link DSA-3200 Quick Installation Guide - Page 7
Click, IP Address, Subnet Mask, DHCP Server Enabled/Disabled - user manual
 |
UPC - 790069274329
View all D-Link DSA-3200 manuals
Add to My Manuals
Save this manual to your list of manuals |
Page 7 highlights
Using The Setup Wizard (continued) Specify the DHCP Server Settings. Specify a range of IP addresses to assign the DHCP clients. The range is entered in the format "Start IP - End IP" i.e. 192.168.1.101 - 192.168.1.200. Enter the Domain Name and Primary DNS Server settings for the clients. Entering a Secondary DNS Server is optional. Click Next Enter the desired Wireless Network SSID, select RF Channel (auto or manual), and Wireless Transmission Mode. The Sync to Ticket option will automatically add the SSID of the Internal AP to the On-Demand User Receipt. Click Next Configure the Public WLAN Port: • IP Address: The IP address used for the DSA-3200 on the Public WLAN. • Subnet Mask: The Subnet Mask of the DSA-3200 on the Public WLAN. • DHCP Server Enabled/Disabled: With DHCP Server enabled, IP addresses are provided automatically to clients on the Public WLAN. Click Next 7
-
 1
1 -
 2
2 -
 3
3 -
 4
4 -
 5
5 -
 6
6 -
 7
7 -
 8
8 -
 9
9 -
 10
10 -
 11
11 -
 12
12
 |
 |
