Craftsman 88830 Operation Manual - Page 9
TopView
 |
View all Craftsman 88830 manuals
Add to My Manuals
Save this manual to your list of manuals |
Page 9 highlights
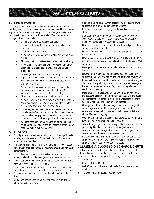
4. Placechuteontochute baseand ensurehexrod is positioned f under handlepanel.Installhex boltpreviouslyremovedbut do not securewith wingnut at this time.See Figure4. 5. Squeezethetriggeron the handlepaneljoystickand rotatethe chute byhand to face forward.The holesin the chutecontrol inputwill be facing up. See Figure5. NOTE:The chutewill not rotatewithoutsqueezingthe triggeron the joystick. 6. Rotatethejoystickto the one o'clockpositionso the silver indicatorarrowon the inputshaft belowthe controlpanel points upward.See Figure6. NOTE:Thejoystickwillbe angledslightlyto the right.See Figures5 & 6. Chute Controlf TopView _i t _i Figure5 Figure4 f FrontView Joystick J Figure6 9
-
 1
1 -
2
-
3
-
 4
4 -
 5
5 -
 6
6 -
 7
7 -
 8
8 -
 9
9 -
 10
10 -
 11
11 -
 12
12 -
 13
13 -
 14
14 -
15
-
16
-
17
-
18
-
19
-
20
-
21
-
22
-
23
-
24
-
25
-
26
-
27
-
28
-
29
-
30
-
31
-
32
-
33
-
34
-
35
-
36
-
37
-
38
-
39
-
40
-
41
-
42
-
43
-
44
-
45
-
46
-
47
-
48
-
49
-
50
-
51
-
52
-
53
-
54
-
55
-
56
-
57
-
58
-
59
-
60
-
61
-
62
-
63
-
64
-
65
-
66
-
67
-
68
-
69
-
70
-
71
-
72
 |
 |

4.
Placechuteontochutebaseandensurehexrodispositioned
underhandlepanel.Installhex boltpreviouslyremovedbut do
not securewith wingnut at this time.See Figure4.
5.
Squeezethetriggeron the handlepaneljoystickand rotatethe
chutebyhandtofaceforward.Theholesinthechutecontrol
inputwillbefacingup.SeeFigure5.
NOTE:The chutewill not rotatewithoutsqueezingthe triggeronthe
joystick.
6.
Rotatethejoystickto the one o'clockpositionso the silver
indicatorarrowonthe inputshaft belowthe controlpanelpoints
upward.SeeFigure6.
NOTE:Thejoystickwillbe angledslightlyto the right.See Figures5 &
6.
Figure4
f
Chute
Controlf
TopView
_i¸
...............
t _i
Figure5
f
FrontView
Joystick
Figure6
J
9