Canon 3686B001 VIXIA HV40 Instruction Manual - Page 54
Press, Set [MAGN.REC] to, to start, recording.
 |
View all Canon 3686B001 manuals
Add to My Manuals
Save this manual to your list of manuals |
Page 54 highlights
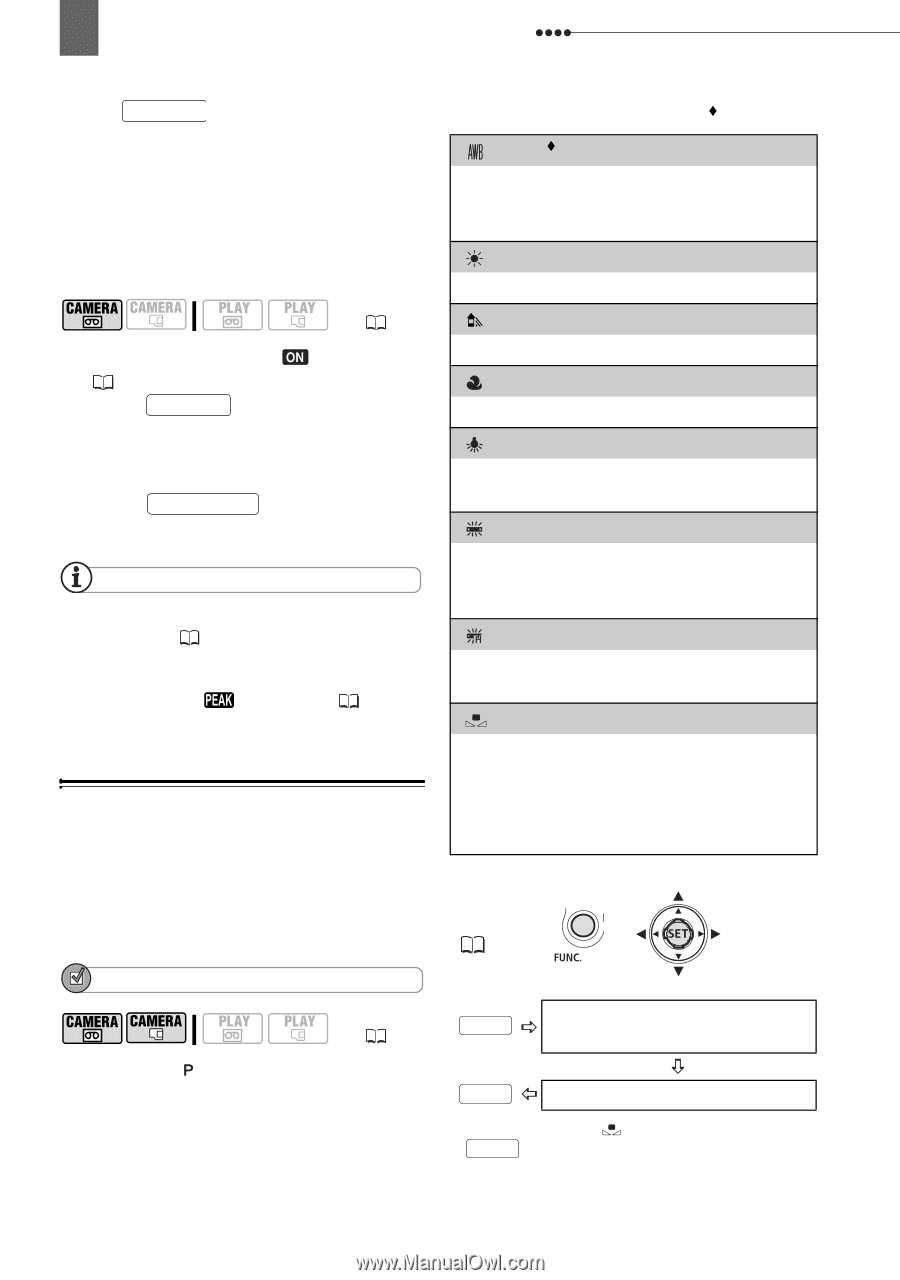
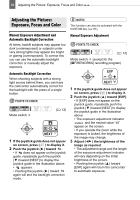
54 Adjusting the Picture: Exposure, Focus and Color Press MAGNIFY . • The image at the center of the screen is magnified 1.8 times and "MAGN." appears in yellow. • This will not affect the recordings on the tape. TO RECORD THE MAGNIFIED IMAGE ( 12) 1 Set [MAGN.REC] to [ ON] ( 46). 2 Press MAGNIFY . The image at the center of the screen is magnified 1.8 times and "MAGN.REC" appears in red. 3 Press START/STOP to start recording. NOTES This function can also be activated with the CUSTOM key ( 61). You can also apply the peaking function (without the magnification) by setting [ASST.FUNC.] to [ PEAKING] ( 45). White Balance The white balance function helps you accurately reproduce colors under different lighting conditions so that white objects will always look truly white in your recordings. POINTS TO CHECK ( 12) Mode switch: (except for the Special Scene recording programs) Options Default value [ AUTO] Settings are automatically set by the camcorder. Use this setting for outdoor scenes. [ DAYLIGHT] For recording outdoors on a bright day. [ SHADE] For recording in shaded places. [ CLOUDY] For recording on a cloudy day. [ TUNGSTEN] For recording under tungsten and tungsten type (3-wavelength) fluorescent lighting. [ FLUORESCENT] For recording under warm white, cool white or warm white type (3-wavelength) fluorescent lighting. [ FLUORESCENT H] For recording under daylight or daylight type (3-wavelength) fluorescent lighting. [ SET] Use the custom white balance for special situations not covered by the other options. The custom white balance will ensure that white subjects appear white under various lighting conditions. FUNC. ( 25) FUNC. Icon of the currently selected White Balance FUNC. Desired option* * When you select [ SET], do not press FUNC. and continue instead with the procedure below.
-
 1
1 -
2
-
3
-
4
-
5
-
6
-
7
-
8
-
9
-
10
-
11
-
12
-
13
-
14
-
15
-
16
-
17
-
18
-
19
-
20
-
21
-
22
-
23
-
24
-
25
-
26
-
27
-
28
-
29
-
30
-
31
-
32
-
33
-
34
-
35
-
36
-
37
-
38
-
39
-
40
-
41
-
42
-
43
-
44
-
45
-
46
-
47
-
48
-
 49
49 -
 50
50 -
 51
51 -
 52
52 -
 53
53 -
 54
54 -
 55
55 -
 56
56 -
 57
57 -
 58
58 -
 59
59 -
60
-
61
-
62
-
63
-
64
-
65
-
66
-
67
-
68
-
69
-
70
-
71
-
72
-
73
-
74
-
75
-
76
-
77
-
78
-
79
-
80
-
81
-
82
-
83
-
84
-
85
-
86
-
87
-
88
-
89
-
90
-
91
-
92
-
93
-
94
-
95
-
96
-
97
-
98
-
99
-
100
-
101
-
102
-
103
-
104
-
105
-
106
-
107
-
108
-
109
-
110
-
111
-
112
-
113
-
114
 |
 |