Beko DCUR701 User Manual - Page 14
Installation
 |
View all Beko DCUR701 manuals
Add to My Manuals
Save this manual to your list of manuals |
Page 14 highlights
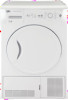
3 Installation Before the calling the nearest Authorized Service for the installation of the dryer, ensure that electrical installation and water drain is appropriate referring to the user's manual. (See 3.4 Connecting to the drain and 3.6 Electrical connection) If they are not suitable, contact a qualified electrician and technician to make necessary arrangements. C Preparation of the dryer's location as well as the electrical and waste water installations is under customer's responsibility. A Prior to installation, visually check if the dryer has any defects on it. If the drier is damaged, do not have it installed. Damaged products cause risks for your safety. 3.1 Appropriate installation location Install the dryer on a stable and level surface. Dryer is heavy. Do not move it by yourself. • Operate your dryer in a well ventilated, dust-free environment. • The gap between the dryer and the surface should not be reduced by the materials such as carpet, wood and tape. • Do not cover the ventilation grills of the dryer. • There must not be a lockable, sliding or hinged door that may block the opening of the loading door in the place where your dryer is to be installed. • Once the dryer is installed, it should stay at the same place where its connections have been made. When installing the dryer, make sure that its rear wall does not touch anywhere (tap, socket, etc.). • Place the dryer at least 1 cm away from the edges of other furniture. • Your dryer can be operated at temperatures between +5°C and +35°C. If the operating conditions fall outside of this range, operation of the dryer will be adversely affected and it can get damaged. • The rear surface of the tumble dryer shall be placed against a wall. B Do not place the dryer on the power cable. 3.2 Removing the transportation safety assembly A Remove the transportation safety assembly before using the dryer for the first time. Open the loading door. There is a nylon bag inside the drum that contains a piece of styrofoam. Hold it from its section marked with XX XX. Pull the nylon towards yourself and remove the transportation safety assembly. A Check that no part of the transportation safety assembly remains inside the drum. 3.3 Under counter installation • A special part (Part no. 297 360 0100) replacing the top trim must be provided and installed by the Authorised Service Agent in order to use the machine under a counter or in a cupboard. It should never be operated without the top trim. • Leave at least 3 cm of space between the side and rear walls of the product and the walls of the counter/cupboard when installing your product under a counter or in a cupboard. 3.4 Connecting to the drain In products equipped with condenser unit, water accumulates in the water tank during the drying cycle. You should drain accumulated water after each drying cycle. You can directly drain accumulated water through the water drain hose supplied with the product instead of periodically draining the water collected in the water tank. EN / 14 Dryer / User Manual
-
 1
1 -
2
-
3
-
4
-
5
-
6
-
7
-
8
-
 9
9 -
 10
10 -
 11
11 -
 12
12 -
 13
13 -
 14
14 -
 15
15 -
 16
16 -
 17
17 -
 18
18 -
 19
19 -
20
-
21
-
22
-
23
-
24
-
25
-
26
-
27
-
28
-
29
-
30
-
31
-
32
 |
 |
