2013 Yamaha Motorsports Raider S Owners Manual - Page 60
2013 Yamaha Motorsports Raider S Manual

Page 60 highlights
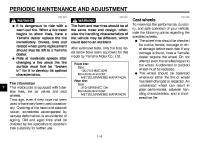
PERIODIC MAINTENANCE AND ADJUSTMENT EAU22273 EAU22392 Brake light switches Checking the front and rear brake pads The front and rear brake pads must be checked for wear at the intervals specified in the periodic maintenance and lubrication chart. EAU22430 indicator grooves have almost disappeared, have a Yamaha dealer replace the brake pads as a set. EAU22500 Rear brake pads Front brake pads 1. Rear brake light switch 2. Rear brake light switch adjusting nut 7 The brake light, which is activated by the brake pedal and brake lever, should come on just before braking takes effect. If necessary, adjust the rear brake light switch as follows, but the front brake light switch should be adjusted by a Yamaha dealer. Turn the rear brake light switch adjusting nut while holding the rear brake light switch in place. To make the brake light come on earlier, turn the adjusting nut in direction (a). To make the brake light come on later, turn the adjusting nut in direction (b). 1 1 1. Lining thickness 1. Brake pad wear indicator groove Each front brake pad is provided with wear indicator grooves, which allow you to check the brake pad wear without having to disassemble the brake. To check the brake pad wear, check the wear indicator grooves. If a brake pad has worn to the point that the wear Check each rear brake pad for damage and measure the lining thickness. If a brake pad is damaged or if the lining thickness is less than 0.8 mm (0.08 in), have a Yamaha dealer replace the brake pads as a set. 7-18
-
 1
1 -
2
-
3
-
4
-
5
-
6
-
7
-
8
-
9
-
10
-
11
-
12
-
13
-
14
-
15
-
16
-
17
-
18
-
19
-
20
-
21
-
22
-
23
-
24
-
25
-
26
-
27
-
28
-
29
-
30
-
31
-
32
-
33
-
34
-
35
-
36
-
37
-
38
-
39
-
40
-
41
-
42
-
43
-
44
-
45
-
46
-
47
-
48
-
49
-
50
-
51
-
52
-
53
-
54
-
 55
55 -
 56
56 -
 57
57 -
 58
58 -
 59
59 -
 60
60 -
 61
61 -
 62
62 -
 63
63 -
 64
64 -
 65
65 -
66
-
67
-
68
-
69
-
70
-
71
-
72
-
73
-
74
-
75
-
76
-
77
-
78
-
79
-
80
-
81
-
82
-
83
-
84
-
85
-
86
-
87
-
88
-
89
-
90
-
91
-
92
-
93
-
94
-
95
-
96
 |
 |
