2010 Yamaha Motorsports Grizzly 700 4x4 EPS Owners Manual - Page 143
2010 Yamaha Motorsports Grizzly 700 4x4 EPS Manual

Page 143 highlights
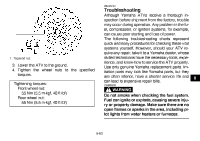
EBU25740 Troubleshooting Although Yamaha ATVs receive a thorough inspection before shipment from the factory, trouble may occur during operation. Any problem in the fuel, compression, or ignition systems, for example, can cause poor starting and loss of power. The following troubleshooting charts represent quick and easy procedures for checking these vital systems yourself. However, should your ATV require any repair, take it to a Yamaha dealer, whose skilled technicians have the necessary tools, experience, and know-how to service the ATV properly. Use only genuine Yamaha replacement parts. Imitation parts may look like Yamaha parts, but they are often inferior, have a shorter service life and can lead to expensive repair bills. EWB02280 1. Tapered nut 3. Lower the ATV to the ground. 4. Tighten the wheel nuts to the specified torques. Tightening torques: Front wheel nut: 55 Nm (5.5 m·kgf, 40 ft·lbf) Rear wheel nut: 55 Nm (5.5 m·kgf, 40 ft·lbf) 8 WARNING Do not smoke when checking the fuel system. Fuel can ignite or explode, causing severe injury or property damage. Make sure there are no open flames or sparks in the area, including pilot lights from water heaters or furnaces. 8-63
-
 1
1 -
2
-
3
-
4
-
5
-
6
-
7
-
8
-
9
-
10
-
11
-
12
-
13
-
14
-
15
-
16
-
17
-
18
-
19
-
20
-
21
-
22
-
23
-
24
-
25
-
26
-
27
-
28
-
29
-
30
-
31
-
32
-
33
-
34
-
35
-
36
-
37
-
38
-
39
-
40
-
41
-
42
-
43
-
44
-
45
-
46
-
47
-
48
-
49
-
50
-
51
-
52
-
53
-
54
-
55
-
56
-
57
-
58
-
59
-
60
-
61
-
62
-
63
-
64
-
65
-
66
-
67
-
68
-
69
-
70
-
71
-
72
-
73
-
74
-
75
-
76
-
77
-
78
-
79
-
80
-
81
-
82
-
83
-
84
-
85
-
86
-
87
-
88
-
89
-
90
-
91
-
92
-
93
-
94
-
95
-
96
-
97
-
98
-
99
-
100
-
101
-
102
-
103
-
104
-
105
-
106
-
107
-
108
-
109
-
110
-
111
-
112
-
113
-
114
-
115
-
116
-
117
-
118
-
119
-
120
-
121
-
122
-
123
-
124
-
125
-
126
-
127
-
128
-
129
-
130
-
131
-
132
-
133
-
134
-
135
-
136
-
137
-
 138
138 -
 139
139 -
 140
140 -
 141
141 -
 142
142 -
 143
143 -
 144
144 -
 145
145 -
 146
146 -
 147
147 -
 148
148 -
149
-
150
-
151
-
152
-
153
-
154
-
155
-
156
-
157
-
158
-
159
-
160
-
161
-
162
-
163
-
164
-
165
-
166
-
167
-
168
-
169
-
170
 |
 |
