Vantec NST-400MX-SR User Guide
Vantec NST-400MX-SR - NexStar MX Manual
 |
View all Vantec NST-400MX-SR manuals
Add to My Manuals
Save this manual to your list of manuals |
Vantec NST-400MX-SR manual content summary:
- Vantec NST-400MX-SR | User Guide - Page 1
MANUAL - Vantec NST-400MX-SR | User Guide - Page 2
A New Partition / Formatting The Hard Drive 10 Individual Mode...11 JBOD Mode ...11 RAID 0 Mode...12 RAID 1 Mode...12 9.RAID Mode Selection ...15 Individual Mode...15 JBOD Mode ...16 RAID 0 ...17 RAID 1 ...18 10. Disconnecting The NexStar MX DUAL 19 11.Troubleshooting/ FAQ/ Warranty...20 12 - Vantec NST-400MX-SR | User Guide - Page 3
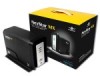
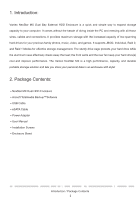
rear fan keep your hard drive(s) cool and improve performance. The Vantec NexStar MX is a high performance, capacity, and durable portable storage solution and lets you store your personal data in an enclosure with style! 2. Package Contents: ˙NexStar MX Dual HDD Enclosure ˙Arcsoft Totalmedia Backup - Vantec NST-400MX-SR | User Guide - Page 4
3. Specifications I Features: Specifications: Model: NST-400MX-SR Device Support: 3.5" SATA I/II Hard Drive (2) Internal Interface: Serial ATA External Interface: USB 2.0 / eSATA HD Capacity: Up to 2TB Transfer Rate: USB 2.0 (Up to 480Mbps) eSATA (Up to 3.0Gbps) Material: Plastic and - Vantec NST-400MX-SR | User Guide - Page 5
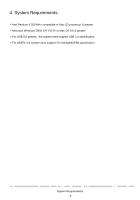
Pentium II 350 MHz compatible or Mac G3 processor & greater ․Microsoft Windows 2000/ XP/ VISTA or Mac OS 8.6 & greater ․For USB 2.0 speeds , the system must support USB 2.0 specification ․For eSATA, the system must support Port Multiplier(PM) specification System Requirements 4 - Vantec NST-400MX-SR | User Guide - Page 6
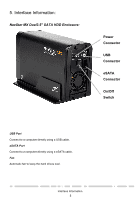
5. Interface Information: NexStar MX DuaI3.5" SATA HDD Enclosure: Power Connector USB Connector eSATA Connector On/Off Switch USB Port Connect to a computer directly using a USB cable. eSATA Port Connect to a computer directly using a eSATA cable. Fan Automatic fan to keep the hard drives cool. - Vantec NST-400MX-SR | User Guide - Page 7
6. Installation: Installation NexStar MX Dual 3.5" HDD Enclosure: Installing two hard drives into the NexStar MX Dual: 1) Release the four screws then pull out the rear panel and tray of the NexStar MX Dual 2) Select operation Mode by switching jumper and press reset button to reset the device. - Vantec NST-400MX-SR | User Guide - Page 8
3) Place the first HDD onto the drive caddy then insert the HDD into the SATA connector. 4) Place the second HDD onto the drive caddy then insert the HDD into the SATA connector. Installation 7 - Vantec NST-400MX-SR | User Guide - Page 9
5) Secure the hard drives onto the drive caddy with screws provided. 6) Insert the drive caddy back into the aluminum housing. Be sure to align and secure with the screws provided. 7) Switch the power button to power on. Installation 8 - Vantec NST-400MX-SR | User Guide - Page 10
drivers are necessary when using Mac as 9.0 or later. If the hard drive does not appear on the desktop, be sure to partition your hard drive. Mac OS 8.6: 1) Unplug the NexStar MX Dual if you currently have it connected. 2) USB Mass Storage Support 1.3.5 must be installed on your system. If it is not - Vantec NST-400MX-SR | User Guide - Page 11
come with a CD that includes its installation program. If not, a download should be available on the manufacturers website. The best way to partition a new hard drive is by using the manufacturers program. However, if that is not possible, please try the following instead (if using Mac as 9or below - Vantec NST-400MX-SR | User Guide - Page 12
STEP2: Select "Disk Management" and you will see your hard drives show "Unallocated". Sample:750GB & 250GB hard drives. Individual Mode JBOD Mode Creating a New Partition / Formatting The Hard Drive 11 - Vantec NST-400MX-SR | User Guide - Page 13
RAID 0 Mode RAID 1 Mode Creating a New Partition / Formatting The Hard Drive 12 - Vantec NST-400MX-SR | User Guide - Page 14
red-squared block and selects "Initialize Disk". Take JBOD Mode for example. (one 750GB HDD & one 250GB hard drives) STEP4: Press "OK" button to initialize hard drive. STEP5: The hard drive will show "Online". Right-click the "Unallocated" block and selects "New Partition". Creating a New Partition - Vantec NST-400MX-SR | User Guide - Page 15
: The "New Partition Wizard" will appear. Please follow the instruction of the wizard to complete the partition. STEP7: When new partition is completed, the hard drive will be recognized as a "New Volume". STEP8: Format the other hard drive in the same way. Creating a New Partition / Formatting The - Vantec NST-400MX-SR | User Guide - Page 16
does not support Port Multiplier, only a single drive will be present. No such limitation if using a USB host connection. Volume A Volume B Volume A Volume B NST-400MX-SR Port 0 Port 1 Drive A Drive B Equal hard drives NST-400MX-SR Port 0 Port 1 Drive A Drive B Unequal hard drives RAID - Vantec NST-400MX-SR | User Guide - Page 17
volume by adding another hard disk drive to Port 0 and still preserve any existing data on that volume. JBOD 500GB JBOD 1000GB NST-400MX-SR Port 0 Port 1 + Drive A Drive A 250GB 250GB Equal hard drives NST-400MX-SR Port 0 Port 1 Drive A 250GB Drive A 750GB Unequal hard drives RAID Mode - Vantec NST-400MX-SR | User Guide - Page 18
hard drives. Two unequal hard drives:The capacity is double of the smaller hard drives. Raid 0 500GB NST-400MX-SR Port 0 Port 1 Drive A 250GB Drive B 250GB Equal hard drives Striping across Raid 0 500GB NST-400MX-SR Port 0 Port 1 Drive A 250GB Drive A 750GB Unequal hard drives Striping - Vantec NST-400MX-SR | User Guide - Page 19
a longer time to complete, and the host data transfer performance will also be affected. Raid 1 250GB NST-400MX-SR Port 0 Port 1 Drive A 250GB Drive B 250GB Equal hard drives Raid 1 250GB NST-400MX-SR Port 0 Port 1 Drive A 250GB Drive A 750GB Unequal hard drives RAID Mode Selection 18 - Vantec NST-400MX-SR | User Guide - Page 20
10. Disconnecting The NexStar MX DUAL: NexStar MX Dual 3.5" HDD Enclosure: Warning: NEVER remove the NexStar MX Dual while the hard drive is in use. Doing so may corrupt the data on the hard drive or damage the hard drive, NexStar MX Dual, or computer. Windows ME /XP /2000 /Vista: 1) Make sure all - Vantec NST-400MX-SR | User Guide - Page 21
11.Troubleshooting/ FAQ/ Warranty: NexStar MX Dual 3.5" HDD Enclosure: Q. My computer recognizes the NexStar MX Dual, but it does not assign a drive letter to it. A. You are probably using a brand new hard drive. If not, then your computer may not be able to recognize the partition on the hard drive - Vantec NST-400MX-SR | User Guide - Page 22
You have probably formatted the hard drive in the FAT32 file system. FAT32 limits the file sizes to 4GB maximum. The NTFS file system does not have this limitation. Warranty: The NexStar MX Dual comes with a purchased the unit immediately and ask for a replacement. Troubleshooting/ FAQ/ Warranty 21 - Vantec NST-400MX-SR | User Guide - Page 23
12. Contact: Vantec Thermal Technologies 43951 Boscell Rd. Fremont, CA 94538 Tel: 510-668-0368 Fax: 510-668-0367 website: www.vantecusa.com Copyright© 2008 Vantec Thermal Technologies. All Right Reserved. All Registered Trademarks Belong To Their Respective Companies Contact 22
-
 1
1 -
 2
2 -
 3
3 -
 4
4 -
 5
5 -
 6
6 -
 7
7 -
8
-
9
-
10
-
11
-
12
-
13
-
14
-
15
-
16
-
17
-
18
-
19
-
20
-
21
-
22
-
23
 |
 |
MANUAL