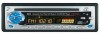
Nextar M930 Instruction Manual
Nextar M930 Manual
 |
View all Nextar M930 manuals
Add to My Manuals
Save this manual to your list of manuals |
Nextar M930 manual content summary:
- Nextar M930 | Instruction Manual - Page 1
- Nextar M930 | Instruction Manual - Page 2
this product. In this operation manual, the Basic Operation for each sound source is outlined at the beginning of its explanation, covering simple operation for that source, such as merely playing music. Remark: In addition to normal audio CD, this unit can play CD-R and CD-R/W disc that contain - Nextar M930 | Instruction Manual - Page 3
LOCATION AND FUNCTION OF CONTROLS 1 2 24 6 7 11 8 9 3 10 REL + SEL SCN - 1 TOP 2 INT 3 RPT 4 RDM 5 EJECT CLK BND ST COMPACT LUD DIGITAL AUDIO 6 A.P MODE MU 22 21 23 5 4 15 16 17 18 19 20 14 12 13 1. REL BUTTON To remove the front control panel from the main body, - Nextar M930 | Instruction Manual - Page 4
SEEK 1/SEEK 2 mode:( Only available during radio operation) SEEK 1: Press and hold the UP(^) or off mode. 6. LCD (Liquid Crystal Display) 7. CD SLOT 8. EJECT KEY In the power on state, the During RADIO mode: Press the UP(^) or DOWN(v) button shortly to manual tune up/down for the desired radio - Nextar M930 | Instruction Manual - Page 5
you would like to hear. The MW/FM band is toggled cyclically through the tuning bands ->FM 1-> FM 2 -> FM 3 -> MW 1->MW 2 ->. 12. MODE BUTTON 1) When a CD/MP3 disc is existed inside the CD slot, press the MODE button shortly to change between CD/MP3 and RADIO mode each other. The LCD display appears - Nextar M930 | Instruction Manual - Page 6
being listened to is memorized into the selected preset button. b) During CD/MP3 mode: Press the TOP/>|| button briefly to interrupt the playback of the disc this function. c) During the normal playback of CDs in MP3 format: Press the radio preset button 6 and 5 to move up and down10 tracks at a time. - Nextar M930 | Instruction Manual - Page 7
radio loudness effect. 24. SCAN BUTTON Press the SCN button to scan the radio frequency. If a valid signal has detected, the current frequency will be scan and remain the current frequency; otherwise, the radio will go on to scan the other radio frequency fiver seconds later. Note: 1.Make sure use - Nextar M930 | Instruction Manual - Page 8
wiring, eg, the Power Supply, the Speakers and the Antenna according to the requirements of this Instruction Manual, then install the metal mounting sleeve into the car as per the diagram illustrated below. METAL SUPPORT protect the CD player during transportation before operating the player. To - Nextar M930 | Instruction Manual - Page 9
leave CDs in a car if it is parked in direct sunlight as that will lead to a considerable rise in the temperature inside the car. Note: Do not use any solvents such as petrol or thinning agents. Commercially available cleaning substances or antistatic spray. This will damage the device. E 8 TROUBLE - Nextar M930 | Instruction Manual - Page 10
If you still have questions after going through the checklist, please consult your local customer service representative. E 9 - Nextar M930 | Instruction Manual - Page 11
SPECIFICATION GENERAL Supply Voltage Current Consumption Power Output Number of channels Unit Dimensions FM SECTION Frequency range Effective sensitivity I.F Frequency AM SECTION Frequency range Effective sensitivity I.F Frequency RCA LINE OUT (OPTION) Output CD PLAYER System Suitable CDs Frequency - Nextar M930 | Instruction Manual - Page 12
les conditions du système d'enregistrement, le programme d'enregistrement, ou les disques CD-R ou CD-R/W, certains ne pourront peut-être pas être lus. Lors d'enregistrement de CD de musique avec des disques CD-R ou CD-R/W, une vitesse d'enregistrement trop élevée risque de donner une mauvaise qualit - Nextar M930 | Instruction Manual - Page 13
EMPLACEMENT ET FONCTION DES COMMANDES 1 2 24 6 7 11 8 9 3 10 REL + SEL SCN - 1 TOP 2 INT 3 RPT 4 RDM 5 EJECT CLK BND ST COMPACT LUD DIGITAL AUDIO 6 A.P MODE MU 22 21 23 5 4 15 16 17 18 19 20 14 12 13 1. TOUCHE REL Pour retirer le panneau avant du boîtier principal, - Nextar M930 | Instruction Manual - Page 14
UP(^) ou DOWN(v). VOL LAST/VOL ADJ DERNIER VOLUME (VOL LAST) : La radio se remet sur le volume programmé lorsque l'appareil a été éteint. AJUSTEMENT VOLUME peut aussi allumer l'appareil pour insérer un disque dans le logement à CD. Quand l'appareil est allumé (ON), appuyez et maintenez la touche - Nextar M930 | Instruction Manual - Page 15
de façon cyclique entre les bandes. ->FM 1-> FM 2 -> FM 3 -> MW 1->MW 2 ->. 12. TOUCHE MODE 1) Lorsqu'un disque CD/MP3 se trouve dans le logement du CD, appuyez brièvement sur la touche MODE pour alterner ente le mode CD/MP3 et RADIO. En mode radio, l'afficheur à cristaux liquides affiche des - Nextar M930 | Instruction Manual - Page 16
PRESET STATION MEMORY) ET TOP/ , INT, RPT, RDM a) En mode radio : Lorsque vous appuyez brièvement, ces touches sélectionnent directement une station pr en cours est mémorisée dans la touche de préréglage. b) En mode CD/MP3 : Appuyez sur la touche TOP/ brièvement pour interrompre la lecture d'un disque. - Nextar M930 | Instruction Manual - Page 17
de CD en format MP3 : Appuyez sur les touches de programmation radio 6 et 5 pour vous déplacer de 10 pistes à la fois. 21. TOUCHE ST/MO En mode radio, TOUCHE BALAYAGE (SCAN) Appuyez sur la touche SCN pour balayer les fréquences radio. Si un signal est détecté, la fréquence en cours sera maintenue - Nextar M930 | Instruction Manual - Page 18
SCHEMA DE CABLAGE Bleu - Antenne automatique - - - - 1. Utilisez un haut-parleur chargé d'une impédance de 4 ohm. 2. Assurez-vous que le câble d'antenne automobile et le câble de mise à terre ne se touchent pas. F 7 - Nextar M930 | Instruction Manual - Page 19
alimentation, les haut-parleurs et l'antenne selon les indications du manuel d'instructions, puis installez le manchon métallique de montage dans la voiture en suivant le schéma illustré ci-dessous. Equerre métallique de support Afin d'augmenter la probabilité que l'appareil ne saute pas, assurez - Nextar M930 | Instruction Manual - Page 20
se trouve déjà dans le logement, n'essayez pas d'insérer un second CD. Ceci risquerait d'endommager l'appareil. Tenez toujours les CD par le bord. Afin que vos CD restent propres, ne touchez pas leur surface. Retirez le CD comme illustré ci-dessous. N'apposez pas d'autocollant ou de bande adhésive - Nextar M930 | Instruction Manual - Page 21
liste, veuillez consulter votre service après-vente local. Symptô CD saute. Pas de réception radio. En mode recherche automatique, la radio ne s'arrête pas sur une station qui transmet. Il y a déjà un CD installation est supérieur à 30 degrés. La surface de la route est inégale. La surface du CD - Nextar M930 | Instruction Manual - Page 22
ch. 2 voies STEREO. 178[L] X 165[P] X 50[H] mm. SECTION FM Bande passante Sensibilité effective Fréquence I.F 87,5 MHz à 107,9 MHz 3 mV @ CD MAX. LECTEUR CD Système CD compatibles Caractéristiques de fréquence Rapport signal sur bruit (lecteur CD) Système audio MP3. Disques MP3/CD/CD-R/CD-RW 20
-
 1
1 -
 2
2 -
 3
3 -
 4
4 -
 5
5 -
 6
6 -
 7
7 -
8
-
9
-
10
-
11
-
12
-
13
-
14
-
15
-
16
-
17
-
18
-
19
-
20
-
21
-
22
 |
 |
