Marantz NR1606 Owner's Manual in English
Marantz NR1606 Manual
 |
View all Marantz NR1606 manuals
Add to My Manuals
Save this manual to your list of manuals |
Marantz NR1606 manual content summary:
- Marantz NR1606 | Owner's Manual in English - Page 1
Contents . Connections Playback Settings Tips Appendix AV Surround Receiver NR1606 Front panel Display Rear panel 1 Remote Owner's Manual Index - Marantz NR1606 | Owner's Manual in English - Page 2
remote control unit Features High quality sound High performance Easy operation Part names and functions Front panel Display Rear panel Remote Connecting to a home network (LAN) 60 13 Wired LAN 60 13 Wireless LAN 61 16 Connecting an external control device 62 18 REMOTE CONTROL jacks 62 - Marantz NR1606 | Owner's Manual in English - Page 3
95 Listening to music on a Bluetooth device 76 Listening to Pandora® 97 Playing music from Bluetooth device 77 Listening to Pandora® 98 Pairing with other Bluetooth devices 79 Creating a new station Skip) 87 Cancelling Preset Skip 88 Front panel Display Rear panel 3 Remote Index - Marantz NR1606 | Owner's Manual in English - Page 4
sound mode 123 Playing iTunes music with this unit 108 Direct playback 124 Selecting multiple speakers (devices) 109 Pure Direct playback 124 Perform iTunes playback operations with the remote control unit Auto surround playback 125 of this unit 109 HDMI control function 134 Spotify - Marantz NR1606 | Owner's Manual in English - Page 5
messages 194 161 Retrieving Audyssey® Setup settings 195 162 Manual Setup 196 162 Amp Assign 196 163 Speaker Config. 197 166 Distances 202 168 Levels 203 168 Crossovers 204 170 Bass 205 175 Front Speaker 206 179 180 Front panel Display Rear panel 5 Remote Index - Marantz NR1606 | Owner's Manual in English - Page 6
Mode General Language ECO ZONE2 Setup Zone Rename Smart Select Names Trigger Out Front Display Firmware Information Usage Data Setup Lock Limiting the operating zone with the remote control 207 Tips 207 207 Tips 229 208 Troubleshooting 231 211 Resetting factory settings 247 213 Appendix - Marantz NR1606 | Owner's Manual in English - Page 7
with the product. Tips Appendix . Quick Start Guide Safety Instructions Notes on radio Warranty (for USA/for CANADA) Cable labels Power cord FM indoor antenna AM loop antenna Sound calibration microphone (ACM1HB) Sound calibration microphone stand Remote control unit (RC024SR) R03/AAA - Marantz NR1606 | Owner's Manual in English - Page 8
battery fluid: 0 Do not use a new battery together with an old one. 0 Do not use two different types of batteries. 0 Remove the batteries from the remote control unit if it will not be in use for long periods. 0 If the battery fluid should leak, carefully wipe the fluid off the inside - Marantz NR1606 | Owner's Manual in English - Page 9
(v p. 264) This unit is equipped with a decoder that supports Dolby Atmos audio format. The placement or movement of sound is accurately reproduced by the addition of overhead speakers, enabling you with HDCP2.2 copyright protection standard. Front panel Display Rear panel 9 Remote Index - Marantz NR1606 | Owner's Manual in English - Page 10
enabling connection to various HDMI compatible devices such as Blu-ray Disc players, game consoles and HD video camcorders. .. Front panel Display Rear panel 10 Remote Index - Marantz NR1606 | Owner's Manual in English - Page 11
supports Apple AirPlay which lets you stream your music library from an iPhone®, iPad®, iPod touch® or iTunes®. 0 Playback of DSD and FLAC files via USB and networks This unit supports or Android™ devices (Google, Amazon Kindle Fire) "Marantz 2015 AVR Remote" is application software that allows - Marantz NR1606 | Owner's Manual in English - Page 12
ZONEH Playback GZONE2H Settings Tips Appendix Easy operation 0 "Setup Assistant" provides easy-to-follow setup instructions First select the language when prompted. Then simply follow the instructions displayed on the TV screen to set up the speakers, network, etc. 0 Easy to use Graphical User - Marantz NR1606 | Owner's Manual in English - Page 13
Contents Connections Playback Part names and functions Front panel qw e r ty Settings Tips Appendix u i . o Q0 Q1 Q2 Q3 Q4 Q5 Q6 Q7 Q8 Q9 W0 Front panel Display Rear panel 13 Remote Index - Marantz NR1606 | Owner's Manual in English - Page 14
of the MAIN ZONE (room where "On" (v p. 172) 0 When "Network Control" is set to "Always On" receives signals from the remote control unit. (v p. 8) F Display This displays various pieces of information. (v p. 16) G PURE DIRECT indicator This lights when the "Pure Direct" mode is selected as the sound - Marantz NR1606 | Owner's Manual in English - Page 15
Contents Connections Playback Settings Tips Appendix . Q0 Q1Q2Q3Q4 Q5QQ6 7Q8Q9 W0 J SETUP MIC jack This is used to connect the supplied Sound calibration microphone. (v p. 189) K M-DAX button This switches the M-DAX game consoles. (v p. 55) Front panel Display Rear panel 15 Remote Index - Marantz NR1606 | Owner's Manual in English - Page 16
conditions when the input source is set to "Tuner". TUNED: Lights up when the broadcast is properly tuned in. STEREO: Lights up when receiving FM stereo broadcasts. F Sleep timer indicator This lights when the sleep mode is selected. (v p. 137) G Circle indicator This is displayed when the input - Marantz NR1606 | Owner's Manual in English - Page 17
H Volume indicator I MUTE indicator This blinks while the sound is muted. (v p. 67) J Information display The input source name, sound mode, setting values and other information are displayed here ) power is turned on. (v p. 149) Tips Appendix Front panel Display Rear panel 17 Remote Index - Marantz NR1606 | Owner's Manual in English - Page 18
Contents Rear panel Connections Playback Settings q w e r t Tips Appendix q y ui o Q0 Q1 Q2 Q3 Q4 . Front panel Display Rear panel 18 Remote Index - Marantz NR1606 | Owner's Manual in English - Page 19
Contents Connections Playback Settings Tips Appendix q q w er A Rod antennas for Bluetooth/wireless LAN Stand this antenna upright when connecting to a network via wireless LAN, or when connecting to a handheld device via Bluetooth. (v p. 61) 90° 90° 320° 320° 0 The antenna clip can be - Marantz NR1606 | Owner's Manual in English - Page 20
"Connection 1 : TV equipped with an HDMI connector and compatible with the ARC (Audio Return Channel)" (v p. 49) 0 "Connection 2 : TV equipped with the trigger function. (v p. 63) G REMOTE CONTROL jack Used to connect infrared receivers/transmitters in order to operate this unit and external - Marantz NR1606 | Owner's Manual in English - Page 21
the inner pins of the connectors on the rear panel. Electrostatic discharge may cause permanent damage to the unit. Front panel Display Rear panel 21 Remote Index - Marantz NR1606 | Owner's Manual in English - Page 22
Playback Settings Tips Appendix A ZONE SELECT buttons These switch the zone (MAIN ZONE, ZONE2) that is operated through the remote control unit. 0 "Playback the output audio. 0 "Turning off the sound temporarily (Muting)" (v p. 67) 0 "Turning off the sound temporarily (Muting) (ZONE2)" (v p. - Marantz NR1606 | Owner's Manual in English - Page 23
to each button, such as input source, volume level and sound mode settings. (v p. 139) J SOUND MODE buttons These select the sound mode. (v p. 122) K Remote control signal transmitter This transmits signals from the remote control unit. (v p. 8) L SLEEP button This sets the sleep timer. (v p. 137 - Marantz NR1606 | Owner's Manual in English - Page 24
the volume" (v p. 67) 0 "Adjusting the volume (ZONE2)" (v p. 150) P OPTION button This displays the option menu on the TV screen. Q ENTER button This determines the selection. R SETUP button This displays the menu on the TV screen. (v p. 154) Front panel Display Rear panel 24 - Marantz NR1606 | Owner's Manual in English - Page 25
an FM/AM antenna 58 Connecting to a home network (LAN) 60 Connecting an external control device 62 Connecting Setup Assistant" is running, follow the instructions in the "Setup Assistant" (page 8 in the separate "Quick Start Guide") screen for making connections. (During "Setup Remote Index - Marantz NR1606 | Owner's Manual in English - Page 26
location near the front speakers. If you have two subwoofers, place them asymmetrically across the front of your room. Front panel Display Rear panel 26 Remote Index - Marantz NR1606 | Owner's Manual in English - Page 27
middle speaker directly above the main listening position and left/right): aligned with the left and right front speakers. Front panel Display Rear panel 27 Remote Index - Marantz NR1606 | Owner's Manual in English - Page 28
using a special upwardpointing speaker that is placed on the floor. You can enjoy the Dolby Atmos 3D sound even in an environment where speakers cannot be installed on the ceiling. .. Place the FRONT Dolby Atmos instead of the surround speaker. Front panel Display Rear panel 28 Remote Index - Marantz NR1606 | Owner's Manual in English - Page 29
Atmos and DTS:X which offers an even wider and deeper surround sensation. 0 Use the illustration below as a guide for how high each speaker should be installed. The height does not need to be exactly the same. Top TMR SR GViewed from the topH .. Front panel Display Rear panel 29 Remote Index - Marantz NR1606 | Owner's Manual in English - Page 30
, place it directly behind the listening position. FL FR SW C z1 z2 SL SR z1:22° - 30° z2:120° Front panel Display Rear panel 30 Remote Index - Marantz NR1606 | Owner's Manual in English - Page 31
n Top speaker layout example Combination of 5.1-channel layout and top middle speakers. TML TMR FL FR SL SW C SR .. Front panel Display Rear panel 31 Remote Index - Marantz NR1606 | Owner's Manual in English - Page 32
Contents Connections Playback n Dolby Atmos Enabled speaker layout example Combination of 5.1-channel layout and front Dolby speakers. Settings FDL FDR SL FL SW C FR SR Tips Appendix . Front panel Display Rear panel 32 Remote Index - Marantz NR1606 | Owner's Manual in English - Page 33
so could result in electric shock. When the "Setup Assistant" (page 8 in the separate "Quick Start Guide") is running, follow the instructions in the "Setup Assistant" screen for making connections. (Power is unit's STATUS to complete the setting. Front panel Display Rear panel 33 Remote Index - Marantz NR1606 | Owner's Manual in English - Page 34
speaker cable's core wire to the hilt into the speaker terminal. 4 Turn the speaker terminal clockwise to tighten it. Front panel Display Rear panel 34 Remote Index - Marantz NR1606 | Owner's Manual in English - Page 35
Green Light blue Blue Beige Brown Beige Brown Beige Brown Beige Brown Beige Brown Beige Brown Beige Brown Black Front panel Display Rear panel 35 Remote Index - Marantz NR1606 | Owner's Manual in English - Page 36
terminal matches that of the cable label. G How to attach the cable label H Speaker This unit Settings Tips Appendix . Front panel Display Rear panel 36 Remote Index - Marantz NR1606 | Owner's Manual in English - Page 37
196) Playback speaker and zone MAIN ZONE ZONE2 "Amp Assign" sound mode that can be selected varies according to the speaker configuration. See "Relationship between sound modes and channel output" (v p. 257) for the sound modes that are supported. Front panel Display Rear panel 37 Remote - Marantz NR1606 | Owner's Manual in English - Page 38
Contents Connections Playback o Standard configuration and connection n 5.1-channel This serves as a basic 5.1-channel surround system. FL FR SW C SL SR Settings Tips Appendix SW FR FL C SR SL .. Front panel Display Rear panel 38 Remote Index - Marantz NR1606 | Owner's Manual in English - Page 39
FR FL C SR SL SBR SBL 0 When using a single surround back speaker, connect it to the SURROUND BACK L terminal. .. Front panel Display Rear panel 39 Remote Index - Marantz NR1606 | Owner's Manual in English - Page 40
with front height speakers. FHL FHR FL FR Appendix SW C SL SR SW FR FL C SR SL FHR FHL .. Front panel Display Rear panel 40 Remote Index - Marantz NR1606 | Owner's Manual in English - Page 41
with top front speakers. TFL TFR FL FR SL SW C SR Appendix SW FR FL C SR SL TFR TFL .. Front panel Display Rear panel 41 Remote Index - Marantz NR1606 | Owner's Manual in English - Page 42
with top middle speakers. TML TMR FL FR SL SW C SR Appendix SW FR FL C SR SL TMR TML .. Front panel Display Rear panel 42 Remote Index - Marantz NR1606 | Owner's Manual in English - Page 43
Dolby Atmos Enabled speakers. Appendix FDL FDR SL FL SW C FR SR SW FR FL C SR SL FDR FDL .. Front panel Display Rear panel 43 Remote Index - Marantz NR1606 | Owner's Manual in English - Page 44
surround Dolby Atmos Enabled speakers. SDL SL FL SW FR C SDR SR SW FR FL C SR SL SDR SDL .. Front panel Display Rear panel 44 Remote Index - Marantz NR1606 | Owner's Manual in English - Page 45
higher sound quality. FL (Bi-Amp) FR (Bi-Amp) SW C SL SR SW C SR SL NOTE 0 When making bi-amp connections, be sure to remove the short-circuiting plate or wire between the speaker's woofer and tweeter terminals. (R) qw FR (L) q w FL .. Front panel Display Rear panel 45 Remote Index - Marantz NR1606 | Owner's Manual in English - Page 46
A and B as desired. Tips Appendix FL FL (B) (A) FR FR (A) (B) SW C SL SR SW FR (A) FL (A) C SR SL FR (B) FL (B) .. Front panel Display Rear panel 46 Remote Index - Marantz NR1606 | Owner's Manual in English - Page 47
ZONE) + 2-channel (ZONE2) This connection method constructs a 5.1-channel speaker system in the MAIN ZONE and a 2-channel system in ZONE2. MAIN ZONE Appendix FL FR SW C SL SR ZONE2 ZONE2 L ZONE2 R SW FR FL C SR SL ZONE2 ZONE2 R L . .. Front panel Display Rear panel 47 Remote - Marantz NR1606 | Owner's Manual in English - Page 48
connectors and functions equipped on the TV. ARC (Audio Return Channel) function plays TV audio HDMI connector? Yes Is the TV compatible with the ARC (Audio Return Channel) ? Yes No No . connector and compatible with the ARC (Audio connector and incompatible with the ARC (Audio Return Channel)" - Marantz NR1606 | Owner's Manual in English - Page 49
and compatible with the ARC (Audio Return Channel) Use an HDMI cable to connect a TV that is compatible with the ARC function to this unit. Set "HDMI Control" to "On" when using a TV that supports the ARC function. (v p. 171) TV HDMI IN (ARC) . Front panel Display Rear panel 49 Remote Index - Marantz NR1606 | Owner's Manual in English - Page 50
Contents Connections Playback Settings Tips Appendix Connection 2 : TV equipped with an HDMI connector and incompatible with the ARC (Audio Return Channel) Use an HDMI cable to connect the TV to this unit. To listen to audio from TV on this unit, use an - Marantz NR1606 | Owner's Manual in English - Page 51
TV to this unit. OUT OPTICAL OUT TV VIDEO IN IN COMPONENT VIDEO IN Y PB PR Tips or Appendix . Front panel Display Rear panel 51 Remote Index - Marantz NR1606 | Owner's Manual in English - Page 52
". (v p. 171) 0 To enjoy content that is copyright protected by HDCP 2.2, use a playback device and TV compatible with HDCP 2.2 only. Front panel Display Rear panel 52 Remote Index - Marantz NR1606 | Owner's Manual in English - Page 53
OUT VIDEO OUT COMPONENT VIDEO OUT Y PB PR Satellite tuner/ Cable TV HDMI OUT RL or or RL Appendix . Front panel Display Rear panel 53 Remote Index - Marantz NR1606 | Owner's Manual in English - Page 54
COMPONENT VIDEO OUT Y PB PR DVD player HDMI OUT Blu-ray Disc player HDMI OUT RL or RL Appendix . Front panel Display Rear panel 54 Remote Index - Marantz NR1606 | Owner's Manual in English - Page 55
. Connect a playback device to this unit, such as a video camcorder or game console. Video camcorder HDMI OUT Tips Appendix . Front panel Display Rear panel 55 Remote Index - Marantz NR1606 | Owner's Manual in English - Page 56
instructions see "Playing an iPod" (v p. 68) or "Playing a USB memory device" (v p. 73). USB memory device iPod or Appendix . 0 Marantz does not guarantee that all USB memory devices will operate or receive interference with other devices. Front panel Display Rear panel 56 Remote Index - Marantz NR1606 | Owner's Manual in English - Page 57
Contents Connections o Supported iPod/iPhone models • iPod classic Playback Settings Tips Appendix • iPod nano • iPod touch • iPhone . Front panel Display Rear panel 57 Remote Index - Marantz NR1606 | Owner's Manual in English - Page 58
AM broadcasts" (v p. 81)) Settings Tips AM loop antenna (supplied) 0 If you are unable to receive a good broadcast signal, we recommend installing an outdoor antenna. For details, inquire at the retail store FM indoor antenna (supplied) . Front panel Display Rear panel 58 Remote Index - Marantz NR1606 | Owner's Manual in English - Page 59
forward. 2 Insert the projecting part into the square hole in the stand. Loop antenna Stand Square hole Projecting part . .. Front panel Display Rear panel 59 Remote Index - Marantz NR1606 | Owner's Manual in English - Page 60
audio such as Internet Radio and from your media server(s) 0 Using the Apple AirPlay function 0 Operation on this unit via the network 0 Firmware Update For connections to the Internet, contact an ISP (Internet Service Provider) or a computer shop. Wired LAN To make connections via wired LAN, use - Marantz NR1606 | Owner's Manual in English - Page 61
to a wireless LAN network, stand the rod antenna for Bluetooth/wireless LAN connection upright on the rear panel. See "Wi-Fi Setup" on how to Do not connect a NETWORK connector directly to the LAN port / Ethernet connector on your computer. 0 Various online services may be discontinued without prior - Marantz NR1606 | Owner's Manual in English - Page 62
To do this, disable the remote control signal receiving function ("Remote lock function" (v p. 146)). RC OUT IR receiver o Remotely connecting Marantz devices When you are using a Marantz device other than this unit that supports remote connection, you can transmit remote control signals just by - Marantz NR1606 | Owner's Manual in English - Page 63
jack cannot be used. In this case, turn off the power to the unit, and disconnect DC OUT jack. Front panel Display Rear panel 63 Remote Index - Marantz NR1606 | Owner's Manual in English - Page 64
Contents Connections Playback Settings Connecting the power cord After completing all the connections, insert the power plug into the power outlet. Tips Appendix To household power outlet (AC 120 V, 60 Hz) Power cord (supplied) . Front panel Display Rear panel 64 Remote Index - Marantz NR1606 | Owner's Manual in English - Page 65
Playback Settings Tips Appendix Playback network audio/service Listening to Internet Radio 89 Playing back files stored on a PC and NAS 93 66 Listening to Pandora® 97 66 Listening to SiriusXM Internet Radio 104 67 AirPlay function 107 67 Spotify Connect function 110 122 Convenience - Marantz NR1606 | Owner's Manual in English - Page 66
ZONE SELECT MAIN ZONE 2 SLEEP POWER CBL /SAT DVD GAME AUX1 TV AUDIO AUX2 Blu-ray MEDIA PLAYER TUNER iPod/USB CD Bluetooth ONLINE MUSIC INTERNET RADIO ECO CH / PAGE MUTE VOLUME INFO OPTION BACK ENTER SETUP TUNE - TUNE + SMART SELECT 1234 MOVIE SOUND 66 Remote Index - Marantz NR1606 | Owner's Manual in English - Page 67
set at "Mute Level" in the menu. (v p. 163) 0 To cancel mute, either adjust the sound volume or press MUTE : again. Settings Tips Appendix Playback a DVD player/Blu-ray Disc player The or Blu-ray Disc player. o Surround playback (v p. 122) Front panel Display Rear panel 67 Remote Index - Marantz NR1606 | Owner's Manual in English - Page 68
p ENTER BACK ZONE SELECT MAIN ZONE 2 SLEEP POWER CBL /SAT DVD GAME AUX1 TV AUDIO AUX2 Blu-ray MEDIA PLAYER TUNER iPod/USB ONLINE MUSIC CD Bluetooth INTERNET RADIO ECO CH / PAGE MUTE VOLUME INFO OPTION BACK ENTER SETUP TUNE - TUNE + SMART SELECT 1234 MOVIE SOUND MODE MUSIC - Marantz NR1606 | Owner's Manual in English - Page 69
version, some functions may not operate. 0 Note that Marantz will accept no responsibility whatsoever for any problems arising with the data on an iPod when using this (v p. 120) 0 "Playing the same music in all zones (All Zone Stereo)" (v p. 121) Front panel Display Rear panel 69 Remote Index - Marantz NR1606 | Owner's Manual in English - Page 70
" are listed below. iPod Browse Mode Playable files Music file Video file From iPod P z On-Screen P Active buttons Remote control unit (This unit) iPod P P P zOnly the sound is played. 4 Use ui p to select the file to be played, then press ENTER. Playback starts. Settings Tips Appendix - Marantz NR1606 | Owner's Manual in English - Page 71
(Channel Level Adjust)" (v p. 117) 0 "Adjusting the tone (Tone)" (v p. 118) 0 "Displaying your desired video during audio playback (Video Select)" (v p. 119) 0 "Playing the same music in all zones (All Zone Stereo)" (v p. 121) Settings Tips Appendix Front panel Display Rear panel 71 - Marantz NR1606 | Owner's Manual in English - Page 72
may hear a track played back more than once during random playback. 0 "Random" settings are stored for each input source. Front panel Display Rear panel 72 Remote Index - Marantz NR1606 | Owner's Manual in English - Page 73
ZONE SELECT MAIN ZONE 2 SLEEP POWER CBL /SAT DVD GAME AUX1 TV AUDIO AUX2 Blu-ray MEDIA PLAYER TUNER iPod/USB ONLINE MUSIC CD Bluetooth INTERNET RADIO ECO CH / PAGE MUTE VOLUME INFO OPTION BACK ENTER SETUP TUNE - TUNE + SMART SELECT 1234 MOVIE SOUND specifications supported - Marantz NR1606 | Owner's Manual in English - Page 74
This unit plays back picture (JPEG) files in the order in which they are stored in the folder. NOTE 0 Note that Marantz will accept no responsibility whatsoever for any problems arising with the data on a USB memory device when using this unit in conjunction with the USB memory device. Front panel - Marantz NR1606 | Owner's Manual in English - Page 75
desired video during audio playback (Video Select)" (v p. 119) 0 "Adjusting the picture quality for your viewing environment (Picture Mode)" (v p. 120) 0 "Playing the same music in all zones (All Zone Stereo)" (v p. 121) Settings Tips Appendix Front panel Display Rear panel 75 - Marantz NR1606 | Owner's Manual in English - Page 76
from a Bluetooth device, the Bluetooth device needs to support the A2DP profile. ui ENTER CH / PAGE MUTE VOLUME INFO OPTION OPTION BACK BACK ENTER SETUP TUNE - TUNE + SMART SELECT 1234 MOVIE SOUND MODE MUSIC GAME PURE 1/3 8 9 . Front panel Display Rear panel 76 Remote Index - Marantz NR1606 | Owner's Manual in English - Page 77
with this unit. Once the Bluetooth device has been paired, it does not need to be paired again. 1 Press Bluetooth to switch the input source to "Bluetooth". Bluetooth Pairing Mode Turn on Bluetooth from your mobile device's settings menu, then select "Marantz NR1606" when it appears in the device - Marantz NR1606 | Owner's Manual in English - Page 78
the Bluetooth device with the remote control of this unit, the Bluetooth device needs to support the AVRCP profile. 0 The remote control of coupled to the volume setting on the Bluetooth device. o Operations accessible through the option menu 0 "Pairing with other Bluetooth devices" (v p. 79) 0 " - Marantz NR1606 | Owner's Manual in English - Page 79
with a maximum of 8 Bluetooth devices. When a 9th Bluetooth device is paired, it will be registered in place of the oldest registered device. 0 Enter "0000" when the password is requested on the screen of the Bluetooth device. 0 Press and hold the Bluetooth button on the remote control for at least - Marantz NR1606 | Owner's Manual in English - Page 80
connected. 0 When the "Network Control" setting of this unit is set to "Always On" and a Bluetooth device is connected with the unit in the standby state, the power of the unit will be turned on automatically. (v p. 213) Settings Tips Appendix Front panel Display Rear panel 80 Remote Index - Marantz NR1606 | Owner's Manual in English - Page 81
BACK ZONE SELECT MAIN ZONE 2 SLEEP POWER CBL /SAT DVD GAME AUX1 TV AUDIO AUX2 Blu-ray MEDIA PLAYER TUNER iPod/USB ONLINE MUSIC CD Bluetooth INTERNET RADIO ECO CH / PAGE MUTE VOLUME INFO OPTION BACK ENTER SETUP TUNER OPTION TUNE - TUNE + SMART SELECT 1234 MOVIE SOUND MODE - Marantz NR1606 | Owner's Manual in English - Page 82
The modes for receiving FM broadcasts consists of "Auto" mode that automatically searches available broadcast stations and "Manual" mode that stations if the reception is not good. If this is the case, then use the "Manual" mode or "Direct Tune" mode to tune in. Operation buttons TUNE +, - CH/PAGE - Marantz NR1606 | Owner's Manual in English - Page 83
0 "Playing the same music in all zones (All Zone Stereo)" (v p. 121) Settings Tips Appendix Tuning in by entering the frequency (Direct Tune) You can enter the receiving frequency directly to tune in. 1 Press The preset frequency is tuned in. Front panel Display Rear panel 83 Remote Index - Marantz NR1606 | Owner's Manual in English - Page 84
Use o p to select the tune mode, then press ENTER. Auto: Manual: Automatically search for and tune to a receivable radio station. Manually change the frequency one step at a time each time the button is pressed 0 The preset memory is overwritten. Front panel Display Rear panel 84 Remote Index - Marantz NR1606 | Owner's Manual in English - Page 85
can also select preset broadcast stations by pressing TUNER PRESET CH + or TUNER PRESET CH - on the main unit. Front panel Display Rear panel 85 Remote Index - Marantz NR1606 | Owner's Manual in English - Page 86
press "OK". 0 For character input, see "Using the keyboard screen" (v p. 156). 7 Press OPTION to return to the previous screen. Front panel Display Rear panel 86 Remote Index - Marantz NR1606 | Owner's Manual in English - Page 87
Preset Skip) Perform auto preset memory to save all the broadcasting stations that can be received in the memory. Selecting a broadcast station becomes easier by skipping unnecessary memories. 1 4 Press OPTION to return to the previous screen. Front panel Display Rear panel 87 Remote Index - Marantz NR1606 | Owner's Manual in English - Page 88
. 3 Use o p to select "On". The skip is cancelled. NOTE 0 Preset skip cannot be cancelled for groups. Settings Tips Appendix Front panel Display Rear panel 88 Remote Index - Marantz NR1606 | Owner's Manual in English - Page 89
1/3 ZONE SELECT MAIN ZONE 2 SLEEP POWER CBL /SAT GAME TV AUDIO DVD AUX1 AUX2 Blu-ray MEDIA PLAYER TUNER iPod/USB ONLINE MUSIC CD Bluetooth INTERNET RADIO ECO CH / PAGE MUTE VOLUME INFO OPTION BACK ENTER SETUP INTERNET RADIO OPTION TUNE - TUNE + SMART SELECT 1234 MOVIE SOUND - Marantz NR1606 | Owner's Manual in English - Page 90
for playback. 0 Check the network environment, then turn on this unit's power. ("Connecting to a home network (LAN)" (v p. 60)) . Displays Internet Radio stations added to favorites in vTuner. For instructions on how to add to favorites in vTuner, see "Using Display Rear panel 90 Remote Index - Marantz NR1606 | Owner's Manual in English - Page 91
are replaced with "." (period). NOTE 0 The radio station database service may be suspended or be otherwise unavailable without notice. Playing the (Video Select)" (v p. 119) 0 "Playing the same music in all zones (All Zone Stereo)" (v p. 121) Front panel Display Rear panel 91 Remote Index - Marantz NR1606 | Owner's Manual in English - Page 92
"radiomarantz.com" with this unit. (v p. 90) 0 You can also add a radio station that is not in the vTuner list. Front panel Display Rear panel 92 Remote Index - Marantz NR1606 | Owner's Manual in English - Page 93
INFO OPTION BACK ENTER SETUP TUNE - TUNE + SMART SELECT 1234 MOVIE SOUND MODE MUSIC GAME PURE OPTION 1/3 8 9 0 This unit can play back music files and playlists (m3u, wpl) stored on a PC and on Network Attached Storage (NAS) that supports DLNA. 0 The network audio playback function of - Marantz NR1606 | Owner's Manual in English - Page 94
on the PC. 2 Select "More streaming options..." in the "Stream". 3 Select "Allowed" in the "Marantz NR1606" drop-down list. 4 Select "Allowed" in the drop-down list for "Media programs on this PC and remote connections...". 1 Start up Windows Media Player 11 on the PC. 2 Select "Media Sharing" in - Marantz NR1606 | Owner's Manual in English - Page 95
Prepare for playback. A Check the network environment, then turn on this unit's power. ("Connecting to a home network (LAN)" (v p. 60)) B Prepare the computer. (vComputer's operating instructions) 2 Press ONLINE MUSIC. 3 page in the list display . Front panel Display Rear panel 95 Remote Index - Marantz NR1606 | Owner's Manual in English - Page 96
files can be displayed. 0 WMA Lossless files can be played when using a server supporting transcoding, such as Windows Media Player (Ver.11 or later). 0 This unit plays p. 120) 0 "Playing the same music in all zones (All Zone Stereo)" (v p. 121) Front panel Display Rear panel 96 Remote Index - Marantz NR1606 | Owner's Manual in English - Page 97
MUSIC CD Bluetooth INTERNET RADIO ECO CH / PAGE MUTE VOLUME INFO OPTION BACK ENTER SETUP TUNE - TUNE + SMART SELECT 1234 MOVIE SOUND MODE MUSIC GAME PURE OPTION 1/3 9 Settings Tips Appendix Pandora is an automated music recommendation and Internet Radio service created by - Marantz NR1606 | Owner's Manual in English - Page 98
1 Prepare for playback. 0 Check the network environment, then turn on this unit's power. ("Connecting to a home network (LAN)" (v p. 60)) 2 Press to Pandora Please go to http://www.pandora.com/NBSBOU[ and follow the instructions there to create a new account. Your activation code is : zzzzzz BACK - Marantz NR1606 | Owner's Manual in English - Page 99
menu for Pandora is displayed. My Station New Station Shuffle Music1 Radio Sign Out [1/4] OPTION Option Settings Tips Appendix . Front panel Display Rear panel 99 Remote Index - Marantz NR1606 | Owner's Manual in English - Page 100
(Press and hold) Stop Skip to next track Switch to the previous page/next page in the list display Front panel Display Rear panel 100 Remote Index - Marantz NR1606 | Owner's Manual in English - Page 101
select "Shuffle", then press ENTER. Created radio stations are selected at random, and tracks are streamed. Settings Tips Appendix Front panel Display Rear panel 101 Remote Index - Marantz NR1606 | Owner's Manual in English - Page 102
track will not be played for 1 month. Press when you want to delete the station that is being played. Front panel Display Rear panel 102 Remote Index - Marantz NR1606 | Owner's Manual in English - Page 103
desired video during audio playback (Video Select)" (v p. 119) 0 "Adjusting the picture quality for your viewing environment (Picture Mode)" (v p. 120) 0 "Playing the same music in all zones (All Zone Stereo)" (v p. 121) Settings Tips Appendix Front panel Display Rear panel 103 - Marantz NR1606 | Owner's Manual in English - Page 104
ZONE SELECT MAIN ZONE 2 SLEEP POWER CBL /SAT DVD GAME AUX1 TV AUDIO AUX2 Blu-ray MEDIA PLAYER TUNER iPod/USB ONLINE MUSIC CD Bluetooth INTERNET RADIO ECO CH / PAGE MUTE VOLUME INFO OPTION BACK ENTER SETUP OPTION TUNE - TUNE + SMART SELECT 1234 MOVIE SOUND 104 Remote Index - Marantz NR1606 | Owner's Manual in English - Page 105
network (LAN)" (v p. 60)) B Access the following website from your PC and obtain a SiriusXM account. http://www.siriusxm.com 0 If you already have SiriusXM Internet Radio credentials, select Sign in in step 4 and enter your SiriusXM username and password. If you need to setup 105 Remote Index - Marantz NR1606 | Owner's Manual in English - Page 106
desired video during audio playback (Video Select)" (v p. 119) 0 "Adjusting the picture quality for your viewing environment (Picture Mode)" (v p. 120) 0 "Playing the same music in all zones (All Zone Stereo)" (v p. 121) Front panel Display Rear panel 106 Remote Index - Marantz NR1606 | Owner's Manual in English - Page 107
unit via the network. 0 X is displayed on the menu screen while AirPlay is being operated. 0 Source input will be switched to "Online Music" when AirPlay playback is started. 0 You can stop AirPlay playback by pressing Appendix This unit . Front panel Display Rear panel 107 Remote Index - Marantz NR1606 | Owner's Manual in English - Page 108
iPhone, iPod touch or iPad Wi-Fi to the same network as this unit. 0 For details, see your device's manual. 2 Play the song on your iPhone, iPod touch or iPad. ' is displayed on the iPhone, iPod touch or iPad screen. 3 Tap the AirPlay icon '. Playing iTunes music with this unit 1 Install iTunes 10 - Marantz NR1606 | Owner's Manual in English - Page 109
you want to use. NOTE 0 In playback using the AirPlay function, the sound is output at the iPhone, iPod touch, iPad or iTunes Select "Devices" in the iTunes setting window. 3 Check "Allow iTunes audio control from remote speakers", and then click "OK". 0 This does not need to be set if using - Marantz NR1606 | Owner's Manual in English - Page 110
Spotify Connect function Spotify is the world's most popular streaming service. If you subscribe to Spotify Premium, you can control your new speaker with your phone or tablet. Because Spotify device in the same network as this unit. 2 Launch the Spotify App. 3 Play back the Spotify track. 4 Tap the - Marantz NR1606 | Owner's Manual in English - Page 111
p ENTER ZONE SELECT MAIN ZONE 2 SLEEP POWER CBL /SAT GAME TV AUDIO DVD AUX1 AUX2 Blu-ray MEDIA PLAYER TUNER iPod/USB ONLINE MUSIC CD Bluetooth INTERNET RADIO ECO CH / PAGE MUTE VOLUME INFO OPTION BACK ENTER SETUP OPTION TUNE - TUNE + SMART SELECT 1234 MOVIE SOUND MODE MUSIC - Marantz NR1606 | Owner's Manual in English - Page 112
Supported input sources: USB / Media Server / Bluetooth the Bluetooth device does not support the repeat setting under each input source. n Supported input sources : USB / Media Server / Bluetooth 1 While content is be set up if the Bluetooth device does not support the random setting under the - Marantz NR1606 | Owner's Manual in English - Page 113
Playback Settings Tips Appendix Registering to Favorites You can register a total of 100 favorites. n Supported input sources : Internet Radio / Media Server / Pandora / SiriusXM 1 While content is playing , then press ENTER. Playback starts. Front panel Display Rear panel 113 Remote Index - Marantz NR1606 | Owner's Manual in English - Page 114
to the previous screen when the delete process is complete. Searching content with keywords (Text Search) n Supported input sources : USB / Internet Radio / Media Server 1 While the content is playing, press OPTION. may not work for some lists. Front panel Display Rear panel 114 Remote Index - Marantz NR1606 | Owner's Manual in English - Page 115
Appendix Playing back music and a favorite picture at the same time (Slideshow) n Supported input sources : USB n Supported input sources : Internet Radio / Media Server 1 Play back a still picture. 0 you were viewing is shown on the screen. Front panel Display Rear panel 115 Remote Index - Marantz NR1606 | Owner's Manual in English - Page 116
back a slideshow of still picture (JPEG) files stored on a USB memory device or media server. n Supported input sources: USB / Media Server 1 While the list is displayed, press OPTION. The option menu screen are reflected for all input sources. Front panel Display Rear panel 116 Remote Index - Marantz NR1606 | Owner's Manual in English - Page 117
dB - +12.0 dB (Default : 0.0 dB) 5 Use uio p to select "Exit", then press ENTER. 0 Select "Reset" and press ENTER if you want to restore the adjustment values of the various channels to "0.0 dB" (default). 0 Headphone volume to "TV". (v p. 171) Front panel Display Rear panel 117 Remote Index - Marantz NR1606 | Owner's Manual in English - Page 118
the tonal quality of the sound. 1 Press OPTION. The On" in step 3 and press i to select the sound range to be adjusted. Bass: Adjust bass. Treble: "Tone" settings are stored for each input source. 0 This cannot be set when the sound mode is set to "Direct" or "Pure Direct". 0 This item cannot be set - Marantz NR1606 | Owner's Manual in English - Page 119
TV during audio playback. You can set this for each input source. n Supported input sources : iPod/USB / CDz / Tuner / Online Music / Bluetooth z This cannot be set when any of the HDMI, component video or are stored for each input source. Front panel Display Rear panel 119 Remote Index - Marantz NR1606 | Owner's Manual in English - Page 120
Playback Adjusting the picture quality for your viewing environment (Picture Mode) n Supported input sources : CBL/SAT / DVD / Blu-ray / Game / watching movies in a dark room at night. Adjusts the picture quality manually. 4 Press ENTER. 0 "Picture Mode" settings are stored for each input source - Marantz NR1606 | Owner's Manual in English - Page 121
Zone Stereo", ZONE, and playback starts in the All Zone Stereo mode. o Stopping the All Zone Stereo mode 1 During playback in All Zone Zone Stereo mode is canceled even when the power supply of the MAIN ZONE is turned off. 0 In the All Zone Stereo mode, only the "Multi Ch Stereo" and "Stereo" sound - Marantz NR1606 | Owner's Manual in English - Page 122
Connections Selecting a sound mode Playback MOVIE MUSIC ZONE SELECT MAIN ZONE 2 SLEEP POWER CBL /SAT GAME TV AUDIO DVD AUX1 AUX2 Blu-ray MEDIA PLAYER TUNER iPod/USB ONLINE MUSIC CD Bluetooth INTERNET RADIO ECO CH / PAGE MUTE VOLUME INFO OPTION BACK ENTER SETUP TUNE - TUNE - Marantz NR1606 | Owner's Manual in English - Page 123
sound mode as the one selected at the previous playback. 0 If the content played back does not support the previously selected sound mode, the most appropriate sound sound mode. 0 Try out various sound modes and enjoy sound mode in your favorite mode. GExampleH When MOVIE is pressed MOVIE SOUND - Marantz NR1606 | Owner's Manual in English - Page 124
the main unit. Settings Tips Appendix Pure Direct playback This mode is for playback with higher sound quality than in Direct playback mode. This mode turns off the main unit display and analog video circuit turns off after about 5 seconds. Front panel Display Rear panel 124 Remote Index - Marantz NR1606 | Owner's Manual in English - Page 125
surround playback begins. 0 This can also be set by pressing PURE DIRECT on the main unit. Settings Tips Appendix Front panel Display Rear panel 125 Remote Index - Marantz NR1606 | Owner's Manual in English - Page 126
Description of sound mode types Dolby sound mode Sound mode type as top middle speakers to realize a three-dimensional sound field. Dolby Digital This mode can be selected when Dolby Atmos Enabled speakers to realize a three-dimensional sound field. z Can be selected when using the Surround - Marantz NR1606 | Owner's Manual in English - Page 127
field. z This can be selected when "Speaker Config." - "Surr. Back" is not set to "None". (v p. 199) PCM multi-channel sound mode Sound mode type Description Multi Ch In This mode can be selected when playing multi-channel PCM sources. Front panel Display Rear panel 127 Remote Index - Marantz NR1606 | Owner's Manual in English - Page 128
speakers and surround back speakers (if connected). This mode lets you experience an expansive surround sound effect when playing back through just the front (L/R) speakers only, and when listening with stereo to the respective channel number. Front panel Display Rear panel 128 Remote Index - Marantz NR1606 | Owner's Manual in English - Page 129
audio with no additional surround sound processing. 0 Sound is output from the front played back with no additional surround sound processing. Description This mode plays back audio quality sound than the "Direct" mode. The following circuits are stopped in order to further improve sound quality. - Marantz NR1606 | Owner's Manual in English - Page 130
MUSIC and GAME buttons. 0 Adjust the sound field effect with the menu "Surround Parameter" to enjoy surround sound the way you like it. (v p. 158) Input signal Stereo Sound mode MOVIE button S MUSIC button S GAME is front speakers only. Front panel Display Rear panel 130 Remote Index - Marantz NR1606 | Owner's Manual in English - Page 131
Settings Tips Appendix Input signal Multi-channel z3 Dolby Digital Sound mode Stereo Dolby Digital Dolby Digital + Dolby Surround MOVIE S S DTS 96/24 S S S DTS + Neural:X S S S z3 The sound mode that can be selected differs depending on the audio format of the input signal and the - Marantz NR1606 | Owner's Manual in English - Page 132
HD/ DTS Express DTS:X PCM multi-channel Multi-channel z3 Sound mode DTS-HD HI RES DTS-HD MSTR DTS Express DTS MUSIC button S S S S S S S S S S S S GAME button S S S S S S S S S S S S z3 The sound mode that can be selected differs depending on the audio format of the input signal and the number of - Marantz NR1606 | Owner's Manual in English - Page 133
Playback . + S DVD qw A Shows a decoder to be used. 0 In the case of the Dolby Digital Plus decoder, "H" is displayed. B Shows a decoder that creates sound output. 0 "k" indicates that the Dolby Surround decoder is being used. Settings Tips Appendix Front panel Display Rear panel 133 - Marantz NR1606 | Owner's Manual in English - Page 134
HDMI control function for all devices connected by HDMI cable. 0 Please consult the operating instructions for the connected devices to check the settings. 0 Carry out steps 2 and 3 or player. Check the owner's manual of each device for details beforehand. Front panel Display Rear panel 134 - Marantz NR1606 | Owner's Manual in English - Page 135
Menu" to "On" on this unit. (v p. 175) 3 Select "AV Receiver" in a TV menu such as "Input"z or "Operate Connected HDMI Device"z. remote control. o Sound Mode Change the sound mode of this unit. You can select from the following three sound modes. Surround: Stereo: Multi Ch Stereo: Surround sound - Marantz NR1606 | Owner's Manual in English - Page 136
Contents Connections Playback o Setup Menu Displays a setup menu for configuring the settings of this unit. o Smart Select Calls up the SMART SELECT items registered to this unit. NOTE 0 If the "HDMI Control" or "Smart Menu" settings have been changed, always reset the power to connected devices - Marantz NR1606 | Owner's Manual in English - Page 137
MAIN ZONE2 ZONE SELECT MAIN ZONE 2 SLEEP POWER CBL /SAT DVD GAME AUX1 TV AUDIO AUX2 Blu-ray MEDIA PLAYER TUNER iPod/USB ONLINE MUSIC CD Bluetooth INTERNET RADIO ECO CH / PAGE MUTE VOLUME INFO OPTION ENTER BACK SETUP SLEEP TUNE - TUNE + SMART SELECT 1234 MOVIE SOUND MODE - Marantz NR1606 | Owner's Manual in English - Page 138
Contents Connections Playback Using the sleep timer 1 Press MAIN or ZONE2 to select the operating zone with the remote control. The button for the selected zone is lit. 2 Press SLEEP and display the time you want to set. 0 The SLEEP indicator lights up on the display and the sleep timer starts. 0 - Marantz NR1606 | Owner's Manual in English - Page 139
function Playback ZONE SELECT MAIN ZONE 2 SLEEP POWER CBL /SAT GAME TV AUDIO DVD AUX1 AUX2 Blu-ray MEDIA PLAYER TUNER iPod/USB ONLINE MUSIC CD Bluetooth INTERNET RADIO ECO CH / PAGE MUTE VOLUME INFO OPTION BACK ENTER SETUP TUNE - TUNE + SMART SELECT 1234 MOVIE SOUND MODE - Marantz NR1606 | Owner's Manual in English - Page 140
Contents Connections Playback Calling up the settings 1 Press MAIN or ZONE2 to select the operating zone with the remote control. The button for the selected zone is lit. 2 Press SMART SELECT. The Smart Select settings registered to the button you pressed are called up. 0 The default settings - Marantz NR1606 | Owner's Manual in English - Page 141
ZONE, and settings A and B can be memorized for ZONE2. A Input source (v p. 66) B Volume (v p. 67) C Sound select the operating zone with the remote control. The button for the selected zone is lit. 3 hold SMART SELECT while a radio station is being received or a track is being played back with any - Marantz NR1606 | Owner's Manual in English - Page 142
the unit from a web control 1 Switch the "Network Control" setting to "Always On". (v p. 213) correctly to the network in order to use the web control function. ("Connecting to a home network (LAN)" (v Network/Information Friendly Name DHCP Connection IP Address MAC Address Marantz NR1606 - Marantz NR1606 | Owner's Manual in English - Page 143
.100.19 File Edit View Favorites Tools Help 5 When the top menu is displayed, click on the menu item you want to operate. Setup Menu Audio Video Inputs Speakers Network General MAIN ZONE CBL/SAT ZONE2 CBL/SAT Save Load .. 0 You can use the "Save" and "Load" functions to store or recall various - Marantz NR1606 | Owner's Manual in English - Page 144
Panel lock function in standby mode. 2 Use ZONE2 SOURCE or INTERNET RADIO to select "FP/VOL LOCK On". 3 Press STATUS to enter the setting. Disabling all button operations except . 2 Use ZONE2 SOURCE or INTERNET RADIO to select "FP LOCK On". 3 Press STATUS to enter the setting. All button operations except - Marantz NR1606 | Owner's Manual in English - Page 145
ZONE2 SOURCE or INTERNET RADIO to select "FP LOCK zOff". (z The currently set mode.) 3 Press STATUS to enter the setting. The Panel lock function is canceled. 0 Even when the Panel lock function is set, you can operate the unit using the remote control unit. Settings Tips Appendix Front panel - Marantz NR1606 | Owner's Manual in English - Page 146
DIMMER with the unit in standby mode. 2 Use ZONE2 SOURCE or INTERNET RADIO to select "RC LOCK On". 3 Press STATUS to enter the setting. The infrared light receiving function is disabled. Enabling the remote sensor function 1 Press X while you press and hold M-DAX and DIMMER with the unit in standby - Marantz NR1606 | Owner's Manual in English - Page 147
placed (MAIN ZONE). You can simultaneously play back the same source in both the MAIN ZONE and ZONE2. You can also play back separate sources in the MAIN ZONE and ZONE2 speaker terminal. (v p. 196) MAIN ZONE This unit 63($.(56 ,03('$1 (R) (L) ZONE2 . Front panel Display Rear panel 147 - Marantz NR1606 | Owner's Manual in English - Page 148
an external amplifier The audio signals of this unit's ZONE2 audio output connectors are output to the ZONE2 amplifiers and played on these amplifiers. MAIN ZONE ZONE2 This unit R L Power amplifier AUX IN Settings Tips Appendix . Front panel Display Rear panel 148 - Marantz NR1606 | Owner's Manual in English - Page 149
Bluetooth INTERNET RADIO ECO CH / PAGE MUTE VOLUME INFO OPTION Playback Settings Tips Appendix POWER X VOLUME df 1 Press ZONE2 to set the operating zone to ZONE2 with the remote BACK ENTER SETUP TUNE - TUNE + SMART SELECT 1234 MOVIE SOUND MODE MUSIC GAME PURE . Front panel - Marantz NR1606 | Owner's Manual in English - Page 150
" is set to "70(-10 dB)". (v p. 219) 0 Turn VOLUME after pressing ZONE2 SOURCE on the main unit to adjust the volume. o Turning off the sound temporarily (Muting) (ZONE2) Press MUTE :. The sound is reduced to the level set at "Mute Level" in the menu. (v p. 220) 0 To cancel mute, either adjust the - Marantz NR1606 | Owner's Manual in English - Page 151
subwoofer. 157 Surround Parameter Adjusts surround sound parameters. 158 . Audio M-DAX Expands and audio. 162 Volume Sets the MAIN ZONE (room where the unit is located) volume Picture Adjust Adjusts picture quality. 168 HDMI Setup Makes settings for HDMI video/audio output. Remote Index - Marantz NR1606 | Owner's Manual in English - Page 152
Select Audyssey® Setup . Speakers . Network Manual Setup Information Connection Settings Network Control Friendly according to your preferences. Used to check the network connection. 214 Used when receiving maintenance from a Marantz service engineer or custom installer. 215 This mode is - Marantz NR1606 | Owner's Manual in English - Page 153
items Language ECO ZONE2 Setup Zone Rename Smart Select Names Trigger Out Front Display Firmware Information Usage Data Setup Lock Begin Setup... Language Select . Speaker Setup Setup Assistant Speaker Calibration Network Setup TV Audio Connection Input Setup Description Changes the - Marantz NR1606 | Owner's Manual in English - Page 154
ONLINE MUSIC CD Bluetooth INTERNET RADIO ECO CH / PAGE MUTE VOLUME INFO OPTION BACK ENTER SETUP TUNE - TUNE + SMART SELECT 1234 MOVIE SOUND MODE MUSIC GAME PURE SETUP Settings Tips Appendix Menu operations 1 Press MAIN on the remote control unit to set the operating zone to the - Marantz NR1606 | Owner's Manual in English - Page 155
screens to the names that you prefer. 0 Preset Name (v p. 86) 0 Text Search (v p. 114) 0 Source Rename (v p. 183) 0 Friendly Name (v p. 213) 0 Zone Rename (v p. 220) 0 Smart Select Names (v p. 220) 0 Character input for the network functions Tips Appendix Front panel Display Rear panel 155 - Marantz NR1606 | Owner's Manual in English - Page 156
with uio p then press ENTER. 5 Repeat steps 2 - 4 to change the name. 6 Use uio p to select "OK", then press ENTER. Front panel Display Rear panel 156 Remote Index - Marantz NR1606 | Owner's Manual in English - Page 157
of the subwoofer level. o Subwoofer Level Adjusts the volume level for the subwoofer. -12.0 dB - +12.0 dB (Default : 0.0 dB) Front panel Display Rear panel 157 Remote Index - Marantz NR1606 | Owner's Manual in English - Page 158
is stopped. Make the settings during playback. 0 "Surround Parameter" settings are stored for each sound mode. o Cinema EQ Gently softens the upper treble range of movie soundtracks to reduce possible harshness and Dolby Atmos signal is input. Front panel Display Rear panel 158 Remote Index - Marantz NR1606 | Owner's Manual in English - Page 159
Contents Connections Playback o Dynamic Compression Compress dynamic range (difference between loud and soft sounds). Auto: Low / Medium / High: Off: Automatic dynamic range compression on/off with the Dialog Controll function is input. Front panel Display Rear panel 159 Remote Index - Marantz NR1606 | Owner's Manual in English - Page 160
Off: The subwoofer is used. The subwoofer is not used. 0 You can set this when the sound mode is "Direct" or "Stereo" and in the menu "Subwoofer Mode" is set to "LFE default settings. 0 You can set this when sound mode is DTS:X or DTS:X MSTR. Front panel Display Rear panel 160 Remote Index - Marantz NR1606 | Owner's Manual in English - Page 161
eliminated upon compression, restoring the sound to conditions near those of the original sound before compression. It also restores the setting for "Online Music", "iPod/USB" and "Bluetooth" is "Low". All others are set to "Off". 0 This cannot be set when the sound mode is set to "Direct" or "Pure - Marantz NR1606 | Owner's Manual in English - Page 162
or "Game". (v p. 176) 0 "Audio Delay" settings are stored for each input source. Volume Set the MAIN ZONE (room where the unit is located) volume setting. o Scale Set how volume is displayed. 0 - 98 (Default are reflected in all the zones. Front panel Display Rear panel 162 Remote Index - Marantz NR1606 | Owner's Manual in English - Page 163
is attenuated by 40 dB down. The sound is attenuated by 20 dB down. Settings Tips Appendix Audyssey® Set Audyssey MultEQ®, Audyssey Dynamic EQ® and Audyssey Dynamic Volume®. These can be selected after Audyssey® Setup has been performed. For additional information on Audyssey technology, please - Marantz NR1606 | Owner's Manual in English - Page 164
of the listening area based on "Audyssey® Setup" measurement results. Selection is done from three MultEQ®". Settings Tips Appendix o Dynamic EQ Solves the problem of deteriorating sound quality as volume is decreased by taking into account Front panel Display Rear panel 164 Remote Index - Marantz NR1606 | Owner's Manual in English - Page 165
Solves the problem of large sounds. Do not use Dynamic Volume. 0 If "Dynamic Volume" is set to "Yes" in "Audyssey® Setup", the setting is automatically changed to "Medium". (v p. 186) 0 Setting is enabled when "Dynamic EQ" is "On". (v p. 164) Front panel Display Rear panel 165 Remote - Marantz NR1606 | Owner's Manual in English - Page 166
for which "Graphic EQ" can be set differ according to the sound mode. 0 This can be set when the "MultEQ®" setting is "Off". (v p. 164) 0 This cannot be set when the sound mode is set to "Direct" or "Pure Direct". 0 the tone for each speaker. Front panel Display Rear panel 166 Remote Index - Marantz NR1606 | Owner's Manual in English - Page 167
/125 Hz/250 Hz/500 Hz/1 kHz. Settings Tips Appendix o Curve Copy Copy the Flat correction curve created in the Audyssey® Setup. 0 "Curve Copy" is displayed after Audyssey® Setup has been performed. 0 "Curve Copy" cannot be used when using headphones. o Set Defaults The "Graphic EQ" settings are - Marantz NR1606 | Owner's Manual in English - Page 168
. A mode suited for watching movies in a bright room during the day. A mode suited for watching movies in a dark room at night. Adjusts the picture quality manually. No picture quality adjustment is done with this unit. Front panel Display Rear panel 168 - Marantz NR1606 | Owner's Manual in English - Page 169
(Default : 0) o Brightness Adjust picture brightness. -50 - +50 (Default : 0) o Saturation Adjust picture chroma level (color saturation). -50 - +50 (Default : 0) Appendix Front panel Display Rear panel 169 Remote Index - Marantz NR1606 | Owner's Manual in English - Page 170
: Off) o Enhancer Emphasize picture sharpness. 0 - +12 (Default : 0) Playback Settings Tips Appendix HDMI Setup Make settings for HDMI video/audio output. NOTE 0 When "HDMI Control" and "HDMI Pass Through" is set not correct automatically. Front panel Display Rear panel 170 Remote Index - Marantz NR1606 | Owner's Manual in English - Page 171
output as 2-channel from the HDMI OUT connector. 0 Please consult the operating instructions for each connected device to check the settings. 0 Refer to "HDMI control Control" settings have been changed, always reset the power to connected devices after the change. Front panel Display Rear - Marantz NR1606 | Owner's Manual in English - Page 172
HDMI MONITOR connector, set whether to receive sound from the TV via HDMI. On: Off (Default): Use ARC function. Do not use ARC function. 0 You can adjust the volume of this unit using the TV remote control. 0 If using this function, use a TV compatible with ARC (Audio Return Channel) and enable - Marantz NR1606 | Owner's Manual in English - Page 173
appropriate CEC control command to the AVR. On (Default): Off: Select the "TV Audio" input automatically when receiving a command from the TV. Do not select the "TV Audio" input automatically when receiving a command from the TV. 0 "TV Audio Switching" can be set when "HDMI Control" is set to "On - Marantz NR1606 | Owner's Manual in English - Page 174
. Do not use Power Saving function. 0 "Power Saving" can be set when "HDMI Control" is set to "On". (v p. 171) Front panel Display Rear panel 174 Remote Index - Marantz NR1606 | Owner's Manual in English - Page 175
an input source and set Tuner and Internet Radio stations using the TV remote control. On: Use Smart Menu function. Off: Do not use Smart p. 171) NOTE 0 If the "Smart Menu" settings have been changed, always reset the power to connected devices after the change. 0 The Smart Menu function may - Marantz NR1606 | Owner's Manual in English - Page 176
is not converted. 0 If "Video Mode" is set to "Auto", the mode is switched according to the input contents. Front panel Display Rear panel 176 Remote Index - Marantz NR1606 | Owner's Manual in English - Page 177
effective when the input signal is "x.v.Color", 3D, sYCC601 color, Adobe RGB color, Adobe YCC601 color or computer resolutions. Front panel Display Rear panel 177 Remote Index - Marantz NR1606 | Owner's Manual in English - Page 178
(Default): 480p/576p / 1080i / 720p / 1080p / 1080p:24Hz / 4K : The resolution supported by the TV connected to the HDMI MONITOR OUT connector is detected automatically and the appropriate output resolution anything other than "Off". (v p. 177) Front panel Display Rear panel 178 Remote Index - Marantz NR1606 | Owner's Manual in English - Page 179
to see when superimposed text (closed captioning) or movie subtitles are present, set to "Top". o Info Displays status of operation temporarily when the sound mode is changed, or input source is switched. On (Default): Off: Shows the volume display. Does not show the volume display. Front panel - Marantz NR1606 | Owner's Manual in English - Page 180
display time for the playback display when the input source is "Online Music", "iPod/USB", "Bluetooth" or "Tuner". Always On (Default): Show display continuously. Auto Off: Show display for 30 the picture will not be displayed properly. Front panel Display Rear panel 180 Remote Index - Marantz NR1606 | Owner's Manual in English - Page 181
audio signal assigned at "Input Assign" - "DIGITAL", you will also need to select "Digital" in the "Input Mode". (v p. 184) Front panel Display Rear panel 181 Remote Index - Marantz NR1606 | Owner's Manual in English - Page 182
the selected input source. Do not assign an HDMI input connector to the selected input source. 0 When "HDMI Control" or "ARC" is set to "On" in the menu, "HDMI" cannot be assigned to "TV Audio". (v p. 171) o to the selected input source. Front panel Display Rear panel 182 Remote Index - Marantz NR1606 | Owner's Manual in English - Page 183
the default settings. 0 Up to 12 characters can be input. For character input, see "Using the keyboard screen" (v p. 156). Front panel Display Rear panel 183 Remote Index - Marantz NR1606 | Owner's Manual in English - Page 184
. If the ~ indicator does not light, check "Input Assign" and the connections. (v p. 181) 0 If "HDMI Control" is set to "On" and a TV compatible with the ARC is connected via the HDMI MONITOR connectors, the input mode whose input source is "TV Audio" is fixed to - Marantz NR1606 | Owner's Manual in English - Page 185
be set for input sources for which "HDMI" or "DIGITAL" is assigned at "Input Assign". (v p. 181) Settings Tips Appendix Front panel Display Rear panel 185 Remote Index - Marantz NR1606 | Owner's Manual in English - Page 186
Setup when you have already performed "Speaker Calibration" in "Setup Assistant". To set up the speakers manually, use "Manual Setup" on the menu. (v p. 196) Audyssey® Setup To perform measurement, place the Sound , install the Sound calibration microphone within the Audyssey® Setup, the Audyssey - Marantz NR1606 | Owner's Manual in English - Page 187
within the listening environment. Before starting Audyssey® Setup, place the Sound calibration microphone in the main listening position. test signals will increase in volume. 0 Operating VOLUME d f on the remote control unit or VOLUME on the main unit during the measurements will cancel the - Marantz NR1606 | Owner's Manual in English - Page 188
for speaker settings (Audyssey® Setup) Preparation Measurement Calculation & Store Check Finish Settings Tips Appendix 1 Attach the Sound calibration microphone to the supplied Frequency 0 Low pass filter : Off 0 Standby mode : Off . Front panel Display Rear panel 188 Remote Index - Marantz NR1606 | Owner's Manual in English - Page 189
Sound calibration microphone to the SETUP MIC jack of this unit. When the Sound calibration microphone is connected, the following screen is displayed. Audyssey Setup Your AV receiver subwoofer. 0 Dolby Speaker Setup Set the distance between the instructions on the screen display and press - Marantz NR1606 | Owner's Manual in English - Page 190
select "Begin Test" and then press ENTER. Start the measurement of the first position. Audyssey Setup Select "Begin Test" to start the calibration. NOTE: You will hear a series of loud perform the necessary procedures. Repeat Last Test Next Front panel Display Rear panel 190 Remote Index - Marantz NR1606 | Owner's Manual in English - Page 191
the Sound calibration microphone to position 2, select "Continue", then press ENTER. The measurement of the second position starts. Measurements can be made in up to six positions. Audyssey Setup Place the make sure the power is not turned off. Front panel Display Rear panel 191 Remote Index - Marantz NR1606 | Owner's Manual in English - Page 192
Setup Audyssey Dynamic EQ maintains bass, clarity and surround sound Sound calibration microphone from the SETUP MIC jack on the main unit and then press "Next". Audyssey Setup Now Analyzing and correcting the your room data. Please disconnect the microphone from your AV receiver the sound when, for - Marantz NR1606 | Owner's Manual in English - Page 193
added electrical delay common in subwoofers. NOTE 0 Do not change the speaker connection or subwoofer volume after Audyssey® Setup. If these are changed, run Audyssey® Setup again in order to configure the optimum equalizer settings. Settings Tips Appendix Front panel Display Rear panel 193 - Marantz NR1606 | Owner's Manual in English - Page 194
Examples Error details Measures No speakers found. 0 Sound calibration microphone is not detected. 0 Connect the included Sound calibration microphone to the SETUP MIC jack of this unit. 0 Not all to select "Ignore", then press ENTER. Front panel Display Rear panel 194 Remote Index - Marantz NR1606 | Owner's Manual in English - Page 195
by MultEQ®) even when you have changed each setting manually. Audyssey Setup Your AV receiver can automatically measure the acoustics of your room then Channel Select Dolby Speaker Setup Check Results Restore... Start Settings Tips Appendix . Front panel Display Rear panel 195 Remote Index - Marantz NR1606 | Owner's Manual in English - Page 196
able to select Audyssey MultEQ®, Audyssey Dynamic EQ® or Audyssey Dynamic Volume®. (v p. 163) 0 "Manual Setup" can be used without changing the settings. Please set if necessary. Amp Assign Select the power Dolby Atmos Enabled speakers. Front panel Display Rear panel 196 Remote Index - Marantz NR1606 | Owner's Manual in English - Page 197
". 0 When "Front" is set to "Small", "Center", "Surround", "Surr. Back" and "Front Height" can not be set to "Large". Front panel Display Rear panel 197 Remote Index - Marantz NR1606 | Owner's Manual in English - Page 198
are not connected. 0 When "Surround" is set to "None", "Surr. Back" and "Surround Dolby" are automatically set to "None". Front panel Display Rear panel 198 Remote Index - Marantz NR1606 | Owner's Manual in English - Page 199
", you can make this setting. (v p. 196) 0 When "Assign Mode" setting is "Surround Back", you can make this setting. (v p. 196) Front panel Display Rear panel 199 Remote Index - Marantz NR1606 | Owner's Manual in English - Page 200
", you can make this setting. (v p. 196) 0 When "Assign Mode" setting is "Top Middle", you can make this setting. (v p. 196) Front panel Display Rear panel 200 Remote Index - Marantz NR1606 | Owner's Manual in English - Page 201
", you can make this setting. (v p. 196) 0 When "Assign Mode" setting is "Surround Dolby", you can make this setting. (v p. 196) Front panel Display Rear panel 201 Remote Index - Marantz NR1606 | Owner's Manual in English - Page 202
Dolby R:10.0 ft (3.00 m) 0 Set the difference in the distance between the speakers to less than 20.0 ft (6.00 m). Front panel Display Rear panel 202 Remote Index - Marantz NR1606 | Owner's Manual in English - Page 203
Contents Connections Playback o Dolby Speaker Setup Set the distance between the Dolby Atmos Enabled speaker and the +12.0 dB (Default : 0.0 dB) 0 The set "Levels" are reflected in all sound modes. 0 If you wish to adjust the channel level for each input source, carry out the 203 Remote Index - Marantz NR1606 | Owner's Manual in English - Page 204
played back through each speaker. See the speaker manual for information concerning speaker crossover frequency. o the frequency range of the speakers is 250 Hz - 20 kHz. 0 Sound below the crossover frequency is cut off from the output of the speakers panel Display Rear panel 204 Remote Index - Marantz NR1606 | Owner's Manual in English - Page 205
0 If "Speaker Config." - "Front" and "Center" are set to "Large", and "Subwoofer Mode" is set to "LFE", no sound may be output from the subwoofers, depending on the input signal or selected sound mode. (v p. 198) Select "LFE+Main" if you want the bass signals to always be produced from the subwoofer - Marantz NR1606 | Owner's Manual in English - Page 206
Contents Connections Playback Front Speaker Set the front speaker A/B to use for every sound mode. A (Default): Front speaker A is used. B : Front speaker B is used. A+B : Both front speakers A and B are used. 0 This can be set when "Assign Mode" is set - Marantz NR1606 | Owner's Manual in English - Page 207
(WiFi)" and configure the "Wi-Fi Setup". (v p. 208) o Wi-Fi You can stop the Wi-Fi function when connecting this unit to the network using Wired LAN. Enabled (Default): Disabled: The Wi-Fi function is used. The Wi-Fi function is stopped. Front panel Display Rear panel 207 Remote Index - Marantz NR1606 | Owner's Manual in English - Page 208
network. Use the wireless LAN (Wi-Fi) function to connect to a network. 0 This can be set when "Wi-Fi" is set to "Enabled". (v p. 207) Settings Tips Appendix Wi-Fi Setup to the network. By connecting your iOS device to this unit, the unit can be automatically connected to the same network as - Marantz NR1606 | Owner's Manual in English - Page 209
wireless LAN (Wi-Fi) router and select "Marantz NR1606" from "SET UP NEW AIRPLAY SPEAKER..." at the bottom of the Wi-Fi configuration screen of your iOS device. 3. Tap "Next" on the screen of the iOS device. 0 The iOS device firmware version needs to support iOS 7 or later. n When using a USB cable - Marantz NR1606 | Owner's Manual in English - Page 210
and hold the M-DAX and SOUND MODE buttons on the main unit for at least 3 seconds when the power of the unit is on. 2. Connect the wireless LAN of the PC or tablet used to "Marantz NR1606" when the message "Connect your Wi-Fi device to Wi-Fi network called "Marantz NR1606"" appears in the display - Marantz NR1606 | Owner's Manual in English - Page 211
network settings manually Settings Tips Appendix o DHCP Selects how to connect to the network. On (Default): Off: Configure the network settings automatically from your router. Configure the network settings manually input 255.255.255.0. . Front panel Display Rear panel 211 Remote Index - Marantz NR1606 | Owner's Manual in English - Page 212
you connect to the Internet via a proxy server that is on your internal network or provided by your provider, etc. On(Address): On(Name): Off (Default not understand about Internet connection, contact your ISP (Internet Service Provider) or the store from which you purchased your computer. Front - Marantz NR1606 | Owner's Manual in English - Page 213
network function during standby. Always On (Default): Network is on during standby. Main unit operable with a network compatible controller. 0 When using the web control function or Marantz 2015 AVR Remote Friendly Name on first use is "Marantz NR1606". o Set Defaults Restores Friendly Name, - Marantz NR1606 | Owner's Manual in English - Page 214
Contents Connections Playback Diagnostics Used to check the network connection. o Physical Connection Checks the physical LAN port connection. OK Error: The LAN cable is not to communicate with the router. Check the router settings. Front panel Display Rear panel 214 Remote Index - Marantz NR1606 | Owner's Manual in English - Page 215
Use when receiving maintenance from a Marantz service engineer or custom installer. Ordinarily, this mode isn't suitable for use by the end user, only by a trained service technician or custom installation professional. NOTE 0 Only use this function if so instructed by a Marantz serviceperson or - Marantz NR1606 | Owner's Manual in English - Page 216
audio at a high volume level, it is recommended to set "ECO Mode" to "Off". 0 Eco mode can also be switched by pressing ECO G on the remote control unit. Front panel Display Rear panel 216 - Marantz NR1606 | Owner's Manual in English - Page 217
meter on the TV screen. Display the meter when changing the mode or volume. Do not display the meter. Front panel Display Rear panel 217 Remote Index - Marantz NR1606 | Owner's Manual in English - Page 218
Playback o Auto Standby Set so the unit power automatically switches to standby. n MAIN ZONE Sets the time for switching to auto standby when there are no audio or video signals Default): Do not automatically put ZONE2 in the standby state. Front panel Display Rear panel 218 Remote Index - Marantz NR1606 | Owner's Manual in English - Page 219
Contents Connections ZONE2 Setup Makes settings for audio playback with ZONE2. - 18.0 dB): Volume can be adjusted. Volume is fixed at the desired level. The volume cannot be adjusting using the remote control unit. o Volume Limit Make a setting for maximum volume. 60 (-20 dB) / 70 (-10 dB) / 80 - Marantz NR1606 | Owner's Manual in English - Page 220
The sound is muted entirely. The sound is attenuated by 40 dB down. The sound is attenuated by 20 dB down. Settings Tips Appendix Zone Rename Change the display title of each zone to one you prefer. MAIN ZONE / keyboard screen" (v p. 156). Front panel Display Rear panel 220 Remote Index - Marantz NR1606 | Owner's Manual in English - Page 221
n When setting for zone (MAIN ZONE/ZONE2) Trigger out is activated through linkage to the power of the zone set to "On". through linkage to the power of the zone set to "On". Front Display Makes It is valid for the zone, which is set to "On" and "When setting for zone". On: - - -: Activate - Marantz NR1606 | Owner's Manual in English - Page 222
Checks for the latest firmware information about updates and upgrades, updates the firmware, and sets up the notification message display for updates and upgrades. o Update Updates the firmware of this unit. Update: Execute the update process. When the update starts, the menu screen is shut - Marantz NR1606 | Owner's Manual in English - Page 223
by pressing and holding the main unit's STATUS and SOUND MODE for at least 3 seconds. 0 If the upgrade is not successful, an error message identical to those in "Firmware" - "Update" will appear on the display. Check the settings and network environment and then perform the upgrade again. Settings - Marantz NR1606 | Owner's Manual in English - Page 224
MAIN ZONE. The information displayed differs according to the input source. This item shows information about settings for ZONE2. o Firmware Version: DTS Version: Displays information for the current firmware. Displays the current DTS version. Front panel Display Rear panel 224 Remote Index - Marantz NR1606 | Owner's Manual in English - Page 225
Appendix Usage Data To help us improve our products and customer service, Marantz collects anonymous information about how you use your AV receiver (such as frequently used input sources and sound modes and speaker settings). Marantz will never provide any information we collect to third parties - Marantz NR1606 | Owner's Manual in English - Page 226
. o Lock On: Off (Default): Turn protection on. Turn protection off. 0 When cancelling the setting, set "Lock" to "Off". NOTE 0 When "Lock" is set to "On", no setting items are displayed except for "Setup Lock". Settings Tips Appendix Front panel Display Rear panel 226 Remote Index - Marantz NR1606 | Owner's Manual in English - Page 227
ZONE2 ZONE SELECT MAIN ZONE 2 SLEEP POWER CBL /SAT DVD GAME AUX1 TV AUDIO AUX2 Blu-ray MEDIA PLAYER TUNER iPod/USB ONLINE MUSIC CD Bluetooth INTERNET RADIO ECO CH / PAGE MUTE VOLUME ZONE2 operations can be disabled using the remote control. 1 Press and hold ZONE2 and SETUP. The - Marantz NR1606 | Owner's Manual in English - Page 228
unit using the TV remote control 230 Settings Tips Appendix Troubleshooting Power does not turn on / Power is turned off 232 Operations cannot be performed through the remote control unit 233 Display on this unit shows nothing 233 No sound comes out 234 Desired sound does not come out - Marantz NR1606 | Owner's Manual in English - Page 229
menu. You can set this for each zone. ("Volume" (v p. 162), "Power On Volume" (v p. 220)) I want to have the subwoofer always output audio 0 Depending on the input signals and sound mode, the subwoofer may not output audio. level. (v p. 165) Front panel Display Rear panel 229 Remote Index - Marantz NR1606 | Owner's Manual in English - Page 230
, USB or Bluetooth. (v p. Receiver" in a TV menu such as "Input"z or "Operate Connected HDMI Device"z. The Smart Menu of this unit is displayed on the TV. This Smart Menu can be operated using the remote control of your TV. z The selection method differs depending on your TV. See the owner's manual - Marantz NR1606 | Owner's Manual in English - Page 231
Settings Tips Appendix Troubleshooting If a problem should arise, first check the following: 1. Are the connections correct? 2. Is the set being operated as described in the owner's manual? 3. Are the the store where you purchased this unit. Front panel Display Rear panel 231 Remote Index - Marantz NR1606 | Owner's Manual in English - Page 232
unit's amplifier circuit has failed. Unplug the power cord and contact our customer service center. Power does not turn off even when the power button is pressed, the POWER X button after pressing the ZONE2 button on the remote control unit to turn off the power supply of ZONE2. Page 64 137 - Marantz NR1606 | Owner's Manual in English - Page 233
remote control sensor will not be exposed to strong light. 0 The operation target zone does not correspond to the zone setting specified on the remote on the menu to something other than "Off". 0 When the sound mode is set to "Pure Direct", the display is off. Page 221 124 Front panel Display - Marantz NR1606 | Owner's Manual in English - Page 234
No sound comes out Symptom Cause / Solution No sound comes on the main unit, sound is not output from the speaker terminal and PRE OUT connector. No sound comes out when 0 When this unit is connected to a device equipped with a DVI-D connector, no sound is output - Marantz NR1606 | Owner's Manual in English - Page 235
the HDMI control function, check that the audio output is set to the AV amplifier on the TV. No sound comes out of a specific speaker. 0 Check that speaker cables are properly connected. 0 Check that a selection - 198 198 205 205 - 185 53 - Front panel Display Rear panel 235 Remote Index - Marantz NR1606 | Owner's Manual in English - Page 236
when you have not performed Audyssey® Setup. 0 Switch to a sound mode other than "Direct" or " Switch to a sound mode other than "Direct" or "Pure Direct". No sound is output when to the audio of a Bluetooth device in ZONE2, remove any obstructions between the Bluetooth device and this unit and use - Marantz NR1606 | Owner's Manual in English - Page 237
sound is occasionally interrupted. 0 When the transfer speed of the USB memory device is slow, sound may occasionally be interrupted. 0 The network from other connection cables. The sounds appear to be distorted. playback volume is high. Sound cuts out when using the playback sound may be - Marantz NR1606 | Owner's Manual in English - Page 238
with an aspect ratio other than 16:9 or 4:3 - 4K video Page 49 181 66 181 224 250 - 251 - 250 - - Front panel Display Rear panel 238 Remote Index - Marantz NR1606 | Owner's Manual in English - Page 239
or status information screen is not displayed properly. 0 In the pure direct playback mode, the menu screen or status information is not displayed. Switch to a sound mode other than the pure direct mode. 0 Set the "TV Format" setting in the menu to a selection that is appropriate for the TV. Page - Marantz NR1606 | Owner's Manual in English - Page 240
iPod variations are not supported. The AirPlay icon ' is not network (LAN). Connect it to the same LAN as this unit. 0 The firmware on iTunes / iPhone / iPod touch / iPad is not compatible with AirPlay. Update the firmware remote control unit. 0 Enable the "Allow iTunes audio control from remote - Marantz NR1606 | Owner's Manual in English - Page 241
that came with the drive. Files on the USB memory device are not displayed. 0 Files of a type not supported by this unit are not displayed. 0 This unit is able to display files in a maximum of eight folder MB. Page 56 - - - - 73 - - 253 - - Front panel Display Rear panel 241 Remote Index - Marantz NR1606 | Owner's Manual in English - Page 242
be played back Symptom Cause / Solution Bluetooth devices cannot 0 The Bluetooth function in the Bluetooth device has not been enabled. See the Owner's Manual of the be connected to this unit. Bluetooth device to enable the Bluetooth function. 0 Bring the Bluetooth device near to this unit - Marantz NR1606 | Owner's Manual in English - Page 243
0 The LAN cable is not properly connected, or the network is disconnected. Check the connection status. 0 Perform the network diagnostic mode. Internet Radio cannot be 0 The selected radio station is broadcasting in a format that is not supported by this unit. Formats that can played. be played - Marantz NR1606 | Owner's Manual in English - Page 244
played back. to this unit through the network. Files on PC or NAS are not 0 Files of a type not supported by this unit are not displayed. o Various online services cannot be played Symptom Cause / Solution Various online services cannot be played. 0 The online service may have been - Marantz NR1606 | Owner's Manual in English - Page 245
. Turn off this unit and devices connected via HDMI, and turn them on again. Page 171 134 134 134 Front panel Display Rear panel 245 Remote Index - Marantz NR1606 | Owner's Manual in English - Page 246
" or "Manual" method to connect. Cannot connect to the 0 Update the iPhone/iPod touch/iPad firmware to the latest version. network using iPhone/iPod 0 When using a USB cable to configure the settings, the iOS device firmware version needs to support iOS touch/iPad. 5 or later. When configuring - Marantz NR1606 | Owner's Manual in English - Page 247
or if operations cannot be performed. Various settings are reset to the factory default values. Make settings again. X M-DAX 1 various settings of the unit. (v p. 143) However, account information for network content and information on registered favorites cannot be stored. 0 When deleting - Marantz NR1606 | Owner's Manual in English - Page 248
. To play back 3D video, you need a TV and player that provide support for the HDMI 3D function and a pair of 3D glasses. 0 4K This unit supports input and output of 4K (3840 x 2160 pixels) video signals of HDMI. the traditional RGB color model. Front panel Display Rear panel 248 Remote Index - Marantz NR1606 | Owner's Manual in English - Page 249
surround audio for TV program, a separate audio cable connection is required. In contrast, if a TV with the ARC function is connected via HDMI connections, no audio cable connection is required. Audio signals from the TV can be unit for the TV. Front panel Display Rear panel 249 Remote Index - Marantz NR1606 | Owner's Manual in English - Page 250
. 0 If a device that does not support HDCP is connected, video and audio are not output correctly. Read the owner's manual of your television or player for more information. 0 When connecting this unit to a device that is compatible with the Deep Color, 4K and ARC functions, use a "High Speed HDMI - Marantz NR1606 | Owner's Manual in English - Page 251
HDMI-incompatible TV Component video signal Component video Component video connectors connectors Video signal Video connector Video connector 0 The main zone video conversion function is compatible with the following formats: NTSC, PAL, SECAM, NTSC4.43, PAL-N, PAL-M and PAL-60. Front - Marantz NR1606 | Owner's Manual in English - Page 252
/576i 480p/576p 720p 1080i 1080p 480i/576i 480i/576i HDMI 480p/576p 720p 1080i 1080p 1080p 24Hz z The HDMI connector on the front panel supports YCbCr420 format only. 4K 30/25/24Hz 4K 60/50Hz z Front panel Display Rear panel 252 - Marantz NR1606 | Owner's Manual in English - Page 253
License at http://www.apache.org/licenses/LICENSE-2.0 0 In ZONE2, it is not possible to play the DSD signal. Front panel Display Rear panel 253 Remote Index - Marantz NR1606 | Owner's Manual in English - Page 254
Audio Distribution Profile): When a Bluetooth device that supports this standard is connected, monaural and stereo sound data can be streamed at a high quality. 0 AVRCP (Audio/Video Remote Control Profile): When a Bluetooth device that supports this standard is connected, the Bluetooth device can be - Marantz NR1606 | Owner's Manual in English - Page 255
compatible with distribution in the corresponding formats is required to play music files via a network. o Specifications of supported files WMAz1 MP3 WAV MPEG-4 AACz1 FLAC ALACz2 DSD AIFF Sampling frequency 32/44.1/48 to play the DSD signal. Front panel Display Rear panel 255 Remote Index - Marantz NR1606 | Owner's Manual in English - Page 256
plus function The most recently used settings (input mode, HDMI output mode, sound mode, tone control, channel level, MultEQ®, Dynamic EQ, Dynamic Volume, input source. 0 "Surround Parameter" settings are stored for each sound mode. Last function memory This function stores the settings which were - Marantz NR1606 | Owner's Manual in English - Page 257
" in the menu is set to "1 spkr". (v p. 199) z3 Audio is output when the set sound mode name contains "+ Dolby Surround". z4 Audio is output when "Subwoofer Mode" in the menu is set Dz3 Dz3 Dz3 D D Subwoofer Dz4 D D D D D D D D D D D D D D D D Front panel Display Rear panel 257 Remote Index - Marantz NR1606 | Owner's Manual in English - Page 258
Sz6 S S S S S S S S S S S S S S S S z1 - z6 : "Sound modes and surround parameters" (v p. 260) Cinema EQ S S S S S S S S S S S S Compression z2 S S S S S S S S S S S S S Dialog Control z3 S Low Frequency z4 S S S S S S S S S S S S S S S Front panel Display Rear panel 258 Remote Index - Marantz NR1606 | Owner's Manual in English - Page 259
HD DTS Express DTS:X S Multi Ch Stereo Virtual z5, z7 - z10: "Sound modes and surround parameters" (v p. 260) Tone z7 S S S S S S S S S S S S S S S S S S S S S S S S S S S S S S S S S S S M-DAX z10 S S S S S Front panel Display Rear panel 259 Remote Index - Marantz NR1606 | Owner's Manual in English - Page 260
"LFE+Main". (v p. 205) z7 This item cannot be set when "Dynamic EQ" is set to "On". (v p. 164) z8 This item cannot be set when Audyssey® Setup (Speaker Calibration) has not been performed. z9 This item cannot be set when "MultEQ®" is set to "Off". (v p. 164) z10 This item can be set - Marantz NR1606 | Owner's Manual in English - Page 261
S F DTS (-HD) F PCM Multi z1 - z7 : "Types of input signals, and corresponding sound modes" (v p. 263) Multi-channel signal DTS:X DTS-HD DTS Express DTS ES Dscrt6.1 DTS ES Digital Plus Dolby Digital (EX) F Sz6 S Sz7 S F F F S Front panel Display Rear panel 261 Remote Index - Marantz NR1606 | Owner's Manual in English - Page 262
Multi Ch In + Neural:X Direct Direct Pure Direct Pure Direct Original sound mode Multi Ch Stereo Virtual Stereo Stereo NOTE Analog / PCM Dolby Digital Plus Dolby Digital (EX) S S S S S S S S S S S S Sz10 S S S S S S S Front panel Display Rear panel 262 Remote Index - Marantz NR1606 | Owner's Manual in English - Page 263
the Dolby TrueHD signal. z7 This can be selected when the Dolby Atmos signal contains the Dolby Digital Plus signal. z8 The default sound mode for the AirPlay playback is "Direct". z9 This item can be selected when the input signals contain surround back signals. z10 This can be selected when - Marantz NR1606 | Owner's Manual in English - Page 264
that corrects for both time and frequency response problems in the listening area and also performs a fully automated surround system setup. o Dolby Dolby Atmos Introduced first in the cinema, Dolby Atmos brings a revolutionary sense of dimension and immersion to the Home Theater experience. Dolby - Marantz NR1606 | Owner's Manual in English - Page 265
contains special metadata that describes the positioning of sounds within the room. This object audio data is decoded by a Dolby Atmos AV receiver and scaled for optimum playback through Home Theater products with Dolby speaker technology. Front panel Display Rear panel 265 Remote Index - Marantz NR1606 | Owner's Manual in English - Page 266
, using lossless coding technology to faithfully reproduce the sound of the studio master. This format provides the facility to support up to 8 audio channels with a sampling frequency up to 5.1-channels of digital discrete surround sound. Front panel Display Rear panel 266 Remote Index - Marantz NR1606 | Owner's Manual in English - Page 267
Express is an audio format supporting low bit rates (max. 5.1channels, 24 to 256 kbps). DTS-HD This audio technology provides higher sound quality and enhanced functionality than the full advantage of all speakers in your surround sound system. Front panel Display Rear panel 267 Remote Index - Marantz NR1606 | Owner's Manual in English - Page 268
BUT NOT LIMITED TO, PROCUREMENT OF SUBSTITUTE GOODS OR SERVICES; LOSS OF USE, DATA, OR PROFITS; OR which is an output channel that emphasizes low frequency effect sound. Surround audio is intensified by outputting 20 Hz to 120 Hz maintaining sound quality equivalent to a music CD. Front - Marantz NR1606 | Owner's Manual in English - Page 269
frequency Sampling involves taking a reading of a sound wave (analog signal) at regular intervals and ". The larger the value, the closer the reproduced sound is to the original. Speaker impedance This is an difference between the maximum undistorted sound level and the minimum discernible level - Marantz NR1606 | Owner's Manual in English - Page 270
Network AirPlay AirPlay sends (plays) contents recorded in iTunes or on an iPhone/iPod touch/iPad to a compatible device via the network. DLNA DLNA and DLNA CERTIFIED are trademarks and/or service marks of Digital Living Network subsidiary. Front panel Display Rear panel 270 Remote Index - Marantz NR1606 | Owner's Manual in English - Page 271
point and client. WPS (Wi-Fi Protected Setup) This is a standard drawn up by the Wi-Fi Alliance to ease the task of setting up wireless LAN connections and configuring security. Network Names (SSID: Service Set Identifier) When forming wireless LAN networks, groups are formed to prevent interference - Marantz NR1606 | Owner's Manual in English - Page 272
The room where this unit is placed is called the MAIN ZONE. Pairing Pairing (registration) is an operation that is required in order to connect a Bluetooth device to this unit using Bluetooth. When paired, the devices authenticate each other and can connect without mistaken connections occurring - Marantz NR1606 | Owner's Manual in English - Page 273
of this accessory with iPod, or iPhone, may affect wireless performance. AirPlay, iPad, iPhone, iPod, iPod classic, iPod nano, iPod shuffle and trademarks of Audyssey Laboratories. The Bluetooth® word mark and logos are registered trademarks owned by Bluetooth SIG, Inc. and any use 273 Remote Index - Marantz NR1606 | Owner's Manual in English - Page 274
has passed the interoperability test conducted by the Wi-Fi Alliance, a group that certifies interoperability among wireless LAN devices. Front panel Display Rear panel 274 Remote Index - Marantz NR1606 | Owner's Manual in English - Page 275
Ω/ohms 130 mV/47 kΩ/kohms 10 Hz - 100 kHz - +1, -3 dB (Direct mode) 98 dB (IHF-A weighted, Direct mode) Appendix Front panel Display Rear panel 275 Remote Index - Marantz NR1606 | Owner's Manual in English - Page 276
) STEREO ― 67 dB (IHF-A weighted, Direct mode) MONO ― 0.7 % (1 kHz) STEREO ― 1.0 % (1 kHz) Tips [AM] 520 kHz - 1710 kHz 18 μV Appendix Front panel Display Rear panel 276 Remote Index - Marantz NR1606 | Owner's Manual in English - Page 277
Contents Connections Playback Settings Tips o Wireless LAN section Network type (wireless LAN standard): Security: Radio frequency: No. of channels: Conforming to IEEE 802.11b are registered trademarks of the Wi-Fi Alliance. Appendix Front panel Display Rear panel 277 Remote Index - Marantz NR1606 | Owner's Manual in English - Page 278
range: Frequency band: Modulation scheme: Supported profiles: Corresponding codec: Transmission range (A2DP): Bluetooth Version 2.1 + EDR (Enhanced Power consumption in CEC standby mode: 0.5 W Power consumption in network standby mode: 2.7 W For purposes of improvement, specifications and - Marantz NR1606 | Owner's Manual in English - Page 279
Contents Connections o Dimensions (Unit : in. (mm)) Playback Settings Tips Appendix 1 1/4 (32) 2 1/2 (63) 8 1/4 (210) 12 15/16 (328) 14 13/16 (376) 2 3/16 ( : 18 lbs 12 oz (8.5 kg) Front panel Display 13 3/8 (340) Rear panel 2 3/16 (55) 1 15/16 (50) 279 Remote 6 13/16 (173) Index - Marantz NR1606 | Owner's Manual in English - Page 280
39 v A AirPlay 107 All Zone Stereo 121 Audio formats 250, 253, 255, 256 Audio settings 151, 157 Audyssey Dynamic EQ 264 Audyssey Dynamic Volume 264 Audyssey MultEQ 264 Audyssey settings 163, 188 Audyssey® Setup 186 Auto sound mode 128 Auto Standby 218 v B Bi-amp 45 Bluetooth device 77 - Marantz NR1606 | Owner's Manual in English - Page 281
N NAS 93 Network settings 207 v O Original sound mode 128 v P Pairing 77, 79 Pandora 97 PC 93 PCM multi-channel sound mode 127 Protection circuit 272 Pure direct 124 v R Random playback 72, 112 Rear panel 18 Remote control unit 22 Repeat playback 72, 112 Resetting factory settings 247 - Marantz NR1606 | Owner's Manual in English - Page 282
Contents Connections Playback Settings v T Text Search 114 Tips 229 Troubleshooting 231 TV 49, 50, 51 v U USB memory device 56, 73 v W Web control 142 Wi-Fi settings 208 Wired Video settings 151, 168 Volume 67, 117 Tips Appendix Front panel Display Rear panel 282 Remote Index - Marantz NR1606 | Owner's Manual in English - Page 283
TO ACCEPT AND BE BOUND BY THE TERMS OF THIS LICENSE, YOU CANNOT MAKE ANY USE OF THE WORK. Front panel Display Rear panel 283 Remote Index - Marantz NR1606 | Owner's Manual in English - Page 284
is intended to reduce, limit, or restrict any rights arising from fair use, fair dealing, first sale or other limitations on the exclusive rights of the copyright owner under copyright law or other applicable laws. be sold, leased or rented. Front panel Display Rear panel 284 Remote Index - Marantz NR1606 | Owner's Manual in English - Page 285
this License with every copy of the Executable Files or Source Code You distribute and ensure that anyone receiving such Executable Files and Source Code agrees that the terms of this License apply to such Executable Files valid and enforceable. Front panel Display Rear panel 285 Remote Index - Marantz NR1606 | Owner's Manual in English - Page 286
USE OF THIS SOFTWARE, EVEN IF ADVISED OF THE POSSIBILITY OF SUCH DAMAGE. o Tremolo http://wss.co.uk/pinknoise/tremolo Copyright (C) 2002 - 2009 Xiph.org Foundation Changes Copyright (C) 2009 - 2010 Robin Watts the following conditions are met: Front panel Display Rear panel 286 Remote Index - Marantz NR1606 | Owner's Manual in English - Page 287
SPECIAL, EXEMPLARY, OR CONSEQUENTIAL DAMAGES (INCLUDING, BUT NOT LIMITED TO, PROCUREMENT OF SUBSTITUTE GOODS OR SERVICES; LOSS OF USE, DATA, OR PROFITS; OR BUSINESS INTERRUPTION) HOWEVER CAUSED AND ON ANY THEORY specific prior written permission. Front panel Display Rear panel 287 Remote Index - Marantz NR1606 | Owner's Manual in English - Page 288
LIMITED TO, PROCUREMENT OF SUBSTITUTE GOODS OR SERVICES; LOSS OF USE, DATA, OR PROFITS; be used in advertising or otherwise to promote the sale, use or other dealings in this Software without prior notice and this permission notice appear in supporting documentation, and that the name of Remote Index - Marantz NR1606 | Owner's Manual in English - Page 289
the product. Marantz provides the source code based on the GPL and LPGL licenses at the actual cost upon your request to our customer service center. However, note that we make no guarantees concerning the source code. Please also understand that we do not offer support - Marantz NR1606 | Owner's Manual in English - Page 290
- Marantz NR1606 | Owner's Manual in English - Page 291
290 3520 10400 00AM Copyright © 2015 D&M Holdings Inc. All Rights Reserved.
-
 1
1 -
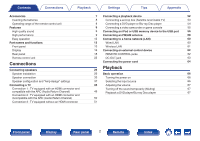 2
2 -
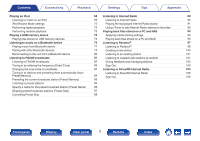 3
3 -
 4
4 -
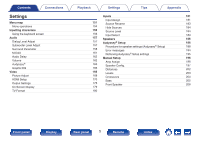 5
5 -
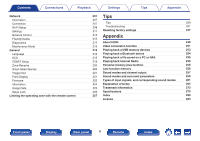 6
6 -
 7
7 -
8
-
9
-
10
-
11
-
12
-
13
-
14
-
15
-
16
-
17
-
18
-
19
-
20
-
21
-
22
-
23
-
24
-
25
-
26
-
27
-
28
-
29
-
30
-
31
-
32
-
33
-
34
-
35
-
36
-
37
-
38
-
39
-
40
-
41
-
42
-
43
-
44
-
45
-
46
-
47
-
48
-
49
-
50
-
51
-
52
-
53
-
54
-
55
-
56
-
57
-
58
-
59
-
60
-
61
-
62
-
63
-
64
-
65
-
66
-
67
-
68
-
69
-
70
-
71
-
72
-
73
-
74
-
75
-
76
-
77
-
78
-
79
-
80
-
81
-
82
-
83
-
84
-
85
-
86
-
87
-
88
-
89
-
90
-
91
-
92
-
93
-
94
-
95
-
96
-
97
-
98
-
99
-
100
-
101
-
102
-
103
-
104
-
105
-
106
-
107
-
108
-
109
-
110
-
111
-
112
-
113
-
114
-
115
-
116
-
117
-
118
-
119
-
120
-
121
-
122
-
123
-
124
-
125
-
126
-
127
-
128
-
129
-
130
-
131
-
132
-
133
-
134
-
135
-
136
-
137
-
138
-
139
-
140
-
141
-
142
-
143
-
144
-
145
-
146
-
147
-
148
-
149
-
150
-
151
-
152
-
153
-
154
-
155
-
156
-
157
-
158
-
159
-
160
-
161
-
162
-
163
-
164
-
165
-
166
-
167
-
168
-
169
-
170
-
171
-
172
-
173
-
174
-
175
-
176
-
177
-
178
-
179
-
180
-
181
-
182
-
183
-
184
-
185
-
186
-
187
-
188
-
189
-
190
-
191
-
192
-
193
-
194
-
195
-
196
-
197
-
198
-
199
-
200
-
201
-
202
-
203
-
204
-
205
-
206
-
207
-
208
-
209
-
210
-
211
-
212
-
213
-
214
-
215
-
216
-
217
-
218
-
219
-
220
-
221
-
222
-
223
-
224
-
225
-
226
-
227
-
228
-
229
-
230
-
231
-
232
-
233
-
234
-
235
-
236
-
237
-
238
-
239
-
240
-
241
-
242
-
243
-
244
-
245
-
246
-
247
-
248
-
249
-
250
-
251
-
252
-
253
-
254
-
255
-
256
-
257
-
258
-
259
-
260
-
261
-
262
-
263
-
264
-
265
-
266
-
267
-
268
-
269
-
270
-
271
-
272
-
273
-
274
-
275
-
276
-
277
-
278
-
279
-
280
-
281
-
282
-
283
-
284
-
285
-
286
-
287
-
288
-
289
-
290
-
291
 |
 |

.
AV Surround Receiver
NR1606
Owner’s Manual
Contents
Connections
Playback
Settings
Tips
Appendix
1
Front panel
Display
Rear panel
Remote
Index