MSI Nightblade MI3 User Manual
MSI Nightblade MI3 Manual
 |
View all MSI Nightblade MI3 manuals
Add to My Manuals
Save this manual to your list of manuals |
MSI Nightblade MI3 manual content summary:
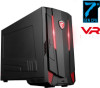
- MSI Nightblade MI3 | User Manual - Page 1
EXPERT Series Personal Computer EXPERT B908 G52-B9081XF - MSI Nightblade MI3 | User Manual - Page 2
Copyright Notice iii Trademarks iii Revision iii Upgrade and Warranty iv Acquisition of Replaceable Parts iv Technical Support iv Green Product Features iv Environmental Policy v Chemical Substances Information v Battery Information v Safety Instructions vi CE Conformity viii FCC-B Radio - MSI Nightblade MI3 | User Manual - Page 3
Preface Copyright Notice The material in this document is the intellectual property of MICRO-STAR INTERNATIONAL. We take every care in the preparation of this document, but no guarantee is given as to the correctness of its contents. Our products are under continual improvement and we reserve the - MSI Nightblade MI3 | User Manual - Page 4
. Technical Support If a problem arises with your system and no solution can be obtained from the user's manual, please contact your place of purchase or local distributor. Alternatively, please iv try the following help resources for further guidance. Visit the MSI website for technical guide - MSI Nightblade MI3 | User Manual - Page 5
the EU REACH Regulation (Regulation EC No. 1907/2006 of the European Parliament and the Council), MSI provides the information of chemical substances in products at: http://www.msi.com/html/popup/csr/evmtprtt_pcm.html Battery Information v European Union: Batteries, battery packs, and accumulators - MSI Nightblade MI3 | User Manual - Page 6
◙◙ Read the safety instructions carefully and thoroughly. ◙◙ All cautions and warnings on the equipment or user's manual should be noted. Keep the User's Guide that comes with the package for future reference. Keep this equipment away from humidity and high temperature. Lay this equipment - MSI Nightblade MI3 | User Manual - Page 7
equipment. vii If any of the following situations arises, get the equipment checked by service personnel: ◙◙ The power cord or plug is damaged. ◙◙ Liquid has penetrated into it work according to user's manual. ◙◙ The equipment has dropped and damaged. ◙◙ The equipment has obvious sign of breakage. - MSI Nightblade MI3 | User Manual - Page 8
. This equipment generates, uses and can radiate radio frequency energy and, if not installed and used in accordance with the instruction manual, may cause harmful interference to radio communications. However, there is no guarantee that interference will not occur in a particular installation - MSI Nightblade MI3 | User Manual - Page 9
for the use of certain dangerous substances in electrical and electronic equipment. Vietnam RoHS As from December 1, 2012, all products manufactured by MSI comply with Circular 30/2011/TT-BCT temporarily regulating the permitted limits for a number of hazardous substances in electronic and electric - MSI Nightblade MI3 | User Manual - Page 10
- MSI Nightblade MI3 | User Manual - Page 11
1 Overview Thank you for choosing the EXPERT Series Personal Computer. This system is your best PC choice. With the fantastic appearance, it can easily be set anywhere. The feature packed platform also gives you an exciting PC experience. - MSI Nightblade MI3 | User Manual - Page 12
Packing Contents EXPERT Series Power Cord Driver/ Utility Disc User Manual & Quick Guide 1-2 Keyboard (Optional) Mouse (Optional) M3 Screws (Optional) 6#32 Screws (Optional) VGA Sponge (Optional) * Please contact us immediately if any of the items is damaged or - MSI Nightblade MI3 | User Manual - Page 13
System Overview hh Front View Overview 1 1-3 1 Ventilator The ventilator on the enclosure is used for air convection and to prevent the equipment from overheating. Do not cover the ventilator. - MSI Nightblade MI3 | User Manual - Page 14
. 2 USB 2.0 Port The USB (Universal Serial Bus) port is for attaching USB devices such as keyboard, mouse, or other USB-compatible devices. It supports up to 480Mbit/s (Hi-Speed) data transfer rate. 3 HDMI-Out Port (Optional) The High-Definition Multimedia Interface is an all-digital audio/video - MSI Nightblade MI3 | User Manual - Page 15
data rate is selected. 1000 Mbit/sec data rate is selected. 6 USB 3.1 Gen1 Port The USB 3.1 Gen1 port is backward-compatible with USB 2.0 devices. It supports up to 5Gbit/s (SuperSpeed) data transfer rate. 7 CS-Out Center/ Subwoofer Out in 5.1/ 7.1 channel mode. 1-5 8 RS-Out Rear-Surround Out in - MSI Nightblade MI3 | User Manual - Page 16
13 Auto Fix Button Press the auto fix button to load default settings when operating system crashes and power button LED blinks. 14 DVI-D Port (Optional) The DVI-D (Digital Visual Interface-Digital) connector allows you to connect an LCD monitor. It provides a high-speed digital interconnection - MSI Nightblade MI3 | User Manual - Page 17
disk activity is detected. 3 USB 3.1 Gen1 Port (Type C) USB Type C port is allowing for reversible plug orientation. 4 USB 2.0 Port (with MSI Super Charger Technology) With MSI Super Charger Technology, not only does it function as normal USB 2.0 port, but it also enables users to charge USB devices - MSI Nightblade MI3 | User Manual - Page 18
For any further information on the product users purchased, please contact the local dealer. Do not attempt to upgrade or replace any component of the product if you are not an authorized dealer or service center, since it may cause the warranty void. It is strongly recommended that you contact the - MSI Nightblade MI3 | User Manual - Page 19
2 Getting Started This chapter provides you with the information on hardware setup procedures. While connecting peripheral devices, be careful in holding the devices and use a grounded wrist strap to avoid static electricity. - MSI Nightblade MI3 | User Manual - Page 20
the floor, so that your knees and elbows have the proper position (about 90-degree) when operating. 5. Put your hands on the desk naturally to support your wrists. 6. Avoid using your PC in a place where discomfort may occur. 7. The PC is an electrical device. Please treat it with great care to - MSI Nightblade MI3 | User Manual - Page 21
Getting Started Hardware Setup Important • The illustrations are for reference only. Your system may vary in appearance. • Please make sure the system has been grounded to earth through the AC power cord and the electrical outlet before powering on the system. 1. Connect the cables of keyboard, - MSI Nightblade MI3 | User Manual - Page 22
2. Connect the power cord to the system and electrical outlet. 1 2 2-4 3. Press the power button to power on the system. - MSI Nightblade MI3 | User Manual - Page 23
3 System Operations This chapter provides you with essential information on system operations. Important All information is subject to change without prior notice. - MSI Nightblade MI3 | User Manual - Page 24
a low-power or "Sleep" mode after a period of user inactivity. When used with an external ENERGY STAR qualified monitor, this feature also supports similar power management features of the monitor. To take advantage of these potential energy savings, the power management feature has been preset to - MSI Nightblade MI3 | User Manual - Page 25
System Operations Energy Saving Tips: ■■ Turn off the monitor by pressing the monitor power button after a period of user inactivity. ■■ Tune the settings in Power Options under Windows OS to optimize your PC's power management. ■■ Install power saving software to manage your PC's energy consumption - MSI Nightblade MI3 | User Manual - Page 26
Network Connection (Windows 10) hh Wired Network 1. Right-click [Start] and select [Control Panel] from the list. 2. Select [View network status and tasks] under [Network and Internet]. 3-4 3. Select [Set up a new connection or network]. - MSI Nightblade MI3 | User Manual - Page 27
System Operations 4. Choose [Connect to the Internet] and click [Next]. 5. Select [Broadband (PPPoE)] to connect using DSL or cable that requires a user name and password. 6. Type the information from your Internet Service Provider (ISP) and click [Connect] to establish your LAN connection. 3-5 - MSI Nightblade MI3 | User Manual - Page 28
the list. 3. To establish a new connection, select [Network and Sharing Center]. 4. Select [Set up a new connection or network]. 3-6 5. Followingly, choose [Manually connect to a wireless network] and click [Next] to continue. 6. Enter information for the wireless network you intend to add and - MSI Nightblade MI3 | User Manual - Page 29
saved on your system drive to other storage devices. If the following solution fails to recover your system, please contact the authorized local distributor or service center for further assistance. 3-7 - MSI Nightblade MI3 | User Manual - Page 30
Reset this PC 1. Go to [Start] , click [Settings] and select [Update and security]. 2. Select [Recovery] and click [Get started] under [Reset this PC] to start the system recovery. 3-8 3. The [Choose an option] screen pops up. Choose between [Keep my files] and [Remove everything]. Keep my - MSI Nightblade MI3 | User Manual - Page 31
hh Keep my files 1. Select [Keep my files]. System Operations 2. The [Your apps will be removed] screen shows a list of apps that will need to be reinstalled from the web or installation discs. Click [Next] to continue. 3-9 3. The next screen will show the changes to be made during the process. - MSI Nightblade MI3 | User Manual - Page 32
hh Remove everything 1. Select [Remove everything]. 2. If you have multiple hard drives, a screen will pop up, asking you to choose between [Only the drive where Windows is installed] and [All drives]. 3. Then select between [Just remove my files] and [Remove files and clean the drive]. 3-10 4. The
-
 1
1 -
 2
2 -
 3
3 -
 4
4 -
 5
5 -
 6
6 -
 7
7 -
8
-
9
-
10
-
11
-
12
-
13
-
14
-
15
-
16
-
17
-
18
-
19
-
20
-
21
-
22
-
23
-
24
-
25
-
26
-
27
-
28
-
29
-
30
-
31
-
32
 |
 |

G52-B9081XF
EXPERT Series
Personal Computer
EXPERT B908