Jensen JN102 Installation Guide
Jensen JN102 - 10.2" LCD Overhead Monitor System Manual
 |
UPC - 044476029639
View all Jensen JN102 manuals
Add to My Manuals
Save this manual to your list of manuals |
Jensen JN102 manual content summary:
- Jensen JN102 | Installation Guide - Page 1
® JN102 DVD PLAYER WITH DROP-DOWN VIDEO MONITOR SOURCE Installation Guide - Jensen JN102 | Installation Guide - Page 2
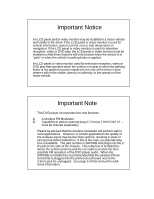
DVD play, the LCD panel or video monitor must be installed so that these features will DVD player incorporates two new features: 1) A wireless FM Modulator 2) Capability to add an optional plug in TV tuner ( P/N PODTVT - must be ordered separately) Please be advised that the wireless modulator will - Jensen JN102 | Installation Guide - Page 3
- Jensen JN102 | Installation Guide - Page 4
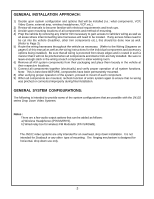
will be installed (i.e.: what components, VCP, Video Game, external amp, wireless headphones, VCP, etc.). 2) Review all manuals pages 6 of this manual as well as the wiring instructions for the individual for wireless FM Modulator (P/N SIRSWB). The JN102 video systems are only intended for an - Jensen JN102 | Installation Guide - Page 5
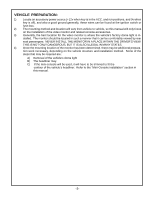
an accessory power source (+12v when key is in the ACC. and run positions, and 0v when key is off), and also a good ground generally, these wires can be found at the ignition switch or fuse-box. 2) The mounting method and location will vary from vehicle to vehicle, so this manual will only focus - Jensen JN102 | Installation Guide - Page 6
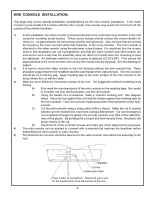
to the outer surface of the mini-console in the areas where the cut will be made. 3) Mark the cut to follow the necessary contour of the roof of the plastic. By bending the cut back and forth several times, the plastic will break cleanly at the cut. D) Check the fit of the trimmed console and make - Jensen JN102 | Installation Guide - Page 7
MOUNTING THE MINI-CONSOLE Roof Roof Support Headliner 12"x9"x3/4" Plywood Block (4) Self-Tapping Screws (not supplied) Mini-Console Video Unit (5) #8 Flat Washers (5) #8x3/4" Self-Tapping Screws -5- - Jensen JN102 | Installation Guide - Page 8
separately, part number: 8010730). This harness would plug into the Mini-Din connector on the main PCB as in steps 2 and 3 above. A/V Source Definitions: 1= AV1, VCP or VCP with TV Tuner (Mini-Din on main PCB) 2= AUX-IN (VCP, Game or future DVD etc...) 3= Built-in DVD 4= TV (TV Tuner) *NOTE - Jensen JN102 | Installation Guide - Page 9
out, both wires at the dome light will rest at + 12vdc. When the light is activated, one of these wires will switch to ground. This is the as the additional current draw of the Monitor's lights may not be supported by the output of the vehicles body control computer. Positive Switched Dome - Jensen JN102 | Installation Guide - Page 10
. If problem is limited to the dash radio, verify radio is tuned to the correct channel, and that power to the wired RF modulator is on. (Refer to instructions with modulator kit). Otherwise, verify all connections per the wiring diagram on page 6. Static on TV Stations (Tuner Version Only - Jensen JN102 | Installation Guide - Page 11
For Customer Service WWVWisi.taOuudr Wioevbosixte.cAtom Product Information, Photos, FAQ's Owner's Manuals 128-7390BA © Copyright 2006 Audiovox Electronics Corp. 150 Marcus Blvd. Hauppauge, NY 11788
-
 1
1 -
 2
2 -
 3
3 -
 4
4 -
 5
5 -
 6
6 -
 7
7 -
8
-
9
-
10
-
11
 |
 |
Installation Guide
JN102
DVD PLAYER WITH DROP-DOWN
VIDEO MONITOR
SOURCE
®