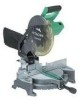
Hitachi C10FCE2 Operating Instructions
Hitachi C10FCE2 - 10 Inch Compound Miter Saw Manual
 |
UPC - 717709011465
View all Hitachi C10FCE2 manuals
Add to My Manuals
Save this manual to your list of manuals |
Hitachi C10FCE2 manual content summary:
- Hitachi C10FCE2 | Operating Instructions - Page 1
Model Modèle Modelo (Laser Marker Equipment) C 10FCH (Equipement à marqueur laser) (Equipo con marcador làser) C 10FCE Compound Saw Scie à onglets Ingletadora SAFETY INSTRUCTIONS AND INSTRUCTION MANUAL WARNING IMPROPER OR UNSAFE use of this power tool can result in death or serious bodily injury! - Hitachi C10FCE2 | Operating Instructions - Page 2
7 OPERATION AND MAINTENANCE 8 NAME OF PARTS 8 SPECIFICATIONS 9 PAGE APPLICATIONS 10 PREPARATION BEFORE OPERATION 10 BEFORE USING 11 BEFORE CUTTING 12 PRACTICAL APPLICATIONS 15 SAW BLADE MOUNTING AND DISMOUNTING 20 MAINTENANCE AND INSPECTION 21 SERVICE AND REPAIRS 23 Français TABLE DES - Hitachi C10FCE2 | Operating Instructions - Page 3
Instruction Manual. NEVER use this power tool in a manner that has not been specifically recommended by HITACHI REMOVE ADJUSTING KEYS AND WRENCHES BEFORE STARTING TOOL. Always confirm that all keys and adjusting wrenches have been removed locks on the doors and on the master switches parts. Always wear non - Hitachi C10FCE2 | Operating Instructions - Page 4
keep tools sharp and clean for the best and safest performance. Always follow instructions for lubricating the tool and for changing accessories. 13. ALWAYS DISCONNECT THE TOOL before servicing and before changing blades or other accessories. 14. NEVER RISK UNINTENTIONAL STARTING WHEN PLUGGING - Hitachi C10FCE2 | Operating Instructions - Page 5
. Always use outboard stands to provide support for long workpieces that overhang the table of the compound saw. 22. Always operate the tool after ensuring the workpiece is fixed properly with a vise assembly. 23. The operating instructions provided with the tool shall direct the user to secure the - Hitachi C10FCE2 | Operating Instructions - Page 6
freehand operation with the compound saw. 5. Never reach around the saw blade. 6. Always turn off tool and wait for saw blade to stop before moving workpiece or changing settings. 7. Always disconnect power before changing blade or servicing. 8. Saw blade diameter is 10" (255mm). 9. No load speed - Hitachi C10FCE2 | Operating Instructions - Page 7
in this Instruction Manual, including not using the power tool in wet environments. To keep the double insulation system effective, follow these precautions: * Only HITACHI AUTHORIZED SERVICE CENTER should disassemble or assemble this power tool, and only genuine HITACHI replacement parts should be - Hitachi C10FCE2 | Operating Instructions - Page 8
Blade Laser Marker (Only C10FCH) Vise Assembly Fence (B) Turntable Lower Guard Rotation Direction Indicator (B) (For bevel scale) Fence (A) Table Insert Indicator (A) (For miter scale) Lever Side Handle Fig. 1 Switch (for Laser marker) (Only C10FCH) Trigger Switch Nameplate Base Locking Pin - Hitachi C10FCE2 | Operating Instructions - Page 9
Product (Only Model Wave length 400~700 nm C10FCH) Laser medium Laser Diode Applicable saw blade Outside Dia. 10" (255mm) Hole Dia. 5/8" (15.9mm) No load speed 5000/min Max. Head Turntable Max. sawing dimension sawing dimension Miter 0 0 Max. Height Max. Width or Max. Height Max - Hitachi C10FCE2 | Operating Instructions - Page 10
preparations before operating the power tool: 1. Installation Base 5/16" (8mm) Bolt 10-3/8" (267mm) 1" (25mm) Thick Bench 11/32" (9mm) 4 Holes the power tool. 6mm Bolt Holder (B) adjustment: Loosen the 6mm bolt with the supplied 10mm box wrench. Adjust the holder (B) until its bottom surface - Hitachi C10FCE2 | Operating Instructions - Page 11
to disengage the locking pin more easily and safely. The lock position of the locking pin is for carrying and storage only. Locking Pin Fig. 6 3. Installing the dust bag, holder, stopper and vises (The holder and stopper are optional accessories.) Attach the dust bag and vise assembly as indicated - Hitachi C10FCE2 | Operating Instructions - Page 12
Run After confirming that no one is standing behind, the power tool start and confirm that no operating abnormalities exist before attempting a cutting operation. 10. Inspect the rotating stability of the saw blade. For precise cutting, rotate the saw blade and check for deflection to confirm that - Hitachi C10FCE2 | Operating Instructions - Page 13
Height Adjustment Bolt 6mm (Optional accessory) Fig. 10 5. Confirmation for use of sub fence ...(Optional accessory) Sub Fence 6mm Wing Bolt Fig. 11 WARNING: In the case of left bevel cutting, remove the sub fence. Supposing it is not able to remove it, It will contact the blade or some part of - Hitachi C10FCE2 | Operating Instructions - Page 14
this tool to the laser marker. A switch lights up the laser marker. (Fig. 14) Depending upon your cutting choice, the laser line can be aligned with the left side of the cutting width (saw blade) or the ink line on the right side. The laser line is adjusted to the width of the saw blade at the time - Hitachi C10FCE2 | Operating Instructions - Page 15
by little and secure it by vise at a position where the laser line overlaps with the ink line. Work on the grooving again and check the position of the laser line. If you wish to change the laser line's position, make adjustments again following the steps from (1) to (3). Fig. 17 NOTE: Check and - Hitachi C10FCE2 | Operating Instructions - Page 16
that it may do so, loosen the 6 mm wing bolt (B) and move the vise assembly to a position where it will not contact the saw blade. 3. Cutting Operation Adjusting Line (1) As shown in Fig. 21 the width of the saw blade is the width of the cut. Therefore, slide the workpiece to the right (viewed - Hitachi C10FCE2 | Operating Instructions - Page 17
cutting groove of the workpiece and to contact the saw blade. 6. Compound cutting procedures Compound cutting can be performed by following the instructions in 4 and 5 above. For maximum dimensions for compound cutting, refer to "SPECIFICATIONS" table on page 9. CAUTION: Always secure the workpiece - Hitachi C10FCE2 | Operating Instructions - Page 18
that are ideal for the two crown molding types. NOTE: For convenience, positive stops are provided for the miter setting (left and right 31.6°) positions. For miter cut setting If the turntable has been set to either of the angles described, move the turntable adjusting side handle a little to the - Hitachi C10FCE2 | Operating Instructions - Page 19
it will not contact the saw blade. Position crown molding with its WALL CONTACT EDGE against the guide fence and its CEILING CONTACT EDGE against the crown molding Stoppers as shown in Fig. 30-b. Adjust the crown molding Stoppers according to the size of the crown molding. Tighten the 6mm wing bolt - Hitachi C10FCE2 | Operating Instructions - Page 20
Fence Vise Assembly Clamp Aluminum Sash 6mm Knob Bolt Wood Plate Fig. 31-a Wood Plate Wood Plate Aluminum Sash Fig. 31-b 9. How to use the dust bag (Standard accessory) Dust Bag (1) When the dust bag has become full of sawdust, dust will be blown out of the dust bag when the saw blade - Hitachi C10FCE2 | Operating Instructions - Page 21
and tighten the bolt by turning it to the left by standard accessorie's wrench (10mm box wrench) as indicated in Fig. 33-c. CAUTION: * Confirm that the spindle lock has returned to the retract position after installing or removing the saw blade. * Tighten the bolt so it does not come loose during - Hitachi C10FCE2 | Operating Instructions - Page 22
M6 hexagonal head bolts (2) are loose, align the sides of the fence and saw blade with the steel square. After adjusting the saw blade and fence to a ninety-degree angle, tighten the lever securing hexagonal head bolts (2). Saw Blade Lever Fence Hex. Head Bolt Steel Square Fig. 34-a Fig. 34 - Hitachi C10FCE2 | Operating Instructions - Page 23
replacement parts will be used and that the double insulation system will be protected, all service (other than routine maintenance) must be performed by an AUTHORIZED HITACHI POWER TOOL REPAIR CENTER ONLY. NOTE: Specifications are subject to change without any obligation on the part of HITACHI - Hitachi C10FCE2 | Operating Instructions - Page 24
d'une manière qui n'est pas spécifiquement recommandée par HITACHI. SIGNIFICATION DES MOTS D'AVERTISSEMENT AVERTISSEMENT indique des situations potentiellement dangereuses LES AVERTISSEMENTS ET TOUTES LES INSTRUCTIONS D'UTILISATION DU MANUEL AVANT DE METTRE L'OUTIL EN SERVICE OU DE L'ENTRETENIR : - Hitachi C10FCE2 | Operating Instructions - Page 25
si le travail doit dégager de la poussière. 10. TOUJOURS FIXER LA PIÈCE À LA GARDE OU la sécurité. Toujours suivre les instructions de graissage et de remplacement des est pas complètement arrêtée. 24. Toujours utiliser des supports extérieurs pour assurer la stabilité des longues pièces - Hitachi C10FCE2 | Operating Instructions - Page 26
les consignes de sécurité et les instructions d'utilisation de l'OUTIL ELECTRIQUE avant de de la table et de provoquer des blessures. 10. Pendant une coupe d'onglet ou de biseau, toujours fermement pendant le travail. 21. Toujours utiliser des supports extérieurs pour soutenir les pièces longues qui - Hitachi C10FCE2 | Operating Instructions - Page 27
jamais utiliser l'OUTIL ELECTRIQUE si l'on ne comprend pas bien les instructions de ce manuel. 2. Ne jamais s'éloigner de l'OUTIL ELECTRIQUE sans ; toujours s'assurer qu'elle glisse en douceur avant d'utiliser l'outil. 10. Ne jamais endommager le cordon d'alimentation de l'outil. 11. Quand l'OUTIL - Hitachi C10FCE2 | Operating Instructions - Page 28
service après-vente Hitachi agréé. UTILISER LE CORDON DE RALLONGE APPROPRIÉ Utiliser exclusivement un cordon de rallonge en bon état. Lorsqu'on utilise un cordon de rallonge, veiller à ce qu'il soit suffisamment lourd pour supporter à à 0 - 6 6 - 10 10 - 12 12 - 16 CALIBRE MINIMUM DES - Hitachi C10FCE2 | Operating Instructions - Page 29
Français CONSERVER CES INSTRUCTIONS ET LES METTRE A LA DISPOSITION DES AUTRES UTILISATEURS ET PROPRIETAIRES DE CET OUTIL ! 29 - Hitachi C10FCE2 | Operating Instructions - Page 30
C10FCE Sac à copeaux Tête de moteur Poignée Carter Moteur Marqueur à laser (C10FCH seulement) Ensemble d'étau Garde (B) Lame Protection inférieure Sens de Levier Poignée latérale Fig. 1 Commutateur (pour marqueur à laser) (C10FCH seulement) Gâchette Plaque signalétique Socle 30 Goupille de - Hitachi C10FCE2 | Operating Instructions - Page 31
sur Longueur d'onde 400 - 700 nm le modèle C10FCH) Type de laser Diode Lame applicable Dia. extérieur 10" (255mm) Dia. d'orifice 5/8" (15,9mm) Vitesse à vide 5000 tr/min Dimension Tête Plaque tournante Dimension de coupe max. de coupe Coupe d'onglet 0 max. 0 Hauteur max. 2-5/16 - Hitachi C10FCE2 | Operating Instructions - Page 32
Avant de mettre l'outil électrique en service, effectuer les préparations suivantes : 1. Installation 10-3/8" (267mm) Epaisseur de l'établi ) d'épaisseur. Le support (B) fixé à l'arrière du socle aide à stabiliser l'outil électrique. Boulon de 6mm Support (B) Régler le support Déplacer jusqu'à ce - Hitachi C10FCE2 | Operating Instructions - Page 33
verrouillée de la goupille de verrouillage ne doit servir que pour le transport et le remisage. Fig. 6 3. Installer le sac à copeaux, le support, la butée et les étaux (Le support et la butée sont des accessoires en option.) Fixer le sac à copeaux et l'ensemble d'étau comme indiqué sur la Fig. 1 et - Hitachi C10FCE2 | Operating Instructions - Page 34
vérifier qu'il n'y a pas d'anomalie de fonctionnement avant d'effectuer une coupe. 10. Vérifier la stabilité de rotation de la lame. Pour assurer des coupes pr boulon de réglage de hauteur de 6mm, et régler la hauteur du support. Ecrou à ailettes de 6mm (accessoire en option) Boulon de réglage de - Hitachi C10FCE2 | Operating Instructions - Page 35
Pour installer la butée, la fixer au support avec le boulon à ailettes option) de 6 mm comme indiqué sur la Fig. 10. Ecrou à ailettes de 6mm (accessoire à laser sont hors service. * Exercer la plus grande attention dans la manoeuvre du commutateur de positionnement de la ligne laser quand - Hitachi C10FCE2 | Operating Instructions - Page 36
de l'outil); en effet, cela peut dérégler la position de la ligne laser provoquant un endommagement du marqueur laser et une diminution de la durée de service. * Ne conserver le laser allumé que pendant l'opération de coupe. L'allumage prolongé du laser peut entraîner une diminution de la durée de - Hitachi C10FCE2 | Operating Instructions - Page 37
prévus aux opérations (1) à (3). Marquage (prémarquage) Fig. 17 REMARQUE : Vérifier et s'assurer périodiquement que la position de la ligne laser est convenable. Pour effectuer la vérification, tracer à l'encre une ligne perpendiculaire sur la pièce de 1-1/2" (38mm) de hauteur et de 3-1/2" (89mm - Hitachi C10FCE2 | Operating Instructions - Page 38
sur la garde droite (garde (A)), en desserrant le boulon à ailettes de 6mm. (2) Le support de vis se relève ou s'abaisse en fonction de la hauteur de la pièce pour le modèle C10FCH) Si le marqueur laser est utilisé, aligner la ligne laser sur le côté gauche de la lame de scie, puis aligner la - Hitachi C10FCE2 | Operating Instructions - Page 39
coupe de la pièce et il touchera la lame. 6. Procédures de coupe mixte La coupe mixte s'effectue en suivant les instructions de 4 et 5 ci-dessus. Pour les dimensions maximales de la coupe mixte, voir le tableau des "SPÉCIFICATIONS" à la page 31. ATTENTION : Pour une coupe mixte, toujours fixer la - Hitachi C10FCE2 | Operating Instructions - Page 40
Français 7. Procédures de coupe de corniche complexe La Fig. 24 montre deux types de corniche complexe courants ayant des angles de 38° et de 45°. Pour les montures de corniche complexe, voir la Fig. 25. Surface supérieure Plafond Plafond Mur Surface inférieure Mur Fig. 24 12 Coin - Hitachi C10FCE2 | Operating Instructions - Page 41
Français 3 Disposer la corniche complexe de façon que la surface supérieure ( sur la Fig. 24) touche la garde comme indiqué à la Fig. 29. Tête Tête Echelle d'angle de biseau 4 1 Garde Echelle d'angle d'onglet Plaque tournante Fig. 26 Socle 2 Garde Echelle d'angle de biseau 3 Socle Plaque - Hitachi C10FCE2 | Operating Instructions - Page 42
Français AVERTISSEMENT : Maintenir ou serrer dans un étau la moulure de corniche contre la garde; dans le cas contraire, la moulure de corniche peut être projetée hors de la table et provoquer une blessare corporelle. Ne pas faire de coupe en biseau. L'outil ou la lame de scie peuvent venir en - Hitachi C10FCE2 | Operating Instructions - Page 43
-dessus. La lame s'enlève facilement si le carter de sécurité est relevé. ATTENTION : Ne jamais tenter d'installer des lames de scie de plus de 10" (255mm) de diamètre. Toujours installer des lames de scie d'un diamètre égal ou inférieur - Hitachi C10FCE2 | Operating Instructions - Page 44
Français ENTRETIEN ET INSPECTION AVERTISSEMENT : Pour éviter tout risque d'accident ou de blessure, toujours vérifier que l'interrupteur à gâchette est coupé et que la fiche d'alimentation est débranchée de la prise secteur avant d'entretenir ou d'inspecter l'outil. 1. Inspection de la lame - Hitachi C10FCE2 | Operating Instructions - Page 45
C10FCH) Si la ligne laser devient invisible en raison des copeaux et autres débris laser, essuyer et nettoyer la fenêtre avec un chiffon sec ou un chiffon doux humecté d'une solution d'eau savonneuse, etc. SERVICE à un SERVICE APRES-VENTE D'OUTILS ELECTRIQUES HITACHI AGREE. REMARQUE : - Hitachi C10FCE2 | Operating Instructions - Page 46
, los riesgos están identificados con ADVERTENCIAS en dicha herramienta y en este Manual de instrucciones. No utilice NUNCA esta herramienta eléctrica de ninguna forma que no esté específicamente recomendada por HITACHI. SIGNIFICADO DE LAS PALABRAS DE SEÑALIZACIÓN ADVERTENCIA indica situaciones - Hitachi C10FCE2 | Operating Instructions - Page 47
contra el polvo si la operación de corte produce polvo. 10. ASEGURE SIEMPRE LA PIEZA DE TRABAJO EN LA ESCUADRA DE los accesorios recomendados, consulte el manual de instrucciones. Para evitar lesiones DE UTILIZAR LA HERRAMIENTA, COMPRUEBE SI TIENE PARTES DAÑADAS. Compruebe siempre si el protector - Hitachi C10FCE2 | Operating Instructions - Page 48
: 1. Antes de intentar utilizar esta HERRAMIENTA ELÉCTRICA, lea este manual y familiarícese con las normas de seguridad y las instrucciones de ya que de lo contrario podría salirse de la mesa y causar lesiones serias. 10. Durante el corte de ingletes o en bisel, espere siempre hasta que la hoja de - Hitachi C10FCE2 | Operating Instructions - Page 49
ÉCTRICA para aplicaciones no especificadas en este manual. 5. No utilice nunca la herramienta con las partes móviles. 6. No acerque las manos a la hoja de sierra. 7. No toque nunca las partes móviles la herramienta, confirme que se desliza suavemente. 10. No dañe nunca el cable de alimentación - Hitachi C10FCE2 | Operating Instructions - Page 50
, ANTES DE UTILIZAR ESTA INGLETADORA ABATIBLE, LEA ESTE MANUAL DE INSTRUCCIONES 1. Para utilizar esta ingletadora abatible, utilice El diámetro de la hoja de sierra es de 10" (255mm). 9. La velocidad sin carga es de 5000/min. 10. Para reducir el riesgo de lesiones, haga el retornar por Hitachi. 50 - Hitachi C10FCE2 | Operating Instructions - Page 51
de No más de 0 - 6 6 - 10 10 - 12 12 - 16 CALIBRE MÍNIMO PARA Manual HITACHI. * Limpie el exterior de la herramienta eléctrica solamente con un paño suave humedecido en agua jabonosa, y después séquela bien. * No utilice disolventes, gasolina, ni diluidor de pintura para limpiar las partes - Hitachi C10FCE2 | Operating Instructions - Page 52
una operación segura y a mantener la herramienta eléctrica. Algunas ilustraciones de este manual pueden mostrar detalles o dispositivos diferentes a los de su propia herramienta eléctrica. NOMENCLATURA DE PARTES MODELO C10FCH/MODELO C10FCE Cabezal del motor Caja de engranajes Empuñadura Bolsa - Hitachi C10FCE2 | Operating Instructions - Page 53
ser CLASE II (Sólo modelo Longitud de onda 400 - 700 nm C10FCH) Medio de láser Diodo láser Hoja de sierra aplicable Diámetro exterior: 10" (255mm) Diámetro del orificio: 5/8" (15,9mm) Velocidad sin carga 5000/min Dimensión Cabeza Mesa giratoria Dimensión máxima de corte máxima Ingletes - Hitachi C10FCE2 | Operating Instructions - Page 54
, realice los preparativos siguientes: 1. Instalación Base Perno de 5/16" (8mm) 10-3/8" (267mm) Banco grueso de 1" (25mm) 11/32" (9mm), 4 orificios de trabajo con grosor de 1" (25mm). El soporte (B) fijado a la parte posterior de la base ayuda a estabilizar la herramienta eléctrica. Perno de - Hitachi C10FCE2 | Operating Instructions - Page 55
Español 2. Liberación del pasador de bloqueo Empuñadura Cuando la herramienta eléctrica esté preparada para transportarse, sus partes principales estarán aseguradas mediante el pasador de bloqueo. Mueva ligeramente la empuñadura de forma que el pasador de bloqueo pueda desenganchar. Caja de - Hitachi C10FCE2 | Operating Instructions - Page 56
ninguna anormalidad antes de intentar realizar la operación de corte. 10. Inspeccione la estabilidad de rotación de la hoja de sierra. vibraciones y ocurrir un accidente. ANTES DEL CORTE 1. Ángulo oblicuo Cuando la herramienta sale de fábrica, está ajustada para corte de 0°, en bisel de 45° hacia - Hitachi C10FCE2 | Operating Instructions - Page 57
perno de mariposa de 6 mm, como se muestra en la Fig. 10. Tuerca de mariposa de 6mm (accesorio opcional) Mueva Perno de mariposa de secundaria. Si no la desmonta, entrará en contacto con la hoja o con alguna parte de la herramienta, y causará lesiones de gravedad al operador. En el caso de - Hitachi C10FCE2 | Operating Instructions - Page 58
Español * Radiación láser: No mire fijamente el haz. * Radiación láser sobre la mesa de trabajo. No mire fijamente el haz. Evite la exposición de los ojos a radiación directa, pues podría sufrir lesiones. * No lo desmonte. * No aplique un impacto fuerte al marcador láser (cuerpo principal de la - Hitachi C10FCE2 | Operating Instructions - Page 59
el interruptor. Fig. 19 ADVERTENCIA: Este bloqueo permitirá evitar el encendido accidental de la herramienta eléctrica o la utilización por parte de personas no autorizadas (especialmente los niños). Para evitar la utilización no autorizada de esta herramienta, inserte un candado a trav - Hitachi C10FCE2 | Operating Instructions - Page 60
Español 2. Utilización del conjunto de tornillo de corpintero (Accesorio estándar) Perno de Soporte roscado mariposa de 6mm (B) Escuadra de guia Eje de tornillo Perilla Placa del tornillo de carpintero (1) El conjunto de tornillo de carpintero puede montarse en la escuadra de guía izquierda ( - Hitachi C10FCE2 | Operating Instructions - Page 61
ón Aflojar Apretar Fig. 23 ADVERTENCIA: Cuando la pieza de trabajo esté asegurada en la parte izquierda o derecha de la hoja de sierra, la parte de corte corto entrará en contacto con el resto de la parte derecha o izquierda de dicha hoja. Desconecte siempre la alimentación y deje que la hoja de - Hitachi C10FCE2 | Operating Instructions - Page 62
Español 7. Procedimientos de corte con moldura en vértice En la Fig. 24 se muestran los tipos de moldura en vértice con ángulos de 38° y 45°. Con respecto a las molduras en vértice típicas, consulte la Fig. 25 Superficie superior Techo Techo Pared Superficie inferior Pared 12 34 - Hitachi C10FCE2 | Operating Instructions - Page 63
Español 2 Incline la cabeza hacia la izquierda y ajuste el ángulo de corte en bisel de la forma siguiente: * Para molduras en vértice de tipo de 45°: 30° (marca ) * Para molduras en vértice de tipo de 38°: 33,9°(marca ) 3 Coloque la moldura en el vértice de forma que la superficie superior ( de la - Hitachi C10FCE2 | Operating Instructions - Page 64
Español ADVERTENCIA: Siempre asegure firmemente la moldura en vértice a la escuadra de guía; de lo contrario, la misma podría zafarse de la mesa y producir lesiones. No efectúe el corte en bisel. El cuerpo principal o la hoja de sierra podría entrar en contacto con la escuadra de guía secundaria, - Hitachi C10FCE2 | Operating Instructions - Page 65
Español MONTAJE Y DESMONTAJE DE LA HOJA DE SIERRA ADVERTENCIA: * Para evitar accidentes o lesiones, suelte siempre el interruptor de disparo y desconecte el enchufe del cable de alimentación del tomacorriente antes de extraer o instalar la hoja de sierra. Si se realizara la tarea de corte sin haber - Hitachi C10FCE2 | Operating Instructions - Page 66
la cubierta de seguridad. PRECAUCIÓN: No intente instalar nunca hojas de sierra de diámetro superior a 10" (255mm). Instale siempre las hojas de sierra de 10" (255mm) de diámetro o menos. MANTENIMIENTO E INSPECCIÓN ADVERTENCIA: Para evitar accidentes o lesiones, confirme que el interruptor - Hitachi C10FCE2 | Operating Instructions - Page 67
el funcionamiento sin carga, y sople aire seco desde el orificio provisto en la parte trasera del motor. Esta acción es sumamente eficaz para descargar el polvo y CENTRO DE REPARACIONES DE HERRAMIENTAS ELÉCTRICAS AUTORIZADO POR HITACHI. NOTA: Las especificaciones están sujetas a cambio sin previo - Hitachi C10FCE2 | Operating Instructions - Page 68
68 - Hitachi C10FCE2 | Operating Instructions - Page 69
69 - Hitachi C10FCE2 | Operating Instructions - Page 70
70 - Hitachi C10FCE2 | Operating Instructions - Page 71
71 - Hitachi C10FCE2 | Operating Instructions - Page 72
72 - Hitachi C10FCE2 | Operating Instructions - Page 73
73 - Hitachi C10FCE2 | Operating Instructions - Page 74
74 - Hitachi C10FCE2 | Operating Instructions - Page 75
75 - Hitachi C10FCE2 | Operating Instructions - Page 76
WARNING: Some dust created by power sanding, sawing, grinding, drilling, and other construction activities contains como las máscares para el polvo especialmente diseñados para eliminar las partículas minúsculas. Issued by Hitachi Koki Co., Ltd. Shinagawa Intercity Tower A, 15-1, Konan 2-chome,
-
 1
1 -
 2
2 -
 3
3 -
 4
4 -
 5
5 -
 6
6 -
 7
7 -
8
-
9
-
10
-
11
-
12
-
13
-
14
-
15
-
16
-
17
-
18
-
19
-
20
-
21
-
22
-
23
-
24
-
25
-
26
-
27
-
28
-
29
-
30
-
31
-
32
-
33
-
34
-
35
-
36
-
37
-
38
-
39
-
40
-
41
-
42
-
43
-
44
-
45
-
46
-
47
-
48
-
49
-
50
-
51
-
52
-
53
-
54
-
55
-
56
-
57
-
58
-
59
-
60
-
61
-
62
-
63
-
64
-
65
-
66
-
67
-
68
-
69
-
70
-
71
-
72
-
73
-
74
-
75
-
76
 |
 |

SAFETY INSTRUCTIONS AND INSTRUCTION MANUAL
WARNING
IMPROPER OR UNSAFE
use of this power tool can result in death or serious bodily injury!
This manual contains important information about product safety. Please read and understand
this manual BEFORE operating the power tool. Please keep this manual available for other
users and owners before they use the power tool. This manual should be stored in safe place.
INSTRUCTIONS DE SECURITE ET MODE D’EMPLOI
AVERTISSEMENT
Une utilisation
INCORRECTE OU DANGEREUSE
de cet outil motorisé peut entraîner la mort
ou de sérieuses blessures corporelles !
Ce mode d’emploi contient d’importantes informations à propos de la sécurité de ce produit.
Prière de lire et de comprendre ce mode d’emploi AVANT d’utiliser l’outil motorisé. Garder ce
mode d’emploi à la disponibilité des autres utilisateurs et propriétaires avant qu’ils utilisent
l’outil motorisé. Ce mode d’emploi doit être conservé dans un endroit sûr.
INSTRUCCIONES DE SEGURIDAD Y MANUAL DE INSTRUCCIONES
ADVERTENCIA
¡La utilización
INAPROPIADA O PELIGROSA
de esta herramienta eléctrica puede resultar en lesiones
de gravedad o la muerte!
Este manual contiene información importante sobre la seguridad del producto. Lea y comprenda este
manual ANTES de utilizar la herramienta eléctrica. Guarde este manual para que puedan leerlo otras
personas antes de utilizar la herramienta eléctrica. Este manual debe ser guardado en un lugar seguro.
DOUBLE INSULATION
DOUBLE ISOLATION
AISLAMIENTO DOBLE
Model
Compound Saw
Modèle
Scie à onglets
Modelo
Ingletadora
C 10FCH
C 10FCE
(Laser Marker Equipment)
(Equipement à marqueur laser)
(Equipo con marcador làser)