Hikvision DS-KH8350-WTE1 Quick Start Guide
Hikvision DS-KH8350-WTE1 Manual
 |
View all Hikvision DS-KH8350-WTE1 manuals
Add to My Manuals
Save this manual to your list of manuals |
Hikvision DS-KH8350-WTE1 manual content summary:
- Hikvision DS-KH8350-WTE1 | Quick Start Guide - Page 1
door sta on manually or enable DHCP to get the network parameters automa cally. e. Tap OK to save the se ngs. 5. Tap Finish to save the se ngs. 3 Refers to Video Intercom Network Indoor Sta on Configura on Guide (Scan the QR code) for details. Refers to Video Intercom Network Indoor Sta on Opera - Hikvision DS-KH8350-WTE1 | Quick Start Guide - Page 2
'ambiente di installazione. Nota: Per l'installazione, fare riferimento alla figura e al Manuale dell'utente. Operazioni preliminari A va disposi vo Prima di u lizzare il disposi vo è necessario a varlo impostando una password sicura. A vare il disposi vo localmente o da remoto tramite il so ware - Hikvision DS-KH8350-WTE1 | Quick Start Guide - Page 3
asamblare sunt incluse. ●Asiguraţi-vă că toate echipamentele aferente sunt oprite în mpul instalării. ●Verificaţi specificaţiile produsului pentru mediul de instalare. Not Catatan: Untuk cara pemasangan, silakan merujuk ke gambar dan Manual Pengguna. Memulai Ak an Perangkat Pertama Anda harus mengak - Hikvision DS-KH8350-WTE1 | Quick Start Guide - Page 4
D'INSTALLATION La force supplémentaire doit être égale à trois fois le poids de l'équipement et au minimum à 50 N. L'équipement et ses supports de MANUAL E O PRODUTO DESCRITO, COM O SEU HARDWARE, SOFTWARE E FIRMWARE, SÃO FORNECIDOS "TAL COMO ESTÃO" E "COM TODAS AS SUAS FALHAS E ERROS". A HIKVISION
-
 1
1 -
 2
2 -
 3
3 -
 4
4
 |
 |

2
1
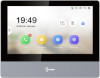
DS-KH8350-(W)TE1
Network Indoor Sta±on
UD20185B
1
2
3
4
5
7
8
6
Screen
1
Screen
Microphone
2
Unlock Key
3
Loudspeaker
4
SD Card Slot
5
Debugging Port
6
Network Interface
7
Power/Alarm Terminal
8
Note: The appearance of the device varies according to different models. Refers to the actual device for
detailed informa±on.
Terminal and Wiring
2
There are 20 pins in the terminal on the rear panel of the indoor sta±on: 2 RS-485 pins, 2
power pins, 2 alarm output pins, 8 alarm input pins, and 4 reserved pins.
Installa±on
3
It supports wall moun±ng.
ENGLISH
Diagram References
Appearance
1
Installa±on Accessory Descrip±on
The wall moun±ng plate is required when installing the indoor sta±on on the wall.
The dimension of wall moun±ng plate is shown.
Wall Moun±ng
Make sure the device in the package is in good condi±on and all the assembly parts
are included.
The power supply the indoor sta±on supports is 12 VDC. Please make sure your
power supply matches your indoor sta±on.
Make sure all related equipments are power-off during the installa±on.
Check the product specifica±on for the installa±on environment.
Before You Start
1. Fix the wall moun±ng plate to the wall with supplied screws.
2. Put the indoor sta±on on the holder of the wall moun±ng plate.
Indoor Sta±on
5.5
95
95.6
15.3
4.6
60
42.1
Unit:mm
1
3
Scan the QR code to get the Opera±on Guide
for detailed informa±on.
Scan the QR code to get the Configura±on
Guide for detailed informa±on.
Ge²ng Started
4
You are required to ac±vate the device first by se²ngs a strong password before you
can use the device.
1. Power on the device. It will enter the ac±va±on page automa±cally.
2. Create a password and confirm it.
3. Tap OK to ac±vate the indoor sta±on.
Ac±vate Indoor Sta±on
1
Quick Configura±on
2
Refers to Video Intercom Network Indoor Sta±on Configura±on Guide (Scan the QR code) for details.
Refers to Video Intercom Network Indoor Sta±on Opera±on Guide (Scan the QR code) for details.
Screw
Screw
Installa±on Part
Wall
1. Choose Language and tap Next.
2. Set network parameters and tap Next.
- Edit Local IP, Subnet Mask and Gateway parameters.
- Enable DHCP, the device will get network parameters automa±cally.
3. Configure the indoor sta±on parameters.
- .Select Indoor Sta±on and tap Next to link main door sta±on.
a. Edit Floor and Room No.
b. Create and confirm SIP register password.
Note: If you want to add the indoor sta±on to the door sta±on, the SIP password of the indoor sta±on
should be the same as the registra±on password of the door sta±on.
c. Tap Advanced Se²ngs to edit Community No, Building No. and Unit No.
d. Op±onal: Enable Indoor Sta±on Se²ngs and select the indoor sta±on to link.
- . Select Indoor Extension and tap Next to link indoor sta±on.
a. Edit No., Room Name.
b. Create and confirm SIP register password.
4. Linked related devices and tap Next. If the device and the indoor sta±on are in the
same LAN, the device will be displayed in the list. Tap the device or enter the serial No.
to link.
a. Tap the se²ngs icon to pop up the Network Se²ngs page.
b. Edit the network parameters of the door sta±on manually or enable DHCP to get
the network parameters automa±cally.
e. Tap OK to save the se²ngs.
5. Tap Finish to save the se²ngs.