Hikvision DS-2CE16H1T-IT3 User Manual
Hikvision DS-2CE16H1T-IT3 Manual
 |
View all Hikvision DS-2CE16H1T-IT3 manuals
Add to My Manuals
Save this manual to your list of manuals |
Hikvision DS-2CE16H1T-IT3 manual content summary:
- Hikvision DS-2CE16H1T-IT3 | User Manual - Page 1
, or requests, do not hesitate to contact the dealer. This manual applies to the models below: Type Type I Camera Type II Camera Model DS-2CE16H1T-IT(E) DS-2CE16H1T-IT1(E) DS-2CE16H1T-IT3(E) DS-2CE16H1T-IT5(E) This manual may contain several technical incorrect places or printing errors, and the - Hikvision DS-2CE16H1T-IT3 | User Manual - Page 2
. This equipment generates, uses, and can radiate radio frequency energy and, if not installed and used in accordance with the instruction manual, may cause harmful interference to radio communications. Operation of this equipment in a residential area is likely to cause harmful interference - Hikvision DS-2CE16H1T-IT3 | User Manual - Page 3
Safety Instruction These instructions are intended to ensure that user can use the from the device, turn off the power at once and unplug the power cord, and then contact the service center. Never attempt to disassemble the camera by unprofessional personal. Cautions Do not drop the camera or - Hikvision DS-2CE16H1T-IT3 | User Manual - Page 4
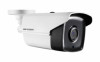
auto switch OSD menu with configurable parameters Auto white balance internal synchronization SMART IR mode PoC (with -E) 3-axis adjustment 1.2 Overview This manual applies to two types of bullet cameras. The overviews of each type are shown in the figures below. 1.2.1 Overview of Type - Hikvision DS-2CE16H1T-IT3 | User Manual - Page 5
is wooden, use self-tapping screws to secure the camera. If the product does not function properly, contact your dealer or the nearest service center. Do NOT disassemble the camera for repair or maintenance by yourself. 2.1 Installation of Type I Camera 2.1.1 Ceiling/Wall Mounting without Junction - Hikvision DS-2CE16H1T-IT3 | User Manual - Page 6
5. Connect the corresponding power cord, and video cable. 6. Power on the camera to check whether the image on the monitor is gotten from the optimum angle. If not, adjust the camera according to the figure below to get an optimum angle. Rotation Position [0°to 360°] Pan Position [0°to 360°] P - Hikvision DS-2CE16H1T-IT3 | User Manual - Page 7
Junction Box Body Figure 2-6 Fix the Junction Box to the Wall/Ceiling 7. Route the cables through the bottom cable hole, or the side cable hole of the junction box. 8. Combine the junction box cover with its body. Figure 2-7 Fix the Junction Box Cover back to its Body 9. Repeat the step 5 and 6 of - Hikvision DS-2CE16H1T-IT3 | User Manual - Page 8
Figure 2-9 Fix the Camera to the Ceiling Note: The supplied screw package contains self-tapping screws, and expansion bolts. For cement wall/ceiling, expansion bolts are required to fix the camera. For wooden wall/ceiling, self-tapping screws are required. 5. Connect the corresponding power cord - Hikvision DS-2CE16H1T-IT3 | User Manual - Page 9
Figure 2-11 Install the Junction Box 6. Route the cables through the bottom cable hole, or the side cable hole of the junction box. 7. Combine the junction box cover with its body with supplied screws on the junction box's cover. Figure 2-12 Combine the Junction Box's Cover with its Body 8. Repeat - Hikvision DS-2CE16H1T-IT3 | User Manual - Page 10
3 Menu Description Purpose: Call the menu by clicking button on the PTZ Control interface, or call preset No.95. Steps: 1. Connect the camera with the TVI DVR, and the monitor, shown as the figure 3-1. TVI DVR Camera Monitor Figure 3-1 Connection 2. Power on the analog camera, TVI DVR, and the - Hikvision DS-2CE16H1T-IT3 | User Manual - Page 11
the analog television system that is used in most of North America, parts of South America, Myanmar, South Korea, etc. 3.2 LANGUAGE Supports English, and Chinese. 3.3 EXPOSURE Exposure describes the brightness-related parameters, which can be adjusted by BRIGHTNESS, EXPOSURE MODE, GAIN, DWDR and - Hikvision DS-2CE16H1T-IT3 | User Manual - Page 12
MWB. ATW (Aoto Tracking White Balance) Under ATW mode, white balance is being adjusted automatically according to the color temperature of the scene illumination. MWB (Manual White Balance) You can set the R GAIN/B GAIN value from 1 to 255 to adjust the shades of red/blue color of the image. WHITE - Hikvision DS-2CE16H1T-IT3 | User Manual - Page 13
DAY/NIGHT MODE INFRARED SMART IR BACK AUTO ON 1 Figure 3-6 DAY NIGHT INFRARED You can turn on/off the IR LED to meet the requirements of different circumstances. SMART IR The Smart IR function is used to adjust the light to its most suitable intensity, and prevent the image from over exposure. - Hikvision DS-2CE16H1T-IT3 | User Manual - Page 14
3.8 SAVE & EXIT Move the cursor to SAVE & EXIT and click Iris+ to save the setting and exit the menu. UD05378B-A
-
 1
1 -
 2
2 -
 3
3 -
 4
4 -
 5
5 -
 6
6 -
 7
7 -
8
-
9
-
10
-
11
-
12
-
13
-
14
 |
 |

TURBO HD
H1T Series Bullet Camera
User Manual
User Manual
Thank you for purchasing our product. If there are any
questions, or requests, do not hesitate to contact the
dealer.
This manual applies to the models below:
Type
Model
Type I
Camera
DS-2CE16H1T-IT(E)
Type II
Camera
DS-2CE16H1T-IT1(E)
DS-2CE16H1T-IT3(E)
DS-2CE16H1T-IT5(E)
This manual may contain several technical incorrect
places or printing errors, and the content is subject to
change without notice. The updates will be added to
the new version of this manual. We will readily improve
or update the products or procedures described in the
manual.
0300001070703