Hikvision DS-2CE12DFT-F User Manual
Hikvision DS-2CE12DFT-F Manual
 |
View all Hikvision DS-2CE12DFT-F manuals
Add to My Manuals
Save this manual to your list of manuals |
Hikvision DS-2CE12DFT-F manual content summary:
- Hikvision DS-2CE12DFT-F | User Manual - Page 1
olorVu 2 MP Bullet and Turret Cameras User Manual 122919NA DS-2CE10DFT-F • DS-2CE10DFT-F28 DS-2CE12DFT-F • DS-2CE12DFT-F28 DS-2CE72DFT-F •DS-2CE72DFT-F28 - Hikvision DS-2CE12DFT-F | User Manual - Page 2
Industry Canada ICES-003 Compliance 4 Warning 4 Safety Instruction 4 Warnings 4 Cautions 5 Mark Description 5 1 Introduction Junction Box 11 2.3 Installation of Type I Turret Camera 12 2.3.1 Ceiling/Wall Mounting without Junction Box 12 & EXIT 20 UM ColorVu DS-2CExxDFT-Fxx 122919NA 2 - Hikvision DS-2CE12DFT-F | User Manual - Page 3
manual applies to the models below: Type Type I Bullet Camera Type II Bullet Camera Type I Turret Camera Model DS-2CE10DFT-F DS-2CE10DFT-F28 DS-2CE12DFT-F DS-2CE12DFT-F28 DS-2CE72DFT-F DS-2CE72DFT-F28 This manual and used in accordance with the instruction manual, may cause harmful interference to - Hikvision DS-2CE12DFT-F | User Manual - Page 4
interference, in which case the user may be required to take adequate measures. Safety Instruction These instructions are intended to ensure that user can use the product correctly to avoid danger or the electrical safety regulations of the nation and region. UM ColorVu DS-2CExxDFT-Fxx 122919NA 4 - Hikvision DS-2CE12DFT-F | User Manual - Page 5
service center. Never attempt to have the camera disassembled by unprofessional personnel. Cautions Do not drop the camera the camera in extremely gently. Do not aim the camera at the sun or extra bright camera away from liquid while in use for a nonwaterproof device. While in delivery, the camera - Hikvision DS-2CE12DFT-F | User Manual - Page 6
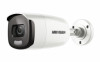
Overview This manual applies to two types of bullet camera and one type of turret camera. The Overview of Type I Bullet Camera Figure 1, Type I Bullet Camera Overview NOTE: Press and 1.2 Overview of Type II Bullet Camera NOTE: Figure 2, Type II Bullet Camera Overview Press and hold the switch - Hikvision DS-2CE12DFT-F | User Manual - Page 7
If the product does not function properly, contact your dealer or the nearest service center. Do NOT disassemble the camera for repair or maintenance yourself. 2.1 Installation of Type I Bullet Camera 2.1.1 Ceiling/Wall Mounting without Junction Box 1. Paste the drill template (supplied) where you - Hikvision DS-2CE12DFT-F | User Manual - Page 8
, and secure the camera with supplied screws. Figure 2-2 Affix Camera to Ceiling NOTE: ceiling, expansion bolts are required to affix the camera. For a wood wall/ceiling, self-tapping the camera to check whether the image on the monitor is at an optimum angle. If not, adjust the camera according - Hikvision DS-2CE12DFT-F | User Manual - Page 9
Box Cover 4. Attach the camera on the junction box's cover with supplied screws. 5. Attach the junction box body to the ceiling/wall by aligning the screw holes of the junction box. 6. Secure the junction box's body with supplied screws on the ceiling/wall. UM ColorVu DS-2CExxDFT-Fxx 122919NA 9 - Hikvision DS-2CE12DFT-F | User Manual - Page 10
Ceiling/Wall Mounting without Junction Box to complete the installation. 2.2 Installation of Type II Bullet Camera 2.2.1 Ceiling/Wall Mounting without Junction Box 1. Paste the drill template (supplied) where you want cable hole (optional) or the side opening. UM ColorVu DS-2CExxDFT-Fxx 122919NA 10 - Hikvision DS-2CE12DFT-F | User Manual - Page 11
and expansion bolts. 5. For a concrete wall/ceiling, expansion bolts are required to fix the camera. For a wood wall/ceiling, self-tapping screws are required. 6. Connect the corresponding power cord in the ceiling/wall according to the drill template holes. UM ColorVu DS-2CExxDFT-Fxx 122919NA 11 - Hikvision DS-2CE12DFT-F | User Manual - Page 12
and align the screw holes of the bullet camera with those on the junction box's cover. 4. Fix the camera on the junction box's cover with three supplied of Type I Turret Camera 2.3.1 Ceiling/Wall Mounting without Junction Box 1. Disassemble the camera. 1) Rotate the camera to align the notch to - Hikvision DS-2CE12DFT-F | User Manual - Page 13
Base 2. Paste the drill template (supplied) to where you want to install the camera. 3. Drill the screw holes and the cable hole (optional) in the ceiling/ For concrete wall/ceiling, expansion bolts are required to fix the camera. For wood wall/ceiling, self-tapping screws are required. 5. Route - Hikvision DS-2CE12DFT-F | User Manual - Page 14
such as power cord and video cable. 8. Power on the camera to check whether the image on the monitor is at an optimum angle. If not, adjust the camera according to the figure below to get an optimum angle. when using the ceiling outlet to route the cable. UM ColorVu DS-2CExxDFT-Fxx 122919NA 14 - Hikvision DS-2CE12DFT-F | User Manual - Page 15
base on junction box's cover by supplied screws. Figure 21, Install Turret Camera's Mounting Base Figure 22, Install Junction Box Body on Ceiling/Wall 5. Junction Box to install the camera to the junction box. Figure 2-8 Fix the Camera to the Junction Box UM ColorVu DS-2CExxDFT-Fxx 122919NA 15 - Hikvision DS-2CE12DFT-F | User Manual - Page 16
display may vary by camera model. 1. Connect the camera to the TVI DVR and the monitor. Figure 23, Connections 2. Power on the camera, TVI DVR, and the monitor to view the image on the monitor. 3. Click PTZ Control to enter the PTZ Control interface. 4. Call the camera menu - Hikvision DS-2CE12DFT-F | User Manual - Page 17
direction arrow to control the camera. 1) Click up/down is strong. • WDR (Wide Dynamic Range) helps the camera provide clear images even under backlight circumstances. WDR balances the single frame, which makes a camera more sensitive to the light so it can produce images even in low lux - Hikvision DS-2CE12DFT-F | User Manual - Page 18
Settings • WHITE BALANCE. The white rendition function of the camera, is to adjust the color temperature according to the AUTO or MANUAL. - AUTO: White balance is adjusted automatically according to the color temperature of the scene illumination. - MANUAL: You can DS-2CExxDFT-Fxx 122919NA 18 - Hikvision DS-2CE12DFT-F | User Manual - Page 19
. • OFF. This is the default mode. 3.1.6. FUNCTIONS In the FUNCTIONS sub-menu, you can set the privacy mask, the motion detection, and DPC of the camera. • PRIVACY. The privacy mask allows you to cover certain areas you don't want to be viewed or recorded. Up to four privacy areas are configurable - Hikvision DS-2CE12DFT-F | User Manual - Page 20
Defective Pixel Correction). Defective pixels are pixels in a CMOS image sensor that fail to sense light levels correctly. This series of cameras supports defective pixel correction. You can set the DPC as ON or OFF. 3.1.7. FACTORY DEFAULT Resets all settings to the factory defaults. 3.1.8. SAVE
-
 1
1 -
 2
2 -
 3
3 -
 4
4 -
 5
5 -
 6
6 -
 7
7 -
8
-
9
-
10
-
11
-
12
-
13
-
14
-
15
-
16
-
17
-
18
-
19
-
20
 |
 |

2 MP
Bullet and Turret
Cameras
User Manual
122919NA
DS-2CE10DFT-F • DS-2CE10DFT-F28
DS-2CE12DFT-F • DS-2CE12DFT-F28
DS-2CE72DFT-F •DS-2CE72DFT-F28
olor
Vu