GE JGP633SETSS Installation Instructions
GE JGP633SETSS Manual
 |
View all GE JGP633SETSS manuals
Add to My Manuals
Save this manual to your list of manuals |
GE JGP633SETSS manual content summary:
- GE JGP633SETSS | Installation Instructions - Page 1
Installation 36″ Sealed Gas Cooktop Instructions JGP628, JGP630, JGP963, JGP970, JGP975, ZGU36 Questions? Call 800.GE.CARES (800.432.2737) or Visit our Website at: www.GEAppliances.com In Canada, call 1.800.361.3400 or Visit our Website at: www.geappliances. - GE JGP633SETSS | Installation Instructions - Page 2
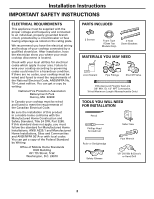
Installation Instructions IMPORTANT SAFETY INSTRUCTIONS ELECTRICAL REQUIREMENTS This appliance must be supplied with the proper voltage and frequency and connected to an individual, properly grounded branch circuit, protected by a circuit breaker or fuse having amperage as noted on the rating plate - GE JGP633SETSS | Installation Instructions - Page 3
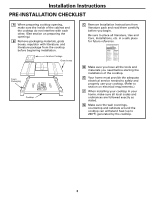
and materials you need before starting the installation of the cooktop. E Your home must provide the adequate electrical service needed to safely and properly use your cooktop. (Refer to section on electrical requirements.) F When installing your cooktop in your home, make sure all local codes and - GE JGP633SETSS | Installation Instructions - Page 4
to nearest cabinet on either side of unit 3-3/4″ MIN. clearance from cutout to side wall on the left of the unit 2 OVERALL COOKTOP DIMENSIONS 21″ (21-1/4″ Max. for 36″ Glass Top models) Cooktop 3″ 18-7/8″ 33-11/16″ 3 CUTOUT DIMENSIONS OF COUNTERTOP To ensure accuracy, it is best to make - GE JGP633SETSS | Installation Instructions - Page 5
Installation Instructions INSTALLING THE COOKTOP UNIT 1 LOCATE ELECTRICAL OUTLET AND GAS SHUT-OFF VALVE BENEATH CABINET NEVER REUSE OLD CONNECTORS WHEN INSTALLING THIS UNIT. Shut-Off Valve Electrical Outlet 12″ Below Countertop Install a manual shut-off valve in the gas line in an easily - GE JGP633SETSS | Installation Instructions - Page 6
REGULATOR NEVER REUSE OLD CONNECTORS WHEN INSTALLING THIS COOKTOP. WARNING: Never reuse old flexible connectors. The use of old flexible connectors can cause gas leaks and personal injury. Always use new flexible connectors when installing a gas appliance. Screw a section of pipe onto the inlet end - GE JGP633SETSS | Installation Instructions - Page 7
Installation Instructions 5 CHECK FOR LEAKS Before testing for leaks, make sure all burner knobs are in the OFF position. After connecting the cooktop to gas, check system for leaks with a manometer. If a manometer is not available, turn the gas supply on to the cooktop and use a liquid leak - GE JGP633SETSS | Installation Instructions - Page 8
type appliance extension cord and that the current carrying rating of the cord in amperes APPLIANCE MUST BE PROPERLY GROUNDED. 2 ELECTRICAL SUPPLY AND OUTLET An adequate electrical supply and outlet must be used to operate the electrical parts of your cooktop. A The power cord of this appliance - GE JGP633SETSS | Installation Instructions - Page 9
Installation Instructions 4 USAGE SITUATIONS WHERE APPLIANCE POWER CORD WILL BE DISCONNECTED INFREQUENTLY For 15 amp Attaching the adaptor ground terminal to the wall receptacle cover screw does not ground the appliance unless the screw is metal, and not insulated, and the wall receptacle is - GE JGP633SETSS | Installation Instructions - Page 10
COOKTOP BURNERS The electrode of the spark igniter is exposed. Be careful not to push any cooktop controls while the top of the burner is removed. Do not remove the top or touch the electrode of any burner while another burner is turned on. Electrical shock might result. A Replace the burner head - GE JGP633SETSS | Installation Instructions - Page 11
when gas is available to the burner. • Once the burner lights, it should be turned out of the LITE position. B Try each valve separately until all burners have been checked. 3 BURNER IGNITION Cooktop Spark Ignition-When you turn the cooktop knob to LITE, the spark igniter makes a series of electric - GE JGP633SETSS | Installation Instructions - Page 12
on the bottom of the burner box. In addition to the model and serial numbers, it tells you the ratings of the burners and the type of fuel and pressure the cooktop was adjusted for when it left the factory. D When ordering parts, always include the serial number, model number and a code letter to - GE JGP633SETSS | Installation Instructions - Page 13
Head Screwdriver 7mm Nutdriver 2 ADJUST YOUR COOKTOP FOR USE WITH LP GAS A Disconnect all electrical power, at the main circuit breaker or fuse box. B Shut off the gas supply to the cooktop by closing the manual shut-off valve. C Adjust the pressure regulator, by the following instructions - GE JGP633SETSS | Installation Instructions - Page 14
These may be accessed through the hole in the cooktop. Burner head Spark igniter Burner base 18,000 BTU Burner (on some models) Burner cap Burner base Burner head 3 CHANGE COOKTOP BURNER ORIFICES (CONT.) NOTE: On most burners, the orifices have a springloaded retaining ring Retainer Ring - GE JGP633SETSS | Installation Instructions - Page 15
marks denote the precise location of each orifice to the cooktop burner. I II III X 18,000 BTU/HR Burner (on some models) The 18,000 BTU/HR burner has two orifices with markings located in the sides only. (See rating plate on bottom of appliance). NOTE: The main orifice is located low in the - GE JGP633SETSS | Installation Instructions - Page 16
gas line may cause an orange flame at first, but this will soon disappear. NOTE: For the 18,000 BTU/HR burner (on some models) the cooktop burner knob the cooktop gas inlet opening to alert others in the future that this appliance has been converted to LP gas. If converting back to natural gas from - GE JGP633SETSS | Installation Instructions - Page 17
de 91 cm (36″) JGP628, JGP630, JGP963, JGP970, JGP975, ZGU36 Questions? Appelez le Centre de réponse 1.800.361.3400 ou visitez notre site Web à l'adresse : www.electromenagersge.ca AVANT DE COMMENCER Avant de commencer, lisez attentivement la totalité de ces instructions. • IMPORTANT - Conservez - GE JGP633SETSS | Installation Instructions - Page 18
codes locaux ou, en l'absence de codes locaux, au National Fuel Gas Code, ANSI Z223.1/NFPA 54 Dernière édition. • Assurez-vous que votre table de cuisson soit bien installée par un installateur qualifié ou un technicien de service. • Pour éliminer tout mouvement corporel au dessus des brûleurs de - GE JGP633SETSS | Installation Instructions - Page 19
Boîtes de grille Emballage en mousse Table de cuisson C Enlevez les instructions d'installation de la trousse de documentation et lisez-les soigneusement avant de autour de la table de cuisson puissent supporter la chaleur [pouvant atteindre 93°C (200°F)] produite par la table de cuisson. 3 - GE JGP633SETSS | Installation Instructions - Page 20
Instructions côté de l'appareil 2 DIMENSIONS DU DÉCOUPAGE DE LA TABLE DE CUISSON 91 cm (36″) 53 cm (21″) (54,6 cm [21-1/2″] max. pour table de cuisson en COMPTOIR ET LES ARMOIRES AUTOUR DE LA TABLE DE CUISSON PUISSENT SUPPORTER LA CHALEUR (POUVANT ATTEINDRE 93°C [200°F]) 3 DIMENSIONS TOTALES - GE JGP633SETSS | Installation Instructions - Page 21
Instructions d'Installation INSTALLATION DE LA TABLE DE CUISSON 1 PLACEZ LA PRISE D' Verre de la table de cuisson 4 TROUVEZ LES PIÈCES DE MONTAGE Retirez les supports de fixation de la trousse de documentation. 5 FIXEZ LES SUPPORTS DE FIXATION À LA TABLE DE CUISSON Enlevez la vis d'un côté de la - GE JGP633SETSS | Installation Instructions - Page 22
Instructions d'installation INSTALLATION-BRANCHEMENT DU GAZ 1 FOURNISSEZ UN BON APPROVISIONNEMENT EN GAZ Cette table de cuisson est conçue pour fonctionner au gaz naturel à une pression - GE JGP633SETSS | Installation Instructions - Page 23
pressions de test égales ou inférieures à 1/2 psig (3,5 kPa). 6 INSTALLATION SUR UN FOUR ENCASTRÉ Consultez l'installation du four encastré pour y trouver les instructions d'installation. Coude de 90° Côtés de l'armoire 5 po. depuis le comptoir jusqu'au centre du trou de 2 po. Trou de 2 po. (20 - GE JGP633SETSS | Installation Instructions - Page 24
Instructions d'installation INSTALLATION-RACCORDS ÉLECTRIQUES AVERTISSEMENT - Débranchez tout courant électrique au niveau du disjoncteur de la maison ou de la boîte à fusibles avant d'installer. 1 RALLONGES À - GE JGP633SETSS | Installation Instructions - Page 25
Instructions d'installation INSTALLATION-RACCORDS ÉLECTRIQUES (SUITE) 4 SITUATION D'UTILISATION OÙ LE CORDON D'ALIMENTATION D'UN APPAREIL ÉLECTROMÉNAGER EST INFRÉQUEMMENT DÉBRANCHÉ Pour un circuit électrique de 15 ampé - GE JGP633SETSS | Installation Instructions - Page 26
Instructions d'installation BRÛLEURS DE LA TABLE DE CUISSON 1 ASSEMBLEZ LES BRÛLEURS DE LA TABLE DE CUISSON L'électrode de l'allumeur est exposée. Faites attention de - GE JGP633SETSS | Installation Instructions - Page 27
Instructions d'installation 2 VÉRIFIEZ LES ALLUMEURS Vous devez vérifier le fonctionnement des allumeurs électriques après vous être soigneusement assuré que la table de cuisson et la ligne d' - GE JGP633SETSS | Installation Instructions - Page 28
, et la catégorie de carburant et la pression de votre table de cuisson au départ de la fabrique. D Quand vous commandez des pièces. indiquez toujours le numéro assurer d'avoir bien suivi toutes les instructions de ce guide. Cela assure une bonne utilisation sécuritaire de la table de cuisson. 12 - GE JGP633SETSS | Installation Instructions - Page 29
dans la documentation jointe au régulateur. ATTENTION : La table de cuisson, au départ de l'usine, est réglée pour le gaz naturel. Si vous désirez le robinet d'arrêt. C Ajustez le régulateur de pression en suivant les instructions suivantes : • Dévissez le capuchon. • Placez votre pouce sur le côté - GE JGP633SETSS | Installation Instructions - Page 30
Instructions d'installation CONVERSION AU GAZ PROPANE (SUITE) 3 CHANGEZ LES DIAPHRAGMES DES BRÛLEURS DE LA TABLE DE CUISSON A Enlevez les grilles du haut, les capuchons de - GE JGP633SETSS | Installation Instructions - Page 31
à leur emplacement précis, conformément aux illustrations ci-dessus. F Remettez les diaphragmes pour gaz naturel sur le support et fixez à nouveau le support et la feuille d'instructions au régulateur de pression à l'aide de la vis enlevée précédemment. G Remettez en place les bases, les têtes - GE JGP633SETSS | Installation Instructions - Page 32
Instructions d'installation CONVERSION AU GAZ PROPANE (SUITE) 4 AJUSTEZ LES FLAMMES DES BRÛLEURS A Allumez tous les brûleurs au maximum et vérifiez les flammes. Elles doivent ê
-
 1
1 -
 2
2 -
 3
3 -
 4
4 -
 5
5 -
 6
6 -
 7
7 -
8
-
9
-
10
-
11
-
12
-
13
-
14
-
15
-
16
-
17
-
18
-
19
-
20
-
21
-
22
-
23
-
24
-
25
-
26
-
27
-
28
-
29
-
30
-
31
-
32
 |
 |
1
31-10612
(12-04 JR)
Questions? Call 800.GE.CARES (800.432.2737) or Visit our Website at: www.GEAppliances.com
In Canada, call 1.800.361.3400 or Visit our Website at: www.geappliances.ca
Installation
36
″
Sealed Gas Cooktop
Instructions
BEFORE YOU BEGIN
Read these instructions completely
and carefully.
•
IMPORTANT
—
Save these
instructions for local inspector’s use.
•
IMPORTANT
—
Observe all
governing codes and ordinances.
•
Note to Installer –
Be sure to leave these
instructions with the Consumer.
•
Note to Consumer –
Keep these
instructions for future reference.
•
Product failure due to improper installation
is not covered under the Warranty.
WARNING
—
This appliance must
be properly grounded.
•
IMPORTANT
—
Leak testing of the
appliance shall be conducted according to
the manufacturer’s instructions.
•
Proper installation is the responsibility
of the installer and product failure due to
improper installation is NOT covered under
warranty.
IN THE COMMONWEALTH OF
MASSACHUSETTS:
•
This product must be installed by a
licensed plumber or gas fitter.
•
When using ball-type gas shut-off valves,
they shall be the T-handle type.
•
A flexible gas connector, when used, must
not exceed 3 feet.
JGP628, JGP630, JGP963, JGP970,
JGP975, ZGU36
FOR YOUR SAFETY:
WARNING
—
If the information
in this manual is not followed exactly, a fire,
explosion or gas leak may result causing
property damage, personal injury or death.
Do not store or use gasoline or other
flammable vapors and liquids in the vicinity
of this or any other appliance!
WHAT TO DO IF YOU
SMELL GAS:
•
Do not try to light any appliance. Do not
touch any electrical switch; do not use any
phone in your building.
•
Immediately call your gas supplier from a
neighbor’s phone. Follow the gas supplier’s
instructions.
•
If you cannot reach your gas supplier, call
the fire department.
Installation and service must be performed by
a qualified installer, service agency or the gas
supplier.
This cooktop has been design certified
by CSA International. You’ll find safety
precautions in your Owner’s Manual.
Read them carefully.
•
Installation of this cooktop must conform
with local codes or, in the absence of local
codes with the National Fuel Gas Code,
ANSI Z223.1/NFPA 54–Latest edition.
•
Be sure your cooktop is installed properly
by a qualified installer or service technician.
•
To eliminate reaching over surface burners,
cabinet storage above burner should be
avoided.
•
Do not install the unit near an outside door
or where a draft may affect its use.
WARNING
—
Disconnect all
electrical power at the main circuit breaker
or fuse box before installing.