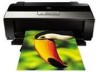
Epson R1900 Start Here
Epson R1900 - Stylus Photo Color Inkjet Printer Manual
 |
UPC - 010343866058
View all Epson R1900 manuals
Add to My Manuals
Save this manual to your list of manuals |
Epson R1900 manual content summary:
- Epson R1900 | Start Here - Page 1
Start Here Epson Stylus® Photo R1900 1 Unpack If anything is missing, contact Epson® as described on the back. Remove all the tape and packing material. (There is more tape on the printer than is shown below.) *411086800* *411086800* - Epson R1900 | Start Here - Page 2
Do not open an ink cartridge package until you are ready to install the ink. Cartridges are vacuum packed to maintain reliability. Don't load paper before installing ink cartridges. 1 Open the printer cover, then open the cartridge cover. 2 Shake the ink cartridges. (All cartridges except the gloss - Epson R1900 | Start Here - Page 3
any seals from the cartridge or ink will leak. 5 Insert the cartridges in the holder for each color. 6 Press the cartridges down until they click. 7 Close the cartridge cover and press it down until it clicks. 8 Close the printer cover. 9 Press the ink button to charge the ink. Charging takes about - Epson R1900 | Start Here - Page 4
on these paper types using the single sheet guide and the manual feed slot: • Epson Velvet Fine Art Paper • Epson Watercolor Paper Radiant White • Epson UltraSmooth® Fine Art Paper 250 gsm • PremierArt™ Matte Scrapbook Photo Paper for Epson 1 Remove any paper from the sheet feeder and close the - Epson R1900 | Start Here - Page 5
edge first. 7 Push the paper into the printer until it meets resistance and hold it there until the printer pulls it in slightly. When the printer begins feeding the paper, let go of it. Note: For instructions on loading roll paper, or a CD or DVD, see the User's Guide or your on-screen Reference - Epson R1900 | Start Here - Page 6
Continue. 3 Click Install and follow the on-screen instructions. 4 When you see this screen, click the first option and click Next, unless the printer is connected to your computer through an external print server. If you're using an external print server, click the second option, click Next, and - Epson R1900 | Start Here - Page 7
securely connected and turned on. 5 When you see this screen, click Open the Printer List. 6 Follow the steps on the right of the screen to add the R1900 Series. Steps 7 Click Next again, if necessary. 8 Follow the on-screen instructions to install the rest of the software. 9 When you're done, eject - Epson R1900 | Start Here - Page 8
? User's Guide Instructions for loading paper, printing, maintaining your printer, and solving problems. Epson Information Center Click the desktop shortcut for easy access to the Epson Stylus Photo R1900 Reference Guide, FAQs, and software downloads. You can also purchase paper and ink. On-screen
-
 1
1 -
 2
2 -
 3
3 -
 4
4 -
 5
5 -
 6
6 -
 7
7 -
8
 |
 |

If anything is missing, contact Epson
®
as described on the back.
Remove all the tape and packing material. (There is more tape on the
printer than is shown below.)
Unpack
1
*411086800*
*411086800*
Start Here
Epson Stylus
®
Photo R1900