Epson PhotoPC L-410 User Manual
Epson PhotoPC L-410 Manual
 |
View all Epson PhotoPC L-410 manuals
Add to My Manuals
Save this manual to your list of manuals |
Epson PhotoPC L-410 manual content summary:
- Epson PhotoPC L-410 | User Manual - Page 1
User's Guide - Epson PhotoPC L-410 | User Manual - Page 2
Advice are service marks of Epson America, Inc. General notice: Other product names used herein are for identification purposes only and may be trademarks of their respective owners. Epson disclaims any and all rights in those marks. RESPONSIBLE USE OF COPYRIGHTED MATERIALS Digital cameras, like - Epson PhotoPC L-410 | User Manual - Page 3
Introduction Safety Instructions 7 Warnings, Cautions, and Notes 7 Chapter 1 Getting Started Unpacking Your Camera 12 Camera Parts and Their Function 13 Front/top view 13 Bottom/rear view 14 Back view 14 Camera buttons 15 Camera lights 16 Installing the Battery 17 Battery life 18 - Epson PhotoPC L-410 | User Manual - Page 4
Framer (P.I.F.) Taking Photos With Frames 54 Deleting and Copying Frames 56 Adding or Changing Frames 55 Chapter 5 Using Direct Print Connecting the Camera to Your Printer 58 Printing Photos 59 Printing the photo displayed on the LCD screen 60 Printing all your saved photos 61 Printing - Epson PhotoPC L-410 | User Manual - Page 5
print head nozzles 67 Aligning the print head 68 Chapter 6 Maintenance and Troubleshooting Maintenance 69 Cleaning your camera 69 Storing your camera 70 Problems and Solutions 71 Camera problems 71 Image problems 75 Printing problems 77 List of Error Messages 78 Where to Get Help 81 - Epson PhotoPC L-410 | User Manual - Page 6
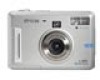
Your new Epson® PhotoPC® L-410 is a compact digital camera that lets you capture all the special moments in your life and print beautiful photos without a computer. Its features include: ❏ 4.0 megapixel resolution, for clear, beautiful photos ❏ 3x optical zoom and 3x digital zoom ❏ Continuous - Epson PhotoPC L-410 | User Manual - Page 7
Read all of these instructions before using the camera, and keep this guide handy for later reference. Follow all warnings and instructions marked on the camera and the options. Warnings, Cautions, and Notes w Warnings must be followed carefully to avoid bodily injury. c Cautions must be - Epson PhotoPC L-410 | User Manual - Page 8
your skin, immediately rinse the affected area thoroughly with water and seek medical treatment. If a battery is swallowed, seek medical treatment immediately. ❏ Use only AA-size batteries or a CR-V3 type battery for the camera according to the directions in the user documentation. ❏ Do not use the - Epson PhotoPC L-410 | User Manual - Page 9
coming into contact with metal objects that could short-circuit it, such as coins or keys. ❏ Do not use the battery if its terminals are soiled. ❏ Do not insert the battery into power outlets or other power sources such as car cigarette lighter sockets. ❏ Do not solder wires or terminals directly - Epson PhotoPC L-410 | User Manual - Page 10
sure to completely cover the ends of the battery with tape to prevent combustion or explosion when disposing of it. ❏ Do not dispose of the battery as ordinary refuse. Instead, dispose of it memory card for details. ❏ Turn the camera off before installing or removing the memory card. Introduction 10 - Epson PhotoPC L-410 | User Manual - Page 11
them immediately with water. If discomfort or vision problems remain after a thorough flushing, see a doctor cleaners. Storing, maintaining, or transporting the camera ❏ Do not store this product outdoors, the batteries and unplug this product and refer servicing to qualified service personnel - Epson PhotoPC L-410 | User Manual - Page 12
identifies the items included with your camera, describes the parts of the camera, and tells you how to set it up. Unpacking Your Camera Make sure that all of the items shown below were included in the box with your camera. Camera Camera Basics guide CR-V3 battery Software CD-ROM PC USB cable - Epson PhotoPC L-410 | User Manual - Page 13
Parts and Their Function See "Camera buttons" on page 15 for more information. Front/top view Mode dial Shutter button Strap holder Automatic mode Manual mode Continuous shooting mode Video mode Setup mode Playback mode Speaker Flash Self-timer light USB light Microphone Lens barrier Getting - Epson PhotoPC L-410 | User Manual - Page 14
Bottom/rear view Connector cover Battery/memory card cover USB connector Tripod mount AC adapter connector Back view Indicator lights Viewfinder Print button P.I.F. button Display button Memory access light POWER button - Epson PhotoPC L-410 | User Manual - Page 15
using the direct print feature. Print with frames or make P.I.F. settings. Turn the camera on or off. Press the W button to zoom out (wide angle). Press or set the self-timer when you are taking pictures (automatic or manual mode). Select menu items or delete the selected photo in playback mode. - Epson PhotoPC L-410 | User Manual - Page 16
is in power save mode • shooting a video • a photo is being processed • a "shake warning" is detected Red light (lower) flashes when: • battery power is low • the camera cannot determine the exposure setting • the memory card is full Flashes red when taking a photo with the self-timer Turns orange - Epson PhotoPC L-410 | User Manual - Page 17
either a CR-V3 battery, like the one included with the camera, or two AA batteries. 1. To open the battery/memory card cover, slide it to the right until it pops up. 2. Insert the battery into the compartment, positioning the + and - ends as shown on the inside of the battery/memory card cover. CR - Epson PhotoPC L-410 | User Manual - Page 18
, press it down, then slide it back into place. w Warning: Do not carry loose batteries in your pockets. Battery life As the battery loses power, the icon that appears when you turn on the camera changes from to . When is flashing, battery power is low and you can no longer take photos. When the red - Epson PhotoPC L-410 | User Manual - Page 19
card. You can use either of the following types of cards: ❏ SD card (Secure Digital®) up to 512 MB ❏ MM card (Multimedia,® MMC V 2.1 or later) up to or in places that are extremely hot, humid, or dusty. ❏ Make sure the camera is turned off before installing or removing a memory card. ❏ Make sure you - Epson PhotoPC L-410 | User Manual - Page 20
To install a memory card: 1. Make sure the camera is turned off. 1. To open the battery/memory card cover, slide it to the right until it pops up. 2. Position the card as shown and slide it all the way into the slot: Notch Getting Started 20 - Epson PhotoPC L-410 | User Manual - Page 21
3. To close the battery/memory card cover, press it down, then slide it back into place. To remove a memory card: 1. Make sure the camera is turned off. 2. Open the battery/memory card cover. 3. Push the memory card to release it. The card pops out. 4. Pull out the card and close the cover. - Epson PhotoPC L-410 | User Manual - Page 22
button. The lens retracts and the lens cover closes. POWER button The LCD screen may turn off to save battery power. Press any button to turn the screen back on. If the camera is idle for more than three minutes, the power shuts off. Press the POWER button to turn it back - Epson PhotoPC L-410 | User Manual - Page 23
Making the Initial Settings When you turn on the camera the first time, you need to select your language and set the date and time. 1. Select the language you You can change these and other settings later from the Setup Menu. For details, see "Adjusting Camera Settings" on page 41. Getting Started 23 - Epson PhotoPC L-410 | User Manual - Page 24
are automatically adjusted to give you the best shot. All you have to do is press the shutter button. ❏ Manual mode You can adjust a variety of camera settings, including resolution, exposure compensation, sensitivity, white balance, and more. ❏ Continuous shooting mode You can capture a series of - Epson PhotoPC L-410 | User Manual - Page 25
on the LCD screen in either automatic or manual modes. (For instructions on taking pictures using just the viewfinder, see "Adjusting Camera Settings" on page 41. Note: The LCD screen may turn off to save battery power after you digital zoom to capture a closer view of your subject. Taking Photos 25 - Epson PhotoPC L-410 | User Manual - Page 26
feature lets you move in even closer to your subject. First, you need to use Setup Menu 1 to enable digital zoom. For instructions, see "Adjusting Camera Settings" on page 41. 1. To use digital zoom, press and hold the T button to maximize the optical zoom. 2. Release the button, then press it again - Epson PhotoPC L-410 | User Manual - Page 27
you press the Flash button. Auto-flash (default setting) The camera detects the brightness automatically and sets off the flash if necessary. In dark settings. Auto red-eye reduction Fill-in flash (manual mode only) Slow synchro (manual mode only) Use this setting when photographing people with - Epson PhotoPC L-410 | User Manual - Page 28
subjects between 4.3 and 19.6 inches (11 and 50 cm) away from the camera. Use of the flash is not recommended for macro close-ups, so make tripod when shooting in the macro mode. 1. Turn the Mode dial to automatic or manual mode. 2. Press the l button to switch to the macro mode. 3. Center your - Epson PhotoPC L-410 | User Manual - Page 29
press the shutter and the actual image capture. This allows you to take a picture of yourself. 1. Secure the camera on a flat surface or on a tripod. 2. Turn the Mode dial to automatic or manual mode. 3. Press the u button. The self-timer icon is displayed on the LCD screen. 4. Center the image and - Epson PhotoPC L-410 | User Manual - Page 30
Selecting the Scene Mode In addition to the normal mode for taking pictures, two special scene modes are pre-programmed in the camera to give you the best image capture settings for portraits or landscapes: ❏ Landscape mode The flash is deactivated so landscapes are captured more clearly. In - Epson PhotoPC L-410 | User Manual - Page 31
1728 pixels with normal compression). If you want to change the resolution, you need to switch to manual mode and use the Photography Menu as described below. 1. Turn the Mode dial to manual mode, then press the MENU button to display the Photography Menu. 2. Select Quality by using the u d buttons - Epson PhotoPC L-410 | User Manual - Page 32
Note: The total number of photos varies according to the quality, compression, amount of memory left on the memory card, and the shooting conditions. Quality (Number of pixels and compression) With 16 MB SD memory card With 128 MB SD Internal memory memory card only (default) Internal memory ( - Epson PhotoPC L-410 | User Manual - Page 33
camera settings by the icons displayed on the LCD screen. Press the DISP button to turn the icons on or off. Flash Number of photos you can take Quality Focus frame Battery bar Scene mode The digital zoom indicator appears when digital zoom is enabled. Normal mode, Landscape mode, Portrait mode - Epson PhotoPC L-410 | User Manual - Page 34
Continuous shooting mode, Video mode Number of the photos that can be taken in the current mode 125 (for example) Displayed if you shake the camera when taking a photo Camera shake warning Taking Photos 34 - Epson PhotoPC L-410 | User Manual - Page 35
the Viewfinder Only To save battery power, you can take photos using the viewfinder only, without the LCD screen. 1. Turn the Mode dial to manual mode. 2. Press the the memory access light is on. After the light turns off, the camera is ready to use again. Note: You cannot take photos using the - Epson PhotoPC L-410 | User Manual - Page 36
with a recording/transfer speed of 10MB/second. Setting White Balance The camera senses the light source and and automatically adjusts the white balance to in any lighting situation. You can adjust the white balance manually to achieve truer colors under the following lighting conditions: daylight - Epson PhotoPC L-410 | User Manual - Page 37
is best for most picture taking. Set the light sensitivity manually in low-light conditions or when you expect blurring problems from camera motion. Use of a tripod is recommended with high sensitivity settings. 1. Turn the Mode dial to manual mode. 2. Press the MENU button. The Photography Menu is - Epson PhotoPC L-410 | User Manual - Page 38
exposure to help control how much light falls on the camera's CCD (light sensor). This influences the brightness of the entire image. Your camera normally adjusts the exposure automatically. However, you may want to increase the exposure manually if you're taking a picture against the sun or when - Epson PhotoPC L-410 | User Manual - Page 39
can record videos with sound using the video mode. The length of the video is limited only by the amount of storage available in your camera or memory card. 1. Turn the Mode dial to video mode. 2. Press the MENU button. The Movie menu is displayed. 3. Press the r button. 4. Select the desired - Epson PhotoPC L-410 | User Manual - Page 40
You can record a sound memo up to 30 seconds long while a photo is displayed in quick view. First you need to set the quick photo review feature to Sound Memo ON. 1. While the photo is displayed on the LCD screen, press the OK button to start recording. 2. When you are finished - Epson PhotoPC L-410 | User Manual - Page 41
can change settings such as Quick View, Sound Memo, and power save. Three Setup menus are available, two for general features, and one for adjusting camera "beep" sounds. 1. Turn the Mode dial to SETUP mode. 2. Select the menu that has the items you want to change by using the l r buttons. 3. Select - Epson PhotoPC L-410 | User Manual - Page 42
1 Setting items Qk View/Sd Memo LCD Brightness Digital Zoom Power Save Startup Screen Description Default Enable the is displayed. Set the brightness level of the LCD screen. - Enable digital zoom. OFF Set the time until the camera enters the power save mode. 3 min. Select an image to display - Epson PhotoPC L-410 | User Manual - Page 43
Setup Menu 2 Setting items Format Reset All Date/Time File No. Reset Language Description Format the camera's memory or the memory card. Reset all the camera's settings to their defaults. Set the date and time. Reset the sequence of the image file numbers to 0001 when replacing or formatting the - Epson PhotoPC L-410 | User Manual - Page 44
Sound Menu Setting items Sound Operation Sound Shutter Sound Cont Shoot Sound Focus Lock Sound Self-Timer Sound Description Default Enable or disable the "beep" sound whenever you press ON a button. Three different sounds (at minimum or maximum volume) are available for each setting, as listed - Epson PhotoPC L-410 | User Manual - Page 45
back your pictures individually or as a slide show. You can also play and record sound memos, view videos, delete photos, and copy photos from the camera to a memory card or to your computer. Viewing Photos You can view your photos on the LCD screen and zoom in to display more detail - Epson PhotoPC L-410 | User Manual - Page 46
Viewing a slide show of your photos You can use the playback menu to view a continuous slide show of your photos. 1. Turn the Mode dial to playback mode. 2. Press the MENU button. Playback Menu 1 is displayed. 3. Select Slide Show by using the u d buttons, then press the OK button. The slide show - Epson PhotoPC L-410 | User Manual - Page 47
Recording and Playing Sound Memos You can record and play back sound memos for your photos while you view them on the LCD screen. 1. Turn the Mode dial to playback mode. 2. Press the MENU button. Playback Menu 1 is displayed. 3. Select Sound Memo by using the u d buttons, then press the r button. 4. - Epson PhotoPC L-410 | User Manual - Page 48
Viewing Picture Information You can display information about a photo, such as the date and time it was taken, its quality (resolution), and so on. 1. Turn the Mode dial to playback mode. 2. Display the photo on the LCD screen by using the l r buttons. 3. Press the DISP button. You see the following - Epson PhotoPC L-410 | User Manual - Page 49
Selecting Photos for Printing You can use the Digital Print Order Format (DPOF) standard to select photos for printing. This format allows you to record information on the memory card including which images to - Epson PhotoPC L-410 | User Manual - Page 50
Menu 1 also lets you delete a series of images or all images in the camera or on a memory card. c Caution: Once a photo has been deleted, it keep should be transfered to your computer before you delete them from the camera. Deleting photos individually 1. Turn the Mode dial to playback mode. To - Epson PhotoPC L-410 | User Manual - Page 51
Deleting all photos You can delete all photos stored in the camera. 1. Turn the Mode dial to playback mode. 2. Press the MENU button. Playback Menu 1 is displayed. 3. Select Delete All Images by using the u d buttons, then press - Epson PhotoPC L-410 | User Manual - Page 52
connected to your computer. See "Using the AC adapter" on page 86 for instructions. ❏ If your computer uses Windows® 98SE, you need to install driver software before you connect the camera. For instructions on installing the software, see the Camera Basics guide. Viewing and Managing Your Photos 52 - Epson PhotoPC L-410 | User Manual - Page 53
your computer. 4. Open the connector cover on the side of the camera and connect the small end of the cable to the camera. 5. Turn on the camera. The blue USB light on the camera flashes. 6. Select the EPSON_DSC drive on your computer. In Windows, you may have to use My Computer to select the drive - Epson PhotoPC L-410 | User Manual - Page 54
, and the P.I.F. frames on your computer. See your Camera Basics guide for instructions. Taking Photos With Frames You can use PRINT Image Framer printing process to print your framed pictures on supported Epson printers. For instructions on printing from the camera, see "Using Direct Print" on page - Epson PhotoPC L-410 | User Manual - Page 55
Turn the Mode dial to automatic or manual mode. 2. Press the P.I.F. button. The first frame stored in the camera is displayed. If you want to select and center it in the frame. (See Chapter 2, "Taking Photos," for instructions.) Adding or Changing Frames You can change the frame after you take a - Epson PhotoPC L-410 | User Manual - Page 56
frame to delete by using the u d buttons, then press the MENU button. Note: To cancel the operation, press the P.I.F. button. 3. Select Delete or Copy (to Camera or Card) by using the u d buttons, then press the OK button. 4. To confirm your choice, select OK by using the u d buttons, then press the - Epson PhotoPC L-410 | User Manual - Page 57
up to four photos on one sheet of paper. You can also print photos with P.I.F. frames directly from the camera. The Epson PhotoPC L-410 supports the printers listed below. To connect to the Epson Stylus Photo R200, use the printer cable labeled with the letter A on the small end. To connect to any - Epson PhotoPC L-410 | User Manual - Page 58
Note: Future models may be added to the list of supported printers. Check the Epson web site at www.epson.com for more information. Connecting the Camera to Your Printer Make sure the camera is turned off before you begin. You can conserve battery power by using the optional AC adapter when you - Epson PhotoPC L-410 | User Manual - Page 59
3. Open the connector cover on the side of the camera and connect the small end of the cable to the camera. Connection for the Epson Stylus Photo R200 Connection for other Epson printers Printing Photos You can print all the photos in the camera, or select the ones you want to print. Images that - Epson PhotoPC L-410 | User Manual - Page 60
start, make sure your printer is set up and has ink installed. Load 4 × 6 inch Epson Premium Glossy Photo Paper, following the instructions that came with your printer. 1. Connect the camera to the printer as described in "Connecting the Camera to Your Printer" on page 58. 2. Turn on the printer and - Epson PhotoPC L-410 | User Manual - Page 61
start, make sure your printer is set up and has ink installed. Load 4 × 6 inch Epson Premium Glossy Photo Paper, following the instructions that came with your printer. 1. Connect the camera to the printer as described in "Connecting the Camera to Your Printer" on page 58. 2. Turn on the printer and - Epson PhotoPC L-410 | User Manual - Page 62
2. Turn on the printer and camera. 3. Turn the Mode dial to playback mode, then press the button. The Print menu is displayed. 4. Choose Select Images by using the u d buttons, then press - Epson PhotoPC L-410 | User Manual - Page 63
start, make sure your printer is set up and has ink installed. Load 4 × 6 inch Epson Premium Glossy Photo Paper, following the instructions that came with your printer. 1. Connect the camera to the printer as described in "Connecting the Camera to Your Printer" on page 58. 2. Turn the printer and - Epson PhotoPC L-410 | User Manual - Page 64
set the paper type to choose 4 × 6 inch or 10 × 15 centimeter paper. Make sure you change this setting to 4 × 6 in. Once you change it, the camera will retain this setting. 10 × 15 cm paper is not available in the U.S. 1. Select Print Settings by using the u d buttons on the preview screen, and - Epson PhotoPC L-410 | User Manual - Page 65
check the status of the print head nozzles and run maintenance programs when you connect the camera to this printer. Note: You can run maintenance programs from the camera only for the Epson Stylus Photo R200. For other printers, you need to run maintenance programs from your computer. 1. Connect - Epson PhotoPC L-410 | User Manual - Page 66
Checking the print head nozzles If your photos have light or dark lines or incorrect color, the print head nozzles may be clogged. You can print a nozzle check pattern to check them. If the nozzle check pattern shows white lines or gaps, you can run the head cleaning program. 1. On the Maintenance - Epson PhotoPC L-410 | User Manual - Page 67
Cleaning the print head nozzles If your photos have light or dark lines or incorrect color, the print head nozzles may be clogged. You can run the head cleaning program to unclog the nozzles so they can deliver ink properly. 1. On the Maintenance screen, select Head Cleaning by using the u d buttons - Epson PhotoPC L-410 | User Manual - Page 68
Aligning the print head If your photos look grainy or blurry or you see misaligned vertical lines or horizontal banding, you may need to align the print head. 1. On the Maintenance screen, select Print Head Alignment by using the u d buttons, then press the OK button. 2. Load some plain paper in the - Epson PhotoPC L-410 | User Manual - Page 69
and Troubleshooting Maintenance To keep your camera operating at its best, you should clean it thoroughly several times a year. Before you perform any maintenance on the camera, be sure to read the "Safety Instructions" on page 7. Then follow these guidelines. Cleaning your camera c Caution - Epson PhotoPC L-410 | User Manual - Page 70
as alcohol, paint thinner or benzine. They will damage the battery compartment. Storing your camera Store the camera in a cool and dry location and remove the batteries to prevent corrosion or leaks if you will not be using the camera for a long period of time. Maintenance and Troubleshooting 70 - Epson PhotoPC L-410 | User Manual - Page 71
Problems and Solutions Camera problems The camera has no power Cause Is the battery installed correctly? Does it need to be replaced? Is the camera turned on? What to do Check the battery and replace it if necessary. See "Installing the Battery" on page 17 for details. The camera may have shut off - Epson PhotoPC L-410 | User Manual - Page 72
turn the power on. If the lights are still flashing, contact Epson as described in "Where to Get Help" on page 81. The power turns off automatically Cause What to do Is the power saving function turned on? Press the POWER button to turn the camera back on. Maintenance and Troubleshooting 72 - Epson PhotoPC L-410 | User Manual - Page 73
The camera takes too long to take a photo Cause What to do Did you press the shutter button completely with screen brightness Adjust the LCD Brightness setting in the Setup Menu. See "Adjusting level set to too bright? Camera Settings" on page 41 for details. Maintenance and Troubleshooting 73 - Epson PhotoPC L-410 | User Manual - Page 74
the camera is connected to a computer, the LCD screen is disabled. The screen also goes black during printing. Is the LCD screen turned off? Press the DISP button to switch the LCD screen setting. See "Taking Photos Using the Viewfinder Only" on page 35 for details. Maintenance and Troubleshooting - Epson PhotoPC L-410 | User Manual - Page 75
problems Images are out of focus Cause What to do Did you operate the auto-focus Place the subject in the center of the focus area and press the shutter correctly? button halfway. See "Taking Photos Using the LCD Screen" on page 25 for details. Is the camera Maintenance and Troubleshooting 75 - Epson PhotoPC L-410 | User Manual - Page 76
the camera away from your face. Is the subject of the picture very When the subject is less than three feet from the lens, you may be close to the camera? experiencing parallax problems. Use the LCD screen to check your pictures before you capture them. Maintenance and Troubleshooting 76 - Epson PhotoPC L-410 | User Manual - Page 77
Photo R200 only. For other models, see the instructions that came with the printer.) Are you using the right paper? Make sure you load Epson Premium Glossy Photo Paper in your printer. The wrong date and/or time is displayed on your camera Cause What to do Is the date and time setting - Epson PhotoPC L-410 | User Manual - Page 78
Check the Unspecified memory card problem. See "Installing and camera has no memory card inserted. Insert a memory card. Not enough free space in the camera 's memory. Not enough free space on the memory card. No more space in the camera the limit (240kb). this camera. The maximum number of - Epson PhotoPC L-410 | User Manual - Page 79
to this file. No images. There are no images saved in the camera's memory or on the memory card. This image cannot be displayed. . Replace the cartridge(s) following the printer instruction booklet. Printer error. There may be a problem with the printer. Turn the printer off Troubleshooting 79 - Epson PhotoPC L-410 | User Manual - Page 80
and try again. XX images could not be printed. Images taken with another camera or saved on your computer may not print. Try printing from your computer does not support this function. Run the printer maintenance program from your computer instead of the camera. Maintenance and Troubleshooting 80 - Epson PhotoPC L-410 | User Manual - Page 81
help services are available 24 hours a day, seven days a week. To use these services, you must have a touch tone telephone and call (800) 922-8911. Your Epson SoundAdviceSM Express Code is 70580. Use this code to quickly select the Epson PhotoPC L-410 in SoundAdvice. Maintenance and Troubleshooting - Epson PhotoPC L-410 | User Manual - Page 82
Product name (Epson PhotoPC L-410) ❏ Product serial number (located on the bottom of the camera) ❏ Proof of purchase (such as a store receipt) and date of purchase ❏ Computer configuration and operating system version ❏ Description of the problem You can purchase ink cartridges, paper, manuals, and - Epson PhotoPC L-410 | User Manual - Page 83
Appendix A Specifications and Optional AC Adapter Specifications Effective pixels: Image recording capacity: Image file type: Camera file system: Internal memory: Available memory card: Lens: 4.07 megapixels Still picture: 2304 × 1728 pixels Video: 640 × 480 pixels JPEG (EXIF 2.2), AVI DCF - Epson PhotoPC L-410 | User Manual - Page 84
Digital zoom: Focus mode: Auto-Focus range: Shutter speed: White balance: Sensitivity: Viewfinder: Flash: Self- dual interface (Mass Storage Class) One CR-V3 battery included. Also accepts 2 AA alkaline, Ni-Cd, or NiMH batteries, including rechargeables Specifications and Optional AC Adapter 84 - Epson PhotoPC L-410 | User Manual - Page 85
External power source: Dimensions (Height × Width × Depth): Weight: Temperature: Electrical: Safety: Optional AC adapter (B867062) 2.4 × 3.6 × 1.2 inches (62 × 92.5 × 31.5 mm) Approx. 0.3 lb (152 g) Operating: 41 to 95 °F (5 to 35 °C) Storage: -4 to 140 °F (-20 to 60 °C) Input voltage: DC 3.4 V - Epson PhotoPC L-410 | User Manual - Page 86
Optional AC adapter Model: Input: Output: Power consumption: B867062 AC 100 - 240 V DC 3.4 V, 2.5 A 14 W Using the AC adapter Note: Read any instructions provided with the AC adapter before using it. 1. If your AC adapter has a separate AC power cable, connect the cable connector firmly into the - Epson PhotoPC L-410 | User Manual - Page 87
Open the connector cover on the side of the camera and plug the adapter cable into the DC IN port on the camera. 3. Plug the AC adapter into an electrical outlet. c Caution: Do not use the adapter for any device other than your Epson PhotoPC L-410 camera. Specifications and Optional AC Adapter 87 - Epson PhotoPC L-410 | User Manual - Page 88
Auto red-eye reduction, 27 B Battery installing, 17 life, 18 safety, 8 to 10 Battery/memory card cover, 14 Buttons location, 14 using, 15 C Cable PC, 12, 53, 57 printer, 12, 57 Camera cleaning, 69 connecting to printer, 58 lights, 16 modes, 24, 30 parts, 13 problems, 71 storing, 70 turning on/off - Epson PhotoPC L-410 | User Manual - Page 89
print order format, 49 Digital zoom, 26, 42 Direct printing albums, 63 description, 57 printing all photos in memory, 61 printing a photo on the LCD screen, 60 printing selected photos, 62 print settings, 64 problems, 77 supported printers, 57 DISP button, 14, 16 DPOF, 49 E Epson Help, 81 Premium - Epson PhotoPC L-410 | User Manual - Page 90
, 59 taking photos with, 54 Functions of buttons, 15 H Help, Epson, 81 I Icons on LCD screen, 33 Image problems, 75 Indicator lights, 16 Information on LCD screen, 33 Initial settings, 23 Ink level, checking from camera, 65 Installing battery, 17 memory card, 20 ISO sensitivity, 28, 37 L Landscape - Epson PhotoPC L-410 | User Manual - Page 91
28 Main features, 6 Managing photos deleting, 50 viewing, 45 Manual photography mode, 24 Memory access light, 14, 16 Memory OK button, 14, 16 Opening the battery/memory card cover, 17 Optical zoom, 26 P P.I.F. button, 14, 15 description, 54 photos, 59 Paper, Epson Premium Glossy Photo, 57 PC USB - Epson PhotoPC L-410 | User Manual - Page 92
Glossy Photo Paper, 57 Print button, 14, 15 Printer connecting camera, 58 supporting direct print, 57 Printer maintenance aligning the print head, 68 checking camera, 57 problems, 77 selecting photos, 49 Print settings, 64 Problems camera, 71 image, 75 LCD screen, 73, 74 printing, 77 Problems - Epson PhotoPC L-410 | User Manual - Page 93
memory card, 21 Reset All setting, 43 Resolution, 26, 31 S Safety instructions, 7 to 11 Scene mode, 30 Self-timer button, 14, 15 Technical support, 81 Time and date setting, 23 Tripod,14, 29, 30 Troubleshooting camera problems, 71 image problems, 75 printing problems, 77 Turning the camera on/off - Epson PhotoPC L-410 | User Manual - Page 94
U Unpacking the camera, 12 USB cables, 12 connector, 14 light, 13, 16 port, 53 V Videos playing, 46 recording, 39 Viewfinder, 14, 35 Viewing photos, 45 properties of photos, 48 W White balance, 36 Z Zoom, 25 Zoom buttons, 14, 15 Index 94
-
 1
1 -
 2
2 -
 3
3 -
 4
4 -
 5
5 -
 6
6 -
 7
7 -
8
-
9
-
10
-
11
-
12
-
13
-
14
-
15
-
16
-
17
-
18
-
19
-
20
-
21
-
22
-
23
-
24
-
25
-
26
-
27
-
28
-
29
-
30
-
31
-
32
-
33
-
34
-
35
-
36
-
37
-
38
-
39
-
40
-
41
-
42
-
43
-
44
-
45
-
46
-
47
-
48
-
49
-
50
-
51
-
52
-
53
-
54
-
55
-
56
-
57
-
58
-
59
-
60
-
61
-
62
-
63
-
64
-
65
-
66
-
67
-
68
-
69
-
70
-
71
-
72
-
73
-
74
-
75
-
76
-
77
-
78
-
79
-
80
-
81
-
82
-
83
-
84
-
85
-
86
-
87
-
88
-
89
-
90
-
91
-
92
-
93
-
94
 |
 |

User’s Guide