Epson PhotoPC L-410 Product Information Guide
Epson PhotoPC L-410 Manual
 |
View all Epson PhotoPC L-410 manuals
Add to My Manuals
Save this manual to your list of manuals |
Epson PhotoPC L-410 manual content summary:
- Epson PhotoPC L-410 | Product Information Guide - Page 1
Epson PhotoPC L-410 Camera Parts Front/top view Mode dial Automatic mode Manual mode Playback mode 152.2 g) Power Sources External One CR-V3 battery (included) Also accepts two AA alkaline, NiCad, lithium or NiMH batteries, including rechargeables Optional AC adapter (B867062) Technical - Epson PhotoPC L-410 | Product Information Guide - Page 2
LCD monitor Installing the Battery The Epson PhotoPC L-410 accepts the CR-V3 battery included with the camera as well as AA alkaline, NiCad, or NiMH batteries, including rechargeables. Follow these steps to install the batteries: 1. Turn the camera upside down. 2. Slide the battery cover until it - Epson PhotoPC L-410 | Product Information Guide - Page 3
Epson PhotoPC L-410 Using Memory Cards You can take pictures and save them in the camera without a memory card. However, you can store more pictures when you use a memory card. You can use either of the following types of cards: ❏ an SD™ card (Secure Digital) up to 512MB. (To shoot at the maximum - Epson PhotoPC L-410 | Product Information Guide - Page 4
the camera software. You can use the PRINT Image Framer Tool to copy the frames from your computer to the camera. You can also modify the frames or create original frames using PIF Designer. See the Camera Basics manual for instructions on installing the software. 8/04 Epson PhotoPC L-410 - 4 - Epson PhotoPC L-410 | Product Information Guide - Page 5
2. Connect the large end of the cable to the correct port on your printer. ❏ On the Epson Stylus Photo R200, shown below, the port is labeled USB. Epson Stylus Photo R200 ❏ On the other supported printers listed in the Camera Basics manual, the port is labeled EXT I/F. 5 - Epson PhotoPC L-410 8/04 - Epson PhotoPC L-410 | Product Information Guide - Page 6
Epson PhotoPC L-410 3. Open the connector cover on the side of the camera and plug the small end of the cable into the camera's USB port as shown. Connection for the Epson Stylus Photo R200 Connection for other supported Epson printers 4. Turn on the camera. Printing the Photo Displayed on the - Epson PhotoPC L-410 | Product Information Guide - Page 7
Epson PhotoPC L-410 Related Documentation CPD-18422 CPD-18421 Epson PhotoPC L-410 Camera Basics Epson PhotoPC L-410 CD-ROM with electronic User's Guide 7 - Epson PhotoPC L-410 8/04
-
 1
1 -
 2
2 -
 3
3 -
 4
4 -
 5
5 -
 6
6 -
 7
7
 |
 |

Epson PhotoPC L-410
1
-
Epson PhotoPC L-410
8/04
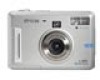
Camera Parts
Front/top view
Bottom/rear view
Back view
Accessory
An AC adapter (part number B867062) is available.
To order the adapter, contact your dealer or call Epson
at (800) 873-7766 or visit the Epson Store
SM
at
www.epsonstore.com (U.S. sales only). In Canada,
please call (800) 463-7766 for dealer referral.
Camera Specifications
Physical Dimensions
Width
2.44 inches (61.9 mm)
Height
3.64 inches (92.4 mm)
Depth
1.24 inches (31.5 mm)
Weight
Approx. 5.37 oz.(152.2 g)
Power
Sources
One CR-V3 battery (included)
Also accepts two AA alkaline, NiCad,
lithium or NiMH batteries,
including rechargeables
External
Optional AC adapter (B867062)
Technical
Effective pixels
4.07 megapixels
Image recording
capacity
Still picture: 2304 × 1728 pixels
Video: 640 × 480 pixels
Image file type
JPEG (EXIF 2.2), AVI
Camera file
system
DCF file format, DPOF 1.1
Internal memory
16MB
Interface
Full-speed USB 2.0
(Mass Storage Class)
Electrical
Input voltage: DC 3.4V
Safety
United States
FCC Part 15 Subpart B Class B
Canada
CSA C108.8 Class B
Mode dial
Manual mode
Continuous
shooting mode
Automatic
mode
Video mode
Setup mode
Playback mode
Shutter
button
Strap holder
Microphone
Speaker
Flash
Self-timer light
USB light
Lens barrier
Connector cover
Battery/memory
card cover
USB connector
AC adapter connector
Tripod mount
Print button
P.I.F. button
Display button
Indicator lights
Viewfinder
POWER button
Zoom buttons
Memory access light
MENU button
Self-timer /
u
button
OK button
Flash /
r
button
Delete /
d
button
Macro /
l
button