Epson PPC650 User Manual
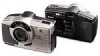
Epson PPC650 - 1MP PhotoPC 650 Digital Camera Manual
 |
UPC - 010343821101
View all Epson PPC650 manuals
Add to My Manuals
Save this manual to your list of manuals |
Epson PPC650 manual content summary:
- Epson PPC650 | User Manual - Page 1
's Guide Update Remove any protective plastic film you may find in these areas before using your camera: protective film EPSON protective film EPSON protective film When playing back pictures on a television or recording them on videotape, ignore the steps beginning on page 3-11 of your manual - Epson PPC650 | User Manual - Page 2
Notice to Windows® Users If you are using the EPSON PhotoPC® 650 TWAIN software to delete individual photos within the camera, do not attempt to delete locked images. Attempting to do so may inadvertently delete other photos. We apologize for any inconvenience this may cause. It is recommended that - Epson PPC650 | User Manual - Page 3
A B - Epson PPC650 | User Manual - Page 4
any and all rights in those marks. Copyright © 1999 by Epson America, Inc. Torrance, California, USA CPD 8855 7/99 A NOTE CONCERNING RESPONSIBLE USE OF COPYRIGHTED MATERIALS Digital cameras and scanners, like photocopiers and conventional cameras, can be misused by improper copying of copyrighted - Epson PPC650 | User Manual - Page 5
Time Formatting the USB CompactFlash Card Installing Your PhotoPC 650 Software 2 Installing on a Windows PC 3 Installing on a Macintosh 3 Identifying Camera Parts 3 3 2 Taking Pictures 4 Getting Ready to Take Pictures 4 Turning the Camera On and Off Saving Battery Power with Auto Shut - Epson PPC650 | User Manual - Page 6
4-17 3-14 Making an EPSON PhotoPC 650 3-14 Plug-In Driver Alias (Macintosh) 4-18 3-15 Opening EPSON PhotoPC 650 TWAIN or Plug-In 4-18 Changing the Picture Transfer Speed 4-19 Selecting Pictures to Transfer 4-20 Transferring Pictures From the Camera to Your Computer 4-20 What - Epson PPC650 | User Manual - Page 7
Printing a Picture with Smart Print 6-11 Printing a Collection 6-12 Using Creative Templates Creating a Photo Page Modifying a Photo Page Saving a Photo Page Printing a Photo Page Displaying Collection Slide Shows 7 Editing Images Making Basic Adjustments Flipping Rotating Resizing Adjusting - Epson PPC650 | User Manual - Page 8
the Camera Solving Camera Problems Solving Picture Problems 9-1 Photographic B-3 9-1 Lexar Media JumpShot USB Cable B-4 9-2 Optional AC Adapter B-4 9-2 Physical Dimensions B-4 9-7 Technical B-4 Where To Get Help Software, CompactFlash Card, and 9-9 Index JumpShot USB Cable Support - Epson PPC650 | User Manual - Page 9
.WMF REMOVED Y our new EPSON® PhotoPC® 650 is an easy-to-use, high resolution digital camera with a built-in LCD Macintosh® G3 only) or serial port (Windows 95, 98, or PowerPC™ Macintosh®). The camera's built-in 37 mm threads let you connect optional video A camcorder lenses to capture close - Epson PPC650 | User Manual - Page 10
PowerPC™ Macintosh Video cable for displaying photos on a TV or videotaping them Your camera comes with the following software: PictureWorks™ HotShots™ software for transferring, organizing, editing, and printing your pictures The EPSON PhotoPC 650 TWAIN driver (Windows) or Plug-In (Macintosh - Epson PPC650 | User Manual - Page 11
Optional Accessories Minimum System Requirements EPSON offers these optional accessories for the PhotoPC 650: AC attach optional 37 mm video camcorder lenses and filters, and connect a tripod to your camera. See Appendix A for details on using all the optional accessories. Make sure your system - Epson PPC650 | User Manual - Page 12
for the PhotoPC 650 digital camera and mail it back to us. This enables you to receive special information on accessories, new products, and software upgrades. You'll get immediate attention if you have a problem with your PhotoPC 650. Safety Instructions Read these instructions and all warnings - Epson PPC650 | User Manual - Page 13
covered by the operating instructions. Avoid sudden temperature changes, which can cause moisture to condense on the camera. Keep the camera in a case sure the AC Don't attempt to service the camera yourself. Refer all servicing to qualified service personnel. If the liquid crystal solution - Epson PPC650 | User Manual - Page 14
6 Introduction - Epson PPC650 | User Manual - Page 15
Attaching the hand strap Removing the protective plastic video cable Setting the date and time Formatting the USB CompactFlash card Installing your PhotoPC 650 software software serial cable USB CompactFlash card Identifying camera parts A in envelope B Getting Started 1-1 - Epson PPC650 | User Manual - Page 16
USB support. However, you must install the USB CompactFlash card to provide memory for your camera. It 1 Before you start, make sure the camera is turned off. The lens cover switch card from the envelope labelled "ATTENTION!". 3 Open the camera's card and port cover and insert the card all the - Epson PPC650 | User Manual - Page 17
turned off (the lens cover switch is in the off position, as shown to the left). Then follow these steps: 1 Turn the camera upside down with the front of the camera facing you. 2 Push the battery cover down and to the right. Then raise the cover. 3 Insert all four batteries into the - Epson PPC650 | User Manual - Page 18
's circuits. Read all safety and handling instructions before using batteries. EPSON offers an optional NiMH Power Pak that includes or mutilate batteries. Don't get them wet or expose them to fire. When the camera isn't used for long periods of time, remove the batteries and store them at a low - Epson PPC650 | User Manual - Page 19
instructions and in compliance with all applicable laws. Contact your local government agency for information about battery recycling and disposal. Battery life varies depending on the battery type, the manufacturer, and other factors. Avoid using your camera holder on the camera, then pull the - Epson PPC650 | User Manual - Page 20
get an error, see Chapter 9 for troubleshooting information. 3 Press the SELECT button. You see the clock setting display in the LCD monitor, with the month setting highlighted in white: Clock Setting 05/15/99 02:37 mm/dd/yy 2 On the back of the camera, slide the monitor switch to PLAYBACK. You - Epson PPC650 | User Manual - Page 21
with any ATA-compatible digital camera, such as EPSON's PhotoPC 600, 700, or 750Z cameras. 1 On the back of the camera, set the monitor switch to PLAYBACK (as shown to the left). 2 Press the SELECT button to display the LCD monitor menus. If you have problems formatting or using your CompactFlash - Epson PPC650 | User Manual - Page 22
pictures from the camera to your computer, and organize, enhance, and print your images. The CD-ROM has these applications for your PC or Macintosh: PictureWorks HotShots EPSON PhotoPC 650 TWAIN driver (Windows) or Plug-In driver (Macintosh) It also contains the driver software for the JumpShot - Epson PPC650 | User Manual - Page 23
Identifying Camera Parts shutter button viewfinder flash tripod threads EPSON timer light EPSON 37 mm threads lens for optional lenses lens cover (on/off) front view card and port cover battery cover CompactFlash card eject switch bottom view A B Getting Started 1-9 - Epson PPC650 | User Manual - Page 24
status display LCD monitor panel switch status light viewfinder status display panel EPSON shutter button FUNCTION button LCD monitor back view flash button image quality button macro/timer button top view 1-10 Getting Started - Epson PPC650 | User Manual - Page 25
Mileage 999-555-5555 Jim Jackson's Auto Sales Taking pictures with PhotoPC 650 is similar to using a traditional "point and shoot" auto-focus camera. This chapter tells you everything you need to know about getting great shots, including the following information: ◗ Getting ready to take pictures - Epson PPC650 | User Manual - Page 26
turns green and stays on, you can take pictures. To turn off the camera, slide down the lens cover switch to the off position. The lens cover the status display panel and status light turn off. . status display panel EPSON EPSON lens cover switch down: OFF lens cover switch up: ON Saving Battery - Epson PPC650 | User Manual - Page 27
when your battery power is completely out. Make sure your subject and the camera aren't moving, or your picture will be blurred. You need to replace the temperature. See page 1-3 for battery handling Chapter 7 for instructions. and power-saving details. In certain low light conditions - Epson PPC650 | User Manual - Page 28
the LCD monitor to preview your picture as you take it; see page 2-6 for instructions. Follow these steps to take a picture with the viewfinder: 1 Make sure you closer, use macro mode as described on page 2-10.) 2 Turn the camera on and wait until the status light turns green and stays on. shutter - Epson PPC650 | User Manual - Page 29
it on.) The Quick Review image lets you see how your picture will turn out and lets you delete the picture, if necessary, before your camera saves it. (You can still delete the picture after it's saved.) The Quick Review image remains on the monitor for around 5 seconds. A gauge on the - Epson PPC650 | User Manual - Page 30
the LCD monitor may appear speckled or "noisy" due to insufficient light reaching the camera's sensor. This won't affect the quality of your picture unless you turn the flash off. (See page 2-11 for instructions on using the flash.) The preview image may appear to flicker under strong fluorescent - Epson PPC650 | User Manual - Page 31
picture will turn out and lets you delete the picture, if necessary, before your camera saves it. (You can still delete the picture after it's saved.) The Saved images remain in memory for at least a year, even when the camera is turned off and the batteries are removed. NOTE The LCD monitor uses - Epson PPC650 | User Manual - Page 32
quality button on top of the camera to cycle from one setting to the other. pictures remaining EPSON When the camera's memory is full, the number the camera's memory, you can play back your pictures on the LCD monitor and erase the ones you don't want to save; see page 3-2 for instructions. If - Epson PPC650 | User Manual - Page 33
used to make the image data fit in a smaller memory area and transfer at a quicker rate. The JPEG compression used by your camera eliminates some image data ("lossy" compression) to achieve these results. The Uncompressed image quality setting doesn't eliminate image data ("lossless" compression - Epson PPC650 | User Manual - Page 34
to the VIEW position. You see a live preview on the LCD monitor. 2 Press the / macro button on top of the camera once. The macro icon appears on the status display panel. EPSON 4 Hold the camera still until it beeps and the status light starts flashing red. The flashing red light indicates that the - Epson PPC650 | User Manual - Page 35
the picture after it's saved, if necessary.) To turn off macro mode, press the / macro button three times or turn off the camera. The camera returns to normal photo mode automatically. An icon for each setting appears on the status display panel: Auto The flash goes off automatically whenever it - Epson PPC650 | User Manual - Page 36
take a picture of yourself. Follow these steps to take a picture with the timer: 1 Place the camera on a flat surface or install it on a tripod. (See page A-3 for tripod instructions.) 2 Turn on the camera and wait until the status light turns green. 3 Press the / timer button twice. The timer icon - Epson PPC650 | User Manual - Page 37
settings through the LCD monitor menus. You can even view your pictures on a television just as easily as on the camera's monitor. This chapter explains the following: ◗ Using playback mode menus ◗ Playing back pictures one by one ◗ Playing back multiple pictures ◗ Playing pictures as a slide - Epson PPC650 | User Manual - Page 38
steps to use the playback mode menus: 1 Turn on the camera, as described on page 2-2. 2 Slide the monitor switch to PLAYBACK. After a moment, the last photo you took appears on the LCD monitor. monitor switch 3 To off the display of information on played-back pictures). See page 3-5 for instructions. - Epson PPC650 | User Manual - Page 39
Mode (play back images one at a time or in groups of 9). See page 3-4 for instructions. Photo Control (erase or lock your pictures, or reformat CompactFlash cards). See page 3-6 and Chapter 8 for instructions. Playing Back Pictures One-by-One When you set the monitor switch to PLAYBACK, you see - Epson PPC650 | User Manual - Page 40
), then press the BACK button to exit the menus. Thumbnail images of the last photos you took (up to 9 of them) appear on the LCD monitor, with the the images on the LCD monitor. When the frame reaches the first or last photo of the current group, the previous or next group of up to nine images - Epson PPC650 | User Manual - Page 41
menu. begins playing back your pictures one by one. To move forward or back through the photos manually, press the or button. Information On Off To pause the slide show at a particular photo, press the SELECT button. The pause icon appears 3 Press the SELECT button to turn information Off - Epson PPC650 | User Manual - Page 42
You can "lock" pictures to prevent their deletion You can erase photos right after you take them, before they are stored in your camera, using Quick Review. See Chapter 2 for instructions. You can also erase stored photos through your software when you're transferring them to your computer. For - Epson PPC650 | User Manual - Page 43
Before you start, set the playback mode to Multi. This makes it easier to select images; see page 3-4 for instructions. 4 Press the or or Erase All. button to choose Select Photo Make sure the monitor switch is set to PLAYBACK, and follow these steps to erase pictures: 1 Press the SELECT button - Epson PPC650 | User Manual - Page 44
images were erased. 9 Press BACK until you return to playback mode. Locking Photos The lock feature allows you to keep your photos from being accidentally erased. You can lock selected photos or all the photos in the camera. Make sure the monitor switch is set to PLAYBACK, then follow these steps - Epson PPC650 | User Manual - Page 45
5. 9 Press BACK until you return to playback mode. 5 Press the SELECT button, then press the or button to move through the images in the camera until the photo you want to lock appears on the monitor. 6 Press the SELECT button. A lock icon appears in the lower left corner. If you want to - Epson PPC650 | User Manual - Page 46
the BACK button until you return to normal playback mode. If you chose Select Photo, continue with step 5. 5 Press the SELECT button, then press the or button to move through the images in the camera until the photo you want to unlock appears on the monitor. 6 Press the SELECT button. The lock - Epson PPC650 | User Manual - Page 47
is highly recommended when you play back your pictures on a TV. See pages A-1 and A-2 for instructions and ordering information. TIP You can videotape your pictures to share them without using a computer. First set the camera's LCD monitor to Slide Show, as described on page 3-5. Then connect the - Epson PPC650 | User Manual - Page 48
or off) Quick Review mode setting (on [default] or off) Brightness of the LCD on the back of the camera Setting the Date and Time If you ever want to change the camera's clock settings, set the monitor switch to PLAYBACK, then follow these steps: 1 Press the SELECT button to display the - Epson PPC650 | User Manual - Page 49
you replace the current selection is highlighted. When you turn the A camera's batteries. In this case, you change the settings through setting on, you hear the camera beep. the Clock Setting menu. See page 1-5 for instructions. 5 If you're finished changing settings, press the BACK B button - Epson PPC650 | User Manual - Page 50
Quick Review Mode Quick Review mode lets you review the picture you just took on the LCD monitor and delete it, if necessary, before your camera stores it in memory. You can turn off Quick Review mode to save additional battery power or if you'd rather not use it. Set the - Epson PPC650 | User Manual - Page 51
until you return to playback mode. Setting the Language You can choose from these six languages for information displayed on the camera's LCD monitor: English Español (Spanish) Portuguese Français (French) Deutsch (German) Italiano (Italian) Set the monitor switch to PLAYBACK and - Epson PPC650 | User Manual - Page 52
3-16 Playing Back Pictures - Epson PPC650 | User Manual - Page 53
that came with your camera A from your camera, insert it in the JumpShot USB cable, and The Jumpshot USB cable and CompactFlash card transfer pictures directly from the card. See the next section for instructions. drivers installed on your computer B Getting Photos Into Your Computer 4-1 - Epson PPC650 | User Manual - Page 54
or Power Macintosh G3, you installed the USB drivers when you installed the rest of your camera software (if not, see page 1-8). With Windows, you'll install the drivers when your system detects the connected JumpShot USB by the USB logo on the label. USB logo 4-2 Getting Photos Into Your Computer - Epson PPC650 | User Manual - Page 55
's USB port or USB hub port. A If you have a Windows 98 computer, see the next section for instructions on installing the USB CompactFlash card and USB cable drivers. If you have a Macintosh, see page 4-7 for instructions on transferring your pictures. B Getting Photos Into Your Computer 4-3 - Epson PPC650 | User Manual - Page 56
cable to your system, you need to install their Windows 98 USB drivers using the plug-and-play function. Follow these steps: 1 Make sure on the cable turns on. (If it doesn't turn on, see page 9-4 for troubleshooting steps.) 3 You see the Add New Hardware Wizard that tells you Windows 98 has - Epson PPC650 | User Manual - Page 57
Next. click CD-ROM drive To check if your driver installation was successful, do the following: 1 Click . 6 You see a message that a driver was located for the USB cable, called Windows Explorer.) 8 You see a message that a driver was located for the USB CompactFlash card, called LexarMedia - Epson PPC650 | User Manual - Page 58
you want to copy the pictures to on your hard disk. 6 To copy all the pictures in the camera at once, click the Photo650 folder, hold down the mouse button, and drag it to the picture folder card out of the USB cable slot and install it back in your camera. 4-6 Getting Photos Into Your Computer - Epson PPC650 | User Manual - Page 59
to transfer pictures, it's a good idea to check Lexar Media's web site periodically for possible updates to your USB CompactFlash card and JumpShot USB cable drivers. Access www.lexarmedia.com for details. your pictures A B Getting Photos Into Your Computer 4-7 - Epson PPC650 | User Manual - Page 60
card out of the USB cable slot and install it back in your camera. See page 1-2 for instructions. CAUTION Never remove the USB CompactFlash card or unplug the USB cable CompactFlash card and JumpShot USB cable drivers. Access www.lexarmedia.com for details. 4-8 Getting Photos Into Your Computer - Epson PPC650 | User Manual - Page 61
camera using the camera's Reformat mode (see page 1-7 for instructions). camera is connected to your system, you can't use any of the camera controls. To save battery power, you can leave the camera use COM1 (port 1) to connect your camera. Transferring pictures using HotShots NOTE If you - Epson PPC650 | User Manual - Page 62
the connector. Then tighten the screws. NOTE If you have problems connecting to your COM port, check your computer's COM port settings instructions on selecting your Port setting with the EPSON PhotoPC 650 Plug-In. 1 Connect the small Macintosh adapter cable to either the modem port or printer - Epson PPC650 | User Manual - Page 63
your pictures via the serial cable using HotShots the camera if AppleTalk is on. Also, if you have problems connecting to the printer port, use the modem port instead. and the EPSON PhotoPC 650 TWAIN (Windows) or PlugIn driver (Macintosh), follow the steps in these sections: 2 Connect the - Epson PPC650 | User Manual - Page 64
Opening the EPSON PhotoPC 650 TWAIN or Plug-In Driver 1 Connect the camera to your computer using the serial cable; see page 4-9 for instructions. 2 Start HotShots. In Windows, double-click the HotShots icon you right away to select a collection file. 4-12 Getting Photos Into Your Computer - Epson PPC650 | User Manual - Page 65
. Then select 115200 (for Windows) or 230400 (for If the current transfer speed displayed on the Camera Content tab is 57600 or lower, see the next section to Macintosh). If your system won't support these faster speeds, select the next lower speed. A select a faster transfer speed. When you're - Epson PPC650 | User Manual - Page 66
the Camera Content tab unless you click the Open Camera button; To permanently erase a picture from your camera, select it and click Erase, then confirm the camera. See the next section. Transferring Pictures From the Camera to Your Computer There are two ways to transfer your pictures from your camera - Epson PPC650 | User Manual - Page 67
your hard disk. See page 4-16 for instructions. NOTE If your camera shuts off automatically while you're transferring pictures (to save battery power), click the Open Camera button on the TWAIN or Plug-In folder button (Macintosh) to create a new folder. B Getting Photos Into Your Computer 4-15 - Epson PPC650 | User Manual - Page 68
Setup tab on the window and click Browse under Default Photo Folder. 3 If you want to save your pictures in press the J and . keys (Macintosh). 5 Close the EPSON PhotoPC 650 TWAIN or Plug-In windows and return to in HotShots, see Chapter 6 for instructions. To import them with another application, - Epson PPC650 | User Manual - Page 69
EPSON PhotoPC 650 TWAIN or Plug-In window and use the Save to Folder method to transfer your pictures instead. See page 4-15 for instructions the camera. Make sure you've already connected the camera to EPSON PhotoPC 650 Plug-In with other applications on a Macintosh, you must copy the Plug-In driver - Epson PPC650 | User Manual - Page 70
Then click and drag the Plug-In alias from your desktop to the folder. Opening EPSON PhotoPC 650 TWAIN or Plug-In 1 Connect the camera to your computer using the serial cable; see page 4-9 for instructions. 2 Start your application. 3 Windows: From the File menu, choose Import, then Select TWAIN_32 - Epson PPC650 | User Manual - Page 71
You see the EPSON PhotoPC 650 TWAIN or Plug-In window (the Windows screen is shown below). The pictures in your camera appear in the window. Camera Content Setup tab tab current transfer speed Changing the Picture Transfer Speed If the current transfer speed displayed on the Camera Content tab is - Epson PPC650 | User Manual - Page 72
the Camera Content tab unless you click the Open Camera button; To permanently erase a picture from your camera, select it and click Erase, then confirm the camera. See the next section. Transferring Pictures From the Camera to Your Computer There are two ways to transfer your pictures from your camera - Epson PPC650 | User Manual - Page 73
your hard disk. See page 4-22 for instructions. NOTE If your camera shuts off automatically while you're transferring pictures (to save battery power), click the Open Camera button on the TWAIN or Plug-In folder button (Macintosh) to create a new folder. B Getting Photos Into Your Computer 4-21 - Epson PPC650 | User Manual - Page 74
open it, click the Setup tab on the window and click Browse under Default Photo Folder. 3 If you want to save your pictures in a format other than JPEG the EPSON PhotoPC 650 TWAIN or Plug-In window and use the Save to Folder method to transfer your pictures instead. See page 4-21 for instructions. - Epson PPC650 | User Manual - Page 75
instructions.) What To Do If the Camera Doesn't Respond If you don't see your camera's pictures in the EPSON setting Speed setting 3 Click the Camera Content tab, then click Open Camera again. If you still don with step 4. 1 Click the Open Camera button on the Camera 4 Check the cable and make sure - Epson PPC650 | User Manual - Page 76
message appears again, continue with step 7. 7 Close the EPSON PhotoPC 650 TWAIN or Plug-In window and try transferring your pictures again. If you still don't see your pictures and the error message appears again, see Chapter 9 for more troubleshooting tips. 4-24 Getting Photos Into Your Computer - Epson PPC650 | User Manual - Page 77
the EPSON PhotoPC 600 XGA color digital camera. It was printed with the EPSON Stylus Color 600 printer at 1440 dpi on EPSON Photo Quality drop from a HotShots collection (Windows only) NOTE Although most of the instructions and illustrations in this chapter apply A to Windows, you can follow - Epson PPC650 | User Manual - Page 78
the Save As feature of HotShots to convert them to another format; see HotShots online help for instructions. NOTE Your picture may display poor image quality after you import it. However, in most cases insert your picture. The picture appears in your document. 5-2 Getting Your Photos Into Documents - Epson PPC650 | User Manual - Page 79
first, and then place the picture in it. For instructions, see your application's online help or documentation. 3 in HotShots; see page 6-2 for Collection instructions. Once you have organized your pictures into Depending A on how well your application supports OLE 2.0, your images may not - Epson PPC650 | User Manual - Page 80
a Collection 4 Locate the collection you want and double-click the collection name to open it. 5 Start your word processor or other application. 5-4 Getting Your Photos Into Documents 6 Open the document in which you want to use the picture. Arrange the window for HotShots so it is next to the - Epson PPC650 | User Manual - Page 81
6 Working with Photos and Collections Action Travel, Inc. 1357 World Drive, Torrance, CA 90509 collections ◗ Saving modified pictures ◗ Organizing pictures in collections ◗ Printing pictures and collections ◗ Using Photo Page layouts A ◗ Displaying collections as slide shows B Working with - Epson PPC650 | User Manual - Page 82
individual pictures in HotShots, or open a collection and then open the picture from there. For instructions on starting HotShots, see page 4-11. TIP The first time you use HotShots, you should saved your collection, highlight the collection, and click Open. 6-2 Working with Photos and Collections - Epson PPC650 | User Manual - Page 83
described on page 6-2. Then click the gray grab bar on the picture, drag it to the collection window, and release the mouse button. A B Working with Photos and Collections 6-3 - Epson PPC650 | User Manual - Page 84
(Windows only) or Shift key as you click the pictures. Then click the Delete button. You see a confirmation message; click Yes. 6-4 Working with Photos and Collections Organizing Pictures in Collections You can easily drag and drop images between HotShots collections to organize them in any way you - Epson PPC650 | User Manual - Page 85
-click the picture; it opens in its own A window. 2 Select Save As from the File menu. You see the Save As B dialog box. Working with Photos and Collections 6-5 - Epson PPC650 | User Manual - Page 86
OK. The information is saved with the picture so you can view it or search for it, as described in the next sections. 6-6 Working with Photos and Collections - Epson PPC650 | User Manual - Page 87
a variety of identification criteria. Description contains Enter the whole description, part of the description, or even one letter of B the description you added Working with Photos and Collections 6-7 - Epson PPC650 | User Manual - Page 88
of the picture on one sheet of paper Size your picture to a standard photo size, such as wallet size or 5 × 7, printing either one or multiple the print settings for your printer, making sure to select the correct paper size setting. (See your printer manual for instructions.) 2 Select Print from - Epson PPC650 | User Manual - Page 89
Description Wallet Size 2 × 3 inches (5.08 × 7.62 cm) 1 Open the picture you want to print; see page 6-2 for instructions. 3 X 5 4 X 6 7.62 × 12.70 cm 10.16 × 15.24 cm 2 Click Share on the remote control to area on the paper size you select in step 6. B Working with Photos and Collections 6-9 - Epson PPC650 | User Manual - Page 90
File menu.) Select some of the print settings for your printer, making sure to select the correct paper size setting. (See your printer manual for instructions.) Select Print It Now from the bottom of the Share or Print (Macintosh) to print your picture(s). 6-10 Working with Photos and Collections - Epson PPC650 | User Manual - Page 91
these steps to print with Smart Print: 1 Open the picture you want to print; see page 6-2 for instructions. 2 Click Share on the remote control to open the Share menu. Then select Print Pictures from the menu. by default, but you can select a new area. A B Working with Photos and Collections 6-11 - Epson PPC650 | User Manual - Page 92
driver settings; see your printer manual for details. Printing a Collection Follow these steps to print an entire collection of pictures using the currently selected collection view: 1 Open the collection you want to print; see page 6-2 for instructions . 6-12 Working with Photos and Collections - Epson PPC650 | User Manual - Page 93
paper size setting. (See your printer manual for instructions.) When you return to the Print dialog box, click OK to print your collection. Using Creative Templates HotShots supplies a variety of templates you can use to display your photos in creative frames, called Photo Pages. Once you drag and - Epson PPC650 | User Manual - Page 94
Page from Share button the menu. 3 Select a category of Make Photo Page option Photo Page templates you'd like to use, such as template categories Photo Page list Sports, Labels, or Holiday. The available Photo Pages for the category appear in the list below the category. 4 To view the - Epson PPC650 | User Manual - Page 95
mouse cursor in the gray grab bar between the image and the title bar; the cursor changes to a hand. Click and drag the picture to a Photo Page location; then release the mouse button. To import an image from a collection, click the picture in the collection window and drag it to - Epson PPC650 | User Manual - Page 96
to place a text box and type your text in the box. text box 3 Use the tools in the Photo Page window taskbar to adjust the size and position of the picture: Click the Enlarge tool, then click in where you want the cursor positioned and add or delete text. 6-16 Working with Photos and Collections - Epson PPC650 | User Manual - Page 97
: left, center, and right align text color Follow these steps to save a Photo Page: 1 Select Save As from the File menu. You see the Save As dialog box. 2 Select the location where you want to store your Photo Page, then select the file type in the Save as type list. bold, italic - Epson PPC650 | User Manual - Page 98
completed Photo Page. Printing with Windows 1 Select Printer Setup from the File menu. Make sure your printer is selected and click the Properties button. 2 Select the print settings for your printer, making sure to select the correct paper size setting. (See your printer manual for instructions - Epson PPC650 | User Manual - Page 99
box Box Out Replaces pictures from the center outward, like an exploding box A Random Blocks Replaces pictures in a pattern of randomly placed blocks B Working with Photos and Collections 6-19 - Epson PPC650 | User Manual - Page 100
6-20 Working with Photos and Collections - Epson PPC650 | User Manual - Page 101
for fast, automatic image adjustment ◗ SmartPix for automatically optimizing images based on how they were captured (camera, scanner, Internet, etc.) and the lighting conditions of the photo ◗ Fix By Example for changing a variety of image characteristics using on-screen before and after examples - Epson PPC650 | User Manual - Page 102
(Windows only) Flipping Follow these steps to flip the picture horizontally or vertically: 1 Open the picture you want to edit. See page 6-2 for instructions. 2 Point to Flip in the Image menu. You see a submenu with Horizontal and Vertical options; click the direction you want to flip the picture - Epson PPC650 | User Manual - Page 103
upside down. This is especially useful for pictures taken with your camera rotated 90 degrees, such as portraits; these pictures retain their 1 Open the picture you want to edit. See page 6-2 for instructions. original image rotated 90 degrees counterclockwise 2 Point to Rotate in the Image - Epson PPC650 | User Manual - Page 104
proportions the same. (If you change your mind about the edit, select Undo from the Edit menu.) 6 To save your edited picture, see page 6-3 for instructions. Be sure to give your picture a new name, if you want to save the original picture as it was. 7-4 Editing Images - Epson PPC650 | User Manual - Page 105
picture, if necessary, after changing its resolution. See page 7-4 for instructions. Follow these steps to adjust your image resolution: 1 Open the menu.) A 7 To save your edited picture, see page 6-3 for instructions. Be sure to give your picture a new name, if you want to save the - Epson PPC650 | User Manual - Page 106
Quick Fix: 1 Open the picture you want to edit. See page 6-2 for instructions. 2 Click the Enhance button on the remote control to open the Enhance menu. Internet, camera, scanner, or other device) whether the photo was taken inside or outside the lighting conditions under which the photo was - Epson PPC650 | User Manual - Page 107
use Smart Pix: 1 Open the picture you want to edit. See page 6-2 for instructions. 2 Click the Enhance button on the remote control to open the Enhance menu. Enhance -down list and select B the type of device used to capture your photo: Camera, Internet, Scanner, or Other Device. Editing Images 7-7 - Epson PPC650 | User Manual - Page 108
either inside or outside. 7 Select the lighting conditions under which the photo was taken. If you chose inside, select with a flash, fluorescent lighting from the Edit menu.) 10 To save your edited picture, see page 6-3 for instructions. Be sure to give your picture a new name, if you want to save - Epson PPC650 | User Manual - Page 109
3 Click Fix By Example. You see the By Example editing window: example with least correction example area selector The key example in the center represents the original image. The surrounding eight examples indicate varying corrections of the characteristic, with the least correction of it in the - Epson PPC650 | User Manual - Page 110
or woodgrain Follow these steps to apply special effects: 1 Open the picture you want to edit. See Enhance button page 6-2 for instructions. Special Effects option 2 Click the Enhance button on the remote control to open the Enhance menu. 3 Click Special Effects. 7-10 Editing - Epson PPC650 | User Manual - Page 111
You see the Special Effects editing window: example with weakest effect example area selector If the portion of the picture shown in the example areas is too small or you want to see a different example area, click and drag the example area selector to choose a new area. Drag the edges of the - Epson PPC650 | User Manual - Page 112
, click Cancel Changes.) (If you change your mind about the edit, select Undo from the Edit menu.) 9 To save your edited picture, see page 6-3 for instructions. Be sure to give your picture a new name, if you want to save the original picture as it was. Using Enhancement Tools HotShots offers a wide - Epson PPC650 | User Manual - Page 113
Zooming It's easier to enhance your picture when your view of it is larger. To zoom into and out of your pictures, click the Zoom tool. Then click the zoom in or zoom out tool option and click in your picture; the view is reduced or enlarged by 50%. To select a specific view percentage, click the - Epson PPC650 | User Manual - Page 114
Follow these steps to use the Shape Selection tool: 1 Choose either the square/rectangle or circle/oval tool option to select the shape you want. 2 Use the Feathering slider to smooth or harden the edges of selection area. 3 Move the cursor to the area in your picture where you want to begin drawing - Epson PPC650 | User Manual - Page 115
, hue, brightness, saturation, and vibrancy compared to the surrounding pixels. For example, if your picture has a flare effect in a bright white area (as in a photo of snow), you can use the Magic Wand tool to select only the flared area for correction. To automatically select an area with relative - Epson PPC650 | User Manual - Page 116
(blue), H (hue), S (saturation), and V (vibrancy) values for the color you want to use. Adjust brightness using the scroll bar. Then click OK. Macintosh: Select a color model in the scroll bar on the left, then select the color you want to use. Adjust the available values for the colors and click OK - Epson PPC650 | User Manual - Page 117
To crop an image, click the Crop tool. Then follow these Using Paint and Drawing Tools steps: 1 Move the cursor to the area in your picture outside of which you want to crop; the cursor looks like the Crop tool. 2 Click and drag the mouse over the picture area you want to keep; then release the - Epson PPC650 | User Manual - Page 118
Select the weight of line from either the diffused line or solid line row. Adjust the transparency slider to allow your picture to show through the line, if you like. 2 Select a color for your design as described on page 7-15. 3 Move the cursor to the area in your picture where you want to begin - Epson PPC650 | User Manual - Page 119
For example, if your photo contains an area of color that you want to change to another color, use the Fill Color Match tool to change it. To fill an - Epson PPC650 | User Manual - Page 120
2 Move the cursor to the area in your picture you want to smudge; the cursor is a pointing finger. Aim the tip of the finger on the place you want to start smudging. Then either: Click and release the mouse button repeatedly over the areas you want to smudge; this thoroughly blends local colors - Epson PPC650 | User Manual - Page 121
3 Now position the cursor on the area in your picture where you want to start painting the cloned image. Click and hold down the mouse button; a crosshair appears on the area you selected in step 2. Drag your mouse on the image to paint in the cloned image. The crosshair and clone brush move in - Epson PPC650 | User Manual - Page 122
. Using Correction Tools You can use HotShots' correction tools to eliminate two common photographic flaws: Red Eye Reduction reduces the red effect of the camera's flash on your subject's eyes Dust Removal erases blemishes, such as scratches and specks from your images 7-22 Editing Images - Epson PPC650 | User Manual - Page 123
Paint Brush tool to replace the original eye color instead of correcting it to black with the Red Eye Reduction tool. See page 7-17 for instructions on using the Paint Brush tool. 1 Click the Zoom tool and enlarge your image view until you can clearly see the pixels in the area - Epson PPC650 | User Manual - Page 124
corner. 3 To format all the text in the box, click any of the text options you want to use. To select a text color, see the instructions on page 7-15. left, center, and right align font point size bold, italic, and underline text box 4 You can resize or reposition your text box - Epson PPC650 | User Manual - Page 125
, as described in this chapter. CompactFlash cards and PCMCIA adapters should be available where you bought your PhotoPC 650 camera. For ATA-compatible CompactFlash cards, EPSON recommends cards and PCMCIA adapters from the following manufacturers: Lexar Media, (800) 789-9418 NOTE If you need an - Epson PPC650 | User Manual - Page 126
cable, see page 4-1. To format and transfer pictures with an ATA-compatible CompactFlash card, follow the instructions beginning on page 8-3. Removing a CompactFlash Card CAUTION Never remove the card while the camera is accessing it. Data in the card will likely be lost or damaged. Avoid using or - Epson PPC650 | User Manual - Page 127
instructing you to do so. With the card installed in the camera Photo Control menu. 6 Press BACK until you return to normal playback mode. NOTE If you have problems formatting or using a CompactFlash card, contact the manufacturer for technical support. See page 9-10 for instructions software - Epson PPC650 | User Manual - Page 128
Remove the CompactFlash card from your camera, as described on page 8-2. computer's PCMCIA slot, you can transfer photos by simply copying them to your hard drive instructions. NOTE If you can't access a card in your notebook computer, contact the computer manufacturer. Also try the troubleshooting - Epson PPC650 | User Manual - Page 129
and Troubleshooting Y our PhotoPC 650 camera is easy to take care of, and any problems you may have are easy to solve. This chapter includes the following sections: Caring for the camera Solving camera problems Solving picture problems Where to get help Caring for the Camera Before - Epson PPC650 | User Manual - Page 130
a closed car or trunk In areas of excessive dirt or dust Where it will be exposed to strong vibrations or magnetic fields Solving Camera Problems Check for your problem and possible solutions on the following pages. The camera has no power. Make sure the lens cover is open all the way. The - Epson PPC650 | User Manual - Page 131
menu. See page 3-14 for instructions. A white or light-colored camera and TV are turned on. See page 3-11 for details. A Make sure your LCD monitor is set to PLAYBACK. B Make sure the TV is set to video mode. See the manual for your television if you need help. Maintenance and Troubleshooting - Epson PPC650 | User Manual - Page 132
a picture. Your camera is operating correctly. The the USB card and cable drivers, as described in Chapter 1 EPSON PhotoPC 650 TWAIN or Plug-In software. You may need to change the Port setting to Auto Detect and change the Speed. See page 4-23 for instructions. 9-4 Maintenance and Troubleshooting - Epson PPC650 | User Manual - Page 133
or Plug-In software. Click the Setup tab and change the speed setting to 115230 (for Windows) or 230400 (for Macintosh). If your system won't support A these faster speeds, select the next lower speed. B Your application may not support drag and drop. Maintenance and Troubleshooting 9-5 - Epson PPC650 | User Manual - Page 134
(Macintosh) for instructions. TIP If you' support or follow these steps to download and install an updated driver driver. Select OK to use the Windows default ESDI/IDE HDD Controller driver. A folder appears on the desktop with a drive letter assigned to the card. 9-6 Maintenance and Troubleshooting - Epson PPC650 | User Manual - Page 135
's video controller doesn't support this color depth. You may need to upgrade your system to achieve the best possible image quality. If your pictures look better on the screen than when you print them out, you may need to upgrade your printer. An EPSON color ink jet printer, for example, provides - Epson PPC650 | User Manual - Page 136
they used to. Your camera's lens may be dirty or dusty. Try cleaning it by following the instructions on page 9-1. The area captured in the photo is different from what you saw the photo. If you're taking a close-up or macro mode picture, use the LCD monitor. 9-8 Maintenance and Troubleshooting - Epson PPC650 | User Manual - Page 137
the on-screen help and checked this User's Guide but you still have questions, EPSON provides technical assistance through electronic support services and automated telephone services 24 hours a day, as follows: Electronic support services Service Access World Wide Web From the Internet, you - Epson PPC650 | User Manual - Page 138
Software, CompactFlash Card, and JumpShot USB Cable Support If you've tried the on-screen help and checked this User's Guide but you still have questions, contact the following for technical support: For EPSON PhotoPC 650 TWAIN or the Plug-In driver, contact EPSON as described in the previous - Epson PPC650 | User Manual - Page 139
You can also get an EPSON NiMH Power Pak for convenient, cost-saving battery power. To increase your camera's picture storage capacity and or studio photographs, you can attach a tripod to your camera. This chapter includes the following instructions: A Using the AC adapter Using a tripod - Epson PPC650 | User Manual - Page 140
pictures via the serial cable. The AC adapter allows you to connect your PhotoPC 650 to any standard 110V electrical outlet. The adapter powers the camera but does not charge the batteries. Follow these steps to connect the AC adapter: 1 To avoid losing any images or settings, make sure the - Epson PPC650 | User Manual - Page 141
steps: 1 Assemble and set up the tripod by following the manufacturer's instructions. Make sure the tripod is well-balanced on a flat surface. 2 Find the as desired. Using Optional Lenses The built-in 37 mm threads on your camera let you attach wide-angle, telephoto, and other types of 37 mm video - Epson PPC650 | User Manual - Page 142
to take pictures, rather than the viewfinder. See page 2-6 for instructions. CAUTION You should not leave lenses attached for extended periods of Then twist the lens clockwise into the threads on the front of the camera. EPSON Using Wide-angle Lenses Wide-angle lenses let you capture a larger area - Epson PPC650 | User Manual - Page 143
and set the LCD monitor switch to VIEW. Then twist the lens clockwise into the threads on the front of the camera. EPSON NOTE If necessary, you can use a neutral density filter, contrast enhancement filter, or close-up lens with a wide-angle lens. First screw the filter or - Epson PPC650 | User Manual - Page 144
and set the LCD monitor switch to VIEW. Then twist the lens clockwise into the threads on the front of the camera until it stops. EPSON NOTE As with the wide-angle lens, you can use a neutral density filter, contrast enhancement filter, or close-up lens with a telephoto lens. First screw - Epson PPC650 | User Manual - Page 145
B Specifications Camera Physical Dimensions Width 5.3 inches (134.5 mm) Height 2.2 inches (57 mm) Depth 2.8 inches (72 mm) Weight 11.1 oz, ± 0.4 oz (315 g, ± 10 g), without batteries Safety Specifications Conforms - Epson PPC650 | User Manual - Page 146
(VGA) JPEG 16.7 million colors or 24-bit Five elements in four groups, aspherical glass lens 1/3 inch color area (1.09 megapixels) 1 pin RCA type (to camera); RS-232 9-pin (to Windows computer); 8-pin mini-DIN (to Macintosh) Up to 115.2Kbps (Windows) or 230.4Kbps (Macintosh) with high-speed serial - Epson PPC650 | User Manual - Page 147
Photographic Lens Auto focus range LCD monitor Sensitivity Exposure control EPSON ClearOptics aspherical glass lens, 6 mm focal length (equivalent to a 39 mm lens on a 35 mm camera) 11.8 inches (0.3 m) to infinity 5.9 to 23.6 inches (15 to 60 cm) in macro mode 1.8-inch active matrix TFT color LCD; - Epson PPC650 | User Manual - Page 148
Lexar Media JumpShot USB Cable Interfaces CompactFlash Type I socket for USB CompactFlash card; USB type A connector for Windows 98 PC, iMac, or Power Macintosh G3 LED indicator Steady green when USB CompactFlash card is recognized; flashing green during data transfer Connector dimensions - Epson PPC650 | User Manual - Page 149
7-10 C Cable, JumpShot USB specifications, B-4 support, 9-10 unpacking, 1-1 to 1-2 using, 4-1 to 4-9, 8-1 Cable, serial, 4-9 to 4-11 Cable, video, 3-11 to 3-12 Camera, see PhotoPC 650 camera Caring for camera, 9-1 to 9-2 CD-ROM, installing software, 1-8 Charger, battery, optional, Intro-3 Cleaning - Epson PPC650 | User Manual - Page 150
storage capacity, Intro-2, 2-8 to 2-9, A-1, B-2 problems, 9-3 specifications, 8-1, B-2 support, 9-10 transferring pictures from, 4-1 to 4-9, 12 to 3-13 Deleting pictures, see Erasing pictures Dimensions AC adapter, B-4 camera, B-1 JumpShot USB cable, B-4 Display panel, status, 2-2, 2-8, 9-4 - Epson PPC650 | User Manual - Page 151
, EPSON, support, 9-10 printing with, 6-8 to 6-13 renaming pictures in, 6-5 saving pictures in, 6-3, 6-5 Smart Print, 6-11 to 6-12 transferring pictures with, 4-11 to 4-17 I Image quality displaying on LCD monitor, 3-5 editing, in software, 7-1 to 7-24 problems, 9-7 to 9-8 setting, camera - Epson PPC650 | User Manual - Page 152
pictures, 3-8 to 3-10 4 Index M Macintosh connecting to camera, 4-9 to 4-11 installing software, 1-8 system requirements, Intro-3 Macro mode, 2-4, 2-10 into documents, 5-3, 9-5 PC, connecting camera to, 4-9 to 4-10 PCMCIA adapter, 8-1, 8-3 to 8-4, 9-6, A-1 Photo Control settings, 1-7, 3-3, 3-6 to 3- - Epson PPC650 | User Manual - Page 153
1-5 problems, solving, 4-23 to 4-24, 9-2 to 9-6 specifications, B-1 to B-3 storing, 9-2 time, setting, 1-5 to 1-6, 3-12 to 3-13 PhotoPC 650 camera ( to 5-3, 9-5 in Photo Pages, see Photo Pages, HotShots information in HotShots, 6-5 to 6-8 information setting, in camera, 3-2, 3-5 inserting - Epson PPC650 | User Manual - Page 154
12 Problems camera, 4-23 to 4-24, 9-2 to 9-6 CompactFlash card, 9-3 PCMCIA adapter, 9-6 picture, 9-7 to 9-8 Q Quick Fix, HotShots, 7-6 Quick Review mode setting, 3-12 to 3-14 using, 2-5 to 2-7, 2-10 to 2-12 R Red eye reduction flash setting, 2-11 tool, HotShots, 7-22 to 7-23 Referral Service, EPSON - Epson PPC650 | User Manual - Page 155
tools, HotShots, 7-10 to 7-12 Specifications, B-1 to B-4 Status display panel, 2-2, 2-8, 9-4 Storing camera, 9-2 Strap, attaching, 1-5 Support card and Jumpshot USB cable, 9-10 EPSON, 9-9 to 9-10 software, 9-10 System requirements, Intro-3 T Taking pictures close-up, 2-4, 2-10 to 2-11, 9-7 to - Epson PPC650 | User Manual - Page 156
to 8-4 via serial cable, 4-9 to 4-24 Tripod, 2-11 to 2-12, A-3 Troubleshooting, 9-2 to 9-8 Turning camera on and off, 2-1 to 2-2 TV, playing back pictures on, 3-11 to 3-12, 9-3 TWAIN, EPSON PhotoPC 650 installing, 1-8 support, 9-9 transferring pictures with, 4-11 to 4-24 U Unlocking pictures, 3-9 to - Epson PPC650 | User Manual - Page 157
: Epson America, Inc. ("EPSON") warrants to the first end-user customer that the EPSON PhotoPC 650 Digital Camera enclosed software problems, interaction with non-EPSON products, or service other than by an EPSON Authorized Servicer. If a claimed defect cannot be identified or reproduced in service - Epson PPC650 | User Manual - Page 158
not installed and used in accordance with the instructions, may cause harmful interference to radio and television EPSON AMERICA, INC. 20770 Madrona Avenue MS: B2-11 Torrance, CA 90503 (310) 782-5254 Trade Name: Type of Product: Type of Device: Model: EPSON Digital Camera Class B Peripheral PPC650
-
 1
1 -
 2
2 -
 3
3 -
 4
4 -
 5
5 -
 6
6 -
 7
7 -
8
-
9
-
10
-
11
-
12
-
13
-
14
-
15
-
16
-
17
-
18
-
19
-
20
-
21
-
22
-
23
-
24
-
25
-
26
-
27
-
28
-
29
-
30
-
31
-
32
-
33
-
34
-
35
-
36
-
37
-
38
-
39
-
40
-
41
-
42
-
43
-
44
-
45
-
46
-
47
-
48
-
49
-
50
-
51
-
52
-
53
-
54
-
55
-
56
-
57
-
58
-
59
-
60
-
61
-
62
-
63
-
64
-
65
-
66
-
67
-
68
-
69
-
70
-
71
-
72
-
73
-
74
-
75
-
76
-
77
-
78
-
79
-
80
-
81
-
82
-
83
-
84
-
85
-
86
-
87
-
88
-
89
-
90
-
91
-
92
-
93
-
94
-
95
-
96
-
97
-
98
-
99
-
100
-
101
-
102
-
103
-
104
-
105
-
106
-
107
-
108
-
109
-
110
-
111
-
112
-
113
-
114
-
115
-
116
-
117
-
118
-
119
-
120
-
121
-
122
-
123
-
124
-
125
-
126
-
127
-
128
-
129
-
130
-
131
-
132
-
133
-
134
-
135
-
136
-
137
-
138
-
139
-
140
-
141
-
142
-
143
-
144
-
145
-
146
-
147
-
148
-
149
-
150
-
151
-
152
-
153
-
154
-
155
-
156
-
157
-
158
 |
 |

Remove any protective plastic film you may find in these areas before using your
camera:
When playing back pictures on a television or recording them on videotape, ignore
the steps beginning on page 3-11 of your manual. Instead, do the following:
1
Make sure the camera and TV (and VCR)
are turned off.
2
Open the camera’s card and port cover
and connect the black end of the video
cable to the
Video Out
port.
3
Connect the yellow end of the cable to the
VIDEO IN
port on the television or VCR.
4
Turn on the TV (and VCR) and switch to
the correct video mode.
5
Turn on the camera and set the LCD
monitor switch to
PLAYBACK
. The most
recent picture appears on the TV screen.
6
Press the
or
button to move
through your pictures.
7
To display or record your pictures as a
slide show, hold down either the
or
button until you hear two beeps;
then release the button. The camera now
scrolls through the pictures.
EPSON is a registered trademark of SEIKO EPSON CORPORATION. PhotoPC is a trademark of
Epson America, Inc.
Copyright © 1999 by Epson America, Inc.
CPD 9386
Long Beach, California, USA
9/99
User’s Guide
Update
EPSON
EPSON
protective film
protective film
protective film