Epson ELPDC12 User Manual
Epson ELPDC12 Manual
 |
View all Epson ELPDC12 manuals
Add to My Manuals
Save this manual to your list of manuals |
Epson ELPDC12 manual content summary:
- Epson ELPDC12 | User Manual - Page 1
Document Camera User's Guide - Epson ELPDC12 | User Manual - Page 2
Important Safety Instructions Read this User's Guide and follow all safety instructions for your document camera. Keep this guide at hand extremely hot. Thermal damage, fire, or malfunction may occur. Do not use or store the document camera outdoors for an extended length of time, or where it may be - Epson ELPDC12 | User Manual - Page 3
Guide. Never attempt to disassemble or modify the document camera. Refer all repairs to qualified service technicians. Unplug the document camera from the outlet and refer all repairs to qualified service to use under these conditions may result in fire or electric shock. Do not attempt to use any - Epson ELPDC12 | User Manual - Page 4
table or slanted surface. The document camera may drop or tip over, causing personal injury. If you use a table, cart, or stand, make sure it is stable and will not fall over. When using the mounting points under the document camera to secure it to a table, cart, or stand, fasten the bolts securely - Epson ELPDC12 | User Manual - Page 5
LED illumination lamp is on. The bright light can damage your eyes. Do not use excessive force when adjusting the document camera. The document camera may be broken, resulting in personal injury. Do not place heavy objects on document camera, or it may be damaged. Do not try to press the arm flat or - Epson ELPDC12 | User Manual - Page 6
If the SD card or USB drive is removed from the document camera while recording or exporting data • If it is subjected to static electricity or electrical noise • If it is used incorrectly • If a malfunction occurs or if the device needs to be repaired • If damage occurs due to a natural disaster In - Epson ELPDC12 | User Manual - Page 7
15 Projector operations 15 Document camera operation 15 Storing the Document Camera 17 Securing the Document Camera 18 Connecting Connecting to a Projector 20 Connecting to a Computer 22 Connect for Use with the Document Camera Software 22 Connect for Use Without the Document Camera Software - Epson ELPDC12 | User Manual - Page 8
and Sharing Your Videos 64 Solving Problems Problems and Solutions 66 Operation Problems 66 Image Quality Problems 66 Problems Using an SD Card 67 Problems Using a USB Drive 67 Problems Connecting a Laptop 67 Problems Using the Document Camera Software 67 Where to Get Help 69 Europe - Epson ELPDC12 | User Manual - Page 9
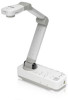
Introduction You can use the Epson ELPDC12 document camera to capture and project pages from books or other documents, and even three-dimensional objects. With the included software, you can create time-lapse photos and annotate images produced by the document camera. - Epson ELPDC12 | User Manual - Page 10
Product Features 10 Included Items • Remote control with 2 AA batteries • Power cord and adapter • VGA cable • USB cable • Software CD • User's manual CD • Quick Start • Microscope adapter - Epson ELPDC12 | User Manual - Page 11
Document Camera Parts Top/Side/Rear Name D Security slot E Interface F Security bar G SD card slot Kensington. s p.18 s "Interface" p.13 Lets you attach a commercially available security cable to lock the document camera in place. s p.18 Lets you save and display images on an SD card. s p.38 Name - Epson ELPDC12 | User Manual - Page 12
Document Camera Parts Camera Head 12 Name F Camera arm Function Extends or retracts the camera arm to adjust the height of the camera head. Attention Do not rub the lens with harsh materials or subject it to shock, as it can be easily damaged. Use a soft cloth to gently wipe the lens. Control - Epson ELPDC12 | User Manual - Page 13
TypeB) port H Mic In port Function Outputs composite video signals to a projector or external monitor. Connects the supplied power cord and adapter. Inputs image drive. Connects the document camera to a computer via the supplied USB cable when using the included software. Connects a commercially - Epson ELPDC12 | User Manual - Page 14
Document Camera Parts 14 Base Name A Mounting points B Security bar Function You can attach the document camera to a table, cart, or stand with commercially available M4 bolts. s p.18 Lets you attach a commercially available security cable to lock the document camera in place. s p.18 - Epson ELPDC12 | User Manual - Page 15
of an Epson projector on or off.* Changes the input source connected to an Epson projector.* * This is not supported by some projectors. For more details, contact your local dealer or the nearest service center provided in this guide. s "Where to Get Help" p.69 Document camera operation Name - Epson ELPDC12 | User Manual - Page 16
video recording. Enlarges or reduces the image without changing the projection size. s p.27 Adjusts the image brightness. [ ] Projects images from a computer. [ ] Projects images from the document camera. Outputs remote control signals. - Epson ELPDC12 | User Manual - Page 17
Storing the Document Camera 17 When you're not using the document camera, simply fold its arm down as shown. Caution Do not try to press the arm flat or fold it backwards, or it may get damaged. - Epson ELPDC12 | User Manual - Page 18
cable into the Kensington security port. In addition, you can attach the document camera to a table, cart, or stand at the mounting points indicated below. Use M4 bolts; you can thread them into the document camera case to a maximum depth of 9 mm (0.35 inch). A Mounting points Attention Fasten - Epson ELPDC12 | User Manual - Page 19
Connecting Follow the instructions in this section to set up the document camera and give a presentation. - Epson ELPDC12 | User Manual - Page 20
other video equipment such as an external monitor. a You can also use the document camera with a computer. s p.22 a Choose the type of cable you will use, based on the type of port that's available on your projector or other video equipment: VGA port (computer monitor style) VGA cable (included - Epson ELPDC12 | User Manual - Page 21
Connecting to a Projector 21 B Composite video cable HDMI connection A HDMI port B HDMI cable a • When connecting with a USB cable, video from other output ports is not displayed. • When two or more cables are connected, the priority of video output is HDMI > Display Out > Composite. - Epson ELPDC12 | User Manual - Page 22
. If you connect it to a USB 3.0 port, it may not function normally. b Connect your computer to your projector using a VGA cable. a It's also possible to connect with composite video, but most computers lack this type of port. c Follow the instructions on p.56 to use the document camera software. - Epson ELPDC12 | User Manual - Page 23
67 to check your laptop settings. Connect for Use Without the Document Camera Software This connection method lets you display PowerPoint slides or Display Out port c Connect a second VGA cable from the document camera's Display Out port to your projector. a • If you connected a laptop but the image - Epson ELPDC12 | User Manual - Page 24
Projecting - Epson ELPDC12 | User Manual - Page 25
to turn on the document camera. It takes about 20 seconds for the document camera to output an image. c Turn on your projector. d Select the appropriate "source" on the projector depending on the port to which you connected. a When you're done using the document camera, press the [t] power button - Epson ELPDC12 | User Manual - Page 26
or Other Materials 26 Positioning the Document Camera a Raise the camera arm while holding the body with your other hand. b Rotate the camera arm as shown below. Attention Do not try to press the arm flat or fold it backwards, or it may get damaged. The camera arm can only rotate within the - Epson ELPDC12 | User Manual - Page 27
size paper with the guides on the side of the document camera. • The maximum paper size that can be projected is A3 landscape. b Slide the lamp switch to illuminate the document. a If necessary, you can adjust the brightness of the image using the [ ] or [ ] on the document camera or remote control - Epson ELPDC12 | User Manual - Page 28
- [z] button on the document camera or remote control. Press the [Zoom] - [x] button to zoom out. 28 a • You can zoom up to 16x. When using the digital zoom, you Area Window is Off: • Depending on the output resolution of the projector or external monitor, part of the area shown in the box at the - Epson ELPDC12 | User Manual - Page 29
the button, it saves the image. s p.39) After freezing the image, you can remove your document while leaving its image displayed on the screen. Place your next document under the camera lens and press the button again; your presentation continues without interruption. a You cannot enlarge the image - Epson ELPDC12 | User Manual - Page 30
Displaying Live Action or Whiteboard Images 30 You can use the document camera to display a lecture or presentation at the front of a room, or to capture images of a whiteboard or chalkboard. a Press the [Menu] button and select Image > - Epson ELPDC12 | User Manual - Page 31
Projecting Through a Microscope 31 To display objects as seen through a microscope, use the included microscope adapter. a • Adjust the focus and zoom of a microscope before attaching to the document camera. • Images may not be displayed correctly depending on the optical properties of your - Epson ELPDC12 | User Manual - Page 32
Projecting Through a Microscope 32 a If you manually adjust the brightness or zoom after setting Microscope to On in step 3, Microscope is automatically set to Off. - Epson ELPDC12 | User Manual - Page 33
image is displayed. • USB mouse devices that require installation of a driver cannot be used. Also, some USB mouse models may not be compatible. a Connect a USB mouse to the document camera. A USB-A port b The annotation tool bar is displayed on the bottom of the screen. Tool A Colors B Line - Epson ELPDC12 | User Manual - Page 34
Adding Annotations 34 a Use the left mouse button to draw lines or graphics or erase with an eraser. d Disconnect the USB mouse to end the annotation. a • You cannot use the on-screen menu while annotating. • Images with your annotations cannot be saved. - Epson ELPDC12 | User Manual - Page 35
computer with a USB cable (s p.22), you can use the document camera software to display captured images and videos, or use another application of your choice. To display the live camera image, make sure you've selected Capture mode in the document camera software. s p.56 • If you've connected your - Epson ELPDC12 | User Manual - Page 36
document camera's internal memory or on an SD card or USB drive (s p.38), you can display two images at the same time. a When connecting to a computer with a USB cable, you cannot use camera image • Internal Memory to display an image stored in internal memory • SD Card to display an image stored on - Epson ELPDC12 | User Manual - Page 37
to use: g To exit split screen mode, press [Menu] or [Esc]. Use the camera image or video on both sides of the screen. f Once you're done setting up both sides of the screen, press [ ] then press [Enter]. The selected images appear side-by-side on the screen. a When connecting to a projector - Epson ELPDC12 | User Manual - Page 38
but also on an SD card or USB drive. Also, stored images can be imported or exported between the document camera and an SD card or USB drive. You can view them as a slideshow or on a connected computer. a • SD and SDHC cards are supported. • When you save images on the SD card, make sure - Epson ELPDC12 | User Manual - Page 39
a When you store images on a USB drive, make sure you set Function > USB Mode to Application. b Display the live camera image you want to the image is saved. a Using the control panel, if you from the document camera or remove an SD card or USB drive from the document camera while exporting data - Epson ELPDC12 | User Manual - Page 40
an SD card face-up or connect a USB drive, if needed. a When you store images on a USB drive, make sure you set Function > USB Mode to Application. use an external microphone to record the audio. s p.40 Connecting an External Microphone If you connect an condenser microphone to the document camera, - Epson ELPDC12 | User Manual - Page 41
to adjust the recording volume of the external microphone. • When an external microphone is connected, the internal microphone is disabled. • Plug-in power is not supported. • Live audio from a microphone cannot be output. A Mic In port - Epson ELPDC12 | User Manual - Page 42
memory, select SD Card or USB Flash Drive. You see this screen, showing the images stored in internal memory: c Use the arrow buttons to highlight each image you want to export, and press [Enter] to to leave the SD card or USB drive in the document camera, press [Menu] or [Esc] to close the screen. - Epson ELPDC12 | User Manual - Page 43
Exporting and Importing Images 43 a • If you want to remove the SD card, press in on the card and then pull it straight out of the slot. The SD Card screen automatically closes. • When USB Flash Drive is not displayed even if one is connected, set USB Mode to Application. - Epson ELPDC12 | User Manual - Page 44
computer with a USB cable to access files stored in the camera's internal memory. Before using the document camera like this, you have to change the function of its USB port as described below. a Connect the document camera to your projector with a VGA cable, composite video cable, or HDMI cable - Epson ELPDC12 | User Manual - Page 45
document camera, you can display images stored in the inserted SD card or connected USB drive. You can also display images copied to the document camera like this: c To rotate an image, use the arrow buttons to highlight it and press projector with an HDMI cable, the movie's audio is also played. - Epson ELPDC12 | User Manual - Page 46
Displaying a Slideshow 46 f Press [ ] to advance to the next image. Press [ ] to return to the previous image. g End the slideshow by pressing [ ] while the last image is displayed. Or press [Menu] or [Esc] to end the slideshow at any time. - Epson ELPDC12 | User Manual - Page 47
Image Adjustments and Effects The document camera provides a full range of image adjustments and effects, including freeze image, black-and-white, and the ability to display negative film in true color. - Epson ELPDC12 | User Manual - Page 48
On-screen Menu 48 Press the [Menu] button on the document camera or remote control to view the on-screen menu. For details of each item in the screen menu, see s p.49. You see this screen: Use the arrow buttons to navigate the menu and adjust the settings. Press [Enter] to select a setting - Epson ELPDC12 | User Manual - Page 49
"Displaying a Document or Other use in a room with incandescent lamps. Lets you manually adjust the focus if auto-focus doesn't produce a sharp enough image. Near: Adjusts the focus in. Far: Adjusts the focus out. Selects the setting to adjust for the image type you are displaying from the camera - Epson ELPDC12 | User Manual - Page 50
. Explanation/Select Changes how the document camera functions when connected with a USB cable. Application: Enables use of a USB drive and the included software. This is the default setting when turned on. Mass Storage: Lets you use a computer to view images stored in the internal memory. Adjusts - Epson ELPDC12 | User Manual - Page 51
is inactive. On: The power automatically turns off if the document camera is inactive for a certain amount of time. Off: The power remains on even if the document camera is not being used. Sets the time from when the document camera is last operated until when the power automatically turns off - Epson ELPDC12 | User Manual - Page 52
Rotate: Rotates selected images 90 degrees clockwise and saves them. Operations related to an SD card. Import: Imports selected images to the document camera's internal memory. Play/Slideshow: Displays the selected images in a slideshow. Select All: Selects all images on an SD card. Delete: Deletes - Epson ELPDC12 | User Manual - Page 53
Explanation Free Space: Displays the remaining capacity of the document camera's internal memory. Total Size: Displays the total capacity of the document camera's internal memory. Displays the number of files saved in the document camera's internal memory. Displays the firmware version of the - Epson ELPDC12 | User Manual - Page 54
also lets you annotate images from the document camera with text and graphics, and upload your videos to popular websites. Before starting, follow the instructions in this section to install the software. a For detailed help when using the software, do one of the following: Windows: Press F1 - Epson ELPDC12 | User Manual - Page 55
power button to turn on the document camera. b Connect the document camera to your computer with a USB cable. s p.22 c Insert the CD labeled "EPSON Document Camera Software" into your computer. d When you see the license agreement, click Yes. e Follow the instructions on the screen to install all - Epson ELPDC12 | User Manual - Page 56
Select Search on Charms, and then select ArcSoft Application Software for Epson Document Camera. • Windows 7/Windows Vista/Windows XP: From Programs or All Programs, select ArcSoft Application Software for Epson Document Camera. If the software does not start, install the Windows Media Player. • Mac - Epson ELPDC12 | User Manual - Page 57
57 You can annotate live images from the document camera with text and graphics while giving a presentation. . Your live camera image appears in the preview area. b Click the Live Annotation button. e Use the selected tool to add text and graphics. f To clear an annotation, use the Eraser tool - Epson ELPDC12 | User Manual - Page 58
quick series of images (called a burst). a If necessary, select the settings you want to use. Click the Settings button and select the Image tab. • Select the default image format, quality display a captured image through your projector, double-click the image or right-click it and select Preview. - Epson ELPDC12 | User Manual - Page 59
-lapse movie or image appears as an icon in the Capture album on the left side of the screen. To display the movie through your projector, double-click the icon or right-click it and select Preview. - Epson ELPDC12 | User Manual - Page 60
how much hard disk space it will use. b To capture sound, click the Settings button, select the Audio tab, and select ELPDC12 from Audio Device. c Click the projector, doubleclick the icon or right-click it and select Preview. When you connect with the computer, you cannot use two document cameras - Epson ELPDC12 | User Manual - Page 61
Recording Videos 61 Type Videos Extension Windows: .wmv (WMV2+WMA) .avi (YUV+PCM) .mpg (MPEG Video+ MPEG Audio) Mac OS X: .mov (Motion JPEG+PCM) - Epson ELPDC12 | User Manual - Page 62
a video, you can pause it and capture a still image from the current frame. a Click the Edit button to enter Edit mode. b For detailed help when using the software, do one of the following: Windows: Press F1 or select Application Help from the Extras menu. Mac OS X: Select Help from the menu bar. - Epson ELPDC12 | User Manual - Page 63
text, you can make it easier to find them later on. a Click the mode. File Management button to enter File Management b For detailed help when using the software, do one of the following: Windows: Press F1 or select Application Help from the Extras menu. Macintosh: Select Help from the menu bar. - Epson ELPDC12 | User Manual - Page 64
, such as YouTube and SchoolTube. a This feature is not available for Apple Macintosh systems. a Click the Edit button. b Select a video. c Select a website. d Follow the instructions on the screen to log in, provide a title for your video and other descriptive information, and upload the file. - Epson ELPDC12 | User Manual - Page 65
Solving Problems - Epson ELPDC12 | User Manual - Page 66
the projector using a VGA cable, composite video cable, or HDMI cable. Press the [Menu] button and select Function > USB Mode, then change the setting to Application. Now you can use the USB cable to display the image. Image Quality Problems The image is fuzzy or out of focus • The document camera - Epson ELPDC12 | User Manual - Page 67
lets you toggle between the LCD screen and the projector, or display on both at the same time. Problems Using the Document Camera Software The buttons on the document camera don't work with the software When you installed the software, the Button Manager and TWAIN Driver for Epson Document camera - Epson ELPDC12 | User Manual - Page 68
TWAIN Driver for Epson Document camera to install. You don't see the live camera image on your computer The document camera's USB Mode setting may be set to Mass Storage. You need to change this setting to Application. First disconnect the USB cable, then reconnect to the projector using a VGA cable - Epson ELPDC12 | User Manual - Page 69
Mostar Bosnia and Herzegovina Tel: 00387 36449660 Fax: 00387 36449669 E-mail: [email protected] http://www.net.com.ba BULGARIA EPSON Service Center, Bulgaria c/o ProSoft Central Service Akad. G. Bonchev SRT. bl.6 1113 Sofia, Bulgaria Tel: 00359 2 979 30 75 Fax: 00359 2 971 31 79 Email: [email protected] - Epson ELPDC12 | User Manual - Page 70
Republic Hotline: 800 142 052 E-mail: [email protected] http://www.epson.cz DENMARK EPSON Denmark Transformervej 6 2730 Herlev, Denmark Tel: 44508585 Fax: 44508586 Hotline: 80808047 Email: [email protected] http://www.epson.dk ESTONIA EPSON Service Center, Estonia c/o Kulbert Ltd. Sirge 4, 10618 - Epson ELPDC12 | User Manual - Page 71
Rep Office 97, Samal-2, bldg A1, 5th floor Business Center "Samal Towers" Almaty 050051, Kazakhstan Phone +7 727 3560260 Fax +7 727 3560260 http://www.epson.kz LATVIA EPSON Service Center, Latvia c/o ServiceNet LV Jelgavas 36 1004 Riga, Latvia Tel.: 00 371 746 0399 Fax: 00 371 746 0299 http://www - Epson ELPDC12 | User Manual - Page 72
Odredi 62 Vlez II mezanin 1000 Skopie, Macedonia Tel: 00389 2 3093393 Fax: 00389 2 3093393 E-mail: [email protected] http://www.digit.com.mk NETHERLANDS Epson Europe B.V. Benelux sales office Entrada 701 NL-1096 EJ Amsterdam Netherlands Tel: +31 20 592 65 55 Fax: +31 20 592 65 66 Hotline: 0900 - Epson ELPDC12 | User Manual - Page 73
d.o.o Litijska Cesta 259 1261 Ljubljana - Dobrunje Slovenia Tel: 00 386 1 5853 410 Fax: 00386 1 5400130 E-mail: [email protected] http://www.birotehna.si SPAIN Epson Ibérica, S.A.U. Av. de Roma, 18-26 08290 Cerdanyola del Vallès Barcelona, Spain Tel: 93 582 15 00 Fax: 93 582 15 55 Hotline: 902 - Epson ELPDC12 | User Manual - Page 74
: +27 11 465 1542 Helpdesk: 0860 337766 or +27 11 201 7741 Helpdesk: 0860 337766 or +27 11 201 7741 Email: [email protected] http://www.epson.co.za Middle East Epson (Middle East) P.O. Box: 17383 Jebel Ali Free Zone Dubai UAE (United Arab Emirates) Tel: +971 4 88 72 1 72 Fax: +971 4 88 - Epson ELPDC12 | User Manual - Page 75
Rica, S.A. De la Embajada Americana, 200 Sur y 200 Oeste Pavas, San Jose Costa Rica Tel: 800-EPSONCR (800-3776627) http://www.epson.co.cr MEXICO EPSON Mexico, S.A. de C.V. Boulevard Manuel Avila Camacho 389 Edificio 1, Conjunto Legaria Col Irrigación, C.P. 11500 México, DF Tel: (52 55) 1323-2052 - Epson ELPDC12 | User Manual - Page 76
Kong Ltd. Unit 715-723, Trade Square, 681 Cheung Sha Wan Road, Cheung Sha Wan, Kowloon, HONG KONG Support Hotline: (852) 2827 8911 Fax: (852) 2827 4383 http://www.epson.com.hk INDIA Epson India Pvt., Ltd. 12th Floor, The Millenia Tower A, No. 1, Murphy Road, Ulsoor, Bangalore 560 008 India Tel: 1800 - Epson ELPDC12 | User Manual - Page 77
-ken, 390-8285 Tel: 0263-87-5814 Fax: 0263-87-5813 http://www.epson.jp KOREA EPpson Korea Co., Ltd. 11F Milim Tower, 825-22 Yeoksam-dong, 135-934 Korea Tel: 82-2-558-4270 Fax: 82-2-558-4272 http://www.epson.co.kr MALAYSIA Epson Malaysia Sdn. Bhd. 3rd Floor, East Tower, Wisma Consplant 1 No.2, Jalan - Epson ELPDC12 | User Manual - Page 78
Where to Get Help 78 THAILAND Epson (Thailand) Co., Ltd. 195 Empire Tower, 42nd Floor, South Sathorn Road, Yannawa, Sathorn, Bangkok 10120, Thailand Tel: 02 685 9899 Fax: 02 685 9889 http://www.epson.co.th - Epson ELPDC12 | User Manual - Page 79
Notices - Epson ELPDC12 | User Manual - Page 80
80 ELPDC12 Open (W ^ D ^ H): 270 ^ 331 ^ 476 mm (10.6 ^ 13.0 ^ 18.7 inches) Folded (W ^ D ^ H): 340 ^ 124 ^ 125 mm (13.4 ^ 4.9 ^ 4.9 inches) 1/2.7 inch CMOS sensor F=2.8 2 megapixel (1920 ^ 1080) XGA: 29.7 ^ 41.9 cm (11.7 ^ 16.5 inches) 1080p: 29.7 ^ 52.6 cm (11.7 ^ 20.7 inches) Automatic/manual 16x - Epson ELPDC12 | User Manual - Page 81
USB-A port* 1 USB connector (TypeA) USB-B port* 1 USB connector (TypeB) Output: QVGA/VGA/SVGA/SXGA/XGA SD card slot 1 SD/SDHC card compatible * USB 2.0 is supported. However, the operation of all USB compatible devices is not guaranteed. - Epson ELPDC12 | User Manual - Page 82
Specifications 82 System Requirements These system requirements are for using the included software: Windows: Microsoft Windows 8 32/64-bit, Windows 7 32/64-bit, Windows Vista 32-bit, Windows XP (Service Pack 3 or later) Mac OS X: Mac OS X 10.5 to 10.8 CPU: Pentium 4 1.4 GHz or higher (Windows XP - Epson ELPDC12 | User Manual - Page 83
reasonable protection against harmful interference in a residential installation. This equipment generates, uses, and can radiate radio frequency energy and, if not installed and used in accordance with the instructions, may cause harmful interference to radio or television reception. However, there - Epson ELPDC12 | User Manual - Page 84
B Personal Computers and Peripherals; and/or CPU Boards and Power Supplies used with Class B Personal Computers We: Located at: Telephone: Epson America, Inc. 3840 Kilroy Airport Way MS: 3-13 Long Beach, cause undesired operation. Trade Name: Type of Product: Model: Epson Document camera ELPDC12 - Epson ELPDC12 | User Manual - Page 85
instructions. Seiko Epson Corporation shall not be liable against any damages or problems arising from the use of any options or any consumable products other than those designated as Original Epson Products or Epson Approved Products by Seiko Epson Corporation. The contents of this guide
-
 1
1 -
 2
2 -
 3
3 -
 4
4 -
 5
5 -
 6
6 -
 7
7 -
8
-
9
-
10
-
11
-
12
-
13
-
14
-
15
-
16
-
17
-
18
-
19
-
20
-
21
-
22
-
23
-
24
-
25
-
26
-
27
-
28
-
29
-
30
-
31
-
32
-
33
-
34
-
35
-
36
-
37
-
38
-
39
-
40
-
41
-
42
-
43
-
44
-
45
-
46
-
47
-
48
-
49
-
50
-
51
-
52
-
53
-
54
-
55
-
56
-
57
-
58
-
59
-
60
-
61
-
62
-
63
-
64
-
65
-
66
-
67
-
68
-
69
-
70
-
71
-
72
-
73
-
74
-
75
-
76
-
77
-
78
-
79
-
80
-
81
-
82
-
83
-
84
-
85
 |
 |

Document Camera
User's Guide