Epson C823622 Administrator's Manual
Epson C823622 Manual
 |
View all Epson C823622 manuals
Add to My Manuals
Save this manual to your list of manuals |
Epson C823622 manual content summary:
- Epson C823622 | Administrator's Manual - Page 1
instructions. SEIKO EPSON CORPORATION shall not be liable for any damages or problems arising from the use of any options or any consumable products other than those designated as Original EPSON Products or EPSON Approved Products by SEIKO EPSON CORPORATION. EPSON, EPSON ESC/P, and EPSON Stylus - Epson C823622 | Administrator's Manual - Page 2
ii - Epson C823622 | Administrator's Manual - Page 3
Contents Introduction Enclosed Items 2 Operating Environments 3 Supported operating systems and network protocols 3 Environments for the setup utility 4 Supported EPSON Printers 7 Installation Overview 8 Chapter 1 Getting Started Ethernet Card Features 1-1 Status lights 1-1 Hardware - Epson C823622 | Administrator's Manual - Page 4
mode 4-9 Using NetWare 4.1x 4-16 Instructions for using NetWare 4-16 Using the Ethernet card in Print Server mode 4-17 Using the Ethernet card in Remote Printer mode 4-25 Configuring the Ethernet Card for NetWare Using the Ethernet Card Home Page 4-35 Using EPSON Net!2 to Create Queues 4-37 - Epson C823622 | Administrator's Manual - Page 5
NT 3.51 7-7 Installing NetBEUI in Windows NT 4.0 7-8 Configuring the Ethernet card for NetBEUI using the Ethernet card home page 7-8 Setting up your printer 7-11 Using the NET USE command to see the Ethernet card . . . . . 7-12 Chapter 8 Using the Ethernet Card with OS/2 Overview 8-1 Applicable - Epson C823622 | Administrator's Manual - Page 6
up for SCO UNIX 4.2 or later (Open Server 9-6 Chapter 10 Using EPSON Net!2 and the Ethernet Card Home Page Using EPSON Net!2 for Windows 10-1 Launching the Browser 10-2 Configuring your printer 10-2 Refreshing the printer information 10-2 Setting time-out time and hops 10-2 Using Subnet - Epson C823622 | Administrator's Manual - Page 7
NT 3.51 11-30 Tips for Using EPSON Status Monitor 2 11-31 Controlling the packet traffic on the network 11-31 Monitoring printers beyond routers 11-31 About uninstalled network printers 11-32 Chapter 12 Troubleshooting General Problems 12-1 Problems Specific to Your Network Environment 12 - Epson C823622 | Administrator's Manual - Page 8
Appendix B Specifications Environmental B-1 Network Software B-1 Network Connectors B-1 Regulatory Approvals B-2 Reliability B-2 Regulatory Approvals for AC Adapter Model EU-30 B-2 Index viii Contents - Epson C823622 | Administrator's Manual - Page 9
u Microsoft® Windows® u Apple® Macintosh® u UNIX u IBM® OS/2 The EPSON Net!2 software lets you quickly and easily configure the interface card to use the following with "supervisor" in this manual. u The C82363* and C82364* Ethernet cards do not support Level 1 printers. u The protocols that the - Epson C823622 | Administrator's Manual - Page 10
For the C82364* Ethernet card, only use the model EU-30 AC adapter. Note: You need a network connection for your Ethernet card and an EPSON printer. For the C82362* card, use a 10Base2 cable with the included coaxial Y connector (and terminator, if necessary) or 10BaseT cable with an RJ-45 connector - Epson C823622 | Administrator's Manual - Page 11
Operating Environments Supported operating systems and network protocols See the following chapters for more information. u NetWare 3.1x/4.1x and IntranetWare Print Server and Remote Printer mode NetWare 4.1x and IntranetWare (NDS and Bindery Emulation) r Chapter 4 u Macintosh System 7.1, 7.5, - Epson C823622 | Administrator's Manual - Page 12
. Applicable operating systems: Windows 95 Windows 98 Windows NT 3.51 Server and Workstation Windows NT 4.0 Server and Workstation u EPSON Net!2 for Macintosh You can configure the Ethernet card for TCP/IP and AppleTalk. Applicable operating systems: System 7.1, 7.5, 7.5.1, 7.5.2, 7.5.3, 7.5.5 Mac - Epson C823622 | Administrator's Manual - Page 13
protocols to use the Status Monitor to monitor an LPR printer. See Chapter 3 for instructions on installing TCP/IP. u NetWare printer protocols are already installed in your NetWare network. If you have a NetWare printer, see "Installing EPSON Status Monitor 2" in Chapter 11. For an explanation of - Epson C823622 | Administrator's Manual - Page 14
server Local Printer Windows 95/98/NT 4.0 EPSON TCP/IP Windows NT 3.51/NT 4.0 Windows NT LPR Windows 95/98/ NT 3.51/NT 4.0 Windows Shared Printer Local Printer Connect the printer directly to the printer port of your computer. Windows 95/ Windows 98 Bi-directional support is necessary - Epson C823622 | Administrator's Manual - Page 15
3. Supported EPSON Printers Your EPSON Ethernet card can be installed in a variety of EPSON laser, ink jet, and dot-matrix printers. C82362* FX-880/1180/2180 DFX-5000+/8000 LQ-570+/1070+/670/870/1170/2070/2170 DLQ-3000/3000+ EPSON Stylus Pro XL+/5000 EPSON Stylus COLOR 800/850/1520/3000 EPSON Stylus - Epson C823622 | Administrator's Manual - Page 16
detailed information. 1. Install the Ethernet card in your printer. See Chapter 1. 2. Install the protocols in your operating system, if necessary. See Chapter 3 or later. 3. Install EPSON Net!2, if necessary. See Chapter 2. 4. Install EPSON Status Monitor 2, if necessary. See Chapter 11. 5. Install - Epson C823622 | Administrator's Manual - Page 17
has two status lights (one red and one green) that indicate the current operating status of the Ethernet card when you first turn on the printer, during normal operation, and when errors occur. The C82363* and C82364* cards also have a link select light (yellow) to show whether 10BaseT or 100BaseTX - Epson C823622 | Administrator's Manual - Page 18
C82363* and C82364* status sheet button link selection light status lights 10BaseT/100BaseTX DC-IN 5V (only C82364*) Here is a brief explanation of the red and green status lights: Red Green Flash simultaneously Off Flashes slowly Off Flashes rapidly Off On On Off Status Initializing - Epson C823622 | Administrator's Manual - Page 19
P: EPSON Stylus COLOR 1520/3000, EPL-N1200/N2000. For all other printers, the switch should be set to A. A SW2 P SW2 1 Install the Ethernet card in your printer Before installing the Ethernet card, see the section on using printer options in your printer documentation for specific instructions on - Epson C823622 | Administrator's Manual - Page 20
3. Insert the card into the interface slot of your EPSON printer, then tighten the screws to secure the card in the slot. interface slot Note: The location of the interface slot varies from printer to printer. 4. If you are using the C82364* Ethernet card, connect the AC adapter to the Ethernet card - Epson C823622 | Administrator's Manual - Page 21
) Connect the AC adapter to the card. 3 Make printer settings using the printer's control panel Some EPSON printers require you to use the printer's control panel to select the interface you plan to use. See your printer manual for instructions on making the necessary interface settings. Note: If - Epson C823622 | Administrator's Manual - Page 22
error communicating with the Ethernet card Note: You can also initialize the Ethernet card using EPSON Net!2. See Chapter 10 for more information. Follow these steps to initialize the Ethernet card: 1. Turn off the printer. It will take several seconds for the Ethernet card to power down. Wait until - Epson C823622 | Administrator's Manual - Page 23
2. Turn on the printer while holding down the status sheet button for about five seconds. When the red and green sheet. If the card initialized properly, the TCP/IP address reads 11.22.33.44 and the printer name reads . Getting Started 1-7 - Epson C823622 | Administrator's Manual - Page 24
1-8 Getting Started - Epson C823622 | Administrator's Manual - Page 25
card, you can configure the Ethernet card using the card's internal home page on an Internet browser. See page 3-14 for details. Installing EPSON Net!2 for Windows Follow these steps to install EPSON Net!2 for your operating system. For Windows 95, Windows 98, and Windows NT 4.0 Before you install - Epson C823622 | Administrator's Manual - Page 26
on the installer screen, then click the right arrow button. click here 4. Follow the on-screen instructions. Note: If you add or delete the protocols or services for the operating system after installing EPSON Net!2 for Windows, EPSON Net!2 for Windows will not start. If this happens, uninstall - Epson C823622 | Administrator's Manual - Page 27
Installing EPSON Net!2 for Macintosh To install EPSON Net!2 for Macintosh, follow these steps: 1. Insert the Ethernet card software CD-ROM. 2. Double-click the EPSON Net!2 CD-ROM icon on the desktop. 3. Drag the EPSON Net!2 icon to your hard disk. Installing EPSON Net!2 2-3 - Epson C823622 | Administrator's Manual - Page 28
2-4 Installing EPSON Net!2 - Epson C823622 | Administrator's Manual - Page 29
using either: u The arp command (see page 3-8) u EPSON Net!2 for Windows/Macintosh (see page 3-10) Note: EPSON Net!2 cannot be used for OS/2 or UNIX. When setting the IP address for OS/2 or UNIX, use the arp command. 4. Set up the printer. See Chapters 6 through 9. Installing the TCP/IP Protocols - Epson C823622 | Administrator's Manual - Page 30
For Windows 95 and Windows 98 Follow the steps below to install TCP/IP. 1. Double-click the Network icon in the Control Panel, then check if TCP/IP is in the list of installed network components on the Configuration menu. 2. If TCP/IP is not in the list, click Add. 3. Select Protocol and click Add. - Epson C823622 | Administrator's Manual - Page 31
. For Windows NT 3.51/4.0 Follow the steps below to install LPR software in Windows NT. If you have already installed the TCP/IP Network Printing Service, skip these steps. Setting the IP Address 3-3 - Epson C823622 | Administrator's Manual - Page 32
check if the TCP/IP Protocol and Microsoft TCP/IP Printing are installed. If they are already installed, skip to "Setting the IP Address Using EPSON Net!2 for Windows/Macintosh" on page 3-10. Windows NT 3.51 Windows NT 4.0 3-4 Setting the IP Address - Epson C823622 | Administrator's Manual - Page 33
2. If the TCP/IP protocol and Microsoft TCP/IP Printing are not listed, click Add Software (for NT 3.51) or Add (for NT 4.0) to add them. Select Connectivity Utilities and TCP/IP Network Printing Support Windows NT 3.51 Setting the IP Address 3-5 - Epson C823622 | Administrator's Manual - Page 34
Select TCP/IP Protocol Select Microsoft TCP/IP Printing Windows NT 4.0 3-6 Setting the IP Address - Epson C823622 | Administrator's Manual - Page 35
3. If you continue installing the TCP/IP protocol, the TCP/IP Configuration dialog box appears, and you can set the IP address. (Ask your network administrator for your IP address.) Note: u NT 3.51 To check the IP addresses which have already been assigned, select TCP/IP Protocol in the Network - Epson C823622 | Administrator's Manual - Page 36
device. u The MAC (Media Access Control) address (hardware serial number) of the Ethernet card. Press the status sheet button for about three seconds while the printer is on to print a status sheet that includes the MAC address. u If the host from which you set up the Ethernet card is on a different - Epson C823622 | Administrator's Manual - Page 37
3. If the card is reachable, you see results like the following (the exact form of the message depends on your operating system, and the times may vary): Reply from 11.22.33.44: bytes=32 time=19ms TTL=32 Reply from 11.22.33.44: bytes=32 time - Epson C823622 | Administrator's Manual - Page 38
command. Use EPSON Net!2 running on Windows (95, 98, or NT Address Using EPSON Net!2 for Windows/Macintosh You can set the IP address for the Ethernet card using EPSON Net!2 also set the IP address for the Ethernet card using EPSON Net!2 in Macintosh with TCP/IP or AppleTalk. c - Epson C823622 | Administrator's Manual - Page 39
Make sure Windows is running, the Ethernet card is connected to the network, and the printer is turned on. 2. Click Start, point to Programs, point to EPSON Net!2, then click EPSON Net!2. 3. Click the printer where you want to set the IP address, and then click the Configuration button. click here - Epson C823622 | Administrator's Manual - Page 40
the IP address is set to the default IP address, the printer model might not appear. 4. Click the TCP/IP tab to display the TCP/IP menu. 5. Under The way of acquiring an IP address, select one of the following: Manual, RARP, BOOTP, or DHCP. Note: To use RARP, BOOTP, or DHCP - Epson C823622 | Administrator's Manual - Page 41
home page, you must assign an IP address manually here. u The default IP address is 11. three seconds before turning off the printer while the new settings are sent cards on the other segments, use the Subnet Settings in the EPSON Net!2 for Windows Option menu. 1. Type the subnet address - Epson C823622 | Administrator's Manual - Page 42
the home page, wait until the process is complete (the indicator lights stop flashing) before turning off the printer or sending data to the printer. Note: u See "Setting the IP Address Using EPSON Net!2 for Windows/ Macintosh" on page 3-10 for the cautions and notes for each step. u There are some - Epson C823622 | Administrator's Manual - Page 43
Configuration menu to view the TCP/IP setting screen. 3. Under Get IP Address, select from the following: Manual, RARP, BOOTP, or DHCP. 4. Type the IP address, the subnet mask, and the default gateway. the changes by clicking RESET or turning your printer off and then on. Setting the IP Address 3-15 - Epson C823622 | Administrator's Manual - Page 44
3-16 Setting the IP Address - Epson C823622 | Administrator's Manual - Page 45
driver. Overall steps Follow these steps for configuring the Ethernet card for use with NetWare. Go to the indicated chapters for more information. 1. Log in as supervisor or admin. 2. Install EPSON Net!2. See Chapter 2. 3. Set the IP address. See Chapter 3. 4. Set up the printer environment - Epson C823622 | Administrator's Manual - Page 46
Set the NetWare mode using EPSON Net!2. About modes You can choose from Print Server, Remote Printer, or Standby mode. Select Print Server mode unless the number of print queues exceeds the limit specified below. In that case, configure the Ethernet card in Remote Printer mode. Features of the modes - Epson C823622 | Administrator's Manual - Page 47
the Ethernet card in a NetWare environment. Using NetWare 3.1x Follow these instructions to set up your Ethernet card for use with NetWare 3.1x. Notes about server to recognize the Ethernet card after turning on the printer. During this startup time, EPSON Net!2 and the status sheet do not show the - Epson C823622 | Administrator's Manual - Page 48
Creating print queues in a file server 1. From any NetWare client, log in to the network with supervisor privileges. 2. Run PCONSOLE. From the Available Options screen, select Print Queue Information and press Enter. 3. Press the Insert key on your keyboard and enter the print queue name. Press - Epson C823622 | Administrator's Manual - Page 49
Enter. 4. From the Print Server Information list, select Print Server Configuration and press Enter. 5. Select Printer Configuration from the Print Server Configuration Menu and press Enter. 6. From the Configured Printers list, select Not Installed (port number = 0) and press Enter. 7. From the - Epson C823622 | Administrator's Manual - Page 50
Esc. 11. Select Queues Serviced by Printer from the Print Server Configuration Menu and press Enter. 12. Select the printer that you want to use from the Defined Printers list and press Enter. 13 section explains how to configure the printer using EPSON Net!2. 4-6 Using the Ethernet Card with NetWare - Epson C823622 | Administrator's Manual - Page 51
1. Turn on the printer. 2. Run EPSON Net!2 from the Start menu. 3. The EPSON Net!2 dialog box appears showing a list of interface cards on the network. Select the printer you want to configure from the list and click Configuration. Note: u If you have connected more than one printer with the same - Epson C823622 | Administrator's Manual - Page 52
4. Click the NetWare Basic tab and make the following settings. Frame type: Select one from the following: Auto, Ethernet 802.2, Ethernet 802.3, Ethernet II, or Ethernet SNAP. Mode: Select Print Server. NDS: Select Disable. 5. Click the Print Server tab and make the following settings. 4-8 Using the - Epson C823622 | Administrator's Manual - Page 53
as "V". You can also leave this space blank. Print server name: Type any new name up to 47 characters. The default name is shown below. (Printer name) - (last 6 digits of the serial number) for example: EPL-N2000-PRIFNW Polling interval: Set the polling time from 5 to 90 seconds. 6. Click OK to - Epson C823622 | Administrator's Manual - Page 54
2. Run PCONSOLE. From the Available Options screen, select Print Queue Information and press Enter. 3. Press the Insert key on your keyboard and enter the print queue name. Press Enter. 4. Select the print queue name that you just entered and press Enter. 5. From the Print Queue Information list, - Epson C823622 | Administrator's Manual - Page 55
From the Print Server Information list, select Print Server Configuration and press Enter. 5. Select Printer Configuration from the Print Server Configuration Menu and press Enter. 6. From the Configured Printers list, select Not Installed (port number = 0) and press Enter. Using the Ethernet Card - Epson C823622 | Administrator's Manual - Page 56
7. From the Printer configuration screen, type the printer name. Then, highlight Type and press Enter. Select Remote Parallel, LPT1 or Remote Other, Unknown. 8. Press Esc; then press Enter to save changes. 4-12 Using the Ethernet Card with NetWare - Epson C823622 | Administrator's Manual - Page 57
9. Select Queues Serviced by Printer from the Print Server Configuration menu and press Enter. 10. Select the Printer that you want to use from the Defined Printers list and press type: > PSERVER print server name 2. Run EPSON Net!2 from the Start menu. Using the Ethernet Card with NetWare 4-13 - Epson C823622 | Administrator's Manual - Page 58
3. The EPSON Net!2 dialog box appears showing a list of interface cards on the network. Select the printer you want to configure from the list and click Configuration. Note: u If you connect more than one printer with the same type of Ethernet card to the network, you can identify the cards by their - Epson C823622 | Administrator's Manual - Page 59
make the following settings. Frame type: Select one from the following: Auto, Ethernet 802.2, Ethernet 802.3, Ethernet II, or Ethernet SNAP. Mode: Select Remote Printer. NDS: Select Disable. 5. Click the Remote Printer tab and make the following settings. Using the Ethernet Card with NetWare 4-15 - Epson C823622 | Administrator's Manual - Page 60
4.1x. Instructions for using NetWare Printing a text file When you print a text file using the NetWare NPRINT command or DOS redirection, misconversion or a gap in characters might occur depending on the client environment. Bindery and NDS u When printing on the network printer from a Bindery - Epson C823622 | Administrator's Manual - Page 61
the AUTOEXEC.NCF file. See your Netware 4.1x manual for more information. IPX routing protocol NLSP It .1x; however, the Ethernet card does not support NLSP. RIP/SAP controls the communication. You Ethernet card after the printer is turned on. During this startup time, EPSON Net!2 and the status - Epson C823622 | Administrator's Manual - Page 62
: Click the directory context icon (or Bindery context), and select Object, then Create, and then Printer. Type the printer name and click Create. 4. Create a print server: Click the directory context icon (or Bindery context), and select Object, then Create, and then Print Server. Type - Epson C823622 | Administrator's Manual - Page 63
5. Create a print queue: Click the directory context icon (or Bindery context), and select Object, then Create, and then Print Queue. Type the print queue name and select the print queue volume. Then click Create. 6. The objects you have just created are added to the NDS tree (or Bindery). Using the - Epson C823622 | Administrator's Manual - Page 64
Object icon on the NetWare Administrator screen. 8. The Printer dialog box appears. Click Assignments and then click Add. 9. From the print queue list, select the queue you want to assign and click OK. 10. - Epson C823622 | Administrator's Manual - Page 65
12. From the printer object list, select the printer object you want to assign and click OK. 13. Double-click the Print Queue Object icon on the NetWare Administrator screen. 14. The Print Queue dialog box appears. Click Assignments. Check if the print server and the printer are assigned to the - Epson C823622 | Administrator's Manual - Page 66
explains how to configure the card in Print Server mode with EPSON Net!2. 1. Turn on the printer. 2. Run EPSON Net!2 from the Start menu. 3. The EPSON Net!2 dialog box shows a list of printers on the network. Select the printer you want to configure from the list, and click Configuration. 4-22 - Epson C823622 | Administrator's Manual - Page 67
status sheet button on the card for three seconds. See Chapter 1 for details. u If the IP address is set to the default IP address, the printer model might not appear. 4. Click the NetWare Basic tab and make the following settings. Frame type: Select one from the following: Auto, Ethernet 802 - Epson C823622 | Administrator's Manual - Page 68
Root. Do not type the "." at the top. Note: See your NetWare manual for the available characters and number of characters you can use. 5. Click the Type any new name up to 47 characters. The default name is shown below. (Printer name) - (last 6 digits of the serial number) Polling interval: Set the - Epson C823622 | Administrator's Manual - Page 69
Caution: Once you make changes to the Ethernet card, you must wait until it registers the settings (up to two minutes) before turning off the printer. 7. In the File Server Console's MONITOR.NLM, open the Connection Information. Check if the print server name assigned to the Ethernet card is logged - Epson C823622 | Administrator's Manual - Page 70
4. Create a print server: Click the directory context icon (or Bindery context), and select Object, then Create, and then Print Server. Type the print server name and click Create. 5. Create a print queue: Click the directory context icon (or Bindery context), and select Object, then Create, and - Epson C823622 | Administrator's Manual - Page 71
6. The objects you have just created are added to the directory context (or Bindery context). 7. Double-click the Printer Object icon on the NetWare Administrator screen. Using the Ethernet Card with NetWare 4-27 - Epson C823622 | Administrator's Manual - Page 72
8. The Printer dialog box appears. Click Assignments and then click Add. 9. From the print queue list, select the queue you want to assign and click OK. 10. Click Configuration, and select Other/Unknown for the Printer type and click OK. 4-28 Using the Ethernet Card with NetWare - Epson C823622 | Administrator's Manual - Page 73
11. Double-click the Print Server Object icon on the NetWare Administrator screen. 12. The Print Server dialog box appears. Click Assignments and then click Add. Using the Ethernet Card with NetWare 4-29 - Epson C823622 | Administrator's Manual - Page 74
you want to assign and click OK. 14. Go back to the Print Server box (shown in step 12), and click the Printer Number button to set the printer number from 0 to 254, then click OK. 15. Double-click the Print Queue Object icon on the NetWare Administrator screen. 4-30 Using the - Epson C823622 | Administrator's Manual - Page 75
16. The Print Queue dialog box appears. Click Assignments. Check if the print server and a printer are assigned to the queue. See your NetWare 4.1x manual for more detailed information. Using the Ethernet Card with NetWare 4-31 - Epson C823622 | Administrator's Manual - Page 76
server name you used in step 4 on page 4-26): >LOAD PSERVER print server name 2. Run EPSON Net!2 from the Start menu. 3. The EPSON Net!2 dialog box shows a list of printers on the network. Select the printer you want to configure from the list and click Configuration. Note: u If you have connected - Epson C823622 | Administrator's Manual - Page 77
Auto, Ethernet 802.2, Ethernet 802.3, Ethernet II, or Ethernet SNAP. Mode: Select Remote Printer. NDS: Select Enable or Disable. NDS Tree Name: If you are using NDS mode, at the top. Note: See your NetWare manual for the available characters and number of characters you can use. Using the Ethernet - Epson C823622 | Administrator's Manual - Page 78
card, you must wait until it completes the settings before turning off the printer. 7. Select Printer Status from the Console screen of the print server. Select a printer from the list and check the status. 8. Select Queues serviced. Check if the print queue name which you set in step 5 on page - Epson C823622 | Administrator's Manual - Page 79
you can configure the Ethernet card using the card's home page. c Caution: u Do not use EPSON Net!2 for Windows/Macintosh and configure the card using the home page at the same time. u flashing) before turning off the printer or sending data to the printer. Using the Ethernet Card with NetWare 4-35 - Epson C823622 | Administrator's Manual - Page 80
can use depending on your browser. For details, see your browser or OS documentation. 1. Run EPSON Net!2. Select the printer you want to configure from the list, and click the Launch Browser button. EPSON Net!2 closes automatically. Or, start your browser and type the IP address of the Ethernet card - Epson C823622 | Administrator's Manual - Page 81
If the message "Configuration change is complete!" appears on your screen, configuration is complete. Activate the changes by clicking RESET or turning your printer off and on. Using EPSON Net!2 to Create Queues If you are using the bindery context, you can create a print queue and set up the queue - Epson C823622 | Administrator's Manual - Page 82
The setting screen appears. 6. Type the queue name and printer name (up to 47 characters), and select the print server Note: The primary server described in this manual is a primary time server, which offers dedicated dial-up line. Remote Printer mode In Remote Printer mode, the primary server can - Epson C823622 | Administrator's Manual - Page 83
to a local file server first and then to a primary server. There is no problem since this occurs only once at power on. t When the Ethernet card is data is being transferred. t When the primary server is down during printer operation The computer dials out because connection to the primary server is - Epson C823622 | Administrator's Manual - Page 84
server is installed on the local network, the computer may unnecessarily dial out depending on the configuration. The following problems are common to the both Print Server mode and Remote Printer mode. t When the power is turned on Since access is made only to the primary server, the computer does - Epson C823622 | Administrator's Manual - Page 85
out. However, if the router is set to pass SAP packets (Find Nearest Server), it may dial out unnecessarily. To avoid this, turn off the printer, or do not allow the router to pass SAP packets. Using the Ethernet Card with NetWare 4-41 - Epson C823622 | Administrator's Manual - Page 86
4-42 Using the Ethernet Card with NetWare - Epson C823622 | Administrator's Manual - Page 87
Mac OS 7.6, 7.6.1, 8.0 t Apple network driver EtherTalk Phase 1 and 2 t EPSON printer driver AT-Stylus COLOR EPSON Stylus (AT) AT-EPSON ESC/P2 AT-EPSON DFX AT-EPSON FX t Apple printer driver LaserWriter, LaserWriter 8 t EPSONScript driver EPSONScript driver, EPSONScript Utility Using the Ethernet - Epson C823622 | Administrator's Manual - Page 88
Ethernet card with Macintosh systems. Go to the indicated chapters for more information. 1. Install the correct printer driver in your Macintosh system. 2. Make AppleTalk active in the Chooser. 3. Install EPSON Net!2 for Macintosh. See Chapter 2. 4. If you plan to configure the card using the card - Epson C823622 | Administrator's Manual - Page 89
. 1. Make AppleTalk active in the Chooser. 2. Connect the Ethernet card to the network and turn on the printer. 3. From your hard disk, double-click the EPSON Net!2 icon. 4. Highlight the printer you want to configure from the list and click Configuration. Note: u If you have connected more than one - Epson C823622 | Administrator's Manual - Page 90
Type: If you are using a Level 2 printer, you do not have to set these options. EPSON Net!2 just shows the printer's Entity type on an AppleTalk network. If you are using a Level 1 printer, set the Entity type to match the printer driver for the printer with the Ethernet card. 5-4 Using the Ethernet - Epson C823622 | Administrator's Manual - Page 91
Mode: The default number is 65535. If you have selected Auto for the network number setting, you cannot type the network number manually. Note: If you cannot see the printer in the Chooser, make sure your AppleTalk routers have been set up correctly. If you cannot change the router settings, select - Epson C823622 | Administrator's Manual - Page 92
can use depending on your browser. For details, see your browser or OS documentation. 1. Run EPSON Net!2. Click the printer you want to configure from the list, and click the Launch Browser button. EPSON Net!2 closes automatically. Or, run the browser and type the IP address for the Ethernet card - Epson C823622 | Administrator's Manual - Page 93
disabled. 4. Type up to 31 characters for each of the following: the Printer Name, Zone Name, and Entity Type. If you are using a Level 2 printer, you don't need to type anything in the Entity Type box. 5. Select either Auto or Manual for Network Number Set. In most cases, you can set it to - Epson C823622 | Administrator's Manual - Page 94
7. If the message "Configuration change is complete!" appears on your screen, the update is complete. Enable the changes by pressing RESET or by turning your printer off and then on. 5-8 Using the Ethernet Card with Macintosh - Epson C823622 | Administrator's Manual - Page 95
Windows 98 do not support LPR printing, you need EPSON Status Monitor 2 to print with TCP/IP. t Microsoft Windows Network (NetBEUI) You need to install the NetBEUI protocol and the Client for Microsoft Networks. Printing to the Ethernet card is equivalent to printing by printer sharing. Using the - Epson C823622 | Administrator's Manual - Page 96
with TCP/IP If you haven't installed TCP/IP on the workstations using the printer, you need to install it as described on page 3-1. Printing method Because Windows 95 and Windows 98 do not support the LPR printing protocol, you need EPSON Status Monitor 2 to print with TCP/IP. See Chapter 11 - Epson C823622 | Administrator's Manual - Page 97
Printing with NetBEUI Installing the NetBEUI protocol After installing TCP/IP, you need to install NetBEUI. If NetBEUI is already installed, skip the steps below. Follow the steps below to install the Client for Microsoft Networks and the NetBEUI Protocol. 1. Double-click Network in the Control - Epson C823622 | Administrator's Manual - Page 98
Ethernet card for NetBEUI using the Ethernet card home page. c Caution: u You cannot use EPSON Net!2 for Windows and the Ethernet card home page at the same time. u Once you ) before turning off the printer or sending data to the printer. 6-4 Using the Ethernet Card with Windows 95 and Windows 98 - Epson C823622 | Administrator's Manual - Page 99
on the characters you can use. For details, see your browser or OS documentation. 1. Run EPSON Net!2. Click the printer you want to configure from the list, and click the Launch Browser button. EPSON Net!2 closes automatically. Or, run the browser and type the IP address for the Ethernet card - Epson C823622 | Administrator's Manual - Page 100
), and the device name (up to 8 characters). Note: u The NetBIOS name is the name of your computer on the network. Make sure to give the printer a unique name for the network. u For the workgroup name, type the domain name or the workgroup name used in the Windows network. 7. Click SUBMIT to - Epson C823622 | Administrator's Manual - Page 101
following at the Network path or queue name box. \\(NetBIOS name of the Ethernet card)\ (Device name of the Ethernet card) 4. Follow the on-screen instructions to set up the printer. Using the Ethernet Card with Windows 95 and Windows 98 6-7 - Epson C823622 | Administrator's Manual - Page 102
6-8 Using the Ethernet Card with Windows 95 and Windows 98 - Epson C823622 | Administrator's Manual - Page 103
) u It is necessary to install the NetBEUI protocol on each system when printing with NetBEUI. Printing to the Ethernet card is equivalent to printing by printer sharing. Using the Ethernet Card with Windows NT 7-1 - Epson C823622 | Administrator's Manual - Page 104
Windows. See Chapter 2. 4. Assign an IP address to the Ethernet card using EPSON Net!2 or the arp command. See Chapter 3. 5. Configure the NetBEUI settings on the Ethernet card home page. See this chapter. 6. Set up the printer on the workstations that will use it. See this chapter. Printing with - Epson C823622 | Administrator's Manual - Page 105
Note: You must install the correct printer drivers before starting these operations. 1. Select Create Printer from the Printer menu in Print Manager. 2. Type the printer name, and select the printer driver. 3. If you use the printer on a network, check the Share this printer on the network check box - Epson C823622 | Administrator's Manual - Page 106
the Ethernet card and the name of the printer, and click OK. 7. In the Create Printer dialog box, if the Print to box shows "IP address: printer name," the setting is complete. 8. Click OK to start installing the printer driver. Follow the on-screen instructions. Changing the type of access of the - Epson C823622 | Administrator's Manual - Page 107
(RWX)(RX), and click OK. Printing via the LPR port for Windows NT 4.0 Setting up your printer 1. Double-click the My Computer icon on the desktop, then double-click the Printers icon. 2. Double-click the Add Printers icon, and click the My Computer radio button, then click Next. 3. Click Add Port in - Epson C823622 | Administrator's Manual - Page 108
of the Ethernet card in the first text box and an appropriate printer name in the second text box. Then click OK to return to the Printer Ports dialog box. 6. Follow the on-screen instructions to install the printer driver. Printing with NetBEUI After installing TCP/IP as described in Chapter 3, you - Epson C823622 | Administrator's Manual - Page 109
Installing NetBEUI in Windows NT 3.51 1. Double-click the Network icon in the Control Panel to display the Network Settings dialog box. Check if NetBEUI Protocol is listed in the Installed Network Software list. 2. If NetBEUI Protocol is not in the list, click the Add Software button. Select NetBEUI - Epson C823622 | Administrator's Manual - Page 110
page. c Caution: u You cannot use EPSON Net!2 for Windows and EPSON Net!2 for Intranet at the same time. u Once you make changes to the Ethernet card using EPSON Net!2, wait until it registers the settings before turning off or sending data to the printer. 7-8 Using the Ethernet Card with Windows - Epson C823622 | Administrator's Manual - Page 111
, make sure to set the IP address for the Ethernet card in the EPSON Net!2 for Windows TCP/IP dialog box. 1. Run EPSON Net!2. Click the printer you want to configure from the list, and click the Launch Browser button. EPSON Net!2 closes automatically. Or, run the browser and type the IP address for - Epson C823622 | Administrator's Manual - Page 112
15 characters), and the device name (up to 8 characters). Note: u The NetBIOS name is the computer name on the network. Make sure to give the printer a unique name for the network. u For the workgroup name, type the domain name or the workgroup name used for the Windows network environment. 7. Click - Epson C823622 | Administrator's Manual - Page 113
want to configure from the Shared Printers list. If you cannot select the printer, type directly in the Printer box as follows: \\ (NetBIOS name of the Ethernet card) \ (Device name of the Ethernet card) 4. Follow the on-screen instructions to set up the printer. Using the Ethernet Card with Windows - Epson C823622 | Administrator's Manual - Page 114
that Server or Workstation is listed in the Services menu. For Windows NT 3.51: Check that Server or Workstation is listed in the Installed Network Software list. 2. Open the command prompt of Windows NT and type in the following command. NET USE (printer port): \\(NetBIOS name of the Ethernet card - Epson C823622 | Administrator's Manual - Page 115
how to configure and use the Ethernet card with an IBM OS/2 network. The instructions in this chapter are valid for OS/2 Warp 3 and Warp 4 (OS/2 /2 Warp 3, OS/2 Warp 4 t lprportd (TCP/IP) of Warp t Shared printer It is necessary to install the IBM OS/2 NetBIOS protocol. Overall steps Follow these - Epson C823622 | Administrator's Manual - Page 116
TCP/IP This section explains TCP/IP printing using the LPR port supported by standard OS/2. 1. Double-click the OS/2 system folder, card in the Remote print server box and the name of the remote print server's printer in the second text box. Type a value of 1 or greater in the Maximum number of LPD - Epson C823622 | Administrator's Manual - Page 117
. 5. Double-click the Template icon in the OS/2 System folder. Drag the Printer icon to your desktop to create a printer. 6. Double-click the Printer icon to link lprportd to the printer (see your OS/2 manual for more information about setting up the printer). Using the Ethernet Card with OS/2 8-3 - Epson C823622 | Administrator's Manual - Page 118
of LPD ports). The \PIPE\LPD -Settings dialog box appears. 9. Type the IP address of the Ethernet card in the LPD server box. Type the printer name set in step 2 in the LPD printer box. 10. Close the window to exit printer configuration. 8-4 Using the Ethernet Card with OS/2 - Epson C823622 | Administrator's Manual - Page 119
Printing with NetBEUI Follow these steps to set up printing on the workstations: 1. Create a printer. 2. Connect to the printer from the command line. For example, to connect the printer on LPT1, type: net use LPT1: \\ (NetBIOS name of the Ethernet card) \(Device name of the Ethernet card) Using the - Epson C823622 | Administrator's Manual - Page 120
8-6 Using the Ethernet Card with OS/2 - Epson C823622 | Administrator's Manual - Page 121
explains how to set up the printer for different UNIX systems using the lpr command. The Ethernet card supports many standard UNIX commands and can be this Ethernet card does not convert data into the printer control language, a printer driver and filter are necessary for each system. Setting - Epson C823622 | Administrator's Manual - Page 122
55 HOSTNAME 2. Define the host name as a print server. For example: lpsystem -t bsd HOSTNAME 3. Create the printer. For example: lpadmin -p Rprinter -s HOSTNAME\aux-T unknown-1 any 4. Enable the printer for use. For example: accept Rprinter enable Rprinter Files are printed using the lp command. For - Epson C823622 | Administrator's Manual - Page 123
name to the \etc\hosts file. For example: 22.33.44.55 HOSTNAME 2. Create a spool directory. For example: mkdir\var\spool\lpd\PRIFx 3. Add the printer entry to the \etc\printcap file. For example: Rprinter | LP-1700:lp=:rm=HOSTNAME:rp=aux:sd=/var/spool/ lpd/PRIFx Files are printed using - Epson C823622 | Administrator's Manual - Page 124
the /etc/hosts file. For example: 22.33.44.55 HOSTNAME 2. Run smit. For example: smit printer 3. Set the printer name (for example: Rprinter) in: "Manage Remote Printer" "Client Services" "Remote Printer Queues" "NAME of queue to add" Set the host name (for example: HOSTNAME) in: "DESTINATION HOST - Epson C823622 | Administrator's Manual - Page 125
jobs to for Rprinter. 1. Add the IP address and host name to the /etc/hosts file. For example: 22.33.44.55 HOSTNAME 2. Terminate the printer service. For example: lpshut 3. Create the printer. For example: lpadmin -pRPrinter -v/dev/null -mrmodel -ormHOSTNAME -orpaux 4. Restart the print - Epson C823622 | Administrator's Manual - Page 126
for SCO UNIX 4.2 or later (Open Server) In the following steps, substitute the name you will use to configure your printer's Ethernet card on the network for HOSTNAME. Substitute the printer name that users will send print jobs to for Rprinter. 1. Add the IP address and host name to the /etc/hosts - Epson C823622 | Administrator's Manual - Page 127
SCO-UNIX) will not be used. For example: If HOSTNAME currently runs SCO OpenServer Release 5 or above, it can support the extended remote line printer protocol. Do you want to turn on the "extended RLP protocol" support flag? If you are not sure, answer "n"? (y/n)[n]n 8. Specify whether the created - Epson C823622 | Administrator's Manual - Page 128
230 User logged in. 200 Type set to I. ftp> put binary file 200 PORT command successful. 150 Opening data connection for binary_file 226 Transfer complete ftp> bye 9-8 Using the Ethernet Card with UNIX - Epson C823622 | Administrator's Manual - Page 129
!2 to check the configuration of your Ethernet card and change settings when necessary. The main dialog box for EPSON Net!2 is shown: The three categories are ALL, TCP/IP, and NETWARE; and the printer list is shown as a tree structure. Note: If the NetWare communication protocol IPX is not used, the - Epson C823622 | Administrator's Manual - Page 130
. The Ethernet card home page appears in your Internet browser. EPSON Net!2 for Windows automatically closes when the browser opens. Configuring your printer Select the printer you want to configure from the printer list on the EPSON Net!2 dialog box, and click the Configuration button to configure - Epson C823622 | Administrator's Manual - Page 131
get to the Ethernet card when searching for printer information. All cards within this number of hops are identified and listed in EPSON Net!2. You can set the number of you added to the Subnet box are searched and are listed on the EPSON Net!2 dialog box. Adds the subnet address to the Subnet List - Epson C823622 | Administrator's Manual - Page 132
in the NetWare file server. See Chapter 4. Note: Only Bindery queues are supported. You have to log onto the NetWare server with supervisor privileges. I change configuration settings for your network protocol. Select your printer in the EPSON Net!2 main dialog box and click the Configure button. - Epson C823622 | Administrator's Manual - Page 133
Hardware version Software version Return to Default Explanations Shows the Media Access Control address (physical address) of the Ethernet card. Shows the printer name. Shows the version of the Ethernet card. Shows the version of the Ethernet card. Resets all configuration settings to the defaults - Epson C823622 | Administrator's Manual - Page 134
details. I tems The way of acquiring an IP address: IP address Subnet mask Default gateway Explanations Select the way of acquiring an IP address from Manual, RARP, BOOTP, or DHCP. Set the IP address for the Ethernet card. Set the subnet mask of the IP address. Set the gateway. 10-6 Using - Epson C823622 | Administrator's Manual - Page 135
4 for details. I tems Frame type Mode NDS NDS Tree Name NDS Context Ex planations Select the frame type. Select the mode from Print Server, Remote Printer, or Standby. Enable or Disable NDS. Type the NDS tree name. Type the NDS context. Using - Epson C823622 | Administrator's Manual - Page 136
queue. Type the print server password, if necessary. Re-input the password. Type the print server name. Type the polling interval in seconds. 10-8 Using EPSON Net!2 and the Ethernet Card Home Page - Epson C823622 | Administrator's Manual - Page 137
you use the Ethernet card in Remote Printer mode. See Chapter 4 for details. I tems Primary print server Printer port number Explanations Select the primary print server name. Type the printer port number. Using EPSON Net!2 for Macintosh You can use EPSON Net!2 to check the configuration of your - Epson C823622 | Administrator's Manual - Page 138
Changing configuration settings You can change IP address and AppleTalk settings in the dialog box shown below. To access the settings, select your printer in the EPSON Net!2 main dialog box and click the Configuration button. Then see the sections below to change the settings for your network. See - Epson C823622 | Administrator's Manual - Page 139
Manual Mode Return to Default Cancel Send Explanations Shows the name of the printer with the interface card. Shows the Entity type of the printer changes and returns to the EPSON Net!2 dialog box. Sends the settings for the Ethernet card to the printer. Using EPSON Net!2 and the Ethernet Card Home - Epson C823622 | Administrator's Manual - Page 140
using the card's home page. To access the Ethernet card, open your browser and type the IP address of your Ethernet card. Or, from EPSON Net!2, click the Launch Browser button. The card home page appears: The home page screens described in the following sections give you detailed information about - Epson C823622 | Administrator's Manual - Page 141
Name NDS Context Explanations Enable or Disable NetWare. Select the frame type. Select the mode from NDS Print Server, NDS Remote Printer, Bindery Print Server, Bindery Remote Printer, or Standby. Type the NDS tree name. Type the NDS context. Using EPSON Net!2 and the Ethernet Card Home Page 10-13 - Epson C823622 | Administrator's Manual - Page 142
Explanations Select the primary print server name. Type the printer port number. Updates the settings. TCP/IP I tems Get IP Address IP Address Subnet Mask Default Gateway SUBMIT Explanations Select the method of acquiring the IP address as Manual, RARP, BOOTP, or DHCP. Type the IP address for - Epson C823622 | Administrator's Manual - Page 143
of the printer attached with the interface card. Input the AppleTalk zone. Specify the setting method for the AppleTalk network number. Input the network number when you select Manual for the settings are described in the tables that follow. Using EPSON Net!2 and the Ethernet Card Home Page 10-15 - Epson C823622 | Administrator's Manual - Page 144
cause the changes to take effect. If you click RESET for each setting screen, or restart the printer, you do not need to click the RESET button. Returns the interface card to the default settings. , you do not need to make any changes here. 10-16 Using EPSON Net!2 and the Ethernet Card Home Page - Epson C823622 | Administrator's Manual - Page 145
the server machine. 1. The port used for monitoring will differ from system to system. 2. The environment must support normal printing from the shared printer. See the Readme file for more information about support for Windows shared printers. Using EPSON Net!2 and the Ethernet Card Home Page 10-17 - Epson C823622 | Administrator's Manual - Page 146
10-18 Using EPSON Net!2 and the Ethernet Card Home Page - Epson C823622 | Administrator's Manual - Page 147
EPSON Status Monitor 2 is a utility program that: u Monitors and shows information about your printer, including the amount of remaining ink or the EPSON Status Monitor 2 Readme file for more information about NDS support. You must set the port number to 0 when using Remote Printer mode. EPSON - Epson C823622 | Administrator's Manual - Page 148
box appears prompting you to select the printer driver.) 6. Click Yes to make your printer the default and click Next. 7. Click Finish. Installing EPSON Status Monitor 2 Note: Turn off all other active applications (such as virus protection programs). For instructions on how to do this, see your - Epson C823622 | Administrator's Manual - Page 149
2. Click Install EPSON Status Monitor 2, and then click the right arrow button. Note: If the screen above does not appear automatically, do the CD-ROM in a drive other than drive D, substitute the appropriate letter. Windows 95, 98, and NT Windows NT EPSON Status Monitor 2 (Windows Only) 11-3 - Epson C823622 | Administrator's Manual - Page 150
and Windows 98): Select Yes in the screen below to enable EPSON TCP/IP printing, and then click Next. (This screen only appears if TCP/IP is installed.) 5. Select the type of printer(s) you want to monitor and click Next. The printer types that you can monitor and the protocols you need to - Epson C823622 | Administrator's Manual - Page 151
network printers that do not have drivers installed in your computer. Select Do not monitor only if network traffic is a problem. Click Next. Note (NetWare network-based printers): In more information, see "Monitoring printers beyond routers" on page 11-31. EPSON Status Monitor 2 (Windows Only) 11-5 - Epson C823622 | Administrator's Manual - Page 152
shared printers, select Do not allow monitoring. Note for Windows 95/98: The screen shown below does not appear in Windows 95 or Windows 98. 8. Check the current settings and click Next. The installation program starts installing the necessary files. Follow the instructions on the screen. 11-6 EPSON - Epson C823622 | Administrator's Manual - Page 153
/IP or LPR printer with EPSON Status Monitor 2, you need to select the printer in your operating system. For Windows 95 and Windows 98, see the following section. For Windows NT, see Chapter 7. Note: A printer will only appear if the Ethernet card's IP address is set. For instructions on installing - Epson C823622 | Administrator's Manual - Page 154
2. Double-click Epson_tcpip_printers, so that available printers equipped with Ethernet cards in the same segment as your computer appear in the window. 3. Double-click the target printer. 11-8 EPSON Status Monitor 2 (Windows Only) - Epson C823622 | Administrator's Manual - Page 155
screen. If you are required to install the printer driver, follow the instructions in the documentation that came with the printer. Note: To install a printer located beyond a router, double-click Add Printer in the Printers folder to start the Add Printer Wizard. Set the IP address for the target - Epson C823622 | Administrator's Manual - Page 156
Changing Status Monitor 2 Settings You can change EPSON Status Monitor 2 settings as described below. 1. directory other than ESM2, type the path to the directory instead of ESM2. 2. Follow the instructions on the screen. Note (Windows NT 3.51 and 4.0): Users can individualize their own settings - Epson C823622 | Administrator's Manual - Page 157
Start, pointing to Programs and EPSON, and then clicking EPSON Status Monitor 2. From Windows NT 3.51 Double-click the EPSON Status Monitor 2 icon on the screen. You can also start EPSON Status Monitor 2 from within the Epson program group in Program Manager. EPSON Status Monitor 2 (Windows Only) 11 - Epson C823622 | Administrator's Manual - Page 158
the basic operation and functions of EPSON Status Monitor 2. 1. Click a printer in the EPSON Status Monitor 2 window. The Installed Printers list shows the current status of all EPSON printers that have printer drivers installed in your computer. 2. Click the Printer Status icon to see detailed - Epson C823622 | Administrator's Manual - Page 159
status or making preference settings. For details, see page 11-16 For details, see page 11-23 Note: If you click the Monitor this printer check box in the Monitoring Preferences dialog box, a Status Alert message appears according to the conditions you select in the Status Alert box. For detailed - Epson C823622 | Administrator's Manual - Page 160
because of a problem. Cannot monitor the printer. Note: u Close the Printer list window when you do not need it; this window uses computer resources if left open. u If you change the printer port setting Print to the following port or Print to in the printer driver, quit EPSON Status Monitor 2 as - Epson C823622 | Administrator's Manual - Page 161
on the taskbar when background monitoring is turned on. Using the Installed Printers list This list displays information about the EPSON printers that are connected to your computer through the network and have printer drivers installed in your system. EPSON Status Monitor 2 (Windows Only) 11-15 - Epson C823622 | Administrator's Manual - Page 162
Job Count title bars. Using the Uninstalled Network Printers list The Uninstalled Network Printers list displays non-EPSON printers and EPSON printers that do not have installed printer drivers. Note: You need to check Monitor in the Network Printer Monitoring dialog box during installation for the - Epson C823622 | Administrator's Manual - Page 163
To monitor network printers that do not have drivers installed in your computer, add uninstalled network printers as described on the next page. Printer Path: Shows the network printer path. Status: Shows the current printer status. Model: Shows the model name of the network printer. Note (Windows - Epson C823622 | Administrator's Manual - Page 164
-click that printer and select Printer Status, or select the printer and click Printer Status on the Printer menu. The Printer Status window appears. There are three menus in the Printer Status window. You can switch between menus by clicking the tabs at the tops of the menus. 11-18 EPSON Status - Epson C823622 | Administrator's Manual - Page 165
an empty ink cartridge. Follow instructions on the screen. Explains the current status of the selected printer. Explains how to solve problems that may occur. If the problem is not solved after following the instructions, see the troubleshooting section in your printer's documentation. EPSON Status - Epson C823622 | Administrator's Manual - Page 166
(EPSON Stylus COLOR/EPSON Stylus Photo series) The information given on the Consumables tab varies according to the printer you are monitoring. 3 1 2 1 2 4 The Consumables menu for the EPSON Stylus COLOR 1520 The Consumables menu for the EPSON Stylus COLOR 3000 Number 1. Remaining color ink - Epson C823622 | Administrator's Manual - Page 167
Checking the Consumables information (EPL Series) The information given on the Consumables tab varies according to the printer you are monitoring. 1 2 Number 1. Remaining paper 2. Remaining toner Description Shows the paper size and approximate amount of remaining paper in each paper source. Shows - Epson C823622 | Administrator's Manual - Page 168
options. 1 Number 1. Printer Resources 2. Details 2 This example shows the Printer Information menu for the EPL-N2000 printer Description Provides information about the printer and the print server. Provides details about the item selected in the Printer Resources list. 11-22 EPSON Status Monitor - Epson C823622 | Administrator's Manual - Page 169
a printer and select Monitoring Preferences, or select the printer and Determines how often the Status Monitor checks for new printer status information, from short (every 2 seconds) this printer check box to monitor the selected printer. A check in the check box means the selected printer is - Epson C823622 | Administrator's Manual - Page 170
according to the printer status: Printer Icon Green Yellow Red Gray Meaning Ready to print. Ready to print; however the printer has detected someting that may become a problem if it isn't fixed. Cannot print because of a problem. Cannot monitor the printer. 11-24 EPSON Status Monitor 2 (Windows - Epson C823622 | Administrator's Manual - Page 171
Settings menu (as shown below) and by selecting Monitor this printer in the Monitoring Preferences dialog box. Status Alert The Status Alert select in the Monitoring Preferences dialog box. Click the printer name and click Printer Status on the Printer menu to open the Status window. For details - Epson C823622 | Administrator's Manual - Page 172
Status Monitor 2 automatically monitors the printer or printers you designate. To stop monitoring a printer, follow these steps: 1. Double-click the icon of EPSON Status Monitor 2 at the bottom of your desktop. Windows 95 and NT 4.0 Windows NT 3.51 Double-click Double-click 2. Click Settings - Epson C823622 | Administrator's Manual - Page 173
3. Click Printer and click Close. Note: You can restart the Status Monitor by clicking Monitor from restart or Monitor now on the Settings menu. If you stop monitoring and close EPSON Status Monitor 2, the background monitoring icon disappears from the taskbar of Windows 95, Windows 98 and NT 4.0, - Epson C823622 | Administrator's Manual - Page 174
Status Monitor 2 from your computer by following the instructions for your operating system below. c Caution: Quit other programs such as virus check programs before removing EPSON Status Monitor 2. Note for Windows 95: If EPSON TCP/IP printing is enabled, disable it as described on page 11-5. Note - Epson C823622 | Administrator's Manual - Page 175
2. Click Start on the taskbar, point to Settings, and then click Control Panel. 3. Double-click Add/Remove Programs. EPSON Status Monitor 2 (Windows Only) 11-29 - Epson C823622 | Administrator's Manual - Page 176
4. Click EPSON Status Monitor 2 and click the Add/Remove button. 5. Follow the instructions on the screen. From Windows NT 3.51 1. Double-click Epson in the Program Manager. 2. Double-click EPSON Status Monitor 2 Uninstall. 11-30 EPSON Status Monitor 2 (Windows Only) - Epson C823622 | Administrator's Manual - Page 177
3. Follow the instructions on the screen. Tips for Using EPSON Status Monitor 2 Controlling the packet traffic on the network The computer with EPSON Status Monitor 2 communicates with the printer across the network. If there are many monitoring computers and printers to be monitored, packet traffic - Epson C823622 | Administrator's Manual - Page 178
uninstalled network printers The Uninstalled Network Printers menu shows network printers that do not have drivers installed in your computer. Because you can monitor printers without installing printer drivers, this feature is useful for network printer administrators. 11-32 EPSON Status Monitor - Epson C823622 | Administrator's Manual - Page 179
Chapter 12 Troubleshooting General Problems You cannot configure the Ethernet card or print from the network. Cause What to do Printer settings or 1. If a status sheet does not print, set the interface mode of the printer's control panel to Auto or Option. If you can print a status sheet, - Epson C823622 | Administrator's Manual - Page 180
You haven't set the IP address Set the IP address for the Ethernet for the Ethernet card. card using EPSON Net!2 for Windows/Macintosh or the arp command, as described in Chapter 3. You can check the IP IP address. Ask your system administrator for more information. 12-2 Troubleshooting - Epson C823622 | Administrator's Manual - Page 181
Problems Specific to Your Network Environment Windows NT environment Clients cannot The CREATOR OWNER has Add the CREATOR OWNER by been deleted from the Printer clicking the Add button on the Permissions list, or the Printer Permissions dialog box, or set CREATOR OWNER is set to the CREATOR - Epson C823622 | Administrator's Manual - Page 182
Explorer. You cannot print when using EPSON Stylus printers from Windows 95 and Windows 98. Cause What to do Print Manager is not on. On the EPSON Spool Manager's Queue Setup dialog box, select Spool to local printer and then check the Use Print Manager for this port box. 12-4 Troubleshooting - Epson C823622 | Administrator's Manual - Page 183
with USB OK. support) or Windows 98. t When using the printers listed below: EPSON Stylus COLOR 800/850/1520/3000, EPSON Stylus 1500, EPSON Stylus Pro 5000 NetWare environment about Print Server mode or Remote Printer mode, see Chapter 4 or your NetWare manual. Troubleshooting 12-5 - Epson C823622 | Administrator's Manual - Page 184
EPSON Net!2 will not start correctly. Cause What to do Microsoft NetWare Directory If you are using NDS service, use Service is installed in your Novell NetWare Client32. computer. Macintosh environment Printers , check the network equipment including the hub and cables. 12-6 Troubleshooting - Epson C823622 | Administrator's Manual - Page 185
at the same time. Preferences dialog box. See "Setting monitoring preferences" on page 11-23 and "Tips for Using EPSON Status Monitor 2" on page 11-31. The printer is not ready to print. Make sure the printer is ready to print. For details, see your printer documentation. Troubleshooting 12-7 - Epson C823622 | Administrator's Manual - Page 186
Net!2, quit EPSON Status Monitor 2 in advance. You can only monitor NetWare printers in Remote Printer mode if the printer port number is set to 0. Cause What to do This is set internally by EPSON Status Monitor 2. Use the NetWare control tool to set the port number to 0. 12-8 Troubleshooting - Epson C823622 | Administrator's Manual - Page 187
Settings" on page 11-10. See also "Tips for Using EPSON Status Monitor 2" on page 11-31. NDS printers cannot be monitored. Cause What to do You are not using this problem immediately after the operating system starts, log on after access to the hard disk drive is completed. Troubleshooting 12-9 - Epson C823622 | Administrator's Manual - Page 188
be monitored when Allow monitoring is selected for monitoring Windows shared printers under Windows NT 4.0. Cause What to do There is a known bug in the Install Service Pack 3 or higher before operating system. monitoring Windows shared printers under Windows NT 4.0. 12-10 Troubleshooting - Epson C823622 | Administrator's Manual - Page 189
Windows NT 3.51/4.0. Cause What to do This is a feature of EPSON Status Monitor 2. Double-click Services in the Control Panel and stop the EPSON Printer Status Agent service. Restart EPSON Status Monitor 2 and then restart the service. This procedure must be repeated every time you log on to - Epson C823622 | Administrator's Manual - Page 190
12-12 Troubleshooting - Epson C823622 | Administrator's Manual - Page 191
Windows 95, 98, and NT 4.0 1. Double-click the Control Panel icon in the My Computer window. 2. Double-click the Add/Remove Programs icon. 3. Select EPSON Net!2 and click the Add/Remove button. 4. When the message "Are you sure you want to completely remove the selected application and all of its - Epson C823622 | Administrator's Manual - Page 192
For Windows NT 3.51 1. Double-click the Uninstall icon in the EPSON Net!2 window. 2. When the message "Are you sure you want to completely remove the selected the message "Uninstall successfully completed" appears on your screen, click OK to complete the uninstallation. A-2 Uninstalling EPSON Net!2 - Epson C823622 | Administrator's Manual - Page 193
Appendix B Specifications Environmental Operating temperature: Storage temperature: Operating humidity: Storage humidity: Operating Vibration: Storage Vibration: Shock: 5° to 35° C (41° to 95° F) -30° to 70° C (-22° to 158° F) 20% to 80% 5% to 95% 0.4 G (5 Hz to 55 Hz) 1 G (5 Hz to 55 Hz) 4 G - Epson C823622 | Administrator's Manual - Page 194
Regulatory Approvals EMC FCC part 15B Class A EN55022 Class A EN50082-1 IEC801-2 ESD Immunity IEC801-3 Radiated Immunity IEC801-4 EFT/Burst Immunity Reliability MTBF for C82362V: 10,000 hours (power on, 100% duty) MTBF for C82363V/C82364V 268,973 hours MTTR: N/A (Replacement) V varies - Epson C823622 | Administrator's Manual - Page 195
13, 5-3 to 5-5, 10-9 for Windows, 3-10 to 3-13, 4-6 to 4-9, 4-13 to 4-16, 4-22 to 4-25, 4-32 to 4-34, 4-37 to 4-38, 10-1 installing, 2-1 to 2-3 EPSON Status Monitor 2, 5 to 7, 11-1 to 11-32 Ethernet card home page, 3-14 to 3-15, 4-35 to 4-37, 5-6 to 5-8, 6-4 to 6-6, 7-8 to 7-10, 10-12 Ethernet card - Epson C823622 | Administrator's Manual - Page 196
NetWare 3.1x, 4-3 to 4-16 4.1x, 4-16 to 4-34 basic settings in EPSON Net!2, 4-8, 4-15, 4-23, 4-33 effective hops, 10-3 Network connectors, B-1 to 4-25, 4-37 Print server, primary, 4-16, 4-34, 4-37 Printer port number, 4-16, 4-34 Problems general, 12-1 to 12-2 Macintosh, 12-6 NetWare, 12-5 to 12-6 - Epson C823622 | Administrator's Manual - Page 197
T TCP/IP, 3-1 to 3-15, 6-2, 7-2 to 7-6, 8-2 to 8-4 Time-out time, 10-3, 10-10 Troubleshooting, 12-1 to 12-11 U Uninstalling EPSON Net!2, A-1 to A-2 Using the Ethernet card with Macintosh, 5-1 to 5-8 NetWare, 4-1 to 4-41 OS/2, 8-1 to 8-5 UNIX, 9-1 to 9-8 Windows 95, 6-1 to 6-7 Windows 98, 6-1 to 6-7 - Epson C823622 | Administrator's Manual - Page 198
Index I-4 - Epson C823622 | Administrator's Manual - Page 199
. This equipment generates, uses and can radiate radio frequency energy and, if not installed and used in accordance with the instruction manual, may cause harmful interference to radio communications. Operation of this equipment in a residential area is likely to cause harmful interference
-
 1
1 -
 2
2 -
 3
3 -
 4
4 -
 5
5 -
 6
6 -
 7
7 -
8
-
9
-
10
-
11
-
12
-
13
-
14
-
15
-
16
-
17
-
18
-
19
-
20
-
21
-
22
-
23
-
24
-
25
-
26
-
27
-
28
-
29
-
30
-
31
-
32
-
33
-
34
-
35
-
36
-
37
-
38
-
39
-
40
-
41
-
42
-
43
-
44
-
45
-
46
-
47
-
48
-
49
-
50
-
51
-
52
-
53
-
54
-
55
-
56
-
57
-
58
-
59
-
60
-
61
-
62
-
63
-
64
-
65
-
66
-
67
-
68
-
69
-
70
-
71
-
72
-
73
-
74
-
75
-
76
-
77
-
78
-
79
-
80
-
81
-
82
-
83
-
84
-
85
-
86
-
87
-
88
-
89
-
90
-
91
-
92
-
93
-
94
-
95
-
96
-
97
-
98
-
99
-
100
-
101
-
102
-
103
-
104
-
105
-
106
-
107
-
108
-
109
-
110
-
111
-
112
-
113
-
114
-
115
-
116
-
117
-
118
-
119
-
120
-
121
-
122
-
123
-
124
-
125
-
126
-
127
-
128
-
129
-
130
-
131
-
132
-
133
-
134
-
135
-
136
-
137
-
138
-
139
-
140
-
141
-
142
-
143
-
144
-
145
-
146
-
147
-
148
-
149
-
150
-
151
-
152
-
153
-
154
-
155
-
156
-
157
-
158
-
159
-
160
-
161
-
162
-
163
-
164
-
165
-
166
-
167
-
168
-
169
-
170
-
171
-
172
-
173
-
174
-
175
-
176
-
177
-
178
-
179
-
180
-
181
-
182
-
183
-
184
-
185
-
186
-
187
-
188
-
189
-
190
-
191
-
192
-
193
-
194
-
195
-
196
-
197
-
198
-
199
 |
 |

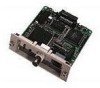
EPSON Type B Ethernet
Interface Card
C82362* (10Base2/10BaseT)
C82363*/C82364* (10BaseT/100BaseTX)
All rights reserved. No part of this publication may be reproduced, stored in a retrieval system, or
transmitted in any form or by any means, electronic, mechanical, photocopying, recording, or otherwise,
without the prior written permission of SEIKO EPSON CORPORATION. The information contained
herein is designed only for use with this EPSON product. EPSON is not responsible for any use of this
information as applied to other products.
Neither SEIKO EPSON CORPORATION nor its affiliates shall be liable to the purchaser of this
product or third parties for damages, losses, costs, or expenses incurred by purchaser or third parties as a
result of: accident, misuse, or abuse of this product or unauthorized modifications, repairs, or alterations
to this product, or (excluding the U.S.) failure to strictly comply with SEIKO EPSON
CORPORATION’s operating and maintenance instructions.
SEIKO EPSON CORPORATION shall not be liable for any damages or problems arising from the use
of any options or any consumable products other than those designated as Original EPSON Products or
EPSON Approved Products by SEIKO EPSON CORPORATION.
EPSON, EPSON ESC/P, and EPSON Stylus are registered trademarks and EPSON ESC/P 2 is a
trademark of SEIKO EPSON CORPORATION. EPSON SoundAdvice is a service mark and EPSON
FaxAdvice is a trademark of Epson America, Inc.
General Notice
: Other product names used herein are for identification purposes only and may be
trademarks of their respective owners. EPSON disclaims any and all rights in those marks.
The E
NERGY
S
TAR
emblem does not represent EPA endorsement of any product or service.
Copyright © 1998 by Epson America, Inc.
CPD-7356
8/98
Administrator’s Manual