Epson C11C501061 Product Information Guide
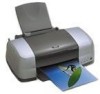
Epson C11C501061 - Stylus Photo 900 Color Inkjet Printer Manual
 |
UPC - 010343846043
View all Epson C11C501061 manuals
Add to My Manuals
Save this manual to your list of manuals |
Epson C11C501061 manual content summary:
- Epson C11C501061 | Product Information Guide - Page 1
User Replaceable Parts EPSON Stylus Photo 900 - 1 Accessories...EPSON Stylus Photo 900 - 1 Printer Specifications EPSON Stylus Photo 900 - 2 Control Panel EPSON Stylus Photo 900 - 3 Installing the First Ink Cartridges EPSON Stylus Photo 900 - 4 Replacing an Ink Cartridge EPSON Stylus Photo 900 - Epson C11C501061 | Product Information Guide - Page 2
EPSON Stylus Photo 900 Sheet feeder Paper support Edge guide Output tray Output tray extension Printer cover Power button Paper button Ink button Roll paper button Roll paper holders USB interface Parallel interface Manual feed slot Manual feed edge guide Paper thickness lever CD/DVD tray - Epson C11C501061 | Product Information Guide - Page 3
EPSON Stylus Photo 900 Printer Specifications Printing Printing method Nozzle Configuration Resolution Print direction Control code Input buffer Interfaces On-demand ink inches (302 mm) 15.2 lb (6.9 kg) without ink cartridges Ink Cartridges Colors Black, cyan, magenta, yellow, light cyan light - Epson C11C501061 | Product Information Guide - Page 4
the printer. See your Printer Basics book for instructions. One of the cartridges is low on ink. Check the message that appears on your screen to determine which cartridge is low or follow the instructions on page 5. Make sure you have a replacement cartridge. One of the cartridges is out of ink or - Epson C11C501061 | Product Information Guide - Page 5
EPSON Stylus Photo 900 Installing the First Ink Cartridges 1. Open the output tray and the printer cover. 4. Lower each cartridge into the holder. Make sure the tabs rest on the hooks in the back. 2. Lift up both ink cartridge clamps. You must install both cartridges or the printer won't work. 5. - Epson C11C501061 | Product Information Guide - Page 6
EPSON Stylus Photo 900 Replacing an Ink Cartridge When the red ink light flashes, one or more ink cartridges are low on ink. When the red ink light stays on, you need to replace the cartridge(s). When you print, you'll also see a message on your screen telling you which cartridge is low or empty. - Epson C11C501061 | Product Information Guide - Page 7
EPSON Stylus Photo 900 3. Pull up the ink cartridge clamp. The cartridge rises up from its holder. 9. Close the printer cover and press the ink button. The printer begins charging the ink delivery system. 4. Lift the cartridge out of the printer and dispose of it carefully. 5. Remove the new - Epson C11C501061 | Product Information Guide - Page 8
90° corners. If the end is cut diagonally, you may have problems feeding the paper. 3. If the paper curls at the end, fold printer. Then remove the paper support, lower the output tray, and turn on the printer. 5. Make sure the paper thickness lever is set to the position. 5/03 EPSON Stylus Photo - Epson C11C501061 | Product Information Guide - Page 9
the left edge guide against the paper (but not start, remove the paper support. Then turn the printer on. (The printer must be on to printer cover and place a sheet of card stock against the left side of the manual feed slot, with the side you want to print on facing up. 8 - EPSON Stylus Photo - Epson C11C501061 | Product Information Guide - Page 10
the paper. 4. Repeat steps 2 and 3 several times. Designing CDs and DVDs You can use the EPSON Print CD program (included on the Printer Software CD-ROM) to create and print a design with images, graphics, and text. See the Printer Basics manual for instructions. 5/03 EPSON Stylus Photo 900 - 9 - Epson C11C501061 | Product Information Guide - Page 11
the edge guide against the tray. 8. Set the paper thickness lever to the position. The paper light goes out. 5. Insert the tray against the left side of the feeder. 9. Close the printer cover and follow the instructions in the next section to print the CD or DVD. 10 - EPSON Stylus Photo 900 5/03 - Epson C11C501061 | Product Information Guide - Page 12
. If you don't see any improvement after cleaning three or four times, see the Printer Basics manual for problem solving guidelines. You can also turn the printer off and wait overnight-this allows any dried ink to soften-and then try cleaning the print head again. 5/03 EPSON Stylus Photo 900 - 11 - Epson C11C501061 | Product Information Guide - Page 13
OS X: Open the Applications folder and select EPSON Printer Utility. Select SP 900 in the printer list, click OK, and select Print Head Alignment. 4. Follow the instructions on the screen to print a test page. Print to print the first pattern on the next test page. 12 - EPSON Stylus Photo 900 5/03 - Epson C11C501061 | Product Information Guide - Page 14
EPSON Stylus Photo 900 Cleaning the Printer To keep your printer working at its best, you should clean it several times a year. 1. Turn off the printer mild detergent. Keep the printer cover closed to prevent water from getting inside. 4. If ink accidentally gets inside the printer, wipe it off with - Epson C11C501061 | Product Information Guide - Page 15
ink cartridge holder with the plastic insert that came with your printer (or secure it to the case with tape). Related Documentation CPD-15860R1 4042669-00 CPD-15861R1 4042670-00 CPD-15862R1 3020522-00 PL-SP900 EPSON Stylus Photo 900 Start Here EPSON Stylus Photo 900 Printer Basics EPSON Stylus
-
 1
1 -
 2
2 -
 3
3 -
 4
4 -
 5
5 -
 6
6 -
 7
7 -
8
-
9
-
10
-
11
-
12
-
13
-
14
-
15
 |
 |

P R O D U C T
I N F O R M A T I O N
G U I D E
5/03
EPSON
UPDATE
5/7/03
This package provides a new ink jet printer product section to be added to the
EPSON Product Information
Guide
. The table of contents of this section is listed below.
EPSON Stylus
®
Photo 900
TABLE OF CONTENTS
User Replaceable Parts
......................................................................................
EPSON Stylus Photo 900 - 1
Accessories
........................................................................................................
EPSON Stylus Photo 900 - 1
Printer Specifications
........................................................................................
EPSON Stylus Photo 900 - 2
Control Panel
...................................................................................................
EPSON Stylus Photo 900 - 3
Installing the First Ink Cartridges
.....................................................................
EPSON Stylus Photo 900 - 4
Replacing an Ink Cartridge
...............................................................................
EPSON Stylus Photo 900 - 5
Selecting the Paper Type Setting
......................................................................
EPSON Stylus Photo 900 - 6
Paper Loading Guidelines
.................................................................................
EPSON Stylus Photo 900 - 7
Loading Roll Paper
...........................................................................................
EPSON Stylus Photo 900 - 7
Loading and Printing CDs and DVDs
.............................................................
EPSON Stylus Photo 900 - 9
Cleaning the Print Head
...................................................................................
EPSON Stylus Photo 900 - 11
Aligning the Print Head
...................................................................................
EPSON Stylus Photo 900 - 12
Cleaning the Printer
.........................................................................................
EPSON Stylus Photo 900 - 13
Transporting the Printer
...................................................................................
EPSON Stylus Photo 900 - 14
Related Documentation
....................................................................................
EPSON Stylus Photo 900 - 14