Epson 1280 Printer Basics (For use with printer drivers posted on 10/20/04)
Epson 1280 - Stylus Photo Color Inkjet Printer Manual
 |
UPC - 010343844230
View all Epson 1280 manuals
Add to My Manuals
Save this manual to your list of manuals |
Epson 1280 manual content summary:
- Epson 1280 | Printer Basics (For use with printer drivers posted on 10/20/04) - Page 1
Epson Stylus® Photo 1280 Printer Basics - Epson 1280 | Printer Basics (For use with printer drivers posted on 10/20/04) - Page 2
, scanners, and ink jet printers. Trademarks Epson, Epson Stylus, Epson Photo Stickers, and MicroWeave are registered trademarks and Exceed Your Vision is a trademark of Seiko Epson Corporation. Epson PhotoCenter, Epson Connection, SoundAdvice, and Epson Store are service marks; Epson Print Lab and - Epson 1280 | Printer Basics (For use with printer drivers posted on 10/20/04) - Page 3
Software About Your Documentation Viewing the On-Screen Reference Guide LOADING PAPER Loading Paper in the Sheet Feeder Loading Envelopes Loading Roll Paper If the Roll Paper Jams or Feeds Incorrectly Removing and Storing Roll Paper PRINTING FROM START TO FINISH Basic Printing in Windows Selecting - Epson 1280 | Printer Basics (For use with printer drivers posted on 10/20/04) - Page 4
Replacing an Ink Cartridge 39 Removing and Installing Ink Cartridges 40 Aligning the Print Head 43 Cleaning the Printer 45 Transporting the Printer 46 PROBLEM SOLVING 47 Printer Parts 48 Diagnosing Printer Problems 49 Checking the Control Panel Lights 49 Running a Printer Check 51 - Epson 1280 | Printer Basics (For use with printer drivers posted on 10/20/04) - Page 5
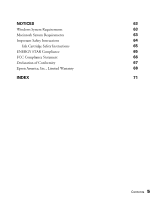
NOTICES 63 Windows System Requirements 63 Macintosh System Requirements 63 Important Safety Instructions 64 Ink Cartridge Safety Instructions 65 ENERGY STAR Compliance 65 FCC Compliance Statement 66 Declaration of Conformity 67 Epson America, Inc., Limited Warranty 68 INDEX 71 - Epson 1280 | Printer Basics (For use with printer drivers posted on 10/20/04) - Page 6
6 Contents - Epson 1280 | Printer Basics (For use with printer drivers posted on 10/20/04) - Page 7
to your printer driver. Visit http://support.epson.com and check the section for your product to see if there is a new driver available, free of charge, for downloading to your computer. Download instructions are included for your convenience. The Windows driver includes the Epson ICC Color Profiles - Epson 1280 | Printer Basics (For use with printer drivers posted on 10/20/04) - Page 8
Getting Started Guide for instructions. About Your Documentation To set up your printer and install its software, see the Start Here sheet. Then read this book for instructions on: ■ Loading paper ■ Printing with Windows® or on a Macintosh® ■ Maintaining the printer ■ Solving basic problems Please - Epson 1280 | Printer Basics (For use with printer drivers posted on 10/20/04) - Page 9
should have installed the on-screen Reference Guide for your printer when you set up your printer, as described on the Start Here sheet. (If not, insert the printer software CD-ROM and select Install Reference Guide from the Install Menu to copy the manual to your computer.) Note: You need a browser - Epson 1280 | Printer Basics (For use with printer drivers posted on 10/20/04) - Page 10
close a subtopic list. Closed list: click to expand Click to go to topic Note: If you see an icon for a graphic when viewing your Reference Guide in Netscape Navigator, click the Reload button to load the graphic. 10 Welcome! - Epson 1280 | Printer Basics (For use with printer drivers posted on 10/20/04) - Page 11
first, even when printing landscape-oriented documents. ■ Load letterhead or preprinted paper into the printer top edge first. ■ You can load up to 20 sheets of Epson Photo Paper, Glossy Photo Paper, or Matte Paper Heavyweight. ■ Load Epson Premium Glossy, Semigloss, and Luster Photo Paper one sheet - Epson 1280 | Printer Basics (For use with printer drivers posted on 10/20/04) - Page 12
sure your printer and computer are turned on. 2. Place your paper against the right edge of the sheet feeder and slide the left edge guide against the above this arrow Printable side up, short edge first Slide the left edge guide against the paper Letter-size paper 4 x 6 inch paper Pull out - Epson 1280 | Printer Basics (For use with printer drivers posted on 10/20/04) - Page 13
load one envelope at a time. 1. Open the printer cover and move the thickness lever to the + position. back to the 0 position when you're done printing envelopes. 2. Insert the envelopes flap edge first, 3. Slide the left edge guide against the envelopes. 4. Before you print, select Plain paper as the - Epson 1280 | Printer Basics (For use with printer drivers posted on 10/20/04) - Page 14
the sheet feeder. 2. Remove the paper support and lower the output tray. 3. Insert the paper support adapter into the positioning slots on the back of the printer, as shown. Position the down arrows above . If the end is cut diagonally, you may have problems feeding the paper. 14 Loading Paper - Epson 1280 | Printer Basics (For use with printer drivers posted on 10/20/04) - Page 15
.) 7. Insert the tabs on the roll paper holders into the slots on the paper support adapter. As you face the front of the printer, insert the tab on the right roll paper holder into the slot at the right end Otherwise your roll paper won't load correctly, and you may see an error. Loading Paper 15 - Epson 1280 | Printer Basics (For use with printer drivers posted on 10/20/04) - Page 16
printer as far as it will go, then slide the left edge guide printer for your paper to eject smoothly. 11. Gently hold the paper in place as you press and release the z roll paper button to feed the paper into the printer . Note: Don't force the paper to feed into the printer. Allow - Epson 1280 | Printer Basics (For use with printer drivers posted on 10/20/04) - Page 17
as straight as possible to avoid further feeding problems. Gently pull the roll backward to rewind it, and then turn the printer on again. 2. After you rewind the paper, the b maintenance light comes on. Press the b maintenance button to turn the light off. 3. Reload the paper, making sure the end - Epson 1280 | Printer Basics (For use with printer drivers posted on 10/20/04) - Page 18
roll paper is cut at right angles. A diagonal cut may cause paper feeding problems. 4. Hold down the z roll paper button for about three seconds. The package. Store your printout in a resealable plastic bag. Keep both printed and unused roll paper away from high temperatures and humidity and out - Epson 1280 | Printer Basics (For use with printer drivers posted on 10/20/04) - Page 19
the Correct Media Type" on page 33 ■ "Printing Borderless Photos" on page 34 Tip: Whenever you print, make sure you: ■ Use the right paper. For the best-looking photos, most vivid colors, and greatest detail, always use genuine Epson papers. ■ Choose the right printer settings for the paper. Your - Epson 1280 | Printer Basics (For use with printer drivers posted on 10/20/04) - Page 20
from the File menu, you may not see this window and will not be able to change the printer software settings before printing. 3. Make sure EPSON Stylus Photo 1280 is selected. 4. Click Properties or Preferences. (If you see a Setup, Printer, or Options button, click it first. Then click Properties - Epson 1280 | Printer Basics (For use with printer drivers posted on 10/20/04) - Page 21
For Ink, select Color to print a color document or black and white photograph. Choose Black to print a Windows Print Settings" on page 27 for instructions on selecting Photo RPM. 6. Click OK to save your settings, return to the Print window, and print. Note: For more information about printer - Epson 1280 | Printer Basics (For use with printer drivers posted on 10/20/04) - Page 22
change the Windows default printer settings. Follow these steps: 1. Windows XP: Click Start > Printers and Faxes (or Start > Settings > Printers and Faxes). Windows 2000: Click Start > Settings > Printers. 2. Right-click the EPSON Stylus Photo 1280 printer and select Printing Preferences. 3. Select - Epson 1280 | Printer Basics (For use with printer drivers posted on 10/20/04) - Page 23
a document from your Macintosh OS X application, follow these steps: Note: Make sure you added your printer to the Printer Setup Utility or Print Center as described on the Start Here sheet. 1. Make sure the printer is on and paper is loaded. 2. From the File menu, select Page Setup. 3. Select your - Epson 1280 | Printer Basics (For use with printer drivers posted on 10/20/04) - Page 24
setting you chose in the Page Setup window Click here and select Print Settings 6. Open the Printer menu and select the same printer option you chose in the Page Setup menu. Note: Always select the same printer option in the Format for menu and the Printer menu. If the settings are different, you - Epson 1280 | Printer Basics (For use with printer drivers posted on 10/20/04) - Page 25
, to select page layout options ■ Output Options, to save your print job as a PDF file ■ Color Management, to select ColorSync®, adjust the color controls, change the gamma setting, or turn off color adjustments by the printer software ■ Summary, to view a list of all your selections 10. Optionally - Epson 1280 | Printer Basics (For use with printer drivers posted on 10/20/04) - Page 26
when it appears in the dock on the bottom of your desktop. Then double-click Stylus Photo 1280 in the printer list. You see a screen like this: You can use the Printer Setup Utility or Print Center to do any of the following: ■ Click the print job, then click Delete to delete the job. ■ Click the - Epson 1280 | Printer Basics (For use with printer drivers posted on 10/20/04) - Page 27
paper. ■ ICM (Image Color Matching): For matching colors as closely as possible with ICM-compatible monitors or scanners. ■ sRGB (standard Red Green Blue): For color matching with other sRGB devices, or for images designed for the Web. See your Windows help for details. Printing from Start to Finish - Epson 1280 | Printer Basics (For use with printer drivers posted on 10/20/04) - Page 28
select Photo RPM (if available for your Media Type). Then click OK. Note: Printing is slower at higher resolutions. For more information about advanced settings, click the Help button. 5. If you're using a color management system, such as the Epson ICC color profiles that came with your printer, and - Epson 1280 | Printer Basics (For use with printer drivers posted on 10/20/04) - Page 29
tab to change paper size, page orientation, or the paper source. If you're printing on roll paper, change the Paper Source to Roll Paper. Shows current settings Select printable area Tip: If your program's Print window includes options for setting the number of copies, orientation, or paper - Epson 1280 | Printer Basics (For use with printer drivers posted on 10/20/04) - Page 30
a poster Add a watermark to a printed page here 10. If you want to preview your job before printing, click the Main tab and click the Print Preview checkbox. 11. Click OK to save your settings and return to the Print window, then click OK (or Print) to print. 30 Printing from Start to Finish - Epson 1280 | Printer Basics (For use with printer drivers posted on 10/20/04) - Page 31
Macintosh Print Settings 1. On the printer settings window, click Custom, then click the Custom Settings list to open it. Click Custom, then click Custom Settings to see the list of options 2. Optionally, select one of these settings from the Custom Settings list: ■ Economy: For printing rough - Epson 1280 | Printer Basics (For use with printer drivers posted on 10/20/04) - Page 32
settings, click Help. 4. If you're using a color management system and don't want your printer to control colors, select Color Management from the Print Settings pull-down menu, and select No Color Adjustment. 5. For the highest print quality, select Photo RPM (if available for your Media Type - Epson 1280 | Printer Basics (For use with printer drivers posted on 10/20/04) - Page 33
so your printer knows what kind of paper you're using and adjusts the ink coverage accordingly. For this paper . . . Plain paper sheets or envelopes Epson Premium Bright White Paper Epson Iron-On Transfer Paper Epson Photo Quality Ink Jet Paper Epson Photo Quality Ink Jet Cards Epson Photo Quality - Epson 1280 | Printer Basics (For use with printer drivers posted on 10/20/04) - Page 34
is a bit slower, you get beautiful snapshots or enlargements without trimming. Windows Follow these steps to print borderless photos on single sheets: 1. Start your photo application and open your photo file. 2. Click File > Print. Then click Properties or Preferences. 3. Make sure the mode is set - Epson 1280 | Printer Basics (For use with printer drivers posted on 10/20/04) - Page 35
the Format for pull-down menu, select Stylus Photo 1280 (Sheet Feeder - Borderless). Note: If you don't see this option, make sure you added the printer to the Printer Setup Utility or Print Center correctly. See the Start Here sheet for instructions. 4. Choose the Paper Size and Orientation, then - Epson 1280 | Printer Basics (For use with printer drivers posted on 10/20/04) - Page 36
4 × 6 in No Perforations. You can also print borderless photos on letter-size paper. 5. Click File > Print. 6. Select Print Settings from the pull-down list. 7. In the Printer pull-down menu, select Stylus Photo 1280 (Sheet Feeder - Borderless). 8. Make sure the Mode is set to Automatic. 9. Select - Epson 1280 | Printer Basics (For use with printer drivers posted on 10/20/04) - Page 37
covers the following: ■ "Cleaning the Print Head" below ■ "Replacing an Ink Cartridge" on page 39 ■ "Aligning the Print Head" on page 43 ■ "Cleaning the Printer" on page 45 ■ "Transporting the Printer" on page 46 Cleaning the Print Head If your printed image is unexpectedly light, or dots are - Epson 1280 | Printer Basics (For use with printer drivers posted on 10/20/04) - Page 38
click EPSON Printer Utility and select SP 1280 in the printer list. Then click OK. 3. On the Utility menu, click the Head Cleaning button. 4. Follow the instructions on the screen to clean the print head. Cleaning takes about 30 seconds, during which the printer makes some noise and the Ppower light - Epson 1280 | Printer Basics (For use with printer drivers posted on 10/20/04) - Page 39
're done. If there are gaps in the lines, clean the print head again; see page 37 for instructions. Gaps in nozzle check pattern Replacing an Ink Cartridge When the b maintenance and P power lights are both flashing, one of your ink cartridges is low on ink. This is a good time to make sure you have - Epson 1280 | Printer Basics (For use with printer drivers posted on 10/20/04) - Page 40
Follow these steps to replace ink cartridges: 1. Make sure the printer is turned on and not printing. 2. Open the printer cover and press the ink cartridge replacement button. The print head moves left to the ink cartridge replacement position. Ink cartridge replacement button Caution: To avoid - Epson 1280 | Printer Basics (For use with printer drivers posted on 10/20/04) - Page 41
instructions on opening the software.) You can also check the ink levels by pressing Start > Settings > Printers and Faxes (or Start > Control Panel > Printers and Faxes). Right-click the Stylus Photo 1280 and select Printing Preferences. Macintosh OS X: Choose Applications > EPSON Printer Utility - Epson 1280 | Printer Basics (For use with printer drivers posted on 10/20/04) - Page 42
step 10. 10. Press the ink cartridge replacement button and close the printer cover. The printer moves the print head and begins charging the ink delivery system. Make sure the cartridge tabs are positioned above the hooks The Ppower light flashes, and the printer makes noise. Charging takes about - Epson 1280 | Printer Basics (For use with printer drivers posted on 10/20/04) - Page 43
drive. Double-click EPSON Printer Utility and select SP 1280 in the printer list. Then click OK. 3. You see the Utility menu. Click the Print Head Alignment button. 4. Follow the instructions on the screen to print an alignment page for black printing. You see this window on your screen: Maintaining - Epson 1280 | Printer Basics (For use with printer drivers posted on 10/20/04) - Page 44
with the two vertical lines most precisely printed on top of each other. You may print another test page. Then repeat this step. 6. Follow the instructions on the next two screens to print an alignment pattern for color printing print another test page. Then repeat this step. 44 Maintaining Your - Epson 1280 | Printer Basics (For use with printer drivers posted on 10/20/04) - Page 45
printer and wait for the Ppower light to go out. 2. Unplug the power cord and disconnect the printer cable. 3. Remove all the paper, then use a soft brush to clean any dust or dirt from the sheet feeder. 4. Clean the exterior of the printer with a soft, damp cloth. 5. Clean ink out of the printer - Epson 1280 | Printer Basics (For use with printer drivers posted on 10/20/04) - Page 46
print head locks in the far right position, then turn the printer off. 2. Unplug the power cord from the electrical outlet. Then disconnect the printer cable from the printer. 3. Remove any paper from the printer and remove the paper support. 4. Open the printer cover. Secure the ink cartridge - Epson 1280 | Printer Basics (For use with printer drivers posted on 10/20/04) - Page 47
setup and printing problems. Caution: It's a good idea to check Epson's support web site periodically for possible updates to your printer driver. Visit http://support.epson.com and check the section for your printer to see if there is a new driver available, free of charge, for downloading to your - Epson 1280 | Printer Basics (For use with printer drivers posted on 10/20/04) - Page 48
Printer Parts Sheet feeder Left edge guide Paper support Right edge guide Printer cover Output tray Output tray extensions Ink cartridge holders (not removable) Paper thickness lever Control panel Maintenance light Power light Ink cartridge replacement button Roll paper button Maintenance - Epson 1280 | Printer Basics (For use with printer drivers posted on 10/20/04) - Page 49
on the Main tab in the Printer Settings window in the printer software. See page 20 for instructions on opening the software. ■ Macintosh OS X: Choose Applications > EPSON Printer Utility > SP 1280 > EPSON StatusMonitor. Then replace the ink cartridge as described on page 39. Problem Solving 49 - Epson 1280 | Printer Basics (For use with printer drivers posted on 10/20/04) - Page 50
on page 39. If both lights come on after you've replaced a cartridge, you may have installed a cartridge your printer can't use. P is off and b is on Jammed paper may be blocking movement of the print head, or you may have an internal error. Turn off the printer, open the cover, and check - Epson 1280 | Printer Basics (For use with printer drivers posted on 10/20/04) - Page 51
dots, you need to clean the print head; see page 37.) 4. To end the check, turn the printer off after it prints the check page. Then reconnect the interface cable and turn on your printer and computer. If the check page prints, the problem probably lies in your software settings, the interface cable - Epson 1280 | Printer Basics (For use with printer drivers posted on 10/20/04) - Page 52
Here are some troubleshooting tips if you have problems setting up your printer, installing software, or printing. Problems Setting Up the Printer or Installing Software The printer makes noise after ink cartridge installation. ■ The first time you install ink cartridges, the printer must charge - Epson 1280 | Printer Basics (For use with printer drivers posted on 10/20/04) - Page 53
properly. See your Windows online help system for details. If it's not working, contact your computer manufacturer. ■ If you're printing over a network, see your on-screen Reference Guide for instructions on configuring your printer for use on a network. Printing Problems The Ppower light is on, but - Epson 1280 | Printer Basics (For use with printer drivers posted on 10/20/04) - Page 54
for instructions. ■ Set the paper thickness lever to the 0 position. Set the lever to the + position when you print on thicker paper or envelopes. You may also need to turn off High Speed in the printer software. ■ The print head nozzles may need cleaning; see page 37 for instructions. 54 Problem - Epson 1280 | Printer Basics (For use with printer drivers posted on 10/20/04) - Page 55
+ position, your printer is set for thicker paper or envelopes. (See page 13.) If you've loaded other paper, your image may smear. For most papers, set the paper thickness lever to the 0 position. ■ The print head nozzles may need cleaning; see page 37 for instructions. ■ The ink cartridges may be - Epson 1280 | Printer Basics (For use with printer drivers posted on 10/20/04) - Page 56
You see wrong or missing colors. ■ If you're printing color images, make sure both your application and printer software are set for color printing. ■ The print head nozzles may need cleaning; see page 37. ■ The ink cartridges may be old or low on ink. To replace an ink cartridge, see page 39. ■ Try - Epson 1280 | Printer Basics (For use with printer drivers posted on 10/20/04) - Page 57
printer. ■ If paper doesn't feed, remove it from the sheet feeder, reload it against the right edge, then slide the left edge guide error. ■ If the b maintenance light is on, press the b maintenance button and wait for the light to go off. Then press the z roll paper button to resume printing - Epson 1280 | Printer Basics (For use with printer drivers posted on 10/20/04) - Page 58
Printer Setup Utility or Print Center. ■ The print head nozzles may need cleaning. See page 37. The margins are incorrect. ■ Make sure the paper settings in your printer software are correct for your paper size. See page 20 (Windows) or page 23 (Macintosh OS X) for instructions. ■ See your software - Epson 1280 | Printer Basics (For use with printer drivers posted on 10/20/04) - Page 59
Change/Remove button. 3. In the next window, make sure the Epson Stylus Photo 1280 printer is selected and click OK. Then follow the on-screen instructions. 4. Restart your computer when you're done. Then follow the instructions on the Start Here sheet to reinstall your software. Problem Solving 59 - Epson 1280 | Printer Basics (For use with printer drivers posted on 10/20/04) - Page 60
Product name (Epson Stylus Photo 1280) ■ Product serial number (located on the back of the printer) ■ Proof of purchase (such as a store receipt) and date of purchase ■ Computer configuration and operating system version ■ Description of the problem You can purchase genuine Epson ink and paper from - Epson 1280 | Printer Basics (For use with printer drivers posted on 10/20/04) - Page 61
If you need help with the software that came with your printer, please contact the software manufacturer, as listed below. Software Adobe Photoshop Elements Web site www.adobe.com/ support/main.html GretagMacbeth - Eye-One Share E-mail Telephone [email protected] (206) 675-6126 6:00 A.M. to - Epson 1280 | Printer Basics (For use with printer drivers posted on 10/20/04) - Page 62
62 Problem Solving - Epson 1280 | Printer Basics (For use with printer drivers posted on 10/20/04) - Page 63
Notices This chapter includes system requirements, safety instructions, legal notices, and warranty information. Windows System Requirements To use your printer and its software, your system should have: ■ A Microsoft Windows compatible PC with a Pentium® or better processor, 200 MHz or faster, - Epson 1280 | Printer Basics (For use with printer drivers posted on 10/20/04) - Page 64
unplug the printer until the P power light is off. ■ Do not block or cover the openings in the printer's case or insert objects through the slots. ■ Except as specifically explained in this manual, do not attempt to service the printer yourself. ■ Unplug the printer and refer servicing to qualified - Epson 1280 | Printer Basics (For use with printer drivers posted on 10/20/04) - Page 65
transporting the printer, make sure the print head is capped in the far right position and the ink cartridges are in place. Tape the ink cartridge holder to the printer case to make sure it remains in the proper position. ENERGY STAR Compliance As an ENERGY STAR® Partner, Epson has determined - Epson 1280 | Printer Basics (For use with printer drivers posted on 10/20/04) - Page 66
comply with the limits for a Class B digital device, pursuant to Part 15 of the FCC Rules. These limits are designed to provide reasonable energy and, if not installed and used in accordance with the instructions, may cause harmful interference to radio or television reception. However, there - Epson 1280 | Printer Basics (For use with printer drivers posted on 10/20/04) - Page 67
Epson America, Inc. Located at: MS: 3-13 3840 Kilroy Airport Way Long Beach, CA 90806-2469 Telephone: (562) 290-5254 Declare under sole responsibility that the product identified herein, complies with 47CFR Part Epson Type of Product: Ink Jet Printer Model: Epson Stylus Photo 1280: P158A Notices - Epson 1280 | Printer Basics (For use with printer drivers posted on 10/20/04) - Page 68
any color change or fading of prints or reimbursement of materials or services required for reprinting. This warranty does not cover damage to the Epson product caused by parts or supplies not manufactured, distributed or certified by Epson. This warranty does not cover ribbons, ink cartridges or - Epson 1280 | Printer Basics (For use with printer drivers posted on 10/20/04) - Page 69
ANY LOSS, INCONVENIENCE, OR DAMAGE, INCLUDING DIRECT, SPECIAL, INCIDENTAL OR CONSEQUENTIAL DAMAGES, RESULTING FROM THE USE OR INABILITY TO USE THE EPSON PRODUCT, WHETHER RESULTING FROM BREACH OF WARRANTY OR ANY OTHER LEGAL THEORY. In Canada, warranties include both warranties and conditions. Some - Epson 1280 | Printer Basics (For use with printer drivers posted on 10/20/04) - Page 70
70 Notices - Epson 1280 | Printer Basics (For use with printer drivers posted on 10/20/04) - Page 71
48 to 50 C Cable, printer, 63 Cancelling printing, 22, 26 Centering text or image, 29 Characters, incorrect, 58 Checking printer, 51 Cleaning print head, 37 to 38 printer, 45 sheets, 45 Color Management settings Mac OS X, 25, 32 Windows, 28 Color problems, 56 ColorLife Photo Paper, 33 ColorSync, 25 - Epson 1280 | Printer Basics (For use with printer drivers posted on 10/20/04) - Page 72
H Head Cleaning utility, 37 to 38 Heavyweight matte paper, 33 Help, Epson, 60 High Speed setting, 54 Holding a print job, 22, 26 I ICC profiles, 7 ICM setting, 27 Image, resizing, 30 Incorrect characters, 58 colors, 56 margins, 58 Ink cartridges ordering, 40 replacing, 39 to 42 safety instructions - Epson 1280 | Printer Basics (For use with printer drivers posted on 10/20/04) - Page 73
Luster Photo paper, 33 Print Center, 23 Print dialog box, 20 Print head aligning, 43 to 44 cleaning, 37 to 38 Print quality problems, 54 to 56 Printable area, increasing, 29 Printer cable, 63 check, 51 cleaning, 45 control panel, 48 to 50 maintaining, 37 to 45 noise, 53 parts, 48 problems, 49 - Epson 1280 | Printer Basics (For use with printer drivers posted on 10/20/04) - Page 74
adhesive sheets, 33 Semigloss Scrapbook Photo paper, 33 Sheet feeder loading envelopes, 13 loading paper, 11 to 12 problems, 56 to 57 Slow printing, 53 Smears, 55 Software problems, solving, 52 to 53 reinstalling, 59 uninstalling, 59 updates, 47 Software support, 61 SoundAdvice, 60 Source, paper - Epson 1280 | Printer Basics (For use with printer drivers posted on 10/20/04) - Page 75
U Uninstalling software, 59 Updates, software, 47 USB cable, 63 Utilities Head Cleaning, 37 to 38 Print Head Alignment, 43 to 44 W Warranty, 68 to 69 Watermark, adding, 30 Windows advanced printing, 27 to 30 basic printing, 20 to 22 cancelling printing, 22 customizing print settings, 27 to 30 - Epson 1280 | Printer Basics (For use with printer drivers posted on 10/20/04) - Page 76
76 Index - Epson 1280 | Printer Basics (For use with printer drivers posted on 10/20/04) - Page 77
Epson Ink Jet Papers and Ink Cartridges Use Epson® paper and inks to get the same photo quality results that have earned Epson printers all their awards! Epson papers are specially coated to work with genuine Epson inks. You'll notice that when prints come out of your printer, the images are crisp - Epson 1280 | Printer Basics (For use with printer drivers posted on 10/20/04) - Page 78
Epson Ink Cartridges T007201 (Black) T009201 (Color) Paper name Epson Premium Bright White Paper Epson Photo Quality Ink Jet Paper Epson Photo Quality Ink Jet Cards Epson Glossy Photo Paper/Photo 5.8 inches) A4 (8.3 x 11.7 inches) Part number S041586 S041062 S041054 S041809 S041141/S041271/ S041272
-
 1
1 -
 2
2 -
 3
3 -
 4
4 -
 5
5 -
 6
6 -
 7
7 -
8
-
9
-
10
-
11
-
12
-
13
-
14
-
15
-
16
-
17
-
18
-
19
-
20
-
21
-
22
-
23
-
24
-
25
-
26
-
27
-
28
-
29
-
30
-
31
-
32
-
33
-
34
-
35
-
36
-
37
-
38
-
39
-
40
-
41
-
42
-
43
-
44
-
45
-
46
-
47
-
48
-
49
-
50
-
51
-
52
-
53
-
54
-
55
-
56
-
57
-
58
-
59
-
60
-
61
-
62
-
63
-
64
-
65
-
66
-
67
-
68
-
69
-
70
-
71
-
72
-
73
-
74
-
75
-
76
-
77
-
78
 |
 |

Epson Stylus
Photo 1280
Printer Basics
®