Dynex DX-BGDTC User Manual (English)
Dynex DX-BGDTC Manual
 |
View all Dynex DX-BGDTC manuals
Add to My Manuals
Save this manual to your list of manuals |
Dynex DX-BGDTC manual content summary:
- Dynex DX-BGDTC | User Manual (English) - Page 1
Wireless G Desktop Card Carte sans fil G pour ordinateur de bureau Tarjeta inalámbrica G para PC de escritorio DX-BGDTC USER GUIDE GUI DE DE L'UTILI S AT EUR • GUÍ A D EL USUAR IO - Dynex DX-BGDTC | User Manual (English) - Page 2
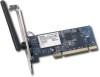
DX-BGDTC Wireless G Desktop Card Contents Introduction 2 Product features 2 Setting up your wireless card 4 Troubleshooting 21 Specifications 24 Legal notices 25 One year limited warranty 27 Français 29 Español 59 Introduction Thank you for purchasing the DX-BGDTC Dynex Wireless G Desktop - Dynex DX-BGDTC | User Manual (English) - Page 3
3 Package contents • Wireless G desktop card • Quick Installation Guide • Installation software CD • This User Guide System requirements • PC-compatible desktop computer with one available PCI slot and CD/DVD drive • Windows® 2000, Windows XP, or Windows Vista™ Components # Component Description - Dynex DX-BGDTC | User Manual (English) - Page 4
up your wireless card Setting up your wireless card Windows Vista™ Important note: Install the software before inserting the card. To install the software and the card with Windows Vista: 1 Insert the Installation Software CD into your CD/DVD drive. The AutoPlay box opens. DX-BGDTC 2 Double-click - Dynex DX-BGDTC | User Manual (English) - Page 5
your wireless card 5 4 Click Install this driver software anyway. 5 When the installation completes, the InstallShield Wizard Complete screen opens. 6 Click Finish. Your installation is now complete. 7 When prompted, turn off your computer and plug in your card. See "Installing the wireless card - Dynex DX-BGDTC | User Manual (English) - Page 6
Connect to a network. The Connect to a network screen opens. 10 Select an available wireless network, then click Connect. Your card attempts to connect to the selected network. Depending on the security settings of your wireless network, you may be prompted to enter in a network security key or - Dynex DX-BGDTC | User Manual (English) - Page 7
. After connecting to the network, you can choose to save this network and connect automatically when your card is in range. The Network and Sharing Center should now show the network connection that you have just made. The links on the left of the window let you configure your network connections. - Dynex DX-BGDTC | User Manual (English) - Page 8
8 Setting up your wireless card All other Windows versions Important note: Install the software before inserting the card. To install the software: 1 Insert the Installation Software CD into your computer's CD/DVD drive. The Dynex Wireless Card Installer screen opens. Note: If the InstallShield - Dynex DX-BGDTC | User Manual (English) - Page 9
computer shuts down. Note: If at any time during the install a warning appears that the software has not passed Windows logo testing, click Continue anyway. This software is designed to run on Windows. Installing the wireless card Caution: Before touching any electronic components, make sure that - Dynex DX-BGDTC | User Manual (English) - Page 10
wireless card 6 Secure the adapter to the case using the screw you removed from the backplate. 7 Carefully screw the antenna onto the threaded connector on the card to the Found New Hardware Wizard Install screen opens. 12 Click Install the software automatically (Recommended), then click Next. - Dynex DX-BGDTC | User Manual (English) - Page 11
Setting up your wireless card 11 13 Click Finish. The Dynex Wireless Networking Utility opens. 14 Select your network from the Available Networks list, then click Connect. Note: If the Dynex Wireless Networking Utility did not open automatically, double-click the Wireless Utility icon in the - Dynex DX-BGDTC | User Manual (English) - Page 12
wireless card Accessing the wireless networking utility (WNU) To access the WNU from the Windows system tray: • Right-click the WNU icon on the Windows system tray in the lower right corner of the desktop. If the icon is not present, click on Start, Programs, Dynex, Wireless of a problem, use the - Dynex DX-BGDTC | User Manual (English) - Page 13
up your wireless card 13 Network Status and Solution Tips To further understand the current network status, click Open Wireless Utility. The default screen is the Current Status tab and the Network Status section determines which connections are good or faulty. Setting Wireless Network Profiles - Dynex DX-BGDTC | User Manual (English) - Page 14
14 Setting up your wireless card Note: When you select a network using encryption, you will first see the simple is a common protocol that adds security to all Wi-Fi-compliant wireless products. WEP gives wireless networks the equivalent level of privacy protection as a comparable wired network. - Dynex DX-BGDTC | User Manual (English) - Page 15
router and enter it manually into the hex WEP key table in your card's configuration screen. WPA WPA is a new Wi-Fi standard that improves upon the security features of WEP. To use WPA security, the drivers and software of your wireless equipment must be upgraded to support it. These updates will - Dynex DX-BGDTC | User Manual (English) - Page 16
your wireless G Plus desktop card to use the same security settings. Changing the Wireless Security Settings The Wireless G USB network adapter supports the latest WPA security feature as well as the legacy WEP security standard. By default, wireless security is disabled. Your Dynex wireless adapter - Dynex DX-BGDTC | User Manual (English) - Page 17
Setting up your wireless card 17 To access the security settings on your card: 1 Open Wireless Network Properties tab on the Edit information for a network page. 2 Select WEP from the Data Encryption menu. 3 After selecting your WEP encryption mode, enter your key by typing in the hex key manually - Dynex DX-BGDTC | User Manual (English) - Page 18
. Caution: If you are using a wireless client (such as your computer equipped with a wireless desktop card) to turn on the security settings in your wireless router, you will temporarily lose your wireless connection until you activate security on your wireless client. Record the key prior to - Dynex DX-BGDTC | User Manual (English) - Page 19
19 Caution: If you are using a wireless client (such as your computer equipped with a wireless desktop card) to turn on the security settings in your wireless router, you will temporarily lose your wireless connection until you activate security on your wireless client. Record the key prior to - Dynex DX-BGDTC | User Manual (English) - Page 20
and telephone support, as well as advanced diagnostic tools. Advanced diagnostic tools The Advanced Diagnostic Tools section is the central control panel for all the settings of the hardware and software components of the wireless network. It provides an array of tests and connectivity services to - Dynex DX-BGDTC | User Manual (English) - Page 21
wireless router in order to see if distance is the problem. If difficulties persist refer to the user guide that accompanied your wireless The window that opens should have a list of Available Networks. Available networks are wireless networks to which you can connect. If you are using a Dynex 802. - Dynex DX-BGDTC | User Manual (English) - Page 22
ON, the problem may be that the card is not connected or is not installed correctly. Make sure that the card is plugged firmly into the PCI slot of your computer. Check to see that the drivers for the card have been installed. Right-click on the My Computer icon on your desktop. Choose Properties - Dynex DX-BGDTC | User Manual (English) - Page 23
; see your router's (or access point's) user manual for instructions on how to choose other channels. Limiting the wireless transmit rate - Limiting the wireless transmit rate can help improve the maximum wireless range, and connection stability. Most wireless cards have the ability to limit the - Dynex DX-BGDTC | User Manual (English) - Page 24
is not recognized by your desktop computer. • The New Hardware Wizard does not appear when booting up the computer. • You receive Microsoft Error Code: 10 • You receive Microsoft Error Code: 0 To correct the problem try moving the card to another PCI slot. See "Installing the wireless card" on page - Dynex DX-BGDTC | User Manual (English) - Page 25
Dynex Corporation, of 7601 Penn Ave. South, Richfield, MN 55423 U.S.A., declare under our sole responsibility that the product, DX-BGDTC Services, installation. This equipment generates, uses, and can radiate radio frequency energy and, if not installed and used in accordance with the instructions - Dynex DX-BGDTC | User Manual (English) - Page 26
26 Legal notices • Reorient or relocate the receiving antenna. • Increase the separation between the equipment and receiver. • Connect the equipment into an outlet on a circuit different from that to which the receiver is connected. • Consult the dealer or an experienced technician for help. RSS - Dynex DX-BGDTC | User Manual (English) - Page 27
Legal notices 27 One year limited warranty Dynex Products ("Dynex") warrants to you, the original purchaser of this new DX-BGDTC ("Product"), that the Product shall be free of defects in the original manufacture of the material or workmanship for a period of one (1) year from the - Dynex DX-BGDTC | User Manual (English) - Page 28
STATE TO STATE OR PROVINCE TO PROVINCE. Contact Dynex: For customer service please call 1-800-305-2204 www.dynexproducts.com DYNEX® is a registered trademark of Best Buy Enterprise Services, Inc. Distributed by Best Buy Purchasing, LLC. Dynex, 7601 Penn Avenue South, Richfield, Minnesota, U.S.A. - Dynex DX-BGDTC | User Manual (English) - Page 29
Dynex DX-BGDTC Table des matières Introduction 29 Caractéristiques du produit 29 Installation installation et de configuration permet de créer un réseau sans fil en quelques minutes. Prendre soin de lire complètement ce guide seau sans fil • Interface PCI, permettant un fonctionnement sur - Dynex DX-BGDTC | User Manual (English) - Page 30
pour ordinateur • Guide d'installation rapide • CD du logiciel d'installation • Ce Guide de l'utilisateur Configuration système requise • Ordinateur de bureau compatible PC avec un connecteur PCI disponible et un lecteur CD/DVD • WindowsMD 2000, Windows XP ou Windows VistaMC Composants # Composant - Dynex DX-BGDTC | User Manual (English) - Page 31
insérer la carte. Pour installer le logiciel et la carte avec Windows Vista : 1 Insérer le CD du logiciel d'installation dans le lecteur CD/DVD. La boîte de dialogue AutoPlay (Exécution automatique) s'affiche. DX-BGDTC 2 Double-cliquer sur Run Installer.exe (Exécuter Installer.exe). Si une fenêtre - Dynex DX-BGDTC | User Manual (English) - Page 32
this driver software » (« Windows ne peut pas vérifier l'éditeur de ce programme pilote ») s'affiche. Ceci est normal et ne résulte pas d'un problème. Ce logiciel a été soigneusement testé et est compatible avec ce système d'exploitation. 4 Cliquer sur Install this driver software anyway (Installer - Dynex DX-BGDTC | User Manual (English) - Page 33
Installation de la carte sans fil 33 8 Pour se connecter à l'Internet, ouvrir la fenêtre Network and Sharing Center (Centre de réseau et de partage) en - Dynex DX-BGDTC | User Manual (English) - Page 34
34 Installation de la carte sans fil Suivant les paramètres de sécurité du réseau sans fil, il pourra être nécessaire d'entrer un mot de passe ou - Dynex DX-BGDTC | User Manual (English) - Page 35
35 Toutes les autres versions de Windows Remarque importante : Installer le logiciel avant d'insérer la carte. Pour installer le logiciel : 1 Insérer le CD du logiciel d'installation dans le lecteur CD/DVD. La fenêtre Dynex Wireless Card Installer (Application d'installation de la carte sans fil - Dynex DX-BGDTC | User Manual (English) - Page 36
le logo Windows, cliquer sur Continue anyway (Continuer). Cette application est conçue pour fonctionner sous Windows. Installation de la installer la carte : 1 Arrêter l'ordinateur, puis débrancher le cordon d'alimentation. 2 Retirer le couvercle du boîtier de l'ordinateur. Se reporter au guide - Dynex DX-BGDTC | User Manual (English) - Page 37
Installation de la carte sans fil 37 3 Localiser un connecteur PCI disponible. Les connecteurs PCI sont en général blancs. Ne pas oublier que l'antenne fournie doit être orientée avec le dessus pointant vers le haut. Si des câbles ou d'autres connecteurs font obstruction, choisir un connecteur PCI - Dynex DX-BGDTC | User Manual (English) - Page 38
the software automatically (Recommended) (Installer le logiciel automatiquement [recommandé]), puis sur Next (Suivant). La fenêtre Completing the Found New Hardware Wizard (Fin de l'Assistant Ajout de nouveau matériel détecté) s'affiche. 13 Cliquer sur Finish (Terminer). La fenêtre Dynex Wireless - Dynex DX-BGDTC | User Manual (English) - Page 39
Installation de la carte sans fil 39 Remarque : Si l'utilitaire de réseau sans fil (Wireless Networking Utility) Dynex ne s'affiche pas automatiquement, double-cliquer sur l'icône Wireless fil (Wireless Networking Utility, ou WNU) Pour accéder au WNU à partir de la barre d'état système de Windows : - Dynex DX-BGDTC | User Manual (English) - Page 40
40 Installation de la carte sans fil Si l'icône n'est pas présente, cliquer sur Start (Démarrer), Programs (Programmes), Dynex, Wireless Networking Utility (Utilitaire de réseau sans fil). La fenêtre par défaut du WNU est l'onglet Current Status (État actuel), qui affiche l'état actuel du ré - Dynex DX-BGDTC | User Manual (English) - Page 41
Installation de la carte sans fil 41 État du réseau et solutions conseillées Pour mieux comprendre l'état actuel du réseau, cliquer sur Open Wireless Utility (Ouvrir l'utilitaire sans fil). La fenêtre par défaut est l'onglet Current Status (État actuel), et la section Network Status (État du ré - Dynex DX-BGDTC | User Manual (English) - Page 42
42 Installation de la carte sans fil Remarque : Lors de la sélection d'un réseau qui utilise un cryptage, l'écran de sécurité simple s'affiche d'abord. Cliquer sur Advanced ( - Dynex DX-BGDTC | User Manual (English) - Page 43
Installation de la carte sans fil 43 WEP WEP est un protocole courant qui fournit une sécurité à tous les produits sans fil compatibles Wi-Fi. WEP - Dynex DX-BGDTC | User Manual (English) - Page 44
44 Installation de la carte sans fil IMPORTANT: Il faut maintenant configurer toutes les que l'ancienne norme de sécurité WEP. Par défaut, la sécurité sans fil est désactivée. L'adaptateur sans fil Dynex est équipé de la dernière norme de sécurité, appelée Wi-Fi Protected Access 2 (WPA2MC) et de l' - Dynex DX-BGDTC | User Manual (English) - Page 45
Installation quel standard est utilisé par le routeur (voir le guide du routeur sans fil pour les instructions concernant l'accès aux paramètres de sécurité). Pour acc Network Authentication (Authentification de réseau), sous l'onglet Wireless Network Properties (Propriétés du réseau sans fil) de - Dynex DX-BGDTC | User Manual (English) - Page 46
46 Installation de la carte sans fil Par exemple : AF 0F 4B C3 D4 = clé pour : 1 Sélectionner OPEN (Ouvrir) dans le menu Network Authentication (Authentification de réseau), sous l'onglet Wireless Network Properties (Propriétés du réseau sans fil) de la page Edit information for a network (Modifier - Dynex DX-BGDTC | User Manual (English) - Page 47
Installation de la carte sans fil 47 Par exemple : C3 03 0F AF 0F 4B B2 C3 D4 4B C3 D4 E7 = clé pour WEP 128 - Dynex DX-BGDTC | User Manual (English) - Page 48
48 Installation de la carte sans fil Pour configurer WPA2-PSK (pas de serveur) [WPA2-PSK (pas de serveur)] dans le menu Network Authentication (Authentification de réseau), sous l'onglet Wireless Network Properties (Propriétés du réseau sans fil) de la page Edit information for a network (Modifier - Dynex DX-BGDTC | User Manual (English) - Page 49
Installation de la carte sans fil 49 Options de l'utilitaire de réseau sans fil L'onglet Options de l'utilitaire de réseau composants matériels et logiciels du réseau sans fil. Elle fournit toute une gamme de tests et de services de connectivité pour assurer un fonctionnement optimal du réseau. - Dynex DX-BGDTC | User Manual (English) - Page 50
sont des réseaux sans fil auxquels il est possible de se connecter. En cas d'utilisation d'un routeur Dynex 802.11g (54g), Dynex 54g est le nom par défaut. Si le routeur utilisé n'est PAS un routeur Dynex, consulter le guide de l'utilisateur du fabricant du routeur pour connaître le nom par défaut. - Dynex DX-BGDTC | User Manual (English) - Page 51
la fenêtre Wireless Networks (Réseaux sans fil). Cliquer sur Add (Ajouter) si le réseau souhaité n'est pas affiché, puis taper le SSID. Pour plus d'informations concernant la définition d'un SSID, consulter le guide de l'utilisateur du fabricant du routeur. Le CD d'installation ne démarre pas - Dynex DX-BGDTC | User Manual (English) - Page 52
Pour plus d'informations concernant la définition d'un SSID, consulter le guide de l'utilisateur du fabricant du routeur. Le témoin DEL de terminer si des problèmes de connexion sans fil sont liés à la portée, Dynex suggère de déplacer temporairement l'ordinateur, si possible, à une distance de - Dynex DX-BGDTC | User Manual (English) - Page 53
point d'accès) pour les instructions concernant le choix d'un quel utilitaire gère la carte. Dynex recommande d'utiliser le WNU. Pour Wireless Networks (Réseaux sans fil disponibles). 3 Sous l'onglet Advanced (Avancé), désactiver l'option Use Windows to configure my wireless network (Utiliser Windows - Dynex DX-BGDTC | User Manual (English) - Page 54
GLEMENT DE LA FCC CONCERNANT LA COMPATIBILITÉ ÉLECTROMAGNÉTIQUE Nous, Dynex Corporation, 7601 Penn Avenue South, Richfield, Minnesota, 55423, États-Unis, déclarons sous notre seule responsabilité que le produit concerné par cette déclaration, DX-BGDTC, est conforme à la section 15 du règlement de la - Dynex DX-BGDTC | User Manual (English) - Page 55
du Ministère de la santé des États-Unis (U.S. Department of Health and Human Services), ainsi qu'aux normes d'irradiation 21 CFR, section de chapitre J de la FDA. diffuse des ondes radio et, s'il n'est pas installé et utilisé conformément aux instructions dont il fait l'objet, il peut provoquer des - Dynex DX-BGDTC | User Manual (English) - Page 56
56 Avis juridiques - Dynex DX-BGDTC | User Manual (English) - Page 57
un an Dynex Products (« Dynex ») garantit au premier acheteur de ce DX-BGDTC neuf é sur le Produit par un service de réparation agréé par Dynex ou le personnel du magasin, Dynex (à sa seule discrétion) couvre pas : • la formation du client; • Installation; • les réglages de configuration; • les - Dynex DX-BGDTC | User Manual (English) - Page 58
L'ACHETEUR DES GARANTIES JURIDIQUES SPÉCIFIQUES; IL PEUT AUSSI BÉNÉFICIER D'AUTRES GARANTIES QUI VARIENT D'UN ÉTAT OU D'UNE PROVINCE À L'AUTRE. Pour contacter Dynex : Pour le service à la clientèle, appeler le 1-800-305-2204 www.dynexproducts.com DYNEXMD est une marque déposée de Best Buy Enterprise - Dynex DX-BGDTC | User Manual (English) - Page 59
su compra de la tarjeta inalámbrica G para PC de escritorio DX-BGDTC de Dynex (la tarjeta). Ahora puede tomar ventaja de esta nueva tecnología y • Fácil de usar aplicación para redes inalámbricas integrada • Interfaz PCI, para funcionar en casi cualquier computadora de escritorio • Codificación WPA, - Dynex DX-BGDTC | User Manual (English) - Page 60
Guía de instalación rápida • CD con el software de instalación • Esta guía del usuario Requisitos de sistema • PC de escritorio compatible con una ranura PCI disponible y una unidad de CD/DVD • Windows® 2000, Windows XP, o Windows Vista™ Componentes # Componente Descripción 1 Antena Permite que - Dynex DX-BGDTC | User Manual (English) - Page 61
insertar el adaptador. Para instalar el software y la tarjeta en Windows Vista: 1 Inserte el CD del software de instalación en su unidad de CD/DVD. Se abre el cuadro de AutoPlay (Reproducción automática). DX-BGDTC 2 Haga doble clic en Run Installer.exe (Ejecturar Installer.exe). Si ve una ventana - Dynex DX-BGDTC | User Manual (English) - Page 62
the publisher of this driver software" (Windows no puede comprobar el editor de este software de controlador). Esto es normal y no indica ningún problema. Nuestro software ha sido verificado y es compatible con este sistema operativo. 4 Haga clic en Install driver software anyway (Instalar el - Dynex DX-BGDTC | User Manual (English) - Page 63
Preparando su tarjeta inalámbrica 63 8 Para conectarse al Internet, abra el Network and Sharing Center (Centro de redes y de recursos compartidos) haciendo clic en Start (Inicio), Control Panel (Panel de control), Network and Internet (Redes e Internet) - View network status and tasks (Ver el - Dynex DX-BGDTC | User Manual (English) - Page 64
64 Preparando su tarjeta inalámbrica Dependiendo de la configuración de seguridad de su red inalámbrica, se le puede pedir que ingrese una clave de seguridad de red o una contraseña. 11 Ingrese la clave de seguridad de red o contraseña, y haga clic en Connect (Conectar). Aparece la pantalla de - Dynex DX-BGDTC | User Manual (English) - Page 65
Todas las otras versiones de Windows Nota importante: Instale el software antes de insertar el adaptador. Para instalar el software: 1 Inserte el CD del software de instalación en la unidad de CD/DVD de su computadora. Aparecerá la pantalla del Dynex Wireless Card Installer (Instalador de la tarjeta - Dynex DX-BGDTC | User Manual (English) - Page 66
software no ha pasado la verificación de logotipo de Windows® haga clic en Continue anyway (Continuar). Este software está diseñado para ejecutarse en Windows de como quitar la cubierta. 3 Ubique una ranura PCI disponible. Las ranuras PCI generalmente son de color blanco. Recuerde que la antena - Dynex DX-BGDTC | User Manual (English) - Page 67
en el panel posterior de su computadora), luego quite la placa posterior. 5 Inserte cuidadosamente la tarjeta en la ranura PCI. No toque el conector de metal de la tarjeta. Aplique presión según sea necesario hasta que el conector esté completamente insertado. 6 Fije el adaptador a la - Dynex DX-BGDTC | User Manual (English) - Page 68
el software automáticamente [Recomendado]), luego haga clic en Next (Siguiente). Se abre la ventana Completing the Found New Hardware Wizard (Finalización del asistente para hardware nuevo encontrado). 13 Haga clic en Finish (Finalizar). Aparecerá la ventana de Dynex Wireless Networking Utility - Dynex DX-BGDTC | User Manual (English) - Page 69
Preparando su tarjeta inalámbrica 69 Nota: Si la aplicación "Dynex Wireless Networking Utility" no aparece automáticamente, haga doble clic en (WNU) Para acceder a la WNU desde la bandeja del sistema de Windows: • Haga clic con el botón secundario en el icono WNU en la bandeja del sistema de - Dynex DX-BGDTC | User Manual (English) - Page 70
70 Preparando su tarjeta inalámbrica Si el icono no está presente, haga clic en Start (Inicio), Programs (Programas), Dynex, Wireless Networking Utility (Aplicación de redes inalámbricas). La pantalla predefinida de la WNU es la ficha Current Status (Estado actual), la que muestra el estado - Dynex DX-BGDTC | User Manual (English) - Page 71
Status and Solution Tips (Estado de red y consejos para soluciones) Para entender mejor el estado actual de la red, haga clic en Open Wireless Utility (Abrir la aplicación inalámbrica). La pantalla predeterminada es la ficha Current Status (Estado actual) y la sección Network Status (Estado de red - Dynex DX-BGDTC | User Manual (English) - Page 72
72 Preparando su tarjeta inalámbrica Nota: Cuando seleccione una red que usa codificación, lo primero de encontrar a la pantalla de seguridad simple. Haga clic en el botón Advanced (Avanzado) para ver otras opciones de seguridad (a continuación). Actualmente, existen cuatro métodos de codificaci - Dynex DX-BGDTC | User Manual (English) - Page 73
. WPA WPA es un nuevo estándar de Wi-Fi que mejora las funciones de seguridad de WEP. Para usar seguridad WPA, los controladores y el software de su equipo inalámbrico deben ser actualizados para soportarla. Estas actualizaciones se encontrarán en el sitio Web del vendedor de su equipo inalámbrico - Dynex DX-BGDTC | User Manual (English) - Page 74
De fábrica, la seguridad inalámbrica viene deshabilitada. Su adaptador inalámbrico Dynex está equipado con el más reciente estándar de seguridad llamado Wi-Fi también se puede conectar usando el software del botón pulsador. • Método de configuración manual: Esta sección lista la configuración - Dynex DX-BGDTC | User Manual (English) - Page 75
configurar la codificación WEP de 64 bits: 1 Seleccione OPEN (Abrir) en el menú de Network Authentication (Autenticación de red) en la ficha Wireless Network Properties (Propiedades de la red inalámbrica) en la página Edit information for a network (Editar información para una red). 2 Seleccione WEP - Dynex DX-BGDTC | User Manual (English) - Page 76
Configurando la codificación WEP de 128 bits: 1 Seleccione OPEN (Abrir) en el menú de Network Authentication (Autenticación de red) en la ficha Wireless Network Properties (Propiedades de la red inalámbrica) en la página Edit information for a network (Editar información para una red). 2 Seleccione - Dynex DX-BGDTC | User Manual (English) - Page 77
y de oficina pequeña. 1 Seleccione WPA-PSK o WPA2-PSK (no server) en el menú de Network Authentication (Autenticación de red) en la ficha Wireless Network Properties (Propiedades de la red inalámbrica) en la página Edit information for a network (Editar información para una red). 2 Seleccione TKIP - Dynex DX-BGDTC | User Manual (English) - Page 78
78 Preparando su tarjeta inalámbrica 3 Ingrese su clave de red. Ésta puede ser de 8 a 63 caracteres y pueden ser letras numerosos símbolos. Esta misma clave debe ser usada en todos los clientes (tarjetas de red) que quiere incluir en su red. 4 Haga clic en Save (Guardar) para finalizar. Ahora - Dynex DX-BGDTC | User Manual (English) - Page 79
Diagnostic Tools (Herramientas de diagnóstico avanzadas) es el panel de control central para toda las configuraciones de los componentes de hardware y software de la red inalámbrica. Provee una selección de pruebas y servicios de conectividad para asegurar un rendimiento de red óptimo. Localizaci - Dynex DX-BGDTC | User Manual (English) - Page 80
una computadora inalámbrica, verifique los siguientes elementos: • Revise las luces en su enrutador inalámbrico. Si utiliza un enrutador inalámbrico Dynex las luces deberán ser como se muestra a continuación: • La luz de encendido debe estar iluminada. • La luz de conexión deberá estar iluminada - Dynex DX-BGDTC | User Manual (English) - Page 81
red disponible, haga doble clic en el icono Wireless Networks (Redes inalámbricas) para mostrar la sobre cómo configurar una SSID, refiérase al manual del usuario del fabricante del enrutador. El CD de tarjeta está insertada firmemente en la ranura PCI de su computadora. Verifique que todos los - Dynex DX-BGDTC | User Manual (English) - Page 82
entre varios otros canales dependiendo de su región; refiérase al manual del usuario de su enrutador (o punto de acceso) para obtener seleccione el botón Configure (Configurar) en la ficha General (los usuarios de Windows 98 tienen que seleccionar la tarjeta inalámbrica en el cuadro de la lista - Dynex DX-BGDTC | User Manual (English) - Page 83
ventajas al usar la WNU en lugar de la aplicación Wireless Zero Configuration de Windows XP. Le ofrecemos entre otros, una inspección de sitio, tarjeta a otra ranura PCI. Refiérase a "Instalación de la tarjeta inalámbrica" en la página 66. Especificaciones Interfaz Host Interfaz PCI de 32 bits - Dynex DX-BGDTC | User Manual (English) - Page 84
DE CONFORMIDAD CON EL REGLAMENTO DE FCC PARA COMPATIBILIDAD ELECTROMAGNÉTICA Nosotros, Dynex Corporation, de 7601 Penn Ave. South, Richfield, MN 55423 Estados Unidos, declaramos bajo nuestra sola responsabilidad que el producto, DX-BGDTC, al cual se relaciona esta declaración, cumple con la parte 15 - Dynex DX-BGDTC | User Manual (English) - Page 85
Avisos legales 85 Este equipo ha sido sometido a prueba y se ha determinado que satisface los límites establecidos para ser clasificado cómo dispositivo digital de la Clase B de acuerdo con la Parte 15 del reglamento FCC. Estos límites están diseñados para proporcionar una protección razonable - Dynex DX-BGDTC | User Manual (English) - Page 86
86 Avisos legales - Dynex DX-BGDTC | User Manual (English) - Page 87
Avisos legales 87 Garantía limitada de un año Dynex Products ("Dynex") le garantiza a usted, el comprador original de este nuevo DX-BGDTC ("Producto"), que éste se encontrará libre de defectos de material o de mano de obra en su fabricación original por un periodo de un (1) año a partir de - Dynex DX-BGDTC | User Manual (English) - Page 88
BAJO ESTA GARANTÍA ES SU ÚNICO RECURSO. DYNEX NO SERÁ RESPONSABLE POR DAÑOS INCIDENTALES O Dynex: Para servicio al cliente favor llamar al 1-800-305-2204 www.dynexproducts.com DYNEX® es una marca comercial registrada de Best Buy Enterprise Services, Inc. Distribuido por Best Buy Purchasing, LLC Dynex - Dynex DX-BGDTC | User Manual (English) - Page 89
Avisos legales 89 - Dynex DX-BGDTC | User Manual (English) - Page 90
Best Buy Purchasing, LLC 7601 Penn Ave. South, Richfield, MN 55423 U.S.A. © 2007 Best Buy Enterprise Services, Inc. Tous droits réservés. DYNEX est une marque déposée de Best Buy Enterprise Services, Inc. Tous les autres produits ou noms de marques sont des marques de commerce qui appartiennent
-
 1
1 -
 2
2 -
 3
3 -
 4
4 -
 5
5 -
 6
6 -
 7
7 -
8
-
9
-
10
-
11
-
12
-
13
-
14
-
15
-
16
-
17
-
18
-
19
-
20
-
21
-
22
-
23
-
24
-
25
-
26
-
27
-
28
-
29
-
30
-
31
-
32
-
33
-
34
-
35
-
36
-
37
-
38
-
39
-
40
-
41
-
42
-
43
-
44
-
45
-
46
-
47
-
48
-
49
-
50
-
51
-
52
-
53
-
54
-
55
-
56
-
57
-
58
-
59
-
60
-
61
-
62
-
63
-
64
-
65
-
66
-
67
-
68
-
69
-
70
-
71
-
72
-
73
-
74
-
75
-
76
-
77
-
78
-
79
-
80
-
81
-
82
-
83
-
84
-
85
-
86
-
87
-
88
-
89
-
90
 |
 |

USER GUIDE
GUIDE DE L’UTILISATEUR • GUÍA DEL USUARIO
Wireless G Desktop Card
Carte sans fil G pour ordinateur de bureau
Tarjeta inalámbrica G para PC de escritorio
DX-BGDTC