Dell W-7010 MNT-19 Mounting Kit Installation Guide
Dell W-7010 Manual
 |
View all Dell W-7010 manuals
Add to My Manuals
Save this manual to your list of manuals |
Dell W-7010 manual content summary:
- Dell W-7010 | MNT-19 Mounting Kit Installation Guide - Page 1
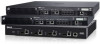
Dell Networking W-7010-MNT-19 Mounting Kit Installation Guide The W-7010-MNT-19 mounting kit includes hardware for mounting the W-7010 controller on a wall or in a twopost 19-inch Telco rack. This document provides the installation instructions Clip Nut Installation Guide (this document, printed) - Dell W-7010 | MNT-19 Mounting Kit Installation Guide - Page 2
: The type of screw depends on the installation surface (not included in the kit) Suitable Screwdrivers for all screw types (not included in the kit) 2 Dell Networking W-7010-MNT-19 Mounting Kit | Installation - Dell W-7010 | MNT-19 Mounting Kit Installation Guide - Page 3
. 4. Align the mounting bracket holes with the holes created in the wall (see Figure 4). 5. Use appropriate screws to secure the W-7010 controller. Figure 4 Wall Mounting Dell Networking W-7010-MNT-19 Mounting Kit | Installation - Dell W-7010 | MNT-19 Mounting Kit Installation Guide - Page 4
Dell Web Site Support Main Website Contact Information Support Website Documentation Website dell.com dell.com/contactdell dell.com/support dell.com/support/manuals System®. Dell™, the DELL™ logo, and PowerConnect™ are trademarks of Dell Inc. All rights reserved. Specifications in this manual are
-
 1
1 -
 2
2 -
 3
3 -
 4
4
 |
 |
Dell Networking W-7010-MNT-19 Mounting Kit
Installation Guide
0511640-04
| February 2015
1
The W-7010-MNT-19 mounting kit includes hardware for mounting the W-7010 controller on a wall or in a two-
post 19-inch Telco rack. This document provides the installation instructions for rack mounting and wall
mounting a W-7010 controller using the W-7010-MNT-19 mounting kit.
Package Contents
Two Mounting Brackets (used for rack or wall mounting)
Eight M4 x 8 mm Phillips Flat Head Screws
Four M6 x 15 mm Phillips Pan Head Screws
Four M6 Cage Nut
Four M6 Clip Nut
Installation Guide (this document, printed)
Rack Mounting - Standard
This mounting option allows mounting the W-7010 controller in a two-post 19-inch Telco rack.
s
Required Tools and Equipment
The following tools and equipment are required for installing a W-7010 controller:
Mounting Brackets (x2); Do not use for table or shelf installation
Screws for the mounting brackets (x8): M4 x 8 mm Phillips Flat Head Screws
Screws for system rack mount (x4): M6 x 15 mm Phillips Pan Head Screws
M6 cage nut (x4): Optional
M6 clip nut (x4): Optional
Suitable Screwdrivers for all screw types (not included in the kit)
Installation Steps
To install a W-7010 controller in a two-post 19-inch Telco rack:
1.
Place the mounting brackets over the mounting holes on the controller (see
Figure 1
).
2.
Secure the brackets to the controller using the eight screws for the mounting brackets (four per bracket) and a
suitable screwdriver.
3.
In the desired rack system, if the rack requires cage nut or clip nut, insert it on the front rails (two per rail,
aligned horizontally).
CAUTION:
Each W-7010 controller must have its own mounting equipment. Do not place other networking equipment directly on
top of a mounted W-7010 controller. Failure to do so can damage the controller.
NOTE:
Some racks require screws that differ from those included with the W-7010 controller. Ensure to have the correct screws
before installing the W-7010 controller.