Dell 24 Video Conferencing I C2422HE C2422HE Users Guide
Dell 24 Video Conferencing I C2422HE Manual
 |
View all Dell 24 Video Conferencing I C2422HE manuals
Add to My Manuals
Save this manual to your list of manuals |
Dell 24 Video Conferencing I C2422HE manual content summary:
- Dell 24 Video Conferencing I C2422HE | C2422HE Users Guide - Page 1
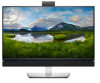
Dell C2422HE Dell C2722DE Dell C3422WE Curved Video Conferencing Monitor User's Guide Model: C2422HE/C2722DE/C3422WE Regulatory model: C2422HEt/C2722DEt/C3422WEt - Dell 24 Video Conferencing I C2422HE | C2422HE Users Guide - Page 2
that helps you make better use of your computer. CAUTION: A CAUTION indicates potential damage to hardware or loss of data if instructions are not followed. WARNING: A WARNING indicates a potential for property damage, personal injury, or death. Copyright © 2020 Dell Inc. or its subsidiaries - Dell 24 Video Conferencing I C2422HE | C2422HE Users Guide - Page 3
Contents Safety instructions 6 About your monitor 7 Package contents 7 Product features 8 Identifying parts and controls 10 Front view 10 Back view 12 Bottom view 13 Monitor specifications 14 Resolution - Dell 24 Video Conferencing I C2422HE | C2422HE Users Guide - Page 4
Tilt, swivel and vertical extension 42 Rotating the Display (C2422HE/C2722DE only 43 Configuring the display settings on your computer after rotation (C2422HE/C2722DE only 44 Operating the monitor webcam 45 Connecting your monitor 46 Dell Power Button Sync (DPBS 50 Connecting the monitor for - Dell 24 Video Conferencing I C2422HE | C2422HE Users Guide - Page 5
Troubleshooting 104 Self-test 104 Built-in diagnostics 105 Common Problems 106 Product specific problems 108 Universal Serial Bus (USB) specific problems 113 Appendix 114 FCC notices (U.S. only) and other regulatory information . . . 114 Contacting Dell 114 EU product database for energy - Dell 24 Video Conferencing I C2422HE | C2422HE Users Guide - Page 6
Safety instructions WARNING: Use of controls, adjustments, or procedures other than those specified in this documentation to remove any cover or touch the inside of the monitor. For information on safety instructions, see the Safety, Environmental, and Regulatory Information (SERI). 6 | Safety - Dell 24 Video Conferencing I C2422HE | C2422HE Users Guide - Page 7
About your monitor Package contents Your monitor ships with the components shown in the table below. If any component is missing, contact Dell. For more information, see Contact Dell. NOTE: Some components may be optional and may not ship with your monitor. Some features may not be available in - Dell 24 Video Conferencing I C2422HE | C2422HE Users Guide - Page 8
cable USB Type-C cable (C to C) • Quick Setup Guide • Safety, Environmental, and Regulatory Information Product features The Dell active area display (Measured diagonally) 1920 x 1080 (16:9) resolution, plus full-screen support for lower resolutions. • C2722DE: 68.47 cm (27.0 in.) active area - Dell 24 Video Conferencing I C2422HE | C2422HE Users Guide - Page 9
users suffer from eye strain and fatigue. • Certified for Microsoft Teams®. • Certified for Windows Hello® (Face Authentication) and supports Microsoft Cortana®. * PC system that supports DPBS is the Dell OptiPlex 7090/3090 Ultra platform. WARNING: The possible long-term effects of blue light - Dell 24 Video Conferencing I C2422HE | C2422HE Users Guide - Page 10
Identifying parts and controls Front view 1 2 345 6 7 7 Label 1,6 3 2,4 5 7 13 8 9 10 11 12 Description Microphones Webcam lens IR LED Webcam LED indicator Built-in speakers Use Monitor microphones (Mic). Mic is enabled when the webcam & Mic module is popped up. Mic is disabled when the - Dell 24 Video Conferencing I C2422HE | C2422HE Users Guide - Page 11
8 Teams button & LED LED will light in static white when Microsoft Teams® is signed in and running. LED will blink when there is a Teams notification. Short press on the button to bring up Teams and open notification. 9 Hookswitch & LED LED will blink in green when there is an incoming Teams - Dell 24 Video Conferencing I C2422HE | C2422HE Users Guide - Page 12
, serial Refer to this label if you need to contact Dell number, and Service Tag label for technical support. The Service Tag is a unique alphanumeric identifier that enables Dell service technicians to identify the hardware components in your computer and access warranty information. 7 Cable - Dell 24 Video Conferencing I C2422HE | C2422HE Users Guide - Page 13
maximum resolution of 3440 x 1440 at 60 Hz NOTE: USB Type-C is not supported on Windows versions that are prior to Windows 10. 6 DP port (out) MST (multi-stream transport) capable monitor. To enable MST, refer to instruction on section "Connecting the Monitor for DP MST Function". NOTE: Remove - Dell 24 Video Conferencing I C2422HE | C2422HE Users Guide - Page 14
you have connected the USB cable (Type-A to Gen1) (3) Type-B or Type-C to Type-C) from the computer to the monitor. Port with battery icon supports Battery Charging Rev. 1.2. 10 RJ-45 connector Connect Internet. You can surf Internet via RJ45 only after you have connected the USB cable(Type - Dell 24 Video Conferencing I C2422HE | C2422HE Users Guide - Page 15
Area Pixel pitch Pixel per inch (PPI) Viewing angle Horizontal Vertical Brightness Contrast ratio Curvature (Only for C3422WE) Display screen coating Backlight Response Time (Gray to Gray) Color depth Color gamut2 156246.28 mm2 (242.18 in.2) 0.2745(H) mm x 0.2745 (V) mm 92.56 200301.75 mm2 (310.47 - Dell 24 Video Conferencing I C2422HE | C2422HE Users Guide - Page 16
Connectivity • 1 x DP 1.2 (HDCP1.4) • 1 x HDMI1 .4 (HDCP1.4) • 1 x DP 1.4 (HDCP1.4) • 1 x HDMI1 .4 (HDCP1.4) • 1 x DP 1.2 (HDCP2.2) • 1 x HDMI2.0 (HDCP2.2) • 1 x USB Type-B (USB 3.2 Gen 1 upstream port) • 1 x USB Type-C (Alternate mode with DisplayPort 1.4/1.2, USB 3.2 Gen 1 upstream port, Power - Dell 24 Video Conferencing I C2422HE | C2422HE Users Guide - Page 17
Resolution specifications Model C2422HE C2722DE Horizontal scan 30 kHz to 83 kHz 30 kHz to 90 kHz range Vertical scan range 56 Hz to 76 Hz Maximum preset 1920 x 1080 at 60 Hz 2560 x 1440 at 60 Hz resolution Video display 480i, 480p, 576i, 560p, 720p, 1080i, 1080p capabilities (HDMI & DP & - Dell 24 Video Conferencing I C2422HE | C2422HE Users Guide - Page 18
Preset display modes C2422HE Display mode VESA, 720 x 400 VESA, 640 x 480 VESA, 640 x 480 VESA, 800 x 600 VESA, 800 x 600 VESA, 1024 x 768 VESA, 1024 x 768 VESA, 1152 x 864 VESA, 1280 x 1024 VESA,1280 x 1024 VESA, 1600 x 900 VESA, 1920 x 1080 Horizontal frequency (kHz) 31.47 31.47 37.50 37.88 46. - Dell 24 Video Conferencing I C2422HE | C2422HE Users Guide - Page 19
C2722DE Display Mode Horizontal Frequency (kHz) Vertical Frequency (Hz) VESA, 720 x 400 31.50 VESA, 640 x 480 31.50 VESA, 640 x 480 37.50 VESA, 800 x 600 37.90 VESA, 800 x 600 46.90 VESA, 1024 x 768 48.40 VESA, 1024 x 768 60.0 VESA, 1152 x 864 67.50 VESA, 1280 x 1024 64.0 VESA, 1280 x 1024 80.0 - Dell 24 Video Conferencing I C2422HE | C2422HE Users Guide - Page 20
C3422WE Display Mode Horizontal Frequency (kHz) Vertical Frequency (Hz) VESA, 720 x 400 31.50 VESA, 640 x 480 31.50 VESA, 640 x 480 37.50 VESA, 800 x 600 37.90 VESA, 800 x 600 46.90 VESA, 1024 x 768 48.40 VESA, 1024 x 768 60.0 VESA, 1152 x 864 67.50 VESA, 1280 x 1024 64.0 VESA, 1280 x 1024 80.0 - Dell 24 Video Conferencing I C2422HE | C2422HE Users Guide - Page 21
change to USB 3.2 Gen2 cable (1m) USB-C Multi-Stream Transport (MST) Modes C2422HE MST Source Monitor Maximum number of external monitors that can be supported 1920 x 1080 at 60 Hz 1920 x 1080 at 60 Hz 1 C2722DE OSD Display Info: Link rate(current) Maximum number of external monitors that - Dell 24 Video Conferencing I C2422HE | C2422HE Users Guide - Page 22
Unified Communications (UC) Platform Compatibility List The table below highlights the call functions that work on the Dell Video Conferencing Monitor - C2422HE, C2722DE and C3422WE when using the following UC platforms#. Call Functions Bring up Microsoft Teams Answer call End call Reject call - Dell 24 Video Conferencing I C2422HE | C2422HE Users Guide - Page 23
for each differential line Per differential line at 100 ohm impedance Input voltage/ frequency/ current Inrush current • DP/HDMI/USB Type-C signal input support 100-240 VAC / 50 or 100-240 VAC / 50 or 60 Hz ± 3 Hz / 2.3 A 60 Hz ± 3 Hz / 2.5 A (maximum) (maximum) 120 V: 42 A (Max.) 100-240 - Dell 24 Video Conferencing I C2422HE | C2422HE Users Guide - Page 24
Webcam - microphone specifications Lens Field of view 75.4° for 2560 x 1920 Focus mode Fixed Focus Focus area 35 cm~1.5 m Focusing distance (normal 70 cm mode) Image Sensor Active array size 5 mega-pixel Video Specification Video frame rate 1920 x 1080 (Full HD)- up to 30 frames per - Dell 24 Video Conferencing I C2422HE | C2422HE Users Guide - Page 25
Dimensions (with stand) Height (extended) 544.08 mm (21.40 in.) 565.57 mm (22.30 in.) 576.20 mm (22.68 in.) Height (compressed) 404.08 mm (15.90 in.) 445.57 mm (17.54 in.) Width 538.64 mm (21.21 in.) 612.34 mm (24.11 in.) 456.20 mm ( 17.96 in.) 815.85 mm (32.10 in.) Depth 185.00 mm (7.30 - Dell 24 Video Conferencing I C2422HE | C2422HE Users Guide - Page 26
Environmental characteristics Compliant Standards • ENERGY STAR certified Monitor. • EPEAT registered where applicable. EPEAT registration varies by country. See https://www.epeat.net for registration status by country. • TCO and TCO Edge Certified Displays. • RoHS Compliant. • BFR/PVC Free - Dell 24 Video Conferencing I C2422HE | C2422HE Users Guide - Page 27
Pin assignments DP port (in) Pin number 1 2 3 4 5 6 7 8 9 10 11 12 13 14 15 16 17 18 19 20 20-pin side of the connected signal cable ML3(n) GND ML3(p) ML2(n) GND ML2(p) ML1(n) GND ML1(p) ML0(n) GND ML0(p) CONFIG1 CONFIG2 AUX CH (p) GND AUX CH (n) Hot Plug Detect Return DP_PWR About your monitor | - Dell 24 Video Conferencing I C2422HE | C2422HE Users Guide - Page 28
DP port (out) Pin number 1 2 3 4 5 6 7 8 9 10 11 12 13 14 15 16 17 18 19 20 20-pin side of the connected signal cable ML0(p) GND ML0(n) ML1(p) GND ML1(n) ML2(p) GND ML2(n) ML3(p) GND ML3(n) CONFIG1 CONFIG2 AUX CH(p) GND AUX CH(n) Hot Plug Detect Return DP_PWR 28 | About your monitor - Dell 24 Video Conferencing I C2422HE | C2422HE Users Guide - Page 29
HDMI port Pin number 1 2 3 4 5 6 7 8 9 10 11 12 13 14 15 16 17 18 19 19-pin side of the connected signal cable TMDS DATA 2+ TMDS DATA 2 SHIELD TMDS DATA 2TMDS DATA 1+ TMDS DATA 1 SHIELD TMDS DATA 1TMDS DATA 0+ TMDS DATA 0 SHIELD TMDS DATA 0TMDS CLOCK+ TMDS CLOCK SHIELD TMDS CLOCKCEC Reserved (N.C. - Dell 24 Video Conferencing I C2422HE | C2422HE Users Guide - Page 30
USB Type-C port Pin Signal A1 GND A2 SSTXp1 A3 SSTXn1 A4 VBUS A5 CC1 A6 Dp1 A7 Dn1 A8 SBU1 A9 VBUS A10 SSRXn2 A11 SSRXp2 A12 GND Pin Signal B12 GND B11 SSRXp1 B10 SSRXn1 B9 VBUS B8 SBU2 B7 Dn1 B6 Dp1 B5 CC2 B4 VBUS B3 SSTXn2 B2 SSTXp2 B1 GND 30 - Dell 24 Video Conferencing I C2422HE | C2422HE Users Guide - Page 31
at bottom, 2 at rear. Power Charging Port - the ports with battery icon supports fast current charging capability if the device is BC 1.2 compatible.The USB Type-C downstream port with icon supports fast current charging capability if the device is 5V/3A - Dell 24 Video Conferencing I C2422HE | C2422HE Users Guide - Page 32
"Driver and download" section. Network (RJ45) data rate via USB-C max speed is 1000 Mbps. NOTE: This LAN port is 1000Base-T IEEE 802.3az compliant, supporting Mac Address (Printed on model label) Pass-thru, Wake-on-LAN (WOL) from standby mode (S3 only) and PXE Boot function, these 3 features depend - Dell 24 Video Conferencing I C2422HE | C2422HE Users Guide - Page 33
RJ45 Connector LED status: Right LED Left LED LED Color Description Right LED Amber or Green Speed indicator: • Amber On - 1000 Mbps • Green On - 100 Mbps • Off - 10 Mbps Left LED Green Link / Activity indicator: • Blinking - Activity on the port. • Green On - Link is being established. • - Dell 24 Video Conferencing I C2422HE | C2422HE Users Guide - Page 34
state which are hard to see and do not affect the display quality or usability. For more information on LCD Monitor Pixel Policy, see Dell support site at:https://www.dell.com/pixelguidelines. 34 | About your monitor - Dell 24 Video Conferencing I C2422HE | C2422HE Users Guide - Page 35
the curtains or blinds on nearby windows) to minimize reflections and glare on the monitor screen. • Use a chair that provides good lower-back support. • Keep your forearms horizontal with your wrists in a neutral, comfortable position while using the keyboard or mouse. • Always leave space to rest - Dell 24 Video Conferencing I C2422HE | C2422HE Users Guide - Page 36
• Keep the area under your desk clear of obstructions and cables or power cords that may interfere with comfortable seating or present a potential trip hazard. monitor screen at or below eye level wrists relaxed and at monitor and keyboard positioned directly in front of the user feet at on the - Dell 24 Video Conferencing I C2422HE | C2422HE Users Guide - Page 37
Handling and moving your display To ensure the monitor is handled safely when lifting or moving it, follow the guidelines mentioned below: • Before moving or lifting the monitor, turn off your computer and the monitor. • Disconnect all cables from the monitor. • Place the monitor in the original box - Dell 24 Video Conferencing I C2422HE | C2422HE Users Guide - Page 38
the monitor, unplug the monitor power cable from the electrical outlet. CAUTION: Read and follow the Safety Instructions before cleaning the monitor. For best practices, follow these instructions in the list below while unpacking, cleaning, or handling your monitor: • To clean your anti-static - Dell 24 Video Conferencing I C2422HE | C2422HE Users Guide - Page 39
for the stand that was shipped with your monitor. If you are connecting a stand that you purchased from any other source, follow the set up instructions that were included with the stand. To attach the monitor stand: 1. Align and place the stand riser on the stand base. 2. Open the screw handle - Dell 24 Video Conferencing I C2422HE | C2422HE Users Guide - Page 40
4. Open the protective cover on the monitor to access the VESA slot on the monitor. 5. Slide the tabs on the stand riser into the slots on the display back cover and lower the stand assembly to snap it into place. 40 | Setting up the monitor - Dell 24 Video Conferencing I C2422HE | C2422HE Users Guide - Page 41
6. Hold the stand riser and lift the monitor carefully, then place it on a flat surface. NOTE: Hold the stand riser firmly when lifting the monitor to avoid any accidental damage. 7. Lift the protective cover from the monitor. Setting up the monitor | 41 - Dell 24 Video Conferencing I C2422HE | C2422HE Users Guide - Page 42
for the stand that was shipped with your monitor. If you are connecting a stand that you purchased from any other source, follow the set up instructions that were included with the stand. Tilt, swivel and vertical extension With the stand attached to the monitor, you can tilt the monitor for the - Dell 24 Video Conferencing I C2422HE | C2422HE Users Guide - Page 43
between landscape and portrait when rotating the display, download and install the latest graphics driver. To download, go to https://www.dell.com/support/drivers and search for the appropriate driver. NOTE: When the display is in portrait mode, you may experience performance degradation when using - Dell 24 Video Conferencing I C2422HE | C2422HE Users Guide - Page 44
set the preferred rotation. NOTE: If you do not see the rotation option or it is not working correctly, go to https://www.dell.com/support and download the latest driver for your graphics card. 44 | Setting up the monitor - Dell 24 Video Conferencing I C2422HE | C2422HE Users Guide - Page 45
Operating the monitor webcam When you want to use the monitor built-in webcam and microphone, press down on the webcam module and then release. The webcam module will pop up. Setting up the monitor | 45 - Dell 24 Video Conferencing I C2422HE | C2422HE Users Guide - Page 46
you begin any of the procedures in this section, follow the Safety Instructions. To connect your monitor to the computer: 1. Turn off your computer 1.1 Graphic card may not display normally. Please refer to "product specific problems - No image when using DP connection to the PC" to change default - Dell 24 Video Conferencing I C2422HE | C2422HE Users Guide - Page 47
Connecting the DP cable DP DP Connecting the monitor for DP Multi-Stream Transport (MST) function (C2422HE/C2722DE only) DP DP DP out DP NOTE: Supports the DP MST feature. To make use of this feature, your PC Graphics Card must be certified to at least DP1.2 with MST option. NOTE: - Dell 24 Video Conferencing I C2422HE | C2422HE Users Guide - Page 48
Type-C The USB Type-C port on your monitor: • Can be used as USB Type-C, DisplayPort 1.4 (C2722DE) or DisplayPort 1.2 (C2422HE/C3422WE), alternatively. • Supports USB Power Delivery (PD), with profiles up to 90 W. NOTE: Regardless of the power requirement/actual power consumption of your laptop, or - Dell 24 Video Conferencing I C2422HE | C2422HE Users Guide - Page 49
C2422HE/C2722DE only) DP in USB Type-C DP out USB Type-C NOTE: The maximum number of supported C2422HE/C2722DE via MST is subjected to the bandwith of the USB-C source. Please refer to "product specific problems -No image when using USB Type-C MST". NOTE: Remove the rubber plug when using DP out - Dell 24 Video Conferencing I C2422HE | C2422HE Users Guide - Page 50
to control PC system power state from the monitor power button. This feature is compatible with Dell OptiPlex 7090/3090 Ultra platform, and is only supported over USB-C interface. USB Type-C OptiPlex 7090/3090 Ultra USB Type-C • To make sure the DPBS function works for the first time, you should do - Dell 24 Video Conferencing I C2422HE | C2422HE Users Guide - Page 51
Go to System Settings In the drop-down menu of When I press the power button, there are a few options for selection namely Do nothing/Sleep/Hibernate/Shut down, and you can select Sleep/Hibernate/Shut down. NOTE: Do not select Do nothing, otherwise monitor power button cannot sync with PC system - Dell 24 Video Conferencing I C2422HE | C2422HE Users Guide - Page 52
Connecting the monitor for DPBS for the first time USB Type-C Initial monitor power state(OFF) Initial system power state(OFF) USB Type-C For the first time setting up the DPBS function, please follow below steps: 1. Make sure both the PC and monitor is OFF. 2. Connect the USB Type-C cable from - Dell 24 Video Conferencing I C2422HE | C2422HE Users Guide - Page 53
Using DPBS function When you press the monitor power button or PC power button, the Monitor / PC state is as follows: 1 USB Type-C Initial monitor power state(ON) 2 New power state of monitor(OFF) Initial system power state(ON) USB Type-C Press PC/Monitor power button New power state of - Dell 24 Video Conferencing I C2422HE | C2422HE Users Guide - Page 54
Slide to shut down your PC When the monitor and PC power state are both ON, while you press and hold 10 seconds on monitor power button, the PC will shut down. Press and hold 10s USB Type-C PC will shut down 54 | Setting up the monitor - Dell 24 Video Conferencing I C2422HE | C2422HE Users Guide - Page 55
. When you press the Monitor 1 or PC power button, both the Monitor 1 and PC turns ON. Meanwhile the Monitor 2 will remain OFF. You need to manually press the power button on Monitor 2 to turn it ON. DP in USB Type-C DP out USB Type-C System power state(ON) Monitor 2 Monitor 1 Similarly - Dell 24 Video Conferencing I C2422HE | C2422HE Users Guide - Page 56
Connecting the monitor for USB-C The Dell OptiPlex 7090 Ultra platform has two USB-C ports, so both Monitor 1 and Monitor 2 power state can sync with the PC. While the PC and two monitors are in an initially ON power state, by pressing the power button on Monitor 1 or Monitor 2 will turn OFF the PC, - Dell 24 Video Conferencing I C2422HE | C2422HE Users Guide - Page 57
Make sure to set USB-C Charging to On in Off Mode. While the PC and two monitors are in an initially OFF power state, by pressing the power button on Monitor 1 or Monitor 2 will turn ON the PC, Monitor 1, and Monitor 2. USB Type-C System power state(OFF) USB Type-C port1 USB Type-C port2 Monitor - Dell 24 Video Conferencing I C2422HE | C2422HE Users Guide - Page 58
Organizing your cables After attaching all necessary cables to your monitor and computer, (see Connecting Your Monitor for cable attachment) organize all cables as shown above. Securing your monitor using Kensington lock (optional) The security lock slot is located at the bottom of the monitor. (See - Dell 24 Video Conferencing I C2422HE | C2422HE Users Guide - Page 59
for the stand that was shipped with your monitor. If you are connecting a stand that you purchased from any other source, follow the set up instructions that were included with the stand. To remove the stand: 1. Place the monitor on a soft cloth or cushion. 2. Press and hold the stand-release button - Dell 24 Video Conferencing I C2422HE | C2422HE Users Guide - Page 60
four screws securing the plastic cover. 4. Attach the mounting bracket from the wall mounting kit to the monitor. 5. Mount the monitor on the wall as instructed in the documentation that shipped with the wall-mounting kit. NOTE: For use only with UL or CSA or GS-listed wall mount bracket with - Dell 24 Video Conferencing I C2422HE | C2422HE Users Guide - Page 61
Operating the monitor Power on the monitor Press the button to turn on the monitor. Using the joystick control Use the joystick control on the rear of the monitor to make OSD adjustments. 1. Press the joystick button to launch the OSD main menu. 2. Move the joystick up/down/left/right to toggle - Dell 24 Video Conferencing I C2422HE | C2422HE Users Guide - Page 62
Using the rear-panel controls Use the joystick control on the rear of the monitor to adjust the display settings. As you use the button to adjust the settings, an OSD shows the numeric values of each feature as they change. Display Info The following table describes the rear-panel buttons: - Dell 24 Video Conferencing I C2422HE | C2422HE Users Guide - Page 63
Buttons Disable Exit 2. The following message appears. Are you sure you want to lock the Menu Buttons? To unlock the Button, refer to the User's Guide. Yes No 3. Select Yes to lock buttons. Once locked, pressing any control button will display the lock icon . Operating the monitor | 63 - Dell 24 Video Conferencing I C2422HE | C2422HE Users Guide - Page 64
Use the Joystick to lock the button(s). Press the left directional navigation of Joystick for four seconds, a menu appears on the screen. Select Option: Select one of the following options: Options 1 Description Select this option to lock OSD menu function. Menu Button lock 2 Use this option - Dell 24 Video Conferencing I C2422HE | C2422HE Users Guide - Page 65
To unlock the button(s). Press the left directional navigation of Joystick for four seconds until a menu appears on the screen. The following table describes the options to unlock the front-panel control buttons. Select Option: Options 1 Description Use this option to unlock OSD menu function. - Dell 24 Video Conferencing I C2422HE | C2422HE Users Guide - Page 66
Front‑panel button Use the buttons on the front of the monitor to adjust the image settings. Front Panel 1 Description Use the Up (increase) and Down (decrease) buttons to adjust items in the OSD menu. Up Down 2 Use the Previous button to go back to the previous menu. Previous 3 Use the - Dell 24 Video Conferencing I C2422HE | C2422HE Users Guide - Page 67
Using the On-Screen Display (OSD) Menu Accessing the menu system Icon Menu and Submenus Brightness/ Contrast Description Use this menu to activate Brightness/Contrast adjustment. 24/27/34 Monitor Brightness/Contrast Input Source Color Display PIP/PBP USB Audio Menu Personalize Others 75% 75% - Dell 24 Video Conferencing I C2422HE | C2422HE Users Guide - Page 68
Icon Menu and Submenus Input Source Description Use the Input Source menu to select between different video inputs that are connected to your monitor. 24/27/34 Monitor Brightness/Contrast Input Source Color Display PIP/PBP USB Audio Menu Personalize Others USB-C 90W DP HDMI Auto Select Auto - Dell 24 Video Conferencing I C2422HE | C2422HE Users Guide - Page 69
Icon Menu and Submenus Reset Input Source Color Description Resets all settings under the Input Source menu to the factory defaults. Use the Color menu to adjust the color setting mode. 24/27/34 Monitor Brightness/Contrast Input Source Color Display PIP/PBP USB Audio Menu Personalize Others - Dell 24 Video Conferencing I C2422HE | C2422HE Users Guide - Page 70
appears cooler with a blue tint. • Custom Color: Allows you to manually adjust the color settings. Press the joystick left and right buttons to adjust HDMI cable. • YPbPr: Select this option if your DVD player supports only YPbPr output. 24/27/34 Monitor Brightness/Contrast Input Source Color - Dell 24 Video Conferencing I C2422HE | C2422HE Users Guide - Page 71
Icon Menu and Submenus Saturation Reset Color Display Description Use joystick up or down to adjust the saturation from 0 to 100. NOTE: Saturation adjustment is available only for Movie and Game mode. Resets your monitor's color settings to the factory defaults. Use the Display menu to adjust image - Dell 24 Video Conferencing I C2422HE | C2422HE Users Guide - Page 72
Icon Menu and Submenus Description USB-C Prioritization (C2722DE only) Allows you to specify the priority to transfer the data with high resolution (High Resolution) or high speed (High Data Speed) when using the USB Type-C port/DisplayPort. NOTE: If your PC does not have a built-in battery pack - Dell 24 Video Conferencing I C2422HE | C2422HE Users Guide - Page 73
Icon Menu and Submenus PIP/PBP Mode Description Adjusts the PIP or PBP (Picture by Picture) mode. You can disable this feature by selecting Off. 24/27/34 Monitor Brightness/Contrast PIP/PBP Mode O Input Source PIP/PBP (Sub) Color Display USB Switch Video Swap PIP/PBP USB Audio Contrast ( - Dell 24 Video Conferencing I C2422HE | C2422HE Users Guide - Page 74
Icon Menu and Submenus PIP/PBP (Sub) Description Select between the different video signals that may be connected to your monitor for the PBP sub-window. Press the button to select the PBP sub-window source signal. 24/27/34 Monitor Brightness/Contrast Input Source Color Display PIP/PBP USB Audio - Dell 24 Video Conferencing I C2422HE | C2422HE Users Guide - Page 75
Icon Menu and Submenus USB Description Allows you to set the USB upstream port for the DP input signals, thus the monitor's USB downstream port (eg. keyboard and mouse) can be used by the current input signals when you connect a computer to either one of the upstream ports. When you use only one - Dell 24 Video Conferencing I C2422HE | C2422HE Users Guide - Page 76
Icon Menu and Submenus Audio Description Use the Audio Settings menu to adjust the audio settings. 24/27/34 Monitor Brightness/Contrast Input Source Color Display PIP/PBP USB Audio Menu Personalize Others Volume Speaker Reset Audio 100 On Exit Volume Speaker Reset Audio Allows you to - Dell 24 Video Conferencing I C2422HE | C2422HE Users Guide - Page 77
Icon Menu and Submenus Menu Description Select this option to adjust the settings of the OSD, such as the languages of the OSD, the amount of time the menu remains on screen, and so on. 24/27/34 Monitor Brightness/Contrast Input Source Color Display PIP/PBP USB Audio Menu Personalize Others - Dell 24 Video Conferencing I C2422HE | C2422HE Users Guide - Page 78
Icon Menu and Submenus Lock Description With the control buttons on the monitor locked, you can prevent people from accessing the controls. It also prevents accidental activation in multiple monitors side-by-side setup. 24/27/34 Monitor Brightness/Contrast Input Source Color Display PIP/PBP USB - Dell 24 Video Conferencing I C2422HE | C2422HE Users Guide - Page 79
Icon Menu and Submenus Description Shortcut key 1 Shortcut key 2 Shortcut key 3 Select from Preset Modes, Brightness/Contrast, Input Source, Aspect Ratio, Rotation, Display Info set as shortcut key. Shortcut key 4 Shortcut key 5 Power Button Allows you to set the state of the power light - Dell 24 Video Conferencing I C2422HE | C2422HE Users Guide - Page 80
/27/34 Monitor Brightness/Contrast Input Source Color Display PIP/PBP USB Audio Menu Personalize Others Display Info DDC/CI LCD Conditioning Firmware Service Tag Reset Others Factory Reset Select √ On O M2T101 ABCDEFG ENERGY STAR® Exit Display Info DDC/CI Displays the monitor's current settings - Dell 24 Video Conferencing I C2422HE | C2422HE Users Guide - Page 81
Tag Reset Others Audio Factory Reset Menu Personalize Others Exit Firmware Displays the firmware version of your monitor. Service Tag Displays the Service Tag. The Service Tag is a unique alphanumeric identifier that allows Dell to identify the product specifications and access warranty - Dell 24 Video Conferencing I C2422HE | C2422HE Users Guide - Page 82
a particular resolution mode, you can see the following message: The current input timing is not supported by the monitor display. Please change your input timing to 1920x1080/2560x1440/3440x1440, 60Hz or any other monitor listed timing as per monitor speci cations. - Dell 24 Video Conferencing I C2422HE | C2422HE Users Guide - Page 83
on the keyboard to wake up. If there is no display, press the monitor joystick to select input source. A message is displayed while the cable supporting DP alternate mode is connected to the monitor under the following conditions: • When Auto Select for USB-C 90 W is set to Prompt for Multiple - Dell 24 Video Conferencing I C2422HE | C2422HE Users Guide - Page 84
When you select 'Yes' to reset to default settings, the following message will appear: 24/27/34 Monitor Select 'Yes' to enable the following function(s): . Always on USB-C Charging . Other USB Charging Yes No When 'Yes' is selected, power consumption will increase. When 'No' is selected, it will - Dell 24 Video Conferencing I C2422HE | C2422HE Users Guide - Page 85
If either USB Type-C / DP / HDMI input is selected and the corresponding cable is not connected, a floating dialog box as shown below appears. No DP Cable The display will go into Standby Mode in 4 minutes. www.dell.com/C24/27/3422XE or No USB-C Cable The display will go into Standby Mode in 4 - Dell 24 Video Conferencing I C2422HE | C2422HE Users Guide - Page 86
buttons to work, you need to connect the USB upstream cable (Type-A to Type-B or Type-C to Type-C) from the PC to the monitor. See Troubleshooting for more information. 86 | Operating the monitor - Dell 24 Video Conferencing I C2422HE | C2422HE Users Guide - Page 87
on your computer, complete one of the following procedures: If you have a Dell desktop or portable computer: • Go to https://www.dell.com/support, enter your service tag, and download the latest driver for your graphics card. If you are using a non-Dell computer (laptop or desktop): • Go to your - Dell 24 Video Conferencing I C2422HE | C2422HE Users Guide - Page 88
Setting the KVM USB Switch To set the KVM USB Switch as Shortcut Key for the monitor: 1. Press the joystick button to launch the OSD main menu. 2. Move the joystick to select Personalize. 24/27/34 Monitor Brightness/Contrast Input Source Color Display PIP/PBP USB Audio Menu Personalize Others - Dell 24 Video Conferencing I C2422HE | C2422HE Users Guide - Page 89
1. When connecting HDMI + USB-B to computer 1 and DP + USB A to C to computer 2: 1 HDMI 2 1 24 3 DP USB-B 3 USB A to C 4 NOTE: The USB Type-C connection currently supports only data transfer. Ensure USB Selection for HDMI is set to USB-B and DP is set to USB-C 90 W. 24/27/34 Monitor Brightness - Dell 24 Video Conferencing I C2422HE | C2422HE Users Guide - Page 90
Source Color Display PIP/PBP USB Audio Menu Personalize Others DP assign to HDMI assign to USB-B USB-B Exit NOTE: As the USB Type-C port supports the DisplayPort Alternate Mode, there is no need to set USB Selection for USB Type-C. NOTE: When connecting to different video input sources not shown - Dell 24 Video Conferencing I C2422HE | C2422HE Users Guide - Page 91
Setting the Auto KVM You can follow below instruction to set up Auto KVM for your monitor: 1. Ensure that PIP/PBP Mode is Off. 24/27/34 Monitor Brightness/Contrast Input Source Color Display - Dell 24 Video Conferencing I C2422HE | C2422HE Users Guide - Page 92
24/27/34 Monitor Brightness/Contrast Input Source Color Display PIP/PBP USB Audio Menu Personalize Others USB-C 90W DP HDMI Auto Select Auto Select for USB-C Rename Inputs Reset Input Source Prompt for Multiple Inputs Yes No Exit 3. Ensure that the USB ports and the video inputs are paired - Dell 24 Video Conferencing I C2422HE | C2422HE Users Guide - Page 93
Setting up Windows Hello In Windows® 10: Click Windows start menu, click Settings. Click Accounts. Click Sign-in options. You must set up a PIN before you can enroll in Windows Hello. Operating the monitor | 93 - Dell 24 Video Conferencing I C2422HE | C2422HE Users Guide - Page 94
Click Add under PIN enter to Set up a PIN. Enter New PIN and Confirm PIN, and thenclick OK. Once you've done that, the options to set up Windows Hello will unlock. Click Set up under Windows Hello, enter to Windows Hello setup. 94 | Operating the monitor - Dell 24 Video Conferencing I C2422HE | C2422HE Users Guide - Page 95
The following message is displayed, click Get started. Keep looking directly at your screen and position yourself so that your face is in the center of the frame that appears on screen. The webcam will then register your face. Operating the monitor | 95 - Dell 24 Video Conferencing I C2422HE | C2422HE Users Guide - Page 96
When the following message is displayed, click Close to exit Windows Hello setup. Once you have set up, you have another option to improve the recognition. Click Improve recognition if necessary. 96 | Operating the monitor - Dell 24 Video Conferencing I C2422HE | C2422HE Users Guide - Page 97
webcam as default setting, you need disable the notebook built-in webcam. To identify the notebook built-in webcam and disable it, please follow below instructions: Right-click Dell Monitor IR Webcam, and click Properties to open the Dell Monitor IR Webcam Properties. Operating the monitor | 97 - Dell 24 Video Conferencing I C2422HE | C2422HE Users Guide - Page 98
Click Details > Property and select Hardware Ids. 98 | Operating the monitor - Dell 24 Video Conferencing I C2422HE | C2422HE Users Guide - Page 99
The Value will show the detail hardware ids of this Dell Monitor IR Webcam. The hardware ids of the notebook built-in webcam and the monitor webcam are different. For C2422HE/C2722DE/C3422WE, the monitor webcam hardware ids will show as below: Right click the PC/Notebook webcam which has different - Dell 24 Video Conferencing I C2422HE | C2422HE Users Guide - Page 100
The following message is displayed: Click Yes. The notebook webcam is now disabled and the monitor webcam will be used as the default setting. Restart the notebook. 100 | Operating the monitor - Dell 24 Video Conferencing I C2422HE | C2422HE Users Guide - Page 101
as default setting When your computer connects multiple speakers, if you want to set up the monitor speaker as default setting, please follow below instructions: Right-click Volume in the Windows task bar notification area. Click Playback devices enter to Sound setting interface. If only the HDMI or - Dell 24 Video Conferencing I C2422HE | C2422HE Users Guide - Page 102
Click DELL C2422HE/C2722DE/C3422WE, and then click Set Default, the monitor speaker will be used as the default setting. Click OK to exit the Sound setting. 102 | Operating the monitor - Dell 24 Video Conferencing I C2422HE | C2422HE Users Guide - Page 103
If the USB cable and the HDMI or DP cable are connected from monitor to the computer, two speakers named DELL C2422HE/C2722DE/C3422WE and Echo Cancelling Speakerphone (C2422HE/C2722DE/C3422WE) respectively from the monitor will show in the Sound setting interface. The difference between DELL C2422HE - Dell 24 Video Conferencing I C2422HE | C2422HE Users Guide - Page 104
Troubleshooting WARNING: Before you begin any of the procedures in this section, follow the Safety Instructions. Self-test Your monitor provides a self-test feature that allows you to check your video controller and computer, because your monitor is functioning properly. 104 | Troubleshooting - Dell 24 Video Conferencing I C2422HE | C2422HE Users Guide - Page 105
built-in diagnostic tool that helps you determine if the screen abnormality you are experiencing is an inherent problem with your monitor, or with your computer and video card. Display Info To run the built-in is functioning properly. Check the video card and computer. Troubleshooting | 105 - Dell 24 Video Conferencing I C2422HE | C2422HE Users Guide - Page 106
on Missing Pixels Stuck-on Pixels Brightness Problems What You Experience No picture No picture on Dell Monitor Quality and Pixel Policy, see Dell Support site at: https://www.dell.com/pixelguidelines. • Cycle Dell Monitor Quality and PixelPolicy, see Dell Support site at: https://www.dell.com/ - Dell 24 Video Conferencing I C2422HE | C2422HE Users Guide - Page 107
Symptoms What You Experience Possible Solutions Safety Related Visible signs of • Do not perform any troubleshooting steps. Issues smoke or sparks • Contact Dell immediately. Intermittent Problems Monitor malfunctions on & off • Ensure that the video cable connecting the monitor to the - Dell 24 Video Conferencing I C2422HE | C2422HE Users Guide - Page 108
the PC side. • Not set the monitor Mic/ webcam as the default device Product specific problems Problem What you experience Possible solutions Screen image is too small Image is centered on screen, but may display in full screen. • Run the built-in diagnostics. 108 | Troubleshooting - Dell 24 Video Conferencing I C2422HE | C2422HE Users Guide - Page 109
Problem No image when using DP connection . Download and install the latest graphics card driver. • Some DP 1.1a graphics card cannot support DP 1.2(C2422HE/C3422WE),DP1.4(C2722DE) monitors. Go to OSD menu, under Input Source selection, the USB Type-C cable is not damaged. Troubleshooting | 109 - Dell 24 Video Conferencing I C2422HE | C2422HE Users Guide - Page 110
Problem What you experience Intermittent charging when using USB Type-C connection to computer, Intermittent charging laptop, and so on No image when cable and power cord of the monitor. Then, power on the computer, plug in the monitor power cord and Type-C cable. 110 | Troubleshooting - Dell 24 Video Conferencing I C2422HE | C2422HE Users Guide - Page 111
Problem Monitor buttons (Mute / Volume down / Volume / off on Microsoft Teams® App with Chrome OS / Ubuntu Video recording • Windows 7 not support App not working • Switch to Windows 10 with Win 7 Headset with Headset with Mic (3.5mm when connected to HDMI or DP only Troubleshooting | 111 - Dell 24 Video Conferencing I C2422HE | C2422HE Users Guide - Page 112
Problem What you experience Ethernet port (RJ45) cannot connect to internet Ethernet port (RJ45) cannot connect to internet on Win 10 Microphone not re-boot the PC Disable Intel Smart Sound Technology for USB Audio driver in the Device Manager and re-boot the PC 112 | Troubleshooting - Dell 24 Video Conferencing I C2422HE | C2422HE Users Guide - Page 113
Universal Serial Bus (USB) specific problems Specific Symptoms What You Experience Possible Solutions USB interface is USB peripherals not working are not working • 3.0 port. USB is not working No USB functionalities Refer to input source and USB pairing table. Troubleshooting | 113 - Dell 24 Video Conferencing I C2422HE | C2422HE Users Guide - Page 114
/Region drop-down menu at the bottom-right corner of the page. 3. Click Contact Us next to the country dropdown. 4. Select the appropriate service or support link based on your need. 5. Choose the method of contacting Dell that is convenient for you. EU product database for energy label and product
-
 1
1 -
 2
2 -
 3
3 -
 4
4 -
 5
5 -
 6
6 -
 7
7 -
8
-
9
-
10
-
11
-
12
-
13
-
14
-
15
-
16
-
17
-
18
-
19
-
20
-
21
-
22
-
23
-
24
-
25
-
26
-
27
-
28
-
29
-
30
-
31
-
32
-
33
-
34
-
35
-
36
-
37
-
38
-
39
-
40
-
41
-
42
-
43
-
44
-
45
-
46
-
47
-
48
-
49
-
50
-
51
-
52
-
53
-
54
-
55
-
56
-
57
-
58
-
59
-
60
-
61
-
62
-
63
-
64
-
65
-
66
-
67
-
68
-
69
-
70
-
71
-
72
-
73
-
74
-
75
-
76
-
77
-
78
-
79
-
80
-
81
-
82
-
83
-
84
-
85
-
86
-
87
-
88
-
89
-
90
-
91
-
92
-
93
-
94
-
95
-
96
-
97
-
98
-
99
-
100
-
101
-
102
-
103
-
104
-
105
-
106
-
107
-
108
-
109
-
110
-
111
-
112
-
113
-
114
 |
 |

Model: C2422HE/C2722DE/C3422WE
Regulatory model: C2422HEt/C2722DEt/C3422WEt
Dell C2422HE
Dell C2722DE
Dell C3422WE Curved
Video Conferencing Monitor
User’s Guide