D-Link DWR-953V2 Product Manual 1
D-Link DWR-953V2 Manual
 |
View all D-Link DWR-953V2 manuals
Add to My Manuals
Save this manual to your list of manuals |
D-Link DWR-953V2 manual content summary:
- D-Link DWR-953V2 | Product Manual 1 - Page 1
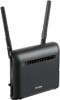
Version 1.00 | 05/26/2021 User Manual LTE Cat. 4 Wi-Fi AC1200 Router DWR-953V2 - D-Link DWR-953V2 | Product Manual 1 - Page 2
(ErP) that automatically switches to a power-saving Network Standby mode within 1 minute of no packets being transmitted. It can also be turned off through a power switch to save energy when it is not needed. Network Standby: 3.48 watts Switched Off: 0.05 watts D-Link DWR-953V2 User Manual i - D-Link DWR-953V2 | Product Manual 1 - Page 3
Reservation 38 LAN Client List 39 IPv6 LAN Setting 40 RADVD 41 Security 44 Firewall 44 NAT 46 DMZ 48 URL Filter 49 MAC Filter 50 System 51 About 51 QoS 52 UPnP 53 DDNS 54 Configuration 55 Firmware Upgrade 56 Administration 57 USSD 58 Syslog 59 D-Link DWR-953V2 User Manual ii - D-Link DWR-953V2 | Product Manual 1 - Page 4
66 Troubleshooting 67 Wireless Basics 71 What is wireless 72 Tips...74 Wireless Modes 75 Networking Basics 76 Check your IP address 76 Statically Assign an IP address 77 Wireless Security 78 What is WPA 78 Technical Specifications 79 Regulatory Information 80 D-Link DWR-953V2 User Manual - D-Link DWR-953V2 | Product Manual 1 - Page 5
operating system with a compatible network adapter. • Java-enabled browser such as Internet Explorer 9, Safari 7, Chrome 28, or Firefox 23 or above (for configuration). * Subject to services and service terms available from your carrier. D-Link DWR-953V2 User Manual 1 - D-Link DWR-953V2 | Product Manual 1 - Page 6
1 - Product Overview Introduction D-Link's DWR-953V2 LTE Cat. 4 Wi-Fi AC1200 Router is equipped with 802.11ac and 802.11n dual-band capabilities, maximizing users' wireless flexibility. In addition to mobile broadband access, the DWR-953V2 provides a physical WAN port that supports a wide variety of - D-Link DWR-953V2 | Product Manual 1 - Page 7
blink when data is being transferred. Will be lit if an Ethernet LAN connection is established, and will blink when data is being transferred. Indicates 4G signal strength with bars. More bars indicate a stronger signal. D-Link DWR-953V2 User Manual 3 - D-Link DWR-953V2 | Product Manual 1 - Page 8
LAN Ports For connection to a network-enabled desktop or notebook computer. 3 Ethernet WAN/LAN Port For connection to a DSL/cable modem or router. This may be configured in the web UI to be a fourth LAN port. For instructions on how to do this, refer to page 13. D-Link DWR-953V2 User Manual 4 - D-Link DWR-953V2 | Product Manual 1 - Page 9
paperclip and hold for ten seconds to reset the device. Press this button to initiate a new WPS connection. Accepts a standard mini-SIM/UICC card for 4G LTE connectivity. D-Link DWR-953V2 User Manual 5 - D-Link DWR-953V2 | Product Manual 1 - Page 10
to use a wired connection exclusively, you must use the Optional Advanced Setup procedure. 4. Connect to the device via Wi-Fi using the SSID and password printed on the bottom of the router, or through Ethernet via one of the LAN ports on the back of your DWR-953V2. D-Link DWR-953V2 User Manual 6 - D-Link DWR-953V2 | Product Manual 1 - Page 11
is to follow these basic guidelines: 1. Minimize the number of walls and ceilings between the D-Link router and other network devices. Each wall or ceiling can reduce your adapter's range from 3 to security systems may dramatically degrade wireless connectivity. D-Link DWR-953V2 User Manual 7 - D-Link DWR-953V2 | Product Manual 1 - Page 12
router (192.168.0.1 by default). To log in to the configuration utility, admin is the default username and the default password is admin. Note: If you get a Page Cannot Be Displayed error, please refer to the Troubleshooting to the appropriate configuration section. D-Link DWR-953V2 User Manual 8 - D-Link DWR-953V2 | Product Manual 1 - Page 13
and other information about your router and Internet connection. Network Status Registration The registration status of your network. Status Network The type of network (LTE/3G). RSSI The Received network. Name MCC The mobile country code of the network carrier. D-Link DWR-953V2 User Manual 9 - D-Link DWR-953V2 | Product Manual 1 - Page 14
International Mobile Subscriber Identity of the inserted SIM card. IMEI The International Mobile Equipment Identity. Cell ID The CID number of the connection. CAT The LTE category of the connection. BAND The LTE band of the connection. D-Link DWR-953V2 User Manual 10 - D-Link DWR-953V2 | Product Manual 1 - Page 15
may attempt to enter the PIN code. Retry Times PUK Code The number of times a user may attempt to enter the PUK code. Retry Times D-Link DWR-953V2 User Manual 11 - D-Link DWR-953V2 | Product Manual 1 - Page 16
router uses this connection as the primary Internet connection. Connection Operation Preferred Choose between Auto Mode to connect automatically, or Cellular Manual Mode to configure the LTE connection yourself. Network Roaming Toggle to Enable or Disable roaming mode. mode D-Link DWR-953V2 User - D-Link DWR-953V2 | Product Manual 1 - Page 17
/LAN interface as a LAN port. If this is selected, the router will only connect to the Internet using its LTE connection. WAN Settings WAN Select the type of WAN connection to use. The subsequent fields Connection will change depending on which type you select. Type D-Link DWR-953V2 User Manual 13 - D-Link DWR-953V2 | Product Manual 1 - Page 18
Mask Enter the subnet mask provided by your ISP. Default Enter the default gateway address provided by your ISP. Gateway Primary DNS Enter the primary DNS server address assigned by your ISP. Secondary Enter the secondary DNS server address assigned by your ISP. DNS D-Link DWR-953V2 User Manual 14 - D-Link DWR-953V2 | Product Manual 1 - Page 19
Manually Toggle this to automatically obtain DNS information via DHCP, or to configure it manually. Primary DNS Specify the IP address of the primary DNS server provided by your ISP. Secondary Specify the IP address of the secondary DNS server provided by DNS your ISP. D-Link DWR-953V2 User Manual - D-Link DWR-953V2 | Product Manual 1 - Page 20
User Name Specify the PPP username provided by your ISP. Password Specify the PPP password provided by your ISP. Verify Reenter your password to confirm it. Password Operation Set this to Keep Alive to maintain your connection when no Mode activity is detected. D-Link DWR-953V2 User Manual 16 - D-Link DWR-953V2 | Product Manual 1 - Page 21
Name Specify the L2TP username provided by your ISP. Password Specify the L2TP password associated with your username. Address Choose between Static and Dynamic. Mode Operation Set this to Keep Alive to maintain your connection when no Mode activity is detected. D-Link DWR-953V2 User Manual 17 - D-Link DWR-953V2 | Product Manual 1 - Page 22
Name Specify the PPTP username provided by your ISP. Password Specify the PPTP password associated with your username. Address Choose between Static and Dynamic. Mode Operation Set this to Keep Alive to maintain your connection when no Mode activity is detected. D-Link DWR-953V2 User Manual 18 - D-Link DWR-953V2 | Product Manual 1 - Page 23
, enter it here. Password If your mobile connection requires a password, enter it here. Number If your SIM uses a PIN number, enter it here. PDP Type Select from IPv4, IPv6, and IPv4/IPv6. Authentication Select the authentication type used by your ISP. Preference D-Link DWR-953V2 User Manual 19 - D-Link DWR-953V2 | Product Manual 1 - Page 24
or disable transparent bridge mode. Settings Network Type Select from LTE, 3G, and 2G. Select Auto Mode for this to be determined automatically. Transparent Check this to enable transparent bridge mode. The DWR-953V2 Bridge cannot broadcast Wi-Fi in this mode. D-Link DWR-953V2 User Manual 20 - D-Link DWR-953V2 | Product Manual 1 - Page 25
Section 3 - Configuration PIN This page allows you to configure the PIN code settings on the inserted LTE SIM card. SIM Lock/Unlock Configuration PIN Code Enter a PIN code to use to unlock your SIM card. D-Link DWR-953V2 User Manual 21 - D-Link DWR-953V2 | Product Manual 1 - Page 26
will search for and select a 3G/4G network based on the inserted SIM card. Network Scan Mode Select either Automatic or Manual. If Manual is selected, perform a scan by clicking 's name. Name Access Indicates the type of connection, e.g. LTE, 3G, etc. Technology D-Link DWR-953V2 User Manual 22 - D-Link DWR-953V2 | Product Manual 1 - Page 27
Setting On this page you can configure your router's IPv6 WAN connection by changing the connection type and specifying which interface to use. WAN Interface Setup Enable IPv6 Check this to enable or disable IPv6. Origin Type Select either DHCPv6 or Static. WAN Link D-Link DWR-953V2 User Manual 23 - D-Link DWR-953V2 | Product Manual 1 - Page 28
this to obtain the DNS server address automatically. Automatically Set DNS Click this to enter the DNS server address manually. Manually DNS1 If Set DNS Manually is checked, enter the IPv6 address of the DNS server. Prefix Length Enter the network prefix length. D-Link DWR-953V2 User Manual 24 - D-Link DWR-953V2 | Product Manual 1 - Page 29
3 - Configuration Data Cap This page allows you to set a cap on the amount of cellular data that may be used each month and configure your router to send an automatic warning via SMS when it is approaching the day of the month that the record should start on. Data D-Link DWR-953V2 User Manual 25 - D-Link DWR-953V2 | Product Manual 1 - Page 30
an Internet connection on your router. The Wizard features four steps. Step 1 - LAN Settings IP Address Enter the default IP address that you want to use for the router. IP Subnet Enter the subnet mask of the router. The default subnet mask is Mask 255.255.255.0. D-Link DWR-953V2 User Manual 26 - D-Link DWR-953V2 | Product Manual 1 - Page 31
Section 3 - Configuration Step 2 - WAN Settings WAN Click Set to manually set the data connection to use for your Configuration WAN connection. D-Link DWR-953V2 User Manual 27 - D-Link DWR-953V2 | Product Manual 1 - Page 32
Section 3 - Configuration Step 3 - Connection Settings Ethernet Type Select between WAN Mode and 4G/3G/2G Mode. WAN If WAN Mode is selected, choose the type of WAN connection to Connection use. Type Host Name Pick a hostname to apply to the router. This is optional. D-Link DWR-953V2 User Manual 28 - D-Link DWR-953V2 | Product Manual 1 - Page 33
Choose an SSID to identify the Wi-Fi networks broadcast by the router. Password Enter a password to protect the router's Wi-Fi networks. Click the checkbox to apply the password. The Wi-Fi Configuration and Wi-Fi 5G Configuration settings do not have to be the same. D-Link DWR-953V2 User Manual 29 - D-Link DWR-953V2 | Product Manual 1 - Page 34
you to designate a secondary connection which your router will switch to if the primary LTE connection fails. Failover Enable Click this to enable or disable the failover feature. Default Route Select the connection to switch to if the primary connection is lost. D-Link DWR-953V2 User Manual 30 - D-Link DWR-953V2 | Product Manual 1 - Page 35
-Fi network(s) broadcast by your router and change their security settings. WiFi-2.4G / WiFi-5G Enable Click this box to enable wireless access. When you enable this option, the following parameters become available. Mode Link DWR-953V2 User Manual 31 - D-Link DWR-953V2 | Product Manual 1 - Page 36
Encryption Select an encryption type to protect the router. Type WPA Mode Select Auto, WPA or WPA2. The recommended setting is WPA2. Cipher Type Select the encryption standard to use. The recommended setting is AES. Pre-shared Specify the pre-shared key to use. Key D-Link DWR-953V2 User Manual 32 - D-Link DWR-953V2 | Product Manual 1 - Page 37
enable WPS. Configure Choose whether to connect your devices via the WPS button Method on your router or by entering a PIN code. The PIN method is less secure and is not recommended. Enrollee PIN If PIN is selected, enter the PIN code to use to create a connection. D-Link DWR-953V2 User Manual 33 - D-Link DWR-953V2 | Product Manual 1 - Page 38
Filter Mode connections by default. Set this to Disable to disable the MAC address filter. Add Click this to add a new MAC address to the filter list. OK Click this to confirm the addition. Delete All Click this to delete all MAC addresses from the filter list. D-Link DWR-953V2 User Manual 34 - D-Link DWR-953V2 | Product Manual 1 - Page 39
Section 3 - Configuration WiFi Client List This page displays a list of the Wi-Fi clients currently connected to your network. WiFi 2.4G/5G List MAC Address This displays the MAC address of each client that is connected to your wireless network. D-Link DWR-953V2 User Manual 35 - D-Link DWR-953V2 | Product Manual 1 - Page 40
IP address, you will need to enter the new address in your browser to access the web UI. LAN IP Address Enter the default IP address that you want to use for the router. IP Subnet Enter the subnet mask of the router. The default subnet mask is Mask 255.255.255.0. D-Link DWR-953V2 User Manual 36 - D-Link DWR-953V2 | Product Manual 1 - Page 41
router's Dynamic Host Control Protocol (DHCP) settings. The DHCP server (built in to the router) will automatically assign an IP address to the computers and devices on your network. DHCP Server DHCP Mode The mode length of time the IP can be leased for, in seconds. D-Link DWR-953V2 User Manual 37 - D-Link DWR-953V2 | Product Manual 1 - Page 42
you would like to assign to them. OK Click this to save the current assignment. Delete All Click this to delete all static DHCP assignment. D-Link DWR-953V2 User Manual 38 - D-Link DWR-953V2 | Product Manual 1 - Page 43
Section 3 - Configuration LAN Client List This page displays a list of each client connected to the router on its LAN interfaces. LAN Client List MAC Address The MAC address of the client. IP Address The IP address of the client. D-Link DWR-953V2 User Manual 39 - D-Link DWR-953V2 | Product Manual 1 - Page 44
settings of your router and configure the DHCPv6 server settings. Configuring LAN Settings Config. Choose whether to configure the IPv6 LAN settings IPv6 LAN automatically or manually. Automatically / Manually range. DNS Mode Select either proxy or forwarding mode. D-Link DWR-953V2 User Manual 40 - D-Link DWR-953V2 | Product Manual 1 - Page 45
When set, hosts use the stateful protocol for autoconfiguration of other information. Click to set this flag to on. AdvLinkMTU This value will be substituted as the MTU value in router advertisement messages for all nodes when the link MTU is not well-known. D-Link DWR-953V2 User Manual 41 - D-Link DWR-953V2 | Product Manual 1 - Page 46
The preference associated with the default router. Select either low, medium, or high. AdvSourceLLAddress When set, the link-layer address of the outgoing interface is included in the RA. UnicastOnly Indicates that the interface link type only supports unicast. D-Link DWR-953V2 User Manual 42 - D-Link DWR-953V2 | Product Manual 1 - Page 47
address of the interface. AdvOnLinkFlag Indicates that this prefix can be used for on-link determination. Click to set this to on. AdvAutonomousFlag Indicates that this prefix can be used for autonomous or by sending a signal to cause RADVD to reconfigure itself. D-Link DWR-953V2 User Manual 43 - D-Link DWR-953V2 | Product Manual 1 - Page 48
to Enable set this to Enable. Packets Choose whether to drop or accept packets by default. The IPv4/ Allowed IPv6 Firewall Entries listed on the following two tabs will be exceptions to this rule. DoS Enable Toggle this to enable or disable DoS protection. D-Link DWR-953V2 User Manual 44 - D-Link DWR-953V2 | Product Manual 1 - Page 49
source filter range at. Port Destination Enter the port to start the source filter range from. from Port Destination Enter the port to end the source filter range at. to Port Protocol Enter the protocol of the traffic to filter. Delete Click this to delete the rule. D-Link DWR-953V2 User Manual 45 - D-Link DWR-953V2 | Product Manual 1 - Page 50
Virtual Private Network (VPN) passthrough functions, which allow VPN traffic to pass through the router. Configure IPSEC VPN Toggle this to allow IPSEC VPN traffic. Pass Through PPTP VPN Toggle WWAN Access Ping Access Toggle this to allow Ping access via WAN. on WAN D-Link DWR-953V2 User Manual 46 - D-Link DWR-953V2 | Product Manual 1 - Page 51
to forward traffic to. Global Port Enter the external port to forward traffic to. This will usually be the same as the private port. Protocol Select the protocol for the port and traffic that the rule will apply to. Delete Click this to delete the port forwarding rule. D-Link DWR-953V2 User Manual - D-Link DWR-953V2 | Product Manual 1 - Page 52
Section 3 - Configuration DMZ If an application has trouble functioning from behind the router, you can enable the Demilitarized Zone (DMZ) feature. This feature directly exposes the client to the IP address of the DMZ host that you want to expose to the Internet. D-Link DWR-953V2 User Manual 48 - D-Link DWR-953V2 | Product Manual 1 - Page 53
this to add a new URL filter. OK Click this to confirm the URL filter rule. Delete All Click this to delete all URL filter rules. D-Link DWR-953V2 User Manual 49 - D-Link DWR-953V2 | Product Manual 1 - Page 54
MAC Filter The MAC Filter is used to control access to your network. You can configure your router to deny access to clients with a particular MAC address. MAC Filter MAC Enter the MAC address MAC filter rule. Delete All Click this to delete all MAC filter rules. D-Link DWR-953V2 User Manual 50 - D-Link DWR-953V2 | Product Manual 1 - Page 55
. FW Version The current firmware version being used by your device. IMEI The device's International Mobile Equipment Identity. This is a unique number assigned to every mobile device. Baseband The version of baseband software being used by your device. Version D-Link DWR-953V2 User Manual 51 - D-Link DWR-953V2 | Product Manual 1 - Page 56
default downlink speed Downlink automatically. If this is not clicked, enter a downlink speed Speed manually. Local IP Start Enter a starting IP of a range to apply a QoS rule to. Local IP End Enter an ending IP of a range to apply a QoS rule to. Mode the QoS rule. D-Link DWR-953V2 User Manual 52 - D-Link DWR-953V2 | Product Manual 1 - Page 57
, communicate with other devices, automatically leave the network when it is no longer in use. Because UPnP can cause security issues, it is disabled by default. UPnP UPnP Click this to enable or disable Universal Plug and Play. D-Link DWR-953V2 User Manual 53 - D-Link DWR-953V2 | Product Manual 1 - Page 58
this to enable DDNS. Service Specify your DDNS service provider. Provider Domain Specify your domain name. Name User Name/ Specify the username or email address used with your DDNS Email service. Password/Key Specify the password associated with the DDNS username. D-Link DWR-953V2 User Manual 54 - D-Link DWR-953V2 | Product Manual 1 - Page 59
Reset to Default Status Click this to reset to factory default settings. Export/Import Setting Export Click this to export your current configuration settings to a file. Setting Import Click this to import configuration settings from a previously Setting saved file. D-Link DWR-953V2 User Manual 55 - D-Link DWR-953V2 | Product Manual 1 - Page 60
the D-Link support site at http://dlink.com/support/. Firmware Upgrade Upgrade Select Remote Server to download a firmware upgrade, or Router Manual to upgrade from a file. File name If Manual is selected, pick the file to use to upgrade. Status The status of the current firmware. D-Link DWR-953V2 - D-Link DWR-953V2 | Product Manual 1 - Page 61
account. Administration Session Specify the number of minutes of inactivity after which the Timeout admin account should be logged out. New Enter a new password for the admin account. password Retype new Reenter the new password to confirm it. password D-Link DWR-953V2 User Manual 57 - D-Link DWR-953V2 | Product Manual 1 - Page 62
Unstructured Supplementary Service Data (USSD) allows ISP-specific applications to be activated with an SMS message. Send USSD USSD CMD Enter an application activation code and click Send. This will allow you to activate applications by sending an SMS to your ISP. D-Link DWR-953V2 User Manual 58 - D-Link DWR-953V2 | Product Manual 1 - Page 63
Configuration Syslog The DWR-953V2 keeps a running log of events and activities that occur on the router. You may settings. Changes Refresh Click this to refresh the system log displayed in the web UI. Clear Click this to clear the system log displayed in the web UI. D-Link DWR-953V2 User Manual - D-Link DWR-953V2 | Product Manual 1 - Page 64
Date Specify the end date of Daylight Saving Time. Time Server Enter the primary and backup NTP servers to obtain the current Address 1/2/3 time from. D-Link DWR-953V2 User Manual 60 - D-Link DWR-953V2 | Product Manual 1 - Page 65
Section 3 - Configuration Reboot Click this menu item to reboot the router. Click OK to proceed with the reboot and Cancel to return to the previous page. D-Link DWR-953V2 User Manual 61 - D-Link DWR-953V2 | Product Manual 1 - Page 66
3 - Configuration SMS New Message This page allows you to send SMS messages using your router's LTE SIM card. Send SMS Send To Enter the number to send the SMS to. Messages Enter the content of your message. Each message can be a maximum of 160 characters. D-Link DWR-953V2 User Manual 62 - D-Link DWR-953V2 | Product Manual 1 - Page 67
Inbox This page allows you to view messages in your inbox. Messages can either be saved in the router's internal memory (click the Local tab) or on the SIM card (click the SIM Card tab). message was sent. Delete Click this to delete the record of the message. D-Link DWR-953V2 User Manual 63 - D-Link DWR-953V2 | Product Manual 1 - Page 68
Outbox This page allows you to view messages in your outbox. Messages can either be saved in the router's internal memory (click the Local tab) or on the SIM card (click the SIM Card tab). message was sent. Delete Click this to delete the record of the message. D-Link DWR-953V2 User Manual 64 - D-Link DWR-953V2 | Product Manual 1 - Page 69
allows you to view saved drafts of messages you have not sent yet. Messages can either be saved in the router's internal memory (click the Local tab) or on the SIM card (click the SIM Card tab). Draftbox saved. Delete Click this to delete the draft of the message. D-Link DWR-953V2 User Manual 65 - D-Link DWR-953V2 | Product Manual 1 - Page 70
Section 3 - Configuration Settings SMS On this page you can specify where SMS messages will be saved. Set SMS Storage Location SMS storage Select either Local to save the message to the router's internal location memory or SIM Card to save it to the SIM card. D-Link DWR-953V2 User Manual 66 - D-Link DWR-953V2 | Product Manual 1 - Page 71
Troubleshooting Troubleshooting This chapter provides solutions to problems that can occur during the installation and operation of the DWR-953V2. Read the following descriptions if you are having problems. for more information on disabling or configuring it. D-Link DWR-953V2 User Manual 67 - D-Link DWR-953V2 | Product Manual 1 - Page 72
on, use a paperclip to hold the button down for 10 seconds. Release the button and the router will go through its reboot process. Wait about 30 seconds to access the router. The default IP address is 192.168.0.1. When logging in, leave the password box empty. D-Link DWR-953V2 User Manual 68 - D-Link DWR-953V2 | Product Manual 1 - Page 73
Section 5 - Troubleshooting 3. Why can't I connect to certain sites or send and receive emails when connecting through my router? If you are having a problem sending or receiving email, or syntax: ping [url] [-f] [-l] [MTU value] Example: ping yahoo.com -f -l 1472 D-Link DWR-953V2 User Manual 69 - D-Link DWR-953V2 | Product Manual 1 - Page 74
Troubleshooting MTU, you can now configure your router with the proper MTU size. To change the MTU rate on your router follow the steps below: • settings. • Test your email. If changing the MTU does not resolve the problem, continue changing the MTU in increments of ten. D-Link DWR-953V2 User Manual - D-Link DWR-953V2 | Product Manual 1 - Page 75
. Under many circumstances, it may be desirable for mobile network devices to link to a conventional Ethernet LAN in order to use servers, printers or an Internet connection supplied through the wired LAN. A wireless router is a device used to provide this link. D-Link DWR-953V2 User Manual 71 - D-Link DWR-953V2 | Product Manual 1 - Page 76
winning designer, developer, and manufacturer of networking products. D-Link delivers the performance you need at a price you can afford. D-Link has all the products you need to build your network campuses, airports, golf courses, and many other outdoor venues. D-Link DWR-953V2 User Manual 72 - D-Link DWR-953V2 | Product Manual 1 - Page 77
in recent years that almost everyone is using it, whether it's for home, office, business, D-Link has a wireless solution for it. Home Uses/Benefits • Gives everyone at home broadband access • Surf printer with multiple computers • No need to dedicate office space D-Link DWR-953V2 User Manual 73 - D-Link DWR-953V2 | Product Manual 1 - Page 78
interference Place home appliances such as cordless telephones, microwaves, and televisions as far away as possible from the router/access point. This would significantly reduce any interference that the appliances might cause since they operate on same frequency. D-Link DWR-953V2 User Manual 74 - D-Link DWR-953V2 | Product Manual 1 - Page 79
an access point or wireless router. All the wireless devices, or clients, will connect to the wireless router or access point. An ad hoc network contains only clients, such as laptops with wireless adapters. All the adapters must be in ad hoc mode to communicate. D-Link DWR-953V2 User Manual 75 - D-Link DWR-953V2 | Product Manual 1 - Page 80
IP address, subnet mask, and the default gateway of your adapter. If the address is 0.0.0.0, check your adapter installation, security settings, and the settings on your router. Some firewall software programs may block a DHCP request on newly installed adapters. D-Link DWR-953V2 User Manual 76 - D-Link DWR-953V2 | Product Manual 1 - Page 81
Default Gateway the same as the LAN IP address of your router (I.E. 192.168.0.1). Set Primary DNS the same as the LAN IP address of your router (192.168.0.1). The Alternate DNS is not needed or you may enter a DNS server from your ISP. Step 5 Click OK twice to save your settings. D-Link DWR-953V2 - D-Link DWR-953V2 | Product Manual 1 - Page 82
is an alpha-numeric password between 8 and 63 characters long. The password can include symbols (!?*&_) and spaces. This key must be the exact same key entered on your wireless router or access point. This . EAP is often used in corporate or university environments. D-Link DWR-953V2 User Manual 78 - D-Link DWR-953V2 | Product Manual 1 - Page 83
• Two FIX 4G antennas Ports • Three LAN ports (RJ-45) • WAN/LAN port (RJ-45) Supported frequency band is dependent upon regional hardware version. 2 Data rates are theoretical. Data transfer rate depends on network capacity, signal strength, and environmental factors. D-Link DWR-953V2 User Manual - D-Link DWR-953V2 | Product Manual 1 - Page 84
. Output Power (EIRP) Max. Output Power Consommation d'énergie max. Potencia máxima de Salida Potenza max. Output Max. Output Power 200 mW 200 mW 1 W 100 mW D-Link DWR-953V2 User Manual 80 - D-Link DWR-953V2 | Product Manual 1 - Page 85
dichiara che questo prodotto, i relativi accessori e il software sono conformi alla direttiva 2014/53/UE. Il testo completo della dichiarazione di conformità UE e il firmware del prodotto sono disponibili per il download dalla pagina del prodotto su www.dlink.com. D-Link DWR-953V2 User Manual 81 - D-Link DWR-953V2 | Product Manual 1 - Page 86
.com. D-Link Corporation täten vakuuttaa, että tämä tuote, lisävarusteet ja ohjelmisto ovat direktiivin 2014/53/EU vaatimusten mukaisia. Täydellinen EU-vaatimustenmukaisuusvakuutus samoin kuin tuotteen laiteohjelmisto ovat ladattavissa osoitteesta www.dlink.com. D-Link DWR-953V2 User Manual 82 - D-Link DWR-953V2 | Product Manual 1 - Page 87
/EU. Hela texten med EU-försäkran om överensstämmelse och produkt-firmware kan hämtas från produktsidan på www.dlink.com. Hér með lýsir D-Link Corporation því yfir að þessi vara, fylgihlutir og hugbúnaður eru outlet should be near the device and easily accessible. D-Link DWR-953V2 User Manual 83 - D-Link DWR-953V2 | Product Manual 1 - Page 88
will support DFS (Dynamic Frequency Selection) and TPC (Transmit Power Control) functionality as required when operating in 5 GHz band within the EU. • Please refer to the product manual or datasheet to , ob Ihr Gerät eine 2,4 GHz und / oder 5 GHz Verbindung nutzt. D-Link DWR-953V2 User Manual 84 - D-Link DWR-953V2 | Product Manual 1 - Page 89
mode Ad-hoc lorsqu'il fonctionne dans la bande de 5 GHz. Le mode l'UE. • Merci de vous référer au guide d'utilisation ou de la fiche technique afin de manual o la ficha de producto para comprobar si el producto utiliza las bandas inalámbricas de 2.4 GHz y/o la de 5 GHz. D-Link DWR-953V2 User Manual - D-Link DWR-953V2 | Product Manual 1 - Page 90
Dit toestel kan niet functioneren in Ad-hoc mode wanneer het gebruikt wordt in 5 GHz. Ad-hoc mode is directe peer-to-peer communicatie tussen twee de EU. • Raadpleeg de handleiding of de datasheet om te controleren of uw product gebruik maakt van 2.4 GHz en/of 5 GHz. D-Link DWR-953V2 User Manual 86 - D-Link DWR-953V2 | Product Manual 1 - Page 91
Do not attempt to service the product and never disassemble the product. For some products with a user replaceable battery, please read and follow the instructions in the user manual. • Do not und verwenden Sie dazu ausschließlich ein trockenes fusselfreies Tuch. D-Link DWR-953V2 User Manual 87 - D-Link DWR-953V2 | Product Manual 1 - Page 92
nunca. Para algunos productos con batería reemplazable por el usuario, lea y siga las instrucciones del manual de usuario. • No derrame comida o líquidos sobre el producto y nunca deje que caigan objetos red antes de limpiarlo y utilice solo un paño seco sin pelusa. D-Link DWR-953V2 User Manual 88 - D-Link DWR-953V2 | Product Manual 1 - Page 93
alcuni prodotti dotati di batteria sostituibile dall'utente, leggere e seguire le istruzioni riportate nel manuale dell'utente. • Non versare cibi o liquidi sul prodotto e non spingere mai alcun u het reinigt en gebruik uitsluitend een droge pluisvrije doek. D-Link DWR-953V2 User Manual 89 - D-Link DWR-953V2 | Product Manual 1 - Page 94
this manner you help to conserve the environment and protect human health. D-Link and the Environment At D-Link, we understand and are committed to reducing any impact our operations and products entsprechende Informationen im Internet unter www.dlinkgreen.com. D-Link DWR-953V2 User Manual 90 - D-Link DWR-953V2 | Product Manual 1 - Page 95
apagar o desenchufar los productos D-Link cuando no se estén utilizando. Al hacerlo, contribuirá a ahorrar energía y a reducir las emisiones de CO2. Para obtener más información acerca de nuestros productos y embalajes ecológicos, visite el sitio www.dlinkgreen.com. D-Link DWR-953V2 User Manual 91 - D-Link DWR-953V2 | Product Manual 1 - Page 96
Link producten uit te schakelen of uit de stekker te halen wanneer u ze niet gebruikt. Door dit te doen bespaart u energie en beperkt u de CO2-emissies. Breng een bezoek aan www.dlinkgreen.com voor meer informatie over onze milieuverantwoorde producten en verpakkingen. D-Link DWR-953V2 User Manual - D-Link DWR-953V2 | Product Manual 1 - Page 97
. Společnost D-Link doporučuje, abyste své výrobky značky D-Link vypnuli nebo vytáhli ze zásuvky vždy, když je nepoužíváte. Pomůžete tak šetřit energii a snížit emise CO2. Více informací o našich ekologických výrobcích a obalech najdete na adrese www.dlinkgreen.com. D-Link DWR-953V2 User Manual 93 - D-Link DWR-953V2 | Product Manual 1 - Page 98
at du alltid slår av eller frakobler D-Link-produkter når de ikke er i bruk. Ved å gjøre dette hjelper du å spare energi og å redusere CO2-utslipp. For mer informasjon angående våre miljøansvarlige produkter og forpakninger kan du gå til www.dlinkgreen.com. D-Link DWR-953V2 User Manual 94 - D-Link DWR-953V2 | Product Manual 1 - Page 99
D-Link-tuotteesi virtalähteestä tai sammutat ne aina, kun ne eivät ole käytössä. Toimimalla näin autat säästämään energiaa ja vähentämään hiilidioksiidipäästöjä. Lue lisää ympäristöystävällisistä D-Link-tuotteista ja pakkauksistamme osoitteesta www.dlinkgreen.com. D-Link DWR-953V2 User Manual 95 - D-Link DWR-953V2 | Product Manual 1 - Page 100
que desligue os seus produtos D-Link quando estes não se encontrarem em utilização. Com esta acção ajudará a poupar energia e reduzir as emissões de CO2. Para saber mais sobre os nossos produtos e embalagens responsáveis a nível ambiental visite www.dlinkgreen.com. D-Link DWR-953V2 User Manual 96
-
 1
1 -
 2
2 -
 3
3 -
 4
4 -
 5
5 -
 6
6 -
 7
7 -
8
-
9
-
10
-
11
-
12
-
13
-
14
-
15
-
16
-
17
-
18
-
19
-
20
-
21
-
22
-
23
-
24
-
25
-
26
-
27
-
28
-
29
-
30
-
31
-
32
-
33
-
34
-
35
-
36
-
37
-
38
-
39
-
40
-
41
-
42
-
43
-
44
-
45
-
46
-
47
-
48
-
49
-
50
-
51
-
52
-
53
-
54
-
55
-
56
-
57
-
58
-
59
-
60
-
61
-
62
-
63
-
64
-
65
-
66
-
67
-
68
-
69
-
70
-
71
-
72
-
73
-
74
-
75
-
76
-
77
-
78
-
79
-
80
-
81
-
82
-
83
-
84
-
85
-
86
-
87
-
88
-
89
-
90
-
91
-
92
-
93
-
94
-
95
-
96
-
97
-
98
-
99
-
100
 |
 |
Version 1.00 | 05/26/2021
User Manual
DWR-953V2
LTE Cat. 4 Wi-Fi AC1200 Router