D-Link DES-1005E Product Manual
D-Link DES-1005E Manual
 |
UPC - 790069333071
View all D-Link DES-1005E manuals
Add to My Manuals
Save this manual to your list of manuals |
D-Link DES-1005E manual content summary:
- D-Link DES-1005E | Product Manual - Page 1
- D-Link DES-1005E | Product Manual - Page 2
Manual Revisions Revision 1.0 1.1 Date February 16, 2010 May 18, 2010 Description DES-1005E - Hardware revision A1 Added Windows® 7 Support ENGLISH Trademarks D-Link and the D-Link energy and, if not installed and used in accordance with this user's guide, may cause harmful interference - D-Link DES-1005E | Product Manual - Page 3
13 Connecting the Switch 14 PC to Switch 14 Hub/Switch to DES-1005E 14 DES-1005E to Other Devices 14 Troubleshooting 15 Networking Basics 16 Check your IP address 16 Statically Assign an IP address 17 Glossary 18 Technical Specifications 23 Contacting Technical Support 25 Registration - D-Link DES-1005E | Product Manual - Page 4
your system components, and never operate the product in a wet environment. If the system gets wet, see the appropriate section in your troubleshooting guide or contact your trained service provider. • Do not push any objects into the openings of your system. Doing so can cause a fire or an electric - D-Link DES-1005E | Product Manual - Page 5
your system, be sure the voltage selection switch (if provided) on the power supply is set to match the power available at your location: - 115 volts (V)/60 hertz (Hz) in most of North and South America and some Far Eastern countries such as South Korea and Taiwan. - 100 V/50 Hz in eastern Japan - D-Link DES-1005E | Product Manual - Page 6
a static-sensitive component from its shipping carton, do not remove the component from the antistatic packing material until you are ready to install the component in your system. Just before unwrapping the antistatic packaging, be sure to discharge static electricity from your body. 2. When - D-Link DES-1005E | Product Manual - Page 7
D-Link DES-1005E 5-port Desktop Switch Warranty Card Wall Mount Kit Quick Install Guide Power Adapter ENGLISH Setup The setup of the DES-1005E can be performed using the following steps: • The power outlet should be within 1.82 meters (6 feet) of the Switch. • Visually inspect the DC power - D-Link DES-1005E | Product Manual - Page 8
of network hubs and bridges, which were characterized by higher latencies. Routers have also been used to segment local area networks, but the cost of a router, the setup and maintenance required, make routers relatively impractical. Today switches are an ideal solution to most kinds of local area - D-Link DES-1005E | Product Manual - Page 9
DES-1005E is a high performance switch designed specifically for environments where traffic on the network and the number of users increase continuously. • The DES-1005E, with its small, compact size, was specifically designed for small to mid-sized workgroups. The DES-1005E can be installed where - D-Link DES-1005E | Product Manual - Page 10
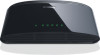
ENGLISH Hardware Overview Top Panel (LEDs) Power Indicator This green indicator light is on when the DES-1005E is receiving power; otherwise, it is off. Link/Act This LED indicator light is green when the port is connected to an Ethernet device and will blink as Ethernet data is transmitted or - D-Link DES-1005E | Product Manual - Page 11
to connect to the switch-just plug either a Crossover or Straight-Through CAT5 cable into any port. Power Jack: Power is supplied through an external DC power adapter. Check the technical specification section for information about the DC power input voltage. Since the DES-1005E does not require - D-Link DES-1005E | Product Manual - Page 12
Install the Switch on a sturdy, level surface that can support at least 3 kg (6.6 lbs.) of weight. Do not place heavy objects on the Switch. • The power outlet should be within 1.82 meters (6 feet) of the Switch. • Visually inspect the power cord and see that it is fully secured to the AC power port - D-Link DES-1005E | Product Manual - Page 13
ENGLISH Mounting the Switch on the Wall The DES-1005E can also be mounted on a wall. Two mounting slots are provided on the bottom of the switch for this purpose. Please make sure that the front panel is exposed in order to view the LEDs. Please refer to the illustration below: Mounting - D-Link DES-1005E | Product Manual - Page 14
cable, and the DES-1005E's conditions and connections. Hub/Switch to DES-1005E A hub (10 or 100BASE-TX) can be connected to the DES-1005E via a two any port of the hub to any port of the DES-1005E. DES-1005E to Other Devices The DES-1005E can be connected to another switch or other devices (routers, - D-Link DES-1005E | Product Manual - Page 15
to multiple computers. Another alternative is to contact your ISP and purchase extra IP addresses for each additional computer. 2. Does the DES-1005E switch have an uplink port? The DES-1005E has Auto-MDI ports which automatically sense the type of cable being used (e.g. Crossover or Straight - D-Link DES-1005E | Product Manual - Page 16
Basics Check your IP address After you install your new D-Link adapter or if you already have an Ethernet adapter installed on your computer, by default, the TCP/IP settings should be set to obtain an IP address from a DHCP server (i.e. router) automatically. To verify your IP address, please follow - D-Link DES-1005E | Product Manual - Page 17
Control Panel > Network Connections. Windows® 2000 - From the desktop, right-click My Network Places and select Properties. Step 2 Right network. Set Default Gateway the same as the LAN IP address of your router (192.168.0.1). Set Primary DNS the same as the LAN IP address of your router (192.168 - D-Link DES-1005E | Product Manual - Page 18
a maximum length of 10 kilometers. 100BASE-FX supports auto-negotiation, the link can self-detect its optimum operating setup. Backbone Port A port that does not learn device addresses, and that receives all frames with an unknown address. Backbone ports are normally used to connect the Switch - D-Link DES-1005E | Product Manual - Page 19
is 100Mbps. Baud Rate The switching speed of a line. Also known as line speed. BOOTP The BOOTP protocol allows you to automatically map an IP address to a given MAC address each time a device is started. In addition, the protocol can assign the subnet mask and default gateway to a device. Bridge - D-Link DES-1005E | Product Manual - Page 20
back at the transmit port of the connected end station. Prevents packet loss at a congested switch port. Forwarding The process of link. Half Duplex A system that allows packets to be transmitted and received, but not at the same time. Contrast with full duplex. IP Address Internet Protocol address - D-Link DES-1005E | Product Manual - Page 21
and management capabilities by addressing up to ten different groups of information. RPS Redundant Power System. A device that provides a backup source of power when connected to the Switch. Server Farm A cluster of servers in a centralized location serving a large user population. SLIP Serial Line - D-Link DES-1005E | Product Manual - Page 22
's destination address. The Switch learns the addresses associated with each switch port and builds tables based on this information to be used for the switching decision. TCP/IP A layered set of communications protocols providing Telnet terminal emulation, FTP file transfer, and other services for - D-Link DES-1005E | Product Manual - Page 23
• Star Network Cables • 10BASE-T: 2-pair UTP Cat. 3,4,5 (100 m), EIA/TIA- 568 100-ohm STP (100 m) • 100BASE-TX: 2-pair UTP Cat. 5 (100 m), EIA/TIA-568 100-ohm STP (100 m) Number of Ports • 5 x 10/100Mbps auto-negotiation, auto MDI-X ports DC inputs • DC 5V/1.2A Temperature • Operating: 0° ~ 50 - D-Link DES-1005E | Product Manual - Page 24
B, CE Class B Safety: • cUL + CB Transmission Method: • Store-and-forward RAM Buffer: • 64KB per device Filtering Address Table: • 2K entries per device Packet Filtering / Forwarding Rate: • 10Mbps Ethernet: 14,880/pps • 100Mbps Fast Ethernet: 148,800/pps MAC Address Learning: • Automatic update 24 - D-Link DES-1005E | Product Manual - Page 25
ready: • Model number of the product (e.g. DES-1005E) • Hardware Revision (located on the label on the bottom of the switch (e.g. rev A1)) • Serial Number (s/n number located on the label on the bottom of the switch) You can find software updates and user documentation on the D-Link website as well - D-Link DES-1005E | Product Manual - Page 26
ENGLISH Registration Product registration is entirely voluntary and failure to complete or return this form will not diminish your warranty rights. Version 1.1 May 18, 2010 26
-
 1
1 -
 2
2 -
 3
3 -
 4
4 -
 5
5 -
 6
6 -
 7
7 -
8
-
9
-
10
-
11
-
12
-
13
-
14
-
15
-
16
-
17
-
18
-
19
-
20
-
21
-
22
-
23
-
24
-
25
-
26
 |
 |
