D-Link DCS-6113 Product Manual
D-Link DCS-6113 Manual
 |
View all D-Link DCS-6113 manuals
Add to My Manuals
Save this manual to your list of manuals |
D-Link DCS-6113 manual content summary:
- D-Link DCS-6113 | Product Manual - Page 1
- D-Link DCS-6113 | Product Manual - Page 2
organization of such revisions or changes. Manual Revisions Revision 1.0 Date October 11, 2011 Description DCS-6112/6113 Revision A1 with firmware version 1.00 Trademarks D-Link and the D-Link logo are trademarks or registered trademarks of D-Link Corporation or its subsidiaries in the United - D-Link DCS-6113 | Product Manual - Page 3
29 System Overview 30 Video 31 Video Settings 31 Image Settings 34 Audio Settings 36 Day and Night Settings 37 D-Link DCS-6112 /6113 User Manual Network 38 IP Settings 38 Port and Access Name Settings 41 Dynamic DNS 44 HTTPS 45 Access List 47 Advanced Settings 49 Event Management - D-Link DCS-6113 | Product Manual - Page 4
Appendix A - Technical Specifications 76 Technical Specifications 76 Contacting Technical Support 78 Warranty 79 Registration 85 D-Link DCS-6112 /6113 User Manual 4 - D-Link DCS-6113 | Product Manual - Page 5
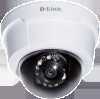
Product Overview Package Contents DCS-6112 /6113 Fixed Dome Network Camera FULL HD DAY & NIGHT Ver. 1.00(WW) DCS-3715 ©2010 D-Link Corporation/D-Link Systems, Inc. All Rights Reserved. User Manual and Software on CD-ROM Quick Install Guide Power Adapter AV/Power Cable CAT5 Ethernet Cable - D-Link DCS-6113 | Product Manual - Page 6
resolution: SVGA or XGA (1024x768 or above) • CPU: 1.7GHz or above (2.8GHz plus processor with 512MB memory and a 32MB video card is required for multiple camera viewing and recording in IP surveillance program) • An available Ethernet connection D-Link DCS-6112 /6113 User Manual 6 - D-Link DCS-6113 | Product Manual - Page 7
Product Overview Introduction D-Link DCS-6112/6113 are indoor fixed dome cameras equipped with industry-leading high definition (Full HD) megapixel resolution and H.264 compression that enable high-quality video footage to be recorded. The DCS-6112/6113 connects to a network to provide high-quality - D-Link DCS-6113 | Product Manual - Page 8
Features Full HD Surveillance DCS-6112/6113 provides Full HD industral standard 16:9 wide screen video for IP surveillance. To utilize the advantage of high resolution, the "viewing window" design can provide user a flexible settings to monitor multiple ROI(Region of Interest) by a single camera - D-Link DCS-6113 | Product Manual - Page 9
Product Overview Hardware Overview Dome Cover Plastic Housing D-Link DCS-6112 /6113 User Manual 9 - D-Link DCS-6113 | Product Manual - Page 10
video format 6: Ground of audio input 7: Audio output 8: Ground of audio output DC input / Video Output 1: Ground of Video out 2: Video output 3: Ground of DC input 4: DC 12V D-Link DCS-6112 /6113 User Manual Audio Input / Output Audio input/output connector for external speaker. Digital Input - D-Link DCS-6113 | Product Manual - Page 11
of supporting the weight of the camera. 2. camera with the plastic anchors. 5. The camera can be mounted with the cable routed through the ceiling, wall or from the side. 6. Insert the provided screws through the holes. Use a screwdriver to tighten and secure. D-Link DCS-6112 /6113 User Manual - D-Link DCS-6113 | Product Manual - Page 12
. Connect the supplied power cable from the camera to a power outlet. Connection with a PoE Switch If using a PoE switch, connect the network camera to the switch via an Ethernet cable, which will provide both power and data transmission over a single cable. D-Link DCS-6112 /6113 User Manual 12 - D-Link DCS-6113 | Product Manual - Page 13
Installation Configuration with Wizard Insert the DCS-6112/6113 CD into your computer's CD-ROM drive to begin the installation. If the Autorun function on the installation. After clicking Setup Wizard, the following window will open. Click Next to continue. D-Link DCS-6112 /6113 User Manual 13 - D-Link DCS-6113 | Product Manual - Page 14
Installation Click Yes to accept the License Agreement. To start the installation process, click Next. Note: The installation may take several minutes to finish. D-Link DCS-6112 /6113 User Manual 14 - D-Link DCS-6113 | Product Manual - Page 15
Installation Click Finish to complete the installation. Click on the D-Link Setup Wizard SE icon that was created in your Windows Start menu. Start > D-Link > Setup Wizard SE D-Link DCS-6112 /6113 User Manual 15 - D-Link DCS-6113 | Product Manual - Page 16
network camera's default static IP 192.168.0.20 will be displayed. Click the Wizard button to continue. Enter the Admin ID and password. When logging in for the first time, the default Admin ID is admin with the password left blank. Click Next to proceed to the next page. D-Link DCS-6112 /6113 User - D-Link DCS-6113 | Product Manual - Page 17
DHCP if your camera obtains an IP address automatically when it boots up. Select static IP if the camera will use the same IP address each time it is started. Click Next to proceed to the next page. Take a moment to confirm your settings and click Restart. D-Link DCS-6112 /6113 User Manual 17 - D-Link DCS-6113 | Product Manual - Page 18
and click the button labeled "Link" to access the web configuration. The Setup Wizard will automatically open your web browser to the IP address of the camera. Alternatively, you may manually open a browser and enter the IP address of the camera: 192.168.0.20 D-Link DCS-6112 /6113 User Manual 18 - D-Link DCS-6113 | Product Manual - Page 19
the password blank. Click OK to continue. This section shows your camera's live video. You can select your video profile and view or operate the camera. For additional information about web configuration, please refer to the user manual included on the CD-ROM or the D-Link website. D-Link DCS-6112 - D-Link DCS-6113 | Product Manual - Page 20
adjust the network camera's image until dome cover to the camera as the direction shown below. With a user friendly mechanism design, the dome cover cannot be attached if the angle does not fit. 4. Finally, make sure all parts of the camera are securely installed. D-Link DCS-6112 /6113 User Manual - D-Link DCS-6113 | Product Manual - Page 21
. D-ViewCam is a comprehensive management tool for IP surveillance. Insert the CD-ROM into the CD-ROM drive. Click "Install D-ViewCam Software" from menu, and select "D-ViewCam" to install the VMS software. Follow the Installation Wizard to install D-ViewCam. D-Link DCS-6112 /6113 User Manual 21 - D-Link DCS-6113 | Product Manual - Page 22
Installation Click Finish to complete the installation. To start D-ViewCam, select Start > All Programs > D-Link D-ViewCam > Main Console. For further detail operation about using D-ViewCam software, please refer to D-ViewCam Manual. D-Link DCS-6112 /6113 User Manual 22 - D-Link DCS-6113 | Product Manual - Page 23
page. This is the Live Video page which will allow you to view the camera's video feed and control basic camera functions using the icons on the screen. Please refer to the tables on the following pages for detailed information about the icons on this screen. D-Link DCS-6112 /6113 User Manual 23 - D-Link DCS-6113 | Product Manual - Page 24
Control. For more information about how to set up the viewing region of the current video stream, please refer to Video settings on page 31. D-Link DCS-6112 /6113 User Manual 24 - D-Link DCS-6113 | Product Manual - Page 25
: Auto Pan automatically scans an area horizontally. Select from the preset drop-down list to quickly move the camera to the desired preset position. Control Pan/Tilt/Zoom speed Pan Speed Control Tilt Speed Control Zoom Speed Control Digital PTZ Control Panel D-Link DCS-6112 /6113 User Manual 25 - D-Link DCS-6113 | Product Manual - Page 26
speaker that is connected to the network camera. Press again to un-mute the speaker. Full Screen Zoom ratio Click this button to switch to full screen mode. Press the "Esc" detailed information regarding camera setup and solve any problems you encounter. D-Link DCS-6112 /6113 User Manual 26 - D-Link DCS-6113 | Product Manual - Page 27
allows you to configure the basic protocol options for you camera. H.264/MPEG-4 Media Options Video and Audio can be packet loss will diminish image quality when bandwidth becomes restricted. If the network is protected by a firewall and it opens only HTTP port (80 Link DCS-6112 /6113 User Manual 27 - D-Link DCS-6113 | Product Manual - Page 28
the following options: System Overview Audio and Video - Video Settings, Audio Settings Network - IP Settings Event Management - Motion Detection, Tamper Detection PTZ Control - Digital PTZ System - User Settings, Device Settings, Time and Date, Maintenance D-Link DCS-6112 /6113 User Manual 28 - D-Link DCS-6113 | Product Manual - Page 29
*Day and Night Settings * function for DCS-6113 only Network - IP Settings, Port & Access Name Settings, Dynamic User Customization - Live Video Page Config, HTML Code Examples System - User Settings, Device Settings, Time and Date, Maintenance, Parameter List, Logs D-Link DCS-6112 /6113 User Manual - D-Link DCS-6113 | Product Manual - Page 30
Configuration System Overview The system overview page contains a summary of the camera's current settings. For more information about adjusting these settings, please consult the subsequent instructions found in this manual. D-Link DCS-6112 /6113 User Manual 30 - D-Link DCS-6113 | Product Manual - Page 31
utilization and video quality. Video Options Viewing Window: The camera supports multiple streams with frame size ranging from 176 x 144 to which captures the full view of the video. Users can also define the "Output Frame Rate" (size of the live view window). D-Link DCS-6112 /6113 User Manual 31 - D-Link DCS-6113 | Product Manual - Page 32
too bright to recognize. It allows the camera to adjust to the best light conditions manually enter a range of time if you choose Schedule mode. 3. Configure Exposure setting in the second column. 4. Click Save to enable the setting and click Close to exit the page. D-Link DCS-6112 /6113 User Manual - D-Link DCS-6113 | Product Manual - Page 33
manually enter a value. • Fixed quality: To optimize the bandwidth utilization and video quality. The video quality can be adjusted to the following setting: Medium, Standard, Good, Detailed and Excellent. You can also select Customize and manually enter a value. D-Link DCS-6112 /6113 User Manual - D-Link DCS-6113 | Product Manual - Page 34
Fixed to confirm the setting while the white balance is being measured. 4. Click Save to enable the new setting. Brightness: Adjust the image brightness level, which ranges from -5 to +5 Saturation: Adjust the image saturation level, which ranges from -5 to +5 D-Link DCS-6112 /6113 User Manual - D-Link DCS-6113 | Product Manual - Page 35
• The "Sensor Settings" and "Image Settings" share the same *Profile 2 settings. * function for DCS-6113 only. Privacy Mask: In this page, you can block out certain sensitive zones for privacy concerns. To set 'x' at the upper right-hand corner of the window. D-Link DCS-6112 /6113 User Manual 35 - D-Link DCS-6113 | Product Manual - Page 36
from the drop-down list. Higher bit rate means higher audio quality but it takes more network bandwidth to transmit. GSM-AMR: A standard adapted audio codec by the 3GPP video (3rd Generation higher audio quality but it takes more network bandwidth to transmit. D-Link DCS-6112 /6113 User Manual 36 - D-Link DCS-6113 | Product Manual - Page 37
only when the exposure mode is set to Auto. • Day Mode: In this mode the camera switches on the IR cut filter at all times, which will block the infrared light from LED automatically switches on at night. By default the LED automatically switches on at night. D-Link DCS-6112 /6113 User Manual 37 - D-Link DCS-6113 | Product Manual - Page 38
Server (DNS) that backups the Primary DNS. Primary WINS Server: The primary WINS server that maintains the database of computer name and IP address. Secondary WINS Server: The secondary WINS server that maintains the database of computer name and IP address. D-Link DCS-6112 /6113 User Manual 38 - D-Link DCS-6113 | Product Manual - Page 39
FTP server. 4. Go to Setup > Network > IP Settings. Select PPPoE and enter the user name and password provided by your ISP. Click Save to enable the setting. 5. The camera will reboot. 6. Disconnect the power to the camera. Remove it from the LAN environment. D-Link DCS-6112 /6113 User Manual 39 - D-Link DCS-6113 | Product Manual - Page 40
. 3. Press Enter on the keyboard or click Refresh button to refresh the webpage. Manually Setup the IP Address: Select this option to manually configure IPv6 setting if your network environment does not have DHCPv6 server and advertisements-enabled routers. D-Link DCS-6112 /6113 User Manual 40 - D-Link DCS-6113 | Product Manual - Page 41
HTTP port and secondary HTTP port can be used to access the Network Camera For example, when the HTTP port is set to 80 and the secondary HTTP port is set to 8080. You can login camera as example link as below: http://192.168.0.20 or http://192.168.0.20:8080 D-Link DCS-6112 /6113 User Manual 41 - D-Link DCS-6113 | Product Manual - Page 42
, the password is sent in plain text format, but there can be potential risks of it being intercepted. If digest authentication is selected, user credentials are encrypted using MD5 algorithm, thus providing better protection against unauthorized access. D-Link DCS-6112 /6113 User Manual 42 - D-Link DCS-6113 | Product Manual - Page 43
~ 5: This Network Camera supports multiple streams simultaneously. The access name is used to differentiate the streaming source. If you want to use an RTSP player to access the Network Camera, you have to tells the router the range a packet can be forwarded. D-Link DCS-6112 /6113 User Manual 43 - D-Link DCS-6113 | Product Manual - Page 44
Name: Enter the host name of the DDNS server. Username: Enter your username or e-mail used to connect to the DDNS Password: Enter your password used to connect to the DDNS server. Status: Indicate the connection status, automatically determined by the system. D-Link DCS-6112 /6113 User Manual 44 - D-Link DCS-6113 | Product Manual - Page 45
the Save button. Create and Install Certificate Method Before using HTTPS for communication with the camera, a certificate must be created first. There are three ways to create and install You can click Property to see detailed information about the certificate. D-Link DCS-6112 /6113 User Manual 45 - D-Link DCS-6113 | Product Manual - Page 46
certificate request. 4. Look for a trusted certificate authority that issues digital certificates. Enroll the camera. Wait for the certificate authority to issue a SSL certificate. Click Browse... to search for Save. Then click Remove to erase the certificate. D-Link DCS-6112 /6113 User Manual 46 - D-Link DCS-6113 | Product Manual - Page 47
the selected connections will only be disconnected temporarily and will automatically try to re-link again (IE Explore or Quick Time Player). If you want to enable the denied list, please select Enable access list filtering and click Save in the first column. D-Link DCS-6112 /6113 User Manual 47 - D-Link DCS-6113 | Product Manual - Page 48
List (This rule is only applied to IPv4). Administrator IP address Always allow the IP address to access this device: You can select this item and add the Administrator's IP address in this field to make sure the Administrator can always connect to the device. D-Link DCS-6112 /6113 User Manual 48 - D-Link DCS-6113 | Product Manual - Page 49
least 8 characters). IEEE 802.1x Enable this function if your network environment uses IEEE 802.1x which is a port-based network access control. The network devices, intermediary switch/access point/hub, and RADIUS server must support and enable 802.1x setting. D-Link DCS-6112 /6113 User Manual 49 - D-Link DCS-6113 | Product Manual - Page 50
of a QoS-aware network: The ability to prioritize traffic and guarantee a certain level of performance to the data flow. The ability to control the amount of bandwidth each application may use, and thus provide higher reliability and stability on the network. D-Link DCS-6112 /6113 User Manual 50 - D-Link DCS-6113 | Product Manual - Page 51
by adding a field to the IP header, called the DSCP (Differentiated Services Code Point). This is a 6- network node classify packets according to their DSCP value and give them a particular forwarding treatment. For example, how much bandwidth should be reserved. D-Link DCS-6112 /6113 User Manual - D-Link DCS-6113 | Product Manual - Page 52
network. Quality of service guarantees are important if the network capacity is insufficient, especially for real-time streaming multimedia applications. Quality can be defined as, for instance, a maintained level of bit rate, low latency, no packet dropping, etc. D-Link DCS-6112 /6113 User Manual - D-Link DCS-6113 | Product Manual - Page 53
: You can configure two sets of sensor setting: one for normal situations(Profile1), the other for special situations(Profile2), such as day/night/schedule mode. D-Link DCS-6112 /6113 User Manual 53 - D-Link DCS-6113 | Product Manual - Page 54
trigger threshold. Set up the event source as Camera Tampering Detection on Event Settings > Server Settings (how to send alarm message)/ Media Settings (send what type of alarm message)/Event Settings/. Please refer to Event settings for detailed information. D-Link DCS-6112 /6113 User Manual 54 - D-Link DCS-6113 | Product Manual - Page 55
Configuration DI and DO Network camera provides a general I/O terminal block with one digital input and a diversity of external alarm devices to the camera such as IR-Sensors and alarm relays. Once triggered images will be taken and e-mailed. DI/DO Schematics D-Link DCS-6112 /6113 User Manual 55 - D-Link DCS-6113 | Product Manual - Page 56
camera Network IP address of the e-mail server. • User name: Enter the user name of the e-mail account if necessary. • Password: Enter the password of the e-mail account if necessary. • Server port: The default mail server port is set to 25. You can also manually Link DCS-6112 /6113 User Manual 56 - D-Link DCS-6113 | Product Manual - Page 57
: Select to send the media files to a network storage location when a trigger is activated. Click Save to enable the setting, then click Close to exit the page. When completed, the new server settings will automatically be displayed on the Event Settings page. D-Link DCS-6112 /6113 User Manual 57 - D-Link DCS-6113 | Product Manual - Page 58
trigger is activated. Source: Select to take snapshots from stream 1 ~ 4. Send pre-event images: The camera has a buffer area. It temporarily holds data up to a certain limit. Enter a number to decide : Select to send video clips when a trigger is activated. D-Link DCS-6112 /6113 User Manual 58 - D-Link DCS-6113 | Product Manual - Page 59
if pre-event recording is set to 5 seconds and the maximum duration is set to 10 seconds, the camera continues to record for another 4 seconds after a trigger is activated. Maximum file size: Specify the maximum settings will appear on the Event Settings page. D-Link DCS-6112 /6113 User Manual 59 - D-Link DCS-6113 | Product Manual - Page 60
after * seconds: Select the delay time before selecting the next event. It is being used for both events of motion detection and digital input trigger. D-Link DCS-6112 /6113 User Manual 60 - D-Link DCS-6113 | Product Manual - Page 61
Camera tampering detection: This option allows the camera to trigger when the camera detects that it is being tampered with. To enable this function, you need to configure the Tamper detection option first. Please refer to Tamper detection for detailed information. D-Link DCS-6112 /6113 User Manual - D-Link DCS-6113 | Product Manual - Page 62
, it is necessary to configure the server and media setting so that the camera will know what action to take (i.e. the server to send the media files to) when a trigger is activated. • Add Server: same as Server Settings • Add Media: same as Media Settings D-Link DCS-6112 /6113 User Manual 62 - D-Link DCS-6113 | Product Manual - Page 63
2. Select the recording start and end times in 24-hr time format. Destination: You can select the network storage or local SD card that was set up for the recorded video files. Capacity: You can choose either that will be appended to the front of the file name. D-Link DCS-6112 /6113 User Manual 63 - D-Link DCS-6113 | Product Manual - Page 64
recording, it will send the recorded files to the Network Storage. The new recording name will appear in the drop-down list on the recording page. To remove a recording setting from the list, select a recording name from the drop-down list and click Delete. D-Link DCS-6112 /6113 User Manual 64 - D-Link DCS-6113 | Product Manual - Page 65
Configuration Local Storage This section explains how to manage the local storage on the Network Camera. Here you can view SD card status, search for recorded files to playback, and Locked. Click up and down arrow to sort the search results in either direction. D-Link DCS-6112 /6113 User Manual 65 - D-Link DCS-6113 | Product Manual - Page 66
Digital PTZ You can set a total of 20 preset positions and select preset positions for the camera to patrol. Please follow the steps below to preset a position: 1. Adjust the shooting or Down to rearrange the patrol order. 7. Click Save to enable the setting. D-Link DCS-6112 /6113 User Manual 66 - D-Link DCS-6113 | Product Manual - Page 67
logo from your files. 3. Click Upload to replace the existing logo with a new one. 4. Enter a website link if necessary. 5. Click Save to enable the setting. Background: You can change the color of your Live Video the title at the top of your Live Video page. D-Link DCS-6112 /6113 User Manual 67 - D-Link DCS-6113 | Product Manual - Page 68
user client use other browser, then the example code can only support MJPEG stream. Still Image Format: • Refresh interval second: If user only need to embedded still image in the browser, please use this option and setup the refresh interval of the still image. D-Link DCS-6112 /6113 User Manual - D-Link DCS-6113 | Product Manual - Page 69
. Username: Enter a username for the new account. Password: Enter a password for the new account. Privilege: Select the access rights for the new user. Manage user: Manage the accounts for existing users. Authentication: The access rights for existing users. D-Link DCS-6112 /6113 User Manual 69 - D-Link DCS-6113 | Product Manual - Page 70
the LED next to the lens. This will prevent anyone from observing the operation of the network camera. Camera Name: Create a unique name for your camera and you can access the camera using this name in your web-browser. For example: http://CAMERA (by default). D-Link DCS-6112 /6113 User Manual 70 - D-Link DCS-6113 | Product Manual - Page 71
server. NTP Server: Network Time Protocol (NTP) synchronizes the network camera with an Internet time manually: This option allows you to set the time and date manually. Copy Your Computer's Time Setting: This will synchronize the time information from your PC. D-Link DCS-6112 /6113 User Manual - D-Link DCS-6113 | Product Manual - Page 72
how to restore the camera to factory default, upgrade firmware version, etc. Reboot: This feature allows you to reboot the camera, which takes about to export language strings. DCS-6112 /6113 provides 5 languages: English, Deutsch, Español, Français, Italiano. D-Link DCS-6112 /6113 User Manual 72 - D-Link DCS-6113 | Product Manual - Page 73
specify the firmware file. 3. Click Upgrade. The camera starts to upgrade and will reboot automatically when the upgrade completes. If the upgrade is successful, you will see "Reboot system now!! This connection will close". After that, re-access the camera. D-Link DCS-6112 /6113 User Manual 73 - D-Link DCS-6113 | Product Manual - Page 74
Configuration Parameter List The Parameters List page lists the entire system's parameters in alphabetical order. If you need technical assistance, please provide the information listed on this page. D-Link DCS-6112 /6113 User Manual 74 - D-Link DCS-6113 | Product Manual - Page 75
the remote server to receive system log messages from the camera. Be sure to note the IP address of the remote server. Follow the steps below to set up the remote system log is stored in the camera's buffer area and will be overwritten when reaching a certain limit. D-Link DCS-6112 /6113 User Manual 75 - D-Link DCS-6113 | Product Manual - Page 76
Technical Specifications Camera Network System Integration Hardware Profile Image Features ƒƒ 1/2.7" Full HD progressive megapixel CMOS sensor ƒƒ Fixed lens, 4 mm F1.5 with 77.4 degree horizontal viewing angle ƒƒ Digital Zoom 16X ƒƒ 10 meter IR illumination distance (DCS-6113) ƒƒ Configurable - D-Link DCS-6113 | Product Manual - Page 77
-0 to 40 ˚C (32 to 104 ˚F) Storage Temperature -20 to 70 ˚C (-4 to 158 ˚F) Humidity 90% non-condensing Weight 466 g (1.03 lbs) (DCS-6112) 472 g (1.04 lbs) (DCS-6113) Certifications CE (Class A), CE LVD (EN60965-1), FCC (Class A), ICES-003, C-Tick D-Link DCS-6112 /6113 User Manual 77 - D-Link DCS-6113 | Product Manual - Page 78
questions and answers to technical issues. For customers within the United States: Phone Support: (877) 354-6555 Internet Support: http://support.dlink.com For customers within Canada: Phone Support: (877) 354-6560 Internet Support: http://support.dlink.ca D-Link DCS-6112 /6113 User Manual 78 - D-Link DCS-6113 | Product Manual - Page 79
defective Hardware will be refunded by D-Link upon return to D-Link of the defective Hardware. All Hardware or part thereof that is replaced by D-Link, or for which the purchase price is refunded, shall become the property of D-Link upon replacement or refund. D-Link DCS-6112 /6113 User Manual 79 - D-Link DCS-6113 | Product Manual - Page 80
price paid that is attributable to the Software. Except as otherwise agreed by D-Link The customer must obtain a Case ID Number from D-Link Technical Support (USA 1-877-453-5465 or Canada 1-800-361 dlink.com/ (USA only) or https://rma.dlink.ca (Canada only). D-Link DCS-6112 /6113 User Manual 80 - D-Link DCS-6113 | Product Manual - Page 81
or services provided by anyone other than D-Link; and Products that have been purchased from inventory clearance or liquidation sales or other sales in which D-Link, the sellers, or the liquidators expressly disclaim their warranty obligation pertaining to the product. D-Link DCS-6112 /6113 User - D-Link DCS-6113 | Product Manual - Page 82
an Authorized D-Link Service Office. Improper LINK UNDER THIS WARRANTY IS LIMITED TO THE PURCHASE PRICE Link is a registered trademark of D-Link Corporation/D-Link Systems, Inc. Other trademarks or registered trademarks are the property of their respective owners. D-Link DCS-6112 /6113 User Manual - D-Link DCS-6113 | Product Manual - Page 83
radiate radio frequency energy and, if not installed and used in accordance with the instructions, may cause harmful interference to radio communication. However, there is no guarantee 5.25GHz frequency range, then it is restricted in indoor environment only. D-Link DCS-6112 /6113 User Manual 83 - D-Link DCS-6113 | Product Manual - Page 84
country dependent and are firmware programmed at the factory to match the intended destination. The firmware setting is not accessible by the end user. For detailed warranty per regulations of Industry Canada. The required antenna impedance is 50 ohms. D-Link DCS-6112 /6113 User Manual 84 - D-Link DCS-6113 | Product Manual - Page 85
Registration Registration Product registration is entirely voluntary and failure to complete or return this form will not diminish your warranty rights. Version 1.0 October 11, 2011 D-Link DCS-6112 /6113 User Manual 85
-
 1
1 -
 2
2 -
 3
3 -
 4
4 -
 5
5 -
 6
6 -
 7
7 -
8
-
9
-
10
-
11
-
12
-
13
-
14
-
15
-
16
-
17
-
18
-
19
-
20
-
21
-
22
-
23
-
24
-
25
-
26
-
27
-
28
-
29
-
30
-
31
-
32
-
33
-
34
-
35
-
36
-
37
-
38
-
39
-
40
-
41
-
42
-
43
-
44
-
45
-
46
-
47
-
48
-
49
-
50
-
51
-
52
-
53
-
54
-
55
-
56
-
57
-
58
-
59
-
60
-
61
-
62
-
63
-
64
-
65
-
66
-
67
-
68
-
69
-
70
-
71
-
72
-
73
-
74
-
75
-
76
-
77
-
78
-
79
-
80
-
81
-
82
-
83
-
84
-
85
 |
 |
