D-Link DCS-4603 User Manual
D-Link DCS-4603 Manual
 |
View all D-Link DCS-4603 manuals
Add to My Manuals
Save this manual to your list of manuals |
D-Link DCS-4603 manual content summary:
- D-Link DCS-4603 | User Manual - Page 1
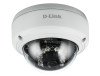
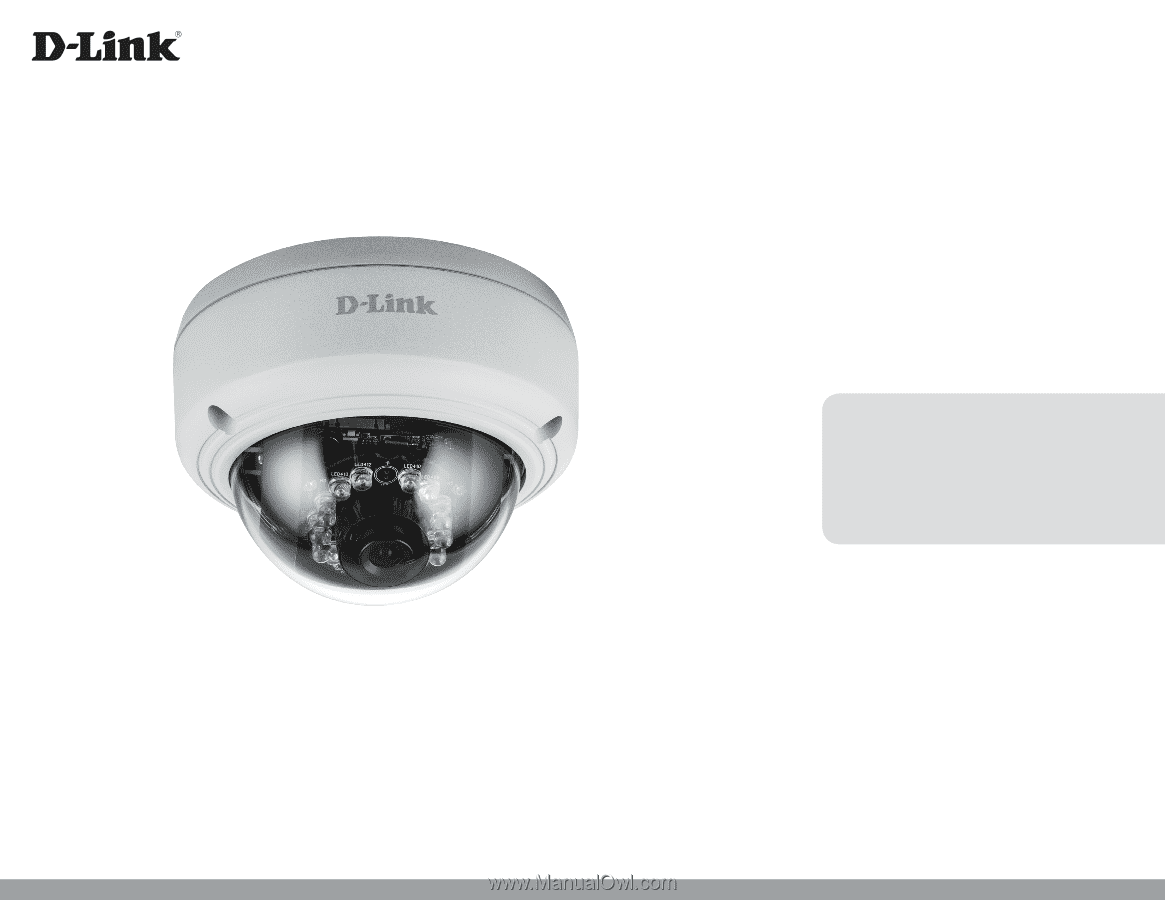
Version 1.02 | 06/25/2019 User Manual Vigilance Full HD PoE Dome Camera DCS-4603 - D-Link DCS-4603 | User Manual - Page 2
as our services and websites develop and change. Revision 1.00 1.01 1.02 Manual Revisions Date 07/13/2016 07/13/2016 06/27/2019 Description DCS-4603 Revision A1 with firmware version 1.00 Add DCS-37-3 optional bracket Modify function description of event trigger settings Trademarks D-Link and - D-Link DCS-4603 | User Manual - Page 3
Time and Date 36 Event Setup 37 Advanced 44 ICR and IR 44 HTTPS 45 Access List 46 Maintenance 47 Device Management 47 System 48 Firmware Upgrade 49 Status 50 Device Info 50 Logs 51 Help 52 Technical Specifications 53 Regulatory Information 56 D-Link DCS-4603 User Manual 3 - D-Link DCS-4603 | User Manual - Page 4
User Manual and software Quick Installation Guide If any of the above items are missing, please contact your reseller. Safety Notice: Installation and servicing should be done by certified technicians so as to conform to all local codes and prevent voiding your warranty. D-Link DCS-4603 User Manual - D-Link DCS-4603 | User Manual - Page 5
The built-in removable IR-cut filter and IR LEDs give the DCS-4603 the capability to view up to 20M at night. The DCS-4603 also incorporates Power over Ethernet (PoE), allowing it to be easily -based network with an available 802.3af Power over Ethernet (PoE) port D-Link DCS-4603 User Manual 5 - D-Link DCS-4603 | User Manual - Page 6
via Intranet or Internet. Other features include image monitoring, recording images to a hard drive, viewing up to 32 cameras on one screen, and taking snapshots. D-Link DCS-4603 User Manual 6 - D-Link DCS-4603 | User Manual - Page 7
Inner Cover Covers the camera components 5 Reset Button Press and hold for 10 seconds to reset camera back to the factory default settings 6 IR LEDs Provide illumination for low-light environments 7 Tilt Adjustment Screw Can be loosened to adjust camera angle D-Link DCS-4603 User Manual 7 - D-Link DCS-4603 | User Manual - Page 8
Section 1: Product Overview 1 2 1 Power Connector Connects to an optional 12 V / 1.5 A power adapter (not included) 2 Ethernet Jack RJ-45 connector for Ethernet which can also be used to power the camera using Power over Ethernet (PoE) D-Link DCS-4603 User Manual 8 - D-Link DCS-4603 | User Manual - Page 9
cables through the hole. Step 2 Use the included wrench to loosen the 3 screws on the top of the camera, then lift the camera cover off. D-Link DCS-4603 User Manual 9 - D-Link DCS-4603 | User Manual - Page 10
camera to the wall or ceiling. If you are running the camera cables out the side of the camera, guide the camera cables through the cable channel on the base. Step 4 Connect the power and Ethernet cables, or just the Ethernet cable if you are using a PoE connection. D-Link DCS-4603 User Manual 10 - D-Link DCS-4603 | User Manual - Page 11
stops when you are adjusting it, do not attempt to rotate or tilt the camera any further in that direction. Step 6 Reattach the camera cover. D-Link DCS-4603 User Manual 11 - D-Link DCS-4603 | User Manual - Page 12
to mount the DCS-37-1 to the wall. Step 3 Remove the cover from the camera. Pass the camera connectors through the back or bottom cable channel on the DCS-37-1. Use the provided screws to mount the camera to the DCS-37-1 using the set of mounting holes marked A. D-Link DCS-4603 User Manual 12 - D-Link DCS-4603 | User Manual - Page 13
the camera cover. If you are passing the camera cables through the wall, place the rubber stopper into the bottom cable channel to seal it. D-Link DCS-4603 User Manual 13 - D-Link DCS-4603 | User Manual - Page 14
-2 Mount (optional) To mount the camera with the DCS-37-2 mount, follow the instructions below. Step 1 Place the DCS-37-2 mounting sticker in the desired location, then use provided screws to mount the camera to the DCS-37-2 using the set of mounting holes marked A. D-Link DCS-4603 User Manual 14 - D-Link DCS-4603 | User Manual - Page 15
the camera cover. If you are passing the camera cables through the wall, place the rubber stopper into the bottom cable channel to seal it. D-Link DCS-4603 User Manual 15 - D-Link DCS-4603 | User Manual - Page 16
Use the provided screws to mount the camera to the DCS-37-3 using the set of mounting holes marked A. Step 4 Remove the inner cover and adjust the angle and rotation of the camera as desired, then put the inner cover back in place. Step 5 Attach the camera cover. D-Link DCS-4603 User Manual 16 - D-Link DCS-4603 | User Manual - Page 17
, click the Start button and type D:\autorun.exe (where D: represents the drive letter of your CD-ROM drive) and press Enter. Step 2 Click on the D-Link Setup Wizard SE icon that was created in your Windows Start menu (Start > D-Link > Setup Wizard SE). D-Link DCS-4603 User Manual 17 - D-Link DCS-4603 | User Manual - Page 18
to change the admin ID and password for the camera, and enter the new ID and password you wish to use. Click Next to continue. D-Link DCS-4603 User Manual 18 - D-Link DCS-4603 | User Manual - Page 19
Select DHCP if your camera obtains an IP address automatically from a DHCP server such as a router. Select Static IP if you want to manually enter the IP settings for the camera. Click Next to continue. Step 6 Take a moment to confirm your settings and click Restart. D-Link DCS-4603 User Manual 19 - D-Link DCS-4603 | User Manual - Page 20
D-Link Setup Wizard SE icon that was created in your Windows Start menu (Start > D-Link > Setup Wizard SE). Step 2 Select the camera and click Link to access the web configuration. The Setup Wizard will automatically open your web browser to the IP address of the camera. D-Link DCS-4603 User Manual - D-Link DCS-4603 | User Manual - Page 21
Section 3: Configuration Step 3 Enter admin as the default username and leave the password blank. Click OK to continue. Step 4 This section displays your camera's live video. You can select your video profile and view or operate the camera. D-Link DCS-4603 User Manual 21 - D-Link DCS-4603 | User Manual - Page 22
folder to save snapshots and video clips to. Digital Zoom Enable/disable digital zoom. Drag the slider to zoom in and out of the image. D-Link DCS-4603 User Manual 22 - D-Link DCS-4603 | User Manual - Page 23
quickly configure your Network Camera's motion detection settings, click Motion Detection Setup Wizard. If you want to enter your settings without running the wizard, click Manual Motion Detection Setup and skip to Motion Detection on page 35. D-Link DCS-4603 User Manual 23 - D-Link DCS-4603 | User Manual - Page 24
Section 3: Configuration Internet Connection Setup Wizard This wizard will guide you through a step-by-step process to configure your new D-Link Camera and connect the camera to the internet. Click Next and enter your user name and password. Click Next to continue. D-Link DCS-4603 User Manual 24 - D-Link DCS-4603 | User Manual - Page 25
address. Please write down all of this information as you will need it in order to access your camera. Click Apply to save your settings. D-Link DCS-4603 User Manual 25 - D-Link DCS-4603 | User Manual - Page 26
Section 3: Configuration Motion Detection Setup Wizard This wizard will guide you through a step-by-step process to configure your camera's motion detection functions. Click Next the day and hours. You may also choose to always record whenever motion is detected. D-Link DCS-4603 User Manual 26 - D-Link DCS-4603 | User Manual - Page 27
Motion Detection Wizard. Please verify your settings and click Apply to save them. Please wait a few moments while the camera saves your settings and restarts. D-Link DCS-4603 User Manual 27 - D-Link DCS-4603 | User Manual - Page 28
name server to backup the Primary DNS. Enable UPnP Enabling this setting allows your camera to be configured as a UPnP device Presentation: on your network. D-Link DCS-4603 User Manual 28 - D-Link DCS-4603 | User Manual - Page 29
Enabling QoS allows you to specify a traffic priority policy to ensure a consistent Quality of Service during busy periods. If the Network Camera is connected to a router that itself implements QoS, the router's settings will override the QoS settings of the camera. D-Link DCS-4603 User Manual 29 - D-Link DCS-4603 | User Manual - Page 30
Section 3: Configuration Enable The DCS-4603 allows you to multicast each of the available streams via a Multicast for group address and specify the TTL Bonjour: network and visible to Apple devices. Bonjour Name: Enter the name to identify this camera on Bonjour. D-Link DCS-4603 User Manual 30 - D-Link DCS-4603 | User Manual - Page 31
of an IP address. To do this, you will need to have an account with one of the DDNS services listed in the drop-down box on this page. After making any changes, click the Save Settings button to in hours. Status: This shows the current status of your DDNS updates. D-Link DCS-4603 User Manual 31 - D-Link DCS-4603 | User Manual - Page 32
following menu options: • Disable All: Disables all mask areas • Enable All: Enables all mask areas • Reset All: Clears all mask areas. Mirror: This will mirror the image horizontally. Flip: This will flip maximum amount of gain to apply to brighten the picture. D-Link DCS-4603 User Manual 32 - D-Link DCS-4603 | User Manual - Page 33
objects that may appear dark due to strong backlighting conditions during the daytime. Higher WDR levels will make it easier to see objects in shadows. Reset Default: Click this button to reset the image settings to the factory defaults. D-Link DCS-4603 User Manual 33 - D-Link DCS-4603 | User Manual - Page 34
video quality. Fixed quality: Select the image quality level for the camera to try to maintain. High quality levels will result in increased bit rates. D-Link DCS-4603 User Manual 34 - D-Link DCS-4603 | User Manual - Page 35
detection area over the entire screen. Clear All: Clears any motion detection areas that have been drawn. Restore: Restores the previously specified motion detection areas. D-Link DCS-4603 User Manual 35 - D-Link DCS-4603 | User Manual - Page 36
from your DHCP server. Set the Date If Synchronize NTP Server is disabled, you can set the date and time and Time manually. You can also click the Copy Your Computer's Time Settings Manually: button to automatically copy the date and time of the PC you are using. D-Link DCS-4603 User Manual 36 - D-Link DCS-4603 | User Manual - Page 37
Section 3: Configuration Event Setup The DCS-4603 has a versatile Event system that lets you configure the camera to perform certain actions when an event System reboot Action Media (what to send) ex. Snapshot, Video Clips Server (where to send) ex. Email, FTP D-Link DCS-4603 User Manual 37 - D-Link DCS-4603 | User Manual - Page 38
device for your server, select this and Storage: enter its settings here. You can only specify a network storage device for one of your server entries. D-Link DCS-4603 User Manual 38 - D-Link DCS-4603 | User Manual - Page 39
four, a total of 9 images are generated after a trigger is activated. 1 pic. 2 pic. 3 pic. 4 pic. 5 pic. 6 pic. 7 pic. 8 pic. 9 pic. The moment the trigger is activated. D-Link DCS-4603 User Manual 39 - D-Link DCS-4603 | User Manual - Page 40
set the media type to system logs. This will save the event to the camera system log, but will not record any snapshots or video. D-Link DCS-4603 User Manual 40 - D-Link DCS-4603 | User Manual - Page 41
this event. Select which days to Schedule: monitor for this event, then select Always or enter the time interval to monitor for the specified event. D-Link DCS-4603 User Manual 41 - D-Link DCS-4603 | User Manual - Page 42
folder as recording files. Size of each file If this is selected, files will be separated based on the file size you specify. for recording: D-Link DCS-4603 User Manual 42 - D-Link DCS-4603 | User Manual - Page 43
Section 3: Configuration Time of If this is selected, files will be separated based on the maximum length you each file for specify. recording: File Name The prefix name will be added to the file name of the recording file(s). Prefix: D-Link DCS-4603 User Manual 43 - D-Link DCS-4603 | User Manual - Page 44
when the ICR filter is disabled (night mode). Schedule: The IR light will turn on or off according to the schedule that you specify below. D-Link DCS-4603 User Manual 44 - D-Link DCS-4603 | User Manual - Page 45
HTTPS service. manually • Create a certificate request and install Status: Displays the status of the certificate. Note: The certificate cannot be removed while HTTPS is still enabled. To remove the certificate, you must first uncheck Enable HTTPS secure connection. D-Link DCS-4603 User Manual - D-Link DCS-4603 | User Manual - Page 46
Section 3: Configuration Access List Here you can set access permissions for users to view your DCS-4603. Allow list: The list of IP addresses that have access rights to the camera. Note: in the Deny List will be denied access, even if they are also in the Allow List. D-Link DCS-4603 User Manual 46 - D-Link DCS-4603 | User Manual - Page 47
will be shown on the OSD when it is enabled. LED: You may specify whether or not to illuminate the status LED on the camera. D-Link DCS-4603 User Manual 47 - D-Link DCS-4603 | User Manual - Page 48
Hard pre-defined settings to your camera by clicking Load Configuration. Drive: Restore You may reset your camera and restore the factory settings by clicking to Factory Restore Factory Defaults. Defaults: the days and time you want the Reboot: camera to reboot on. D-Link DCS-4603 User Manual 48 - D-Link DCS-4603 | User Manual - Page 49
the firmware. Current Displays the detected firmware version. Firmware Version: Current Displays the camera model name. Product Name: File Path: Select a firmware file to use on your hard drive by clicking Browse. Upload: Uploads the selected firmware to your camera. D-Link DCS-4603 User Manual 49 - D-Link DCS-4603 | User Manual - Page 50
Section 3: Configuration Status Device Info This page displays detailed information about your device and network connection. D-Link DCS-4603 User Manual 50 - D-Link DCS-4603 | User Manual - Page 51
Section 3: Configuration Logs This page displays the log information of your camera. You may download the information by clicking Download. You may also click Clear to delete the saved log information. D-Link DCS-4603 User Manual 51 - D-Link DCS-4603 | User Manual - Page 52
Section 3: Configuration Help This page provides helpful information regarding camera operation. D-Link DCS-4603 User Manual 52 - D-Link DCS-4603 | User Manual - Page 53
, 1280 x 960, 900 x 720, 800 x 592, 640 x 480 up to 30 fps • Supports 802.3af PoE (Class 2) • HTTP/HTTPS • Samba client • PPPoE • UPnP port forwarding • RTP/RTSP/RTCP • IP filtering • Multicast • CoS • QoS/DSCP • SNMP • ONVIF compliant • HTTP and RTSP authentication D-Link DCS-4603 User Manual 53 - D-Link DCS-4603 | User Manual - Page 54
• Protocol: Standard TCP/IP • Supports all management functions provided in web interface • Scheduled motion triggered, or manual recording options • Output: 12 V DC 1.5 A • Storage: -20 to 70 °C (-4 to 158 °F) • Storage: 5% to 95% non-condensing • FCC • C-Tick D-Link DCS-4603 User Manual 54 - D-Link DCS-4603 | User Manual - Page 55
Appendix A: Technical Specifications Dimensions Diagram Optional Products Mounts • • DCS-37-1 Wall type mount bracket • DCS-37-2 Ceiling type mount bracket D-Link DCS-4603 User Manual 55 - D-Link DCS-4603 | User Manual - Page 56
radio frequency energy and, if not installed and used in accordance with the instruction manual, may cause harmful interference to radio communications. Operation of this equipment in CISPR 32. In a residential environment this equipment may cause radio interference. D-Link DCS-4603 User Manual 56 - D-Link DCS-4603 | User Manual - Page 57
Do not attempt to service the product and never disassemble the product. For some products with a user replaceable battery, please read and follow the instructions in the user manual. • Do not und verwenden Sie dazu ausschließlich ein trockenes fusselfreies Tuch. D-Link DCS-4603 User Manual 57 - D-Link DCS-4603 | User Manual - Page 58
nunca. Para algunos productos con batería reemplazable por el usuario, lea y siga las instrucciones del manual de usuario. • No derrame comida o líquidos sobre el producto y nunca deje que caigan objetos red antes de limpiarlo y utilice solo un paño seco sin pelusa. D-Link DCS-4603 User Manual 58 - D-Link DCS-4603 | User Manual - Page 59
alcuni prodotti dotati di batteria sostituibile dall'utente, leggere e seguire le istruzioni riportate nel manuale dell'utente. • Non versare cibi o liquidi sul prodotto e non spingere mai alcun voordat u het reinigt en gebruik uitsluitend een droge pluisvrije doek. D-Link DCS-4603 User Manual 59 - D-Link DCS-4603 | User Manual - Page 60
this manner you help to conserve the environment and protect human health. D-Link and the Environment At D-Link, we understand and are committed to reducing any impact our operations and products Sie entsprechende Informationen im Internet unter www.dlinkgreen.com. D-Link DCS-4603 User Manual 60 - D-Link DCS-4603 | User Manual - Page 61
apagar o desenchufar los productos D-Link cuando no se estén utilizando. Al hacerlo, contribuirá a ahorrar energía y a reducir las emisiones de CO2. Para obtener más información acerca de nuestros productos y embalajes ecológicos, visite el sitio www.dlinkgreen.com. D-Link DCS-4603 User Manual 61 - D-Link DCS-4603 | User Manual - Page 62
D-Link producten uit te schakelen of uit de stekker te halen wanneer u ze niet gebruikt. Door dit te doen bespaart u energie en beperkt u de CO2-emissies. Breng een bezoek aan www.dlinkgreen.com voor meer informatie over onze milieuverantwoorde producten en verpakkingen. D-Link DCS-4603 User Manual - D-Link DCS-4603 | User Manual - Page 63
. Společnost D-Link doporučuje, abyste své výrobky značky D-Link vypnuli nebo vytáhli ze zásuvky vždy, když je nepoužíváte. Pomůžete tak šetřit energii a snížit emise CO2. Více informací o našich ekologických výrobcích a obalech najdete na adrese www.dlinkgreen.com. D-Link DCS-4603 User Manual 63 - D-Link DCS-4603 | User Manual - Page 64
anbefaler at du alltid slår av eller frakobler D-Link-produkter når de ikke er i bruk. Ved å gjøre dette hjelper du å spare energi og å redusere CO2-utslipp. For mer informasjon angående våre miljøansvarlige produkter og forpakninger kan du gå til www.dlinkgreen.com. D-Link DCS-4603 User Manual 64 - D-Link DCS-4603 | User Manual - Page 65
D-Link-tuotteesi virtalähteestä tai sammutat ne aina, kun ne eivät ole käytössä. Toimimalla näin autat säästämään energiaa ja vähentämään hiilidioksiidipäästöjä. Lue lisää ympäristöystävällisistä D-Link-tuotteista ja pakkauksistamme osoitteesta www.dlinkgreen.com. D-Link DCS-4603 User Manual 65 - D-Link DCS-4603 | User Manual - Page 66
que desligue os seus produtos D-Link quando estes não se encontrarem em utilização. Com esta acção ajudará a poupar energia e reduzir as emissões de CO2. Para saber mais sobre os nossos produtos e embalagens responsáveis a nível ambiental visite www.dlinkgreen.com. D-Link DCS-4603 User Manual 66
-
 1
1 -
 2
2 -
 3
3 -
 4
4 -
 5
5 -
 6
6 -
 7
7 -
8
-
9
-
10
-
11
-
12
-
13
-
14
-
15
-
16
-
17
-
18
-
19
-
20
-
21
-
22
-
23
-
24
-
25
-
26
-
27
-
28
-
29
-
30
-
31
-
32
-
33
-
34
-
35
-
36
-
37
-
38
-
39
-
40
-
41
-
42
-
43
-
44
-
45
-
46
-
47
-
48
-
49
-
50
-
51
-
52
-
53
-
54
-
55
-
56
-
57
-
58
-
59
-
60
-
61
-
62
-
63
-
64
-
65
-
66
 |
 |
User Manual
Version 1.02 | 06/25/2019
DCS-4603
Vigilance Full HD PoE Dome Camera