D-Link DCH-S161 User Manual
D-Link DCH-S161 Manual
 |
View all D-Link DCH-S161 manuals
Add to My Manuals
Save this manual to your list of manuals |
D-Link DCH-S161 manual content summary:
- D-Link DCH-S161 | User Manual - Page 1
DCH-S161 Wi-Fi Water Sensor User Manual January 29, 2019 Hardware: A1 Manual Version: 1.10 - D-Link DCH-S161 | User Manual - Page 2
obsolete as our services and websites develop and change. Please refer to the www.mydlink.com website for the most current information. Manual Revisions Revision 1.10 Date January 29, 2019 Description Added the Google Assistant information Trademarks D-Link and the D-Link logo are trademarks - D-Link DCH-S161 | User Manual - Page 3
23 Getting Started 8 Mounting the Water Sensor 8 Installation 10 Powering The Water Sensor 10 mydlink™ App 11 The Google Assistant Installation 13 Using the mydlink App 17 Controlling Your Sensor 17 Sensor 18 Firmware Upgrade 20 Troubleshooting 21 D-Link DCH-S161 User Manual ii - D-Link DCH-S161 | User Manual - Page 4
Section 1 - Product Overview Product Overview Package Contents DCH-S161 Wi-Fi Water Sensor Water-sensing probe 2 x AA batteries Quick Installation Guide If any of the above items are missing, please contact your reseller. Note: Using a power supply with a different voltage rating than the one - D-Link DCH-S161 | User Manual - Page 5
router connected to your broadband modem • An 802.11n/g Wi-Fi enabled router. mydlink App Requirements • iOS, or AndroidTM device (please refer to the mobile app's store page to check whether your device is compatible) • Email account (for mydlink service registration) D-Link DCH-S161 User Manual - D-Link DCH-S161 | User Manual - Page 6
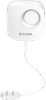
Water Sensor Probe 8 Water-Sensing Probe Port 1 Water Sensor Probe Place this in the location where you would like the sensor to detect water The LED will flash red once. 4 Siren Water-Sensing Probe Port Where to plug in the cable for the water-sensing probe. D-Link DCH-S161 User Manual 3 - D-Link DCH-S161 | User Manual - Page 7
will turn off after 20 seconds and enter sleep mode. It will still function normally. The device is connecting to a Wi-Fi network. The device is booting up or has been reset successfully. The device has lost its Wi-Fi connection. Updating firmware. Ready for setup. D-Link DCH-S161 User Manual 4 - D-Link DCH-S161 | User Manual - Page 8
Section 1 - Product Overview Siren Behavior Action Button Note: Press the Action Button to immediately silence the siren. Siren Beeping every 3 seconds Water detected. Beeping will occur for one minute. D-Link DCH-S161 User Manual 5 - D-Link DCH-S161 | User Manual - Page 9
. To clean the device, remove the batteries and use a damp towel. Before you Begin Plan the location of your water sensor: 1. Insert batteries before mounting. 2. Make sure the water sensor is placed in a location that has a consistent and adequate Wi-Fi signal. D-Link DCH-S161 User Manual 6 - D-Link DCH-S161 | User Manual - Page 10
mydlink Wi-Fi Water Sensor lets you monitor for water water (fish tanks), mirrors, file cabinets, brick, and concrete will degrade your wireless signal. 3. Keep your product at least 1 to 2 meters (3 to 6 feet) from electrical devices or appliances that generate RF noise. D-Link DCH-S161 User Manual - D-Link DCH-S161 | User Manual - Page 11
that are 2.5 cm deep over the marks. For a plaster, drywall, or 2 concrete wall, insert plastic anchors to support the screws first. Step 3 Twist the screws into the wall or anchors, making sure to leave enough clearance between the screw head and the wall. 3 D-Link DCH-S161 User Manual 8 - D-Link DCH-S161 | User Manual - Page 12
the screws with the largest holes on the back of the water sensor. Slide the sensor down 4 to lock it into place. Step 5 Assure that the water sensing probe is plugged in securely to the port on the bottom of main 5 sensor unit. Adjust the position as desired. D-Link DCH-S161 User Manual 9 - D-Link DCH-S161 | User Manual - Page 13
Section 2 - Installation Installation Powering the Water Sensor Remove the battery cover by gently pressing down on the tab. Insert the two AA batteries and reattach the battery cover. D-Link DCH-S161 User Manual 10 - D-Link DCH-S161 | User Manual - Page 14
Section 2 - Installation mydlink™ App Please follow the instructions below to set up your Wi-Fi Water Sensor. Step 1: Download the mydlink app from the App Store (iOS) or Google Play (Android). Note: Please ensure that your device is connected to the internet. Step 2: Launch the mydlink app and - D-Link DCH-S161 | User Manual - Page 15
selected No: Select the DCH-S161 sensor from the list, then press Next. Select Next and continue to follow the on-screen instructions. Final Step: Congratulations, your Wi-Fi Water Sensor is now ready to use! Be sure to enable the Auto-Upgrade function for the latest firmware updates to keep your - D-Link DCH-S161 | User Manual - Page 16
connected to the internet and is connected to the same Wi-Fi network as your water sensor. Step 2: Tap on the plus sign icon in order to add a new device. Step 3: Tap on Set up device. Note: The app is consistently being updated and screenshots are subject to change. D-Link DCH-S161 User Manual - D-Link DCH-S161 | User Manual - Page 17
Section 2 - Installation Step 4: Tap on "Have something already set up?" Step 5: Search for "mydlink" and tap on mydlink Smart. D-Link DCH-S161 User Manual 14 - D-Link DCH-S161 | User Manual - Page 18
app, but for the sake of consistency please make sure you have the desired name in the mydlink app before you add it to your Google Assistant. This is the name that the Google Assistant will announce in audio alerts, as well as what you must say to do voice commands. D-Link DCH-S161 User Manual 15 - D-Link DCH-S161 | User Manual - Page 19
Section 2 - Installation Step 8: Tap on the desired room name and tap Next. Step 9: You are now done. The water sensor will now be listed as a device in the assigned room. You can adjust individual setings for your water sensor by tapping the water sensor's icon. D-Link DCH-S161 User Manual 16 - D-Link DCH-S161 | User Manual - Page 20
the "Add to shortcut" option while installing a sensor, you will see a quick link to your sensor directly on the home screen. Note: Screenshots are representative only. The mydlink app is constantly updating and so may appear different. You can access your DCH-S161 by tapping the Menu icon in the - D-Link DCH-S161 | User Manual - Page 21
is sounding. Tap to turn it off. In the sensor control page, after you have selected the specific sensor you wish to configure, tap the button in the bottom-left corner to enter the Device page. The icon will tell you approximately how much battery is remaining. D-Link DCH-S161 User Manual 18 - D-Link DCH-S161 | User Manual - Page 22
1 D-Link DCH-S161 User Manual 1 Device Photo Tap to add a customized photo of this device. 2 Device Name Tap to change the device's name. 2 3 Device Location Tap to change or add a new location for this device. 3 4 4 Wi-Fi Displays the Wi-Fi network the device is currently connected to - D-Link DCH-S161 | User Manual - Page 23
have the 1 most up-to-date security updates. 2 2 Upgrade Time Tap to change the time for automatic firmware updates to be downloaded and installed. 3 3 Upgrade Reminder Tap an option below if you want to be notified of an upcoming automatic firmware update. D-Link DCH-S161 User Manual 20 - D-Link DCH-S161 | User Manual - Page 24
up for a new mydlink account when transferring to the mydlink app? No, you do not need to sign up for a new mydlink account. You just have to sign in to the mydlink app using your existing mydlink account and all your existing devices will show up in the mydlink app. D-Link DCH-S161 User Manual 21 - D-Link DCH-S161 | User Manual - Page 25
Standards Wireless Frequency Range Water Sensor Probe Antennas Alarm Volume Functionality Wireless Encryption Supported Features Device Management Physical ± 5 g (0.60 oz ± 0.18 oz) • Storage: -20 to 65 °C (-4 to 149 °F) • Storage: 5% to 95% non-condensing • CE D-Link DCH-S161 User Manual 22 - D-Link DCH-S161 | User Manual - Page 26
instructions and local/national disposal and recycling regulations. For more information, please refer to the warranty guide Connect the equipment into an outlet on a circuit different from that to which the receiver is connected in the USA/Canada market, only channel Link DCH-S161 User Manual 23 - D-Link DCH-S161 | User Manual - Page 27
érique de la classe B est conforme à la norme NMB-003 du Canada. Innovation, Science and Economic Development Canada (ISED) Statement: This device complies with ISED licence-exempt RSS standard(s). 20 cm de distance entre la source de rayonnement et votre corps. D-Link DCH-S161 User Manual 24 - D-Link DCH-S161 | User Manual - Page 28
Consommation d'énergie max. Potencia máxima de Salida Potenza max. Output Max. Output Power 15.86 dBm 12.77 dBm 12.85 dBm 12.88 dBm D-Link DCH-S161 User Manual 25 - D-Link DCH-S161 | User Manual - Page 29
dichiara che questo prodotto, i relativi accessori e il software sono conformi alla direttiva 2014/53/UE. Il testo completo della dichiarazione di conformità UE e il firmware del prodotto sono disponibili per il download dalla pagina del prodotto su www.dlink.com. D-Link DCH-S161 User Manual 26 - D-Link DCH-S161 | User Manual - Page 30
dlink.com. D-Link Corporation täten vakuuttaa, että tämä tuote, lisävarusteet ja ohjelmisto ovat direktiivin 2014/53/EU vaatimusten mukaisia. Täydellinen EU-vaatimustenmukaisuusvakuutus samoin kuin tuotteen laiteohjelmisto ovat ladattavissa osoitteesta www.dlink.com. D-Link DCH-S161 User Manual 27 - D-Link DCH-S161 | User Manual - Page 31
/EU. Hela texten med EU-försäkran om överensstämmelse och produkt-firmware kan hämtas från produktsidan på www.dlink.com. Hér með lýsir D-Link Corporation því yfir að þessi vara, fylgihlutir og hugbúnaður eru outlet should be near the device and easily accessible. D-Link DCH-S161 User Manual 28 - D-Link DCH-S161 | User Manual - Page 32
client devices without an Access Point. • Access points will support DFS (Dynamic Frequency Selection) and TPC (Transmit Power Control dieses Geräts ist in den folgenden Ländern erlaubt: AL, AD, BE, BG, DK, DE, FI, FR, GR, GW, IS, IT, HR, LI, LU, MT, MK, MD, MC, nutzt. D-Link DCH-S161 User Manual 29 - D-Link DCH-S161 | User Manual - Page 33
pays suivants : AL, AD, BE , BG, DK, DE, FI, FR, GR, GW, IS, IT, HR, LI, LU, • Merci de vous référer au guide d'utilisation ou de la fiche technique manual o la ficha de producto para comprobar si el producto utiliza las bandas inalámbricas de 2.4 GHz y/o la de 5 GHz. D-Link DCH-S161 User Manual - D-Link DCH-S161 | User Manual - Page 34
stati membri dell'Unione europea e nei paesi EFTA. • Questo dispositivo può essere utilizzato in AL, AD, BE, BG, DK, DE, FI, FR, GR, GW, IS, IT, HR, LI, LU, MT, MK, MD, MC, NL, NO, AT, PL, PT, RO om te controleren of uw product gebruik maakt van 2.4 GHz en/of 5 GHz. D-Link DCH-S161 User Manual 31 - D-Link DCH-S161 | User Manual - Page 35
Do not attempt to service the product and never disassemble the product. For some products with a user replaceable battery, please read and follow the instructions in the user manual. • Do not und verwenden Sie dazu ausschließlich ein trockenes fusselfreies Tuch. D-Link DCH-S161 User Manual 32 - D-Link DCH-S161 | User Manual - Page 36
productos con batería reemplazable por el usuario, lea y siga las instrucciones del manual de usuario. • No derrame comida o líquidos sobre el producto y nunca siempre el producto de la alimentación de red antes de limpiarlo y utilice solo un paño seco sin pelusa. D-Link DCH-S161 User Manual 33 - D-Link DCH-S161 | User Manual - Page 37
de openingen van uw product duwen. • Gebruik dit product niet in de buurt van water, gebieden met hoge vochtigheid of condensatie, tenzij het product specifiek geclassificeerd is voor gebruik buitenshuis u het reinigt en gebruik uitsluitend een droge pluisvrije doek. D-Link DCH-S161 User Manual 34 - D-Link DCH-S161 | User Manual - Page 38
this manner you help to conserve the environment and protect human health. D-Link and the Environment At D-Link, we understand and are committed to reducing any impact our operations and products Sie entsprechende Informationen im Internet unter www.dlinkgreen.com. D-Link DCH-S161 User Manual 35 - D-Link DCH-S161 | User Manual - Page 39
apagar o desenchufar los productos D-Link cuando no se estén utilizando. Al hacerlo, contribuirá a ahorrar energía y a reducir las emisiones de CO2. Para obtener más información acerca de nuestros productos y embalajes ecológicos, visite el sitio www.dlinkgreen.com. D-Link DCH-S161 User Manual 36 - D-Link DCH-S161 | User Manual - Page 40
D-Link producten uit te schakelen of uit de stekker te halen wanneer u ze niet gebruikt. Door dit te doen bespaart u energie en beperkt u de CO2-emissies. Breng een bezoek aan www.dlinkgreen.com voor meer informatie over onze milieuverantwoorde producten en verpakkingen. D-Link DCH-S161 User Manual - D-Link DCH-S161 | User Manual - Page 41
. Společnost D-Link doporučuje, abyste své výrobky značky D-Link vypnuli nebo vytáhli ze zásuvky vždy, když je nepoužíváte. Pomůžete tak šetřit energii a snížit emise CO2. Více informací o našich ekologických výrobcích a obalech najdete na adrese www.dlinkgreen.com. D-Link DCH-S161 User Manual 38 - D-Link DCH-S161 | User Manual - Page 42
anbefaler at du alltid slår av eller frakobler D-Link-produkter når de ikke er i bruk. Ved å gjøre dette hjelper du å spare energi og å redusere CO2-utslipp. For mer informasjon angående våre miljøansvarlige produkter og forpakninger kan du gå til www.dlinkgreen.com. D-Link DCH-S161 User Manual 39 - D-Link DCH-S161 | User Manual - Page 43
D-Link-tuotteesi virtalähteestä tai sammutat ne aina, kun ne eivät ole käytössä. Toimimalla näin autat säästämään energiaa ja vähentämään hiilidioksiidipäästöjä. Lue lisää ympäristöystävällisistä D-Link-tuotteista ja pakkauksistamme osoitteesta www.dlinkgreen.com. D-Link DCH-S161 User Manual 40 - D-Link DCH-S161 | User Manual - Page 44
que desligue os seus produtos D-Link quando estes não se encontrarem em utilização. Com esta acção ajudará a poupar energia e reduzir as emissões de CO2. Para saber mais sobre os nossos produtos e embalagens responsáveis a nível ambiental visite www.dlinkgreen.com. D-Link DCH-S161 User Manual 41
-
 1
1 -
 2
2 -
 3
3 -
 4
4 -
 5
5 -
 6
6 -
 7
7 -
8
-
9
-
10
-
11
-
12
-
13
-
14
-
15
-
16
-
17
-
18
-
19
-
20
-
21
-
22
-
23
-
24
-
25
-
26
-
27
-
28
-
29
-
30
-
31
-
32
-
33
-
34
-
35
-
36
-
37
-
38
-
39
-
40
-
41
-
42
-
43
-
44
 |
 |

DCH-S161
User Manual
Wi-Fi Water Sensor
Hardware: A1
Manual Version: 1.10
January 29, 2019