D-Link COVR-X1862 Product Manual 1
D-Link COVR-X1862 Manual
 |
View all D-Link COVR-X1862 manuals
Add to My Manuals
Save this manual to your list of manuals |
D-Link COVR-X1862 manual content summary:
- D-Link COVR-X1862 | Product Manual 1 - Page 1
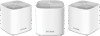
-Fi 6 System Covr your Whole Home in Seamless Mesh Wi-Fi Single Pack Coverage up to 230 sqm / 2500 sq. ft. 2-Pack Coverage up to 420 sqm / 4500 sq. ft. 3-Pack Coverage up to 600 sqm / 6500 sq. ft. 4-Pack Coverage up to 790 sqm / 8500 sq. ft. COVR-X1860 COVR-X1862 COVR-X1863 COVR-X1864 - D-Link COVR-X1862 | Product Manual 1 - Page 2
are trademarks of Apple Inc., registered in the U.S. and other countries. App StoreSM is a service mark of Apple Inc. Chrome™ browser, Google Play™ and Android™ are trademarks of Google energy. Network Standby: 7.07 watts D-Link COVR-X1860 || COVR-X1862 || COVR-X1863 || COVR-X1864 User Manual i - D-Link COVR-X1862 | Product Manual 1 - Page 3
3 Introduction 4 Features 4 Hardware Overview 5 COVR-X1860 LED Indicator 5 COVR-X1860 Rear 6 Hardware Setup 7 Using The D-Link Wi-Fi App 7 Web Based Installation 10 65 Admin 65 System 67 User 68 Upgrade 69 D-Link COVR-X1860 || COVR-X1862 || COVR-X1863 || COVR-X1864 User Manual ii - D-Link COVR-X1862 | Product Manual 1 - Page 4
Google Assistant Setup 82 The Google Assistant Voice Commands 85 Connect to a Wireless Client 86 WPS Button 86 Wireless Basics 87 What is Wireless 88 Tips...90 Technical Specifications 91 Regulatory Information 93 D-Link COVR-X1860 || COVR-X1862 || COVR-X1863 || COVR-X1864 User Manual iii - D-Link COVR-X1862 | Product Manual 1 - Page 5
adapter (x 2) Ethernet Cable Ethernet Cable Quick Installation Card Quick Installation Card Simple Setup Guide Simple Setup Guide If any of the above items are missing or damaged, please contact your local reseller. D-Link COVR-X1860 || COVR-X1862 || COVR-X1863 || COVR-X1864 User Manual 1 - D-Link COVR-X1862 | Product Manual 1 - Page 6
adapter (x 4) Ethernet Cable Ethernet Cable Quick Installation Card Quick Installation Card Simple Setup Guide Simple Setup Guide If any of the above items are missing or damaged, please contact your local reseller. D-Link COVR-X1860 || COVR-X1862 || COVR-X1863 || COVR-X1864 User Manual 2 - D-Link COVR-X1862 | Product Manual 1 - Page 7
10 or higher • Firefox 28 or higher • Safari 6 or higher • Chrome 28 or higher D-Link Wi-Fi App Requirements • iOS® or Android™ device (Please refer to the app's store page to check whether your device is compatible.) D-Link COVR-X1860 || COVR-X1862 || COVR-X1863 || COVR-X1864 User Manual 3 - D-Link COVR-X1862 | Product Manual 1 - Page 8
you're always connected to fast, reliable Wi-Fi throughout your home. • Simple Setup - Covr Points come pre-paired out of the box, just plug them in and get started conditions will adversely affect wireless signal range. D-Link COVR-X1860 || COVR-X1862 || COVR-X1863 || COVR-X1864 User Manual 4 - D-Link COVR-X1862 | Product Manual 1 - Page 9
client using Wi-Fi Protected Setup (WPS). The COVR-X1860 is powered off. If the device is powered on and Status LED is disabled, the device is working as normal. Refer to the Admin section on page 65 for more information. D-Link COVR-X1860 || COVR-X1862 || COVR-X1863 || COVR-X1864 User Manual 5 - D-Link COVR-X1862 | Product Manual 1 - Page 10
1 - Product Overview COVR-X1860 Rear 2 1 3 4 1 WPS Press this button to establish an instant connection to a wireless client using Wi-Fi Protected Setup (WPS). 2 Gigabit , connect your broadband modem to this port. D-Link COVR-X1860 || COVR-X1862 || COVR-X1863 || COVR-X1864 User Manual 6 - D-Link COVR-X1862 | Product Manual 1 - Page 11
will take you to the respective D-Link Wi-Fi app store page. Step 2 Launch the D-Link Wi-Fi app from the home screen of your device. Step 3 Tap on the Install New Device button at the middle of the screen. D-Link Wi-Fi D-Link COVR-X1860 || COVR-X1862 || COVR-X1863 || COVR-X1864 User Manual 7 - D-Link COVR-X1862 | Product Manual 1 - Page 12
Section 2 - Installation Step 4 Tap Yes to scan the setup QR code located in the Quick Install Card and proceed to step 6. Alternatively, you can tap No to proceed to step 5. QUICK INSTALL CARD D-Link COVR-X1860 || COVR-X1862 || COVR-X1863 || COVR-X1864 User Manual 8 - D-Link COVR-X1862 | Product Manual 1 - Page 13
COVR-X1860 COVR-X1862 OR Step 6 You will now be guided through a step-by-step process for setting up your Covr product. Simply follow the on-screen instructions to complete the installation and the configuration process. D-Link COVR-X1860 || COVR-X1862 || COVR-X1863 || COVR-X1864 User Manual - D-Link COVR-X1862 | Product Manual 1 - Page 14
Covr Wi-Fi settings using the free D-Link Wi-Fi mobile app or the web-based user interface. Refer to the Configuration section on page page 11 for more information on configuring your network using the web-based user interface. D-Link COVR-X1860 || COVR-X1862 || COVR-X1863 || COVR-X1864 User Manual - D-Link COVR-X1862 | Product Manual 1 - Page 15
SSID is "password" • If you have previously completed the Setup Wizard, specify the password you created during initial setup 4. Click Log In. Note: The system will automatically log out after a period of inactivity. D-Link COVR-X1860 || COVR-X1862 || COVR-X1863 || COVR-X1864 User Manual 11 - D-Link COVR-X1862 | Product Manual 1 - Page 16
3 - Configuration Home The Home page displays the current status of your Covr Wi-Fi network in the form of an interactive diagram. You can click other pages. Refer to the following pages for a description of each section. D-Link COVR-X1860 || COVR-X1862 || COVR-X1863 || COVR-X1864 User Manual 12 - D-Link COVR-X1862 | Product Manual 1 - Page 17
Home page displays whether or not Covr Point A is currently connected to the Internet. If it is disconnected, click Click to repair to bring up the setup wizard, refer to Wizard on page Go to settings at the bottom-right. D-Link COVR-X1860 || COVR-X1862 || COVR-X1863 || COVR-X1864 User Manual 13 - D-Link COVR-X1862 | Product Manual 1 - Page 18
IPv4 and IPv6 local networks, and WiFi information. This overview is only informational. To configure these sections, refer to the corresponding configuration sections in this manual. COVR-X1860 D-Link COVR-X1860 || COVR-X1862 || COVR-X1863 || COVR-X1864 User Manual 14 - D-Link COVR-X1862 | Product Manual 1 - Page 19
Click on the Connected Clients icon to view details about the clients currently connected to your Covr Wi-Fi network. To edit each client's settings, click the pencil icon on the information. Click Save when you are done. D-Link COVR-X1860 || COVR-X1862 || COVR-X1863 || COVR-X1864 User Manual 15 - D-Link COVR-X1862 | Product Manual 1 - Page 20
settings icon in the bottom-right of the Extenders's box and click Remove. Name: Enter a name for the Covr Point. COVR-X1860 MAC Address: Displays the MAC address of the Covr Point. Click Save when you are done. D-Link COVR-X1860 || COVR-X1862 || COVR-X1863 || COVR-X1864 User Manual COVR-X1860 16 - D-Link COVR-X1862 | Product Manual 1 - Page 21
Reboot. To remove a Extenders from your Mesh Wi-Fi network, click the settings icon in the bottom-right of the Extenders's box and click Remove. D-Link COVR-X1860 || COVR-X1862 || COVR-X1863 || COVR-X1864 User Manual 17 - D-Link COVR-X1862 | Product Manual 1 - Page 22
web-user interface for the first time. This Wizard will also launch when clicking the Click to Repair button when no Internet connection is detected. D-Link COVR-X1860 || COVR-X1862 || COVR-X1863 || COVR-X1864 User Manual 18 - D-Link COVR-X1862 | Product Manual 1 - Page 23
connection type. Click Advanced Settings... to expand the list and see all of the options. COVR-X1860 HW:A1 FW:1.00 For Dynamic IP (DHCP) refer to Dynamic IP (DHCP) IPv6 connection, click the IPv6 link. Refer to page 29. D-Link COVR-X1860 || COVR-X1862 || COVR-X1863 || COVR-X1864 User Manual 19 - D-Link COVR-X1862 | Product Manual 1 - Page 24
from your Internet Service Provider (ISP Covr Point A.You can use the drop-down menu to replace the Internet port's MAC address with the MAC address of a connected client. Click Save when you are done. COVR-X1860 HW:A1 FW:1.00 D-Link COVR-X1860 || COVR-X1862 || COVR-X1863 || COVR-X1864 User Manual - D-Link COVR-X1862 | Product Manual 1 - Page 25
by your Internet Service Provider (ISP). Covr Point A.You can use the drop-down menu to replace the Internet port's MAC address with the MAC address of a connected client. Click Save when you are done. COVR-X1860 HW:A1 FW:1.00 D-Link COVR-X1860 || COVR-X1862 || COVR-X1863 || COVR-X1864 User Manual - D-Link COVR-X1862 | Product Manual 1 - Page 26
Dynamic IP. If you selected Dynamic IP as the Address Mode: Service Name: Enter the ISP service name (optional). Primary DNS Enter the primary DNS server IP address performance with your ISP. COVR-X1860 HW:A1 FW:1.00 D-Link COVR-X1860 || COVR-X1862 || COVR-X1863 || COVR-X1864 User Manual 22 - D-Link COVR-X1862 | Product Manual 1 - Page 27
by your ISP. Service Name: Enter the ISP service name (optional). Covr Point A.You can use the drop-down menu to replace the Internet port's MAC address with the MAC address of a connected client. Click Save when you are done. D-Link COVR-X1860 || COVR-X1862 || COVR-X1863 || COVR-X1864 User Manual - D-Link COVR-X1862 | Product Manual 1 - Page 28
PPTP Choose PPTP (Point-to-Point-Tunneling Protocol ) if your Internet Service Provider (ISP) uses a PPTP connection. Your ISP will provide you the MTU for optimal performance with your ISP. COVR-X1860 HW:A1 FW:1.00 D-Link COVR-X1860 || COVR-X1862 || COVR-X1863 || COVR-X1864 User Manual 24 - D-Link COVR-X1862 | Product Manual 1 - Page 29
ISP. Server: MTU: Maximum Transmission Unit - you may need to change the MTU for optimal performance with your ISP. Click Save when you are done. D-Link COVR-X1860 || COVR-X1862 || COVR-X1863 || COVR-X1864 User Manual 25 - D-Link COVR-X1862 | Product Manual 1 - Page 30
Configuration L2TP Choose L2TP (Layer 2 Tunneling Protocol) if your Internet Service Provider (ISP) uses a L2TP connection. Your ISP will provide you the MTU for optimal performance with your ISP. COVR-X1860 HW:A1 FW:1.00 D-Link COVR-X1860 || COVR-X1862 || COVR-X1863 || COVR-X1864 User Manual 26 - D-Link COVR-X1862 | Product Manual 1 - Page 31
ISP. Server: MTU: Maximum Transmission Unit - you may need to change the MTU for optimal performance with your ISP. Click Save when you are done. D-Link COVR-X1860 || COVR-X1862 || COVR-X1863 || COVR-X1864 User Manual 27 - D-Link COVR-X1862 | Product Manual 1 - Page 32
displayed here. Address: IPv6 WAN Default Once connected, the IPv6 WAN default gateway address will be Gateway: displayed here. Click Save when you are done. COVR-X1860 HW:A1 FW:1.00 D-Link COVR-X1860 || COVR-X1862 || COVR-X1863 || COVR-X1864 User Manual 28 - D-Link COVR-X1862 | Product Manual 1 - Page 33
IPv6 link. COVR-X1860 HW:A1 FW:1.00 For Static IPv6 refer to page 30. For Auto Configuration (SLAAC/DHCPv6) refer to page 32. For PPPoE refer to page 34. For 6rd refer to page 37. For Local Connectivity Only refer to page 39. D-Link COVR-X1860 || COVR-X1862 || COVR-X1863 || COVR-X1864 User Manual - D-Link COVR-X1862 | Product Manual 1 - Page 34
provided by your Internet Service Provider (ISP). COVR-X1860 HW:A1 FW:1.00 Use Link-Local Enable or disable link-local address use. Covr Point A. LAN IPv6 Link- Displays Covr Point A's LAN link-local address. Local Address: D-Link COVR-X1860 || COVR-X1862 || COVR-X1863 || COVR-X1864 User Manual - D-Link COVR-X1862 | Product Manual 1 - Page 35
address for the DHCP server's IPv6 assignment. Range (End): IPv6 Address Enter the IPv6 address lifetime (in minutes). Lifetime: Click Save when you are done. D-Link COVR-X1860 || COVR-X1862 || COVR-X1863 || COVR-X1864 User Manual 31 - D-Link COVR-X1862 | Product Manual 1 - Page 36
PD: Enable or disable prefix delegation services. LAN IPv6 Link- Displays Covr Point A's LAN link-local address. Local Address: If Enable . LAN IPv6 Link- Displays Covr Point A's LAN link-local address. Local Address: D-Link COVR-X1860 || COVR-X1862 || COVR-X1863 || COVR-X1864 User Manual 32 - D-Link COVR-X1862 | Product Manual 1 - Page 37
assignment. Range (End): IPv6 Address If Enable DHCP-PD is disabled, enter the IPv6 address lifetime (in Lifetime: minutes). Click Save when you are done. D-Link COVR-X1860 || COVR-X1862 || COVR-X1863 || COVR-X1864 User Manual 33 - D-Link COVR-X1862 | Product Manual 1 - Page 38
by your ISP. Service Name: Enter the ISP service name (optional). Reconnect Mode: Select either Always On or Manual. MTU: Maximum Transmission Unit - you may need to change the MTU for optimal performance with your ISP. D-Link COVR-X1860 || COVR-X1862 || COVR-X1863 || COVR-X1864 User Manual 34 - D-Link COVR-X1862 | Product Manual 1 - Page 39
DHCP-PD: Enable or disable prefix delegation services. LAN IPv6 Link- Displays Covr Point A's LAN link-local address. Local Address: If Enable . LAN IPv6 Link- Displays Covr Point A's LAN link-local address. Local Address: D-Link COVR-X1860 || COVR-X1862 || COVR-X1863 || COVR-X1864 User Manual 35 - D-Link COVR-X1862 | Product Manual 1 - Page 40
assignment. Range (End): IPv6 Address If Enable DHCP-PD is disabled, enter the IPv6 address lifetime (in Lifetime: minutes). Click Save when you are done. D-Link COVR-X1860 || COVR-X1862 || COVR-X1863 || COVR-X1864 User Manual 36 - D-Link COVR-X1862 | Product Manual 1 - Page 41
supplied by your ISP. IPv4 Address: LAN IPv6 Address Settings LAN IPv6 Address: Displays Covr Point A's LAN IPv6 Address link-local address. LAN IPv6 Link- Displays Covr Point A's LAN link-local address. Local Address: D-Link COVR-X1860 || COVR-X1862 || COVR-X1863 || COVR-X1864 User Manual 37 - D-Link COVR-X1862 | Product Manual 1 - Page 42
address for the DHCP server's IPv6 assignment. Range (End): IPv6 Address Enter the IPv6 address lifetime (in minutes). Lifetime: Click Save when you are done. D-Link COVR-X1860 || COVR-X1862 || COVR-X1863 || COVR-X1864 User Manual 38 - D-Link COVR-X1862 | Product Manual 1 - Page 43
IPv6 ULA Settings Current ULA Displays the current ULA prefix. Prefix: LAN IPv6 ULA: Displays the LAN's IPv6 ULA. Click Save when you are done. COVR-X1860 HW:A1 FW:1.00 D-Link COVR-X1860 || COVR-X1862 || COVR-X1863 || COVR-X1864 User Manual 39 - D-Link COVR-X1862 | Product Manual 1 - Page 44
connect to the network. Advanced Settings - Wireless Security Mode: Choose None, WPA2/WPA3-Personal or WPA/WPA2. Transmission Power: Select the desired wireless transmission power. COVR-X1860 HW:A1 FW:1.00 D-Link COVR-X1860 || COVR-X1862 || COVR-X1863 || COVR-X1864 User Manual 40 - D-Link COVR-X1862 | Product Manual 1 - Page 45
or disable WPS Push Button Configuration (PBC) functionality. Enabling this feature allows wireless clients to connect to the Covr Wi-Fi through an encrypted connection by using the WPS button. Click Save when you are done. D-Link COVR-X1860 || COVR-X1862 || COVR-X1863 || COVR-X1864 User Manual 41 - D-Link COVR-X1862 | Product Manual 1 - Page 46
wireless network. Password: Create a password for your guest Wi-Fi network. Wireless clients will need to enter this password to successfully connect to the network. COVR-X1860 HW:A1 FW:1.00 D-Link COVR-X1860 || COVR-X1862 || COVR-X1863 || COVR-X1864 User Manual 42 - D-Link COVR-X1862 | Product Manual 1 - Page 47
name (optional). Name: Enable DNS Relay: Disable to transfer the DNS server information from your ISP to your computers. If enabled, your computers will use Covr Point A for a DNS server. COVR-X1860 HW:A1 FW:1.00 D-Link COVR-X1860 || COVR-X1862 || COVR-X1863 || COVR-X1864 User Manual 43 - D-Link COVR-X1862 | Product Manual 1 - Page 48
IPv4 multicast traffic to pass through Covr Point A Streams: from the Internet. IPv6 Multicast Enable to allow IPv6 multicast traffic to pass through Covr Point A Streams: from the Internet. Click Save when you are done. D-Link COVR-X1860 || COVR-X1862 || COVR-X1863 || COVR-X1864 User Manual 44 - D-Link COVR-X1862 | Product Manual 1 - Page 49
details. This page lists whether you are registered with D-Link Cloud Service and email address associated with the account. Use the DLink Wi-Fi app to find out more about D-Link Cloud's features. COVR-X1860 HW:A1 FW:1.00 D-Link COVR-X1860 || COVR-X1862 || COVR-X1863 || COVR-X1864 User Manual 45 - D-Link COVR-X1862 | Product Manual 1 - Page 50
as a router. Bridge Mode Select Bridge Mode to run this device as a bridge. Extender Mode Select Extender Mode to run this device as an extender. D-Link COVR-X1860 || COVR-X1862 || COVR-X1863 || COVR-X1864 User Manual 46 - D-Link COVR-X1862 | Product Manual 1 - Page 51
Edit column. If you wish to create a new rule, click the Add Profile button. COVR-X1860 HW:A1 FW:1.00 Profile Name Schedule(Set Schedule when you want to be online) to be denied Internet access. COVR-X1860 HW:A1 FW:1.00 D-Link COVR-X1860 || COVR-X1862 || COVR-X1863 || COVR-X1864 User Manual 47 - D-Link COVR-X1862 | Product Manual 1 - Page 52
that you wish to deny access to. Device Click the Add Device button to select the devices that you wish to add to the schedule D-Link COVR-X1860 || COVR-X1862 || COVR-X1863 || COVR-X1864 User Manual 48 - D-Link COVR-X1862 | Product Manual 1 - Page 53
select Off to disable or select Manage Type: by Device to enable the Quality of Service (QoS) feature. Download Speed Enter the maximum download speed (in Mbps) for connected becomes available. COVR-X1860 HW:A1 FW:1.00 D-Link COVR-X1860 || COVR-X1862 || COVR-X1863 || COVR-X1864 User Manual 49 - D-Link COVR-X1862 | Product Manual 1 - Page 54
return it to the Connected Clients list, click the close button (x) in the top right of the device card. Click Save when you are done. D-Link COVR-X1860 || COVR-X1862 || COVR-X1863 || COVR-X1864 User Manual 50 - D-Link COVR-X1862 | Product Manual 1 - Page 55
Settings. Click Advanced Settings... to expand the list and see all of the options. COVR-X1860 HW:A1 FW:1.00 Enable DMZ: Enable or disable Demilitarized Zone (DMZ). This or disable IPv6 ingress filtering. Filtering: D-Link COVR-X1860 || COVR-X1862 || COVR-X1863 || COVR-X1864 User Manual 51 - D-Link COVR-X1862 | Product Manual 1 - Page 56
to connect to their corporate network using IPSec. Some VPN clients support traversal of IPSec through NAT. This Application Level Gateway (ALG) trouble making VoIP calls, try turning this ALG off. Click Save when you are done. D-Link COVR-X1860 || COVR-X1862 || COVR-X1863 || COVR-X1864 User Manual - D-Link COVR-X1862 | Product Manual 1 - Page 57
Settings page click IPv6 Rules. To return to the main Firewall Settings page, click Advanced. COVR-X1860 HW:A1 FW:1.00 To begin, use the drop-down menu to select whether you information. Click Apply when you are done. D-Link COVR-X1860 || COVR-X1862 || COVR-X1863 || COVR-X1864 User Manual 53 - D-Link COVR-X1862 | Product Manual 1 - Page 58
you can create your own schedules in the Schedule section. Refer to Schedule on page 62 for more information. Click Apply when you are done. D-Link COVR-X1860 || COVR-X1862 || COVR-X1863 || COVR-X1864 User Manual 54 - D-Link COVR-X1862 | Product Manual 1 - Page 59
Forwarding page click Virtual Server. To return to the main Port Forwarding page, click Port Forwarding. COVR-X1860 HW:A1 FW:1.00 If you wish to remove a rule, click on its trash can . Click Apply when you are done. D-Link COVR-X1860 || COVR-X1862 || COVR-X1863 || COVR-X1864 User Manual 55 - D-Link COVR-X1862 | Product Manual 1 - Page 60
Static Routes section allows you to define custom routes to control how traffic moves around your network. COVR-X1860 HW:A1 FW:1.00 In the Features menu on the bar on the top of the is used. Click Apply when you are done. D-Link COVR-X1860 || COVR-X1862 || COVR-X1863 || COVR-X1864 User Manual 56 - D-Link COVR-X1862 | Product Manual 1 - Page 61
on the Static Routes page click IPv6. To return to the main IPv4 static routes page, click IPv4. COVR-X1860 HW:A1 FW:1.00 If you wish to remove a rule, click on its trash can icon in is used. Click Apply when you are done. D-Link COVR-X1860 || COVR-X1862 || COVR-X1863 || COVR-X1864 User Manual 57 - D-Link COVR-X1862 | Product Manual 1 - Page 62
drop-down menu, or select Manual to manually enter a DDNS server address. Host Name: Enter the host name that you registered with your dynamic DNS service provider. User Name: Enter DNS host, refer to following page. D-Link COVR-X1860 || COVR-X1862 || COVR-X1863 || COVR-X1864 User Manual 58 - D-Link COVR-X1862 | Product Manual 1 - Page 63
name that you registered with your dynamic DNS service provider. IPv6 Address: Enter the IPv6 address of the dynamic DNS server. Alternatively, select the server device in the drop-down menu. Click Apply when you are done. D-Link COVR-X1860 || COVR-X1862 || COVR-X1863 || COVR-X1864 User Manual 59 - D-Link COVR-X1862 | Product Manual 1 - Page 64
is working properly. We recommend configuring Dynamic DNS before proceeding with Quick VPN setup. If your router is assigned an IP address from your ISP using , or RC4128.RC4-128 is the default. COVR-X1860 HW:A1 FW:1.00 D-Link COVR-X1860 || COVR-X1862 || COVR-X1863 || COVR-X1864 User Manual 60 - D-Link COVR-X1862 | Product Manual 1 - Page 65
here you can set the time zone and the Network Time Protocol (NTP) server. COVR-X1860 HW:A1 FW:1.00 In the Management menu on the bar on the top the NTP server manually by selecting Manual. Click Save when you are done. D-Link COVR-X1860 || COVR-X1862 || COVR-X1863 || COVR-X1864 User Manual 61 - D-Link COVR-X1862 | Product Manual 1 - Page 66
delete schedules, from the Time page click Schedule. To return to the Time page, click Time. COVR-X1860 HW:A1 FW:1.00 If you wish to remove a rule, click on its trash can icon section. Click Apply when you are done. D-Link COVR-X1860 || COVR-X1862 || COVR-X1863 || COVR-X1864 User Manual 62 - D-Link COVR-X1862 | Product Manual 1 - Page 67
the IP address for the Syslog server. If the Syslog server is Address: connected to Covr Point A, select it from the drop-down menu to automatically populate the field. Email Settings your SysLog messages will be sent to. D-Link COVR-X1860 || COVR-X1862 || COVR-X1863 || COVR-X1864 User Manual 63 - D-Link COVR-X1862 | Product Manual 1 - Page 68
When Full or On Schedule Send When Log If enabled, this option will set Covr Point A to automatically send the log Full: when it is full. Send on Schedule: If enabled, for more information. Click Save when you are done. D-Link COVR-X1860 || COVR-X1862 || COVR-X1863 || COVR-X1864 User Manual 64 - D-Link COVR-X1862 | Product Manual 1 - Page 69
you configure Covr Point A using a web browser. Enable Graphical Enables a challenge-response test to require Covr Point A remotely and securely, you must enter https:// at the beginning of the address. COVR-X1860 HW:A1 FW:1.00 D-Link COVR-X1860 || COVR-X1862 || COVR-X1863 || COVR-X1864 User Manual - D-Link COVR-X1862 | Product Manual 1 - Page 70
Control Status LED: Choose to enable or disable the COVR status indicator LED on the front panel of both Covr Point A and the other Covr Point(s). When disabled, the LED will no longer again. Click Save when you are done. D-Link COVR-X1860 || COVR-X1862 || COVR-X1863 || COVR-X1864 User Manual 66 - D-Link COVR-X1862 | Product Manual 1 - Page 71
set to Never, Daily, or Weekly. Depending on your selection, set a time and date for the auto reboot schedule. Click Save when you are done. COVR-X1860 HW:A1 FW:1.00 D-Link COVR-X1860 || COVR-X1862 || COVR-X1863 || COVR-X1864 User Manual 67 - D-Link COVR-X1862 | Product Manual 1 - Page 72
services COVR-X1860 HW:A1 FW:1.00 User Name Password Status Enter a username for the new user account. Enter a password for the new user account. VPN Enable or disable Virtual Private Network (VPN) functionality for this user. D-Link COVR-X1860 || COVR-X1862 || COVR-X1863 || COVR-X1864 User Manual - D-Link COVR-X1862 | Product Manual 1 - Page 73
firmware, either automatically or manually. To manually upgrade the firmware, you must first download the newest firmware file from http://support.dlink.com. In the . COVR-X1860 HW:A1 FW:1.00 COVR-X1860 COVR-X1860 (Master) D-Link COVR-X1860 || COVR-X1862 || COVR-X1863 || COVR-X1864 User Manual 69 - D-Link COVR-X1862 | Product Manual 1 - Page 74
the Statistics page you can view the amount of packets that pass through your Covr Wi-Fi network. COVR-X1860 HW:A1 FW:1.00 In the Management menu on the bar on the traffic counter will reset if the device is rebooted. D-Link COVR-X1860 || COVR-X1862 || COVR-X1863 || COVR-X1864 User Manual 70 - D-Link COVR-X1862 | Product Manual 1 - Page 75
mobile device. Refer to the steps below to learn how to add more Covr Points to your Covr network using the D-Link Wi-Fi app. Step 1 Open the D-Link Wi-Fi app, then tap the menu icon in the top-left to open the app menu. D-Link COVR-X1860 || COVR-X1862 || COVR-X1863 || COVR-X1864 User Manual 71 - D-Link COVR-X1862 | Product Manual 1 - Page 76
will now be guided through a step-by-step process for setting up the new Covr Point. Simply follow the on-screen steps to complete the installation process. Repeat this process to add additional Covr Points. D-Link COVR-X1860 || COVR-X1862 || COVR-X1863 || COVR-X1864 User Manual QUICK INSTALL CARD - D-Link COVR-X1862 | Product Manual 1 - Page 77
D-Link Cloud Service. Follow the steps below if you do not have a D-Link Cloud Service account. Step 1 Launch the D-Link Wi-Fi app. Step 2 Tap the settings gear icon on the top right corner of the screen. D-Link Wi-Fi COVR D-Link COVR-X1860 || COVR-X1862 || COVR-X1863 || COVR-X1864 User Manual - D-Link COVR-X1862 | Product Manual 1 - Page 78
Section 5 - Third Party Services Step 3 Tap the Cloud Service icon. Step 4 Tap the Register button. D-Link COVR-X1860 || COVR-X1862 || COVR-X1863 || COVR-X1864 User Manual 74 - D-Link COVR-X1862 | Product Manual 1 - Page 79
Services Step 5 In this menu, you can sign up for a D-Link account using Facebook, Google or an Email address. If you already have a D-Link account, you can tap the Log In link at the bottom of the screen to be redirected to the login page. D-Link COVR-X1860 || COVR-X1862 || COVR-X1863 || COVR - D-Link COVR-X1862 | Product Manual 1 - Page 80
third party services to control and manage your device, please register your device with D-Link Cloud Service. This section will go through how to set up and link your Amazon Alexa or the Google Assistant to D-Link Wi-Fi. D-Link COVR-X1860 || COVR-X1862 || COVR-X1863 || COVR-X1864 User Manual 76 - D-Link COVR-X1862 | Product Manual 1 - Page 81
5 - Third Party Services Amazon Alexa Setup You will need the Amazon Alexa app, an Amazon account, an Amazon Alexa device and a D-Link Cloud Service account to use this -hand corner of the home screen. Amazon Alexa D-Link COVR-X1860 || COVR-X1862 || COVR-X1863 || COVR-X1864 User Manual 77 - D-Link COVR-X1862 | Product Manual 1 - Page 82
Section 5 - Third Party Services Step 3 Tap on Skills & Games. Step 4 Search for "D-Link Wi-Fi". Tap on the search result. D-Link COVR-X1860 || COVR-X1862 || COVR-X1863 || COVR-X1864 User Manual 78 - D-Link COVR-X1862 | Product Manual 1 - Page 83
Section 5 - Third Party Services Step 5 Tap Enable to link the skill. Step 6 Sign in using your D-Link account details. D-Link COVR-X1860 || COVR-X1862 || COVR-X1863 || COVR-X1864 User Manual 79 - D-Link COVR-X1862 | Product Manual 1 - Page 84
linked as a skill for your Amazon device. Close the window by tapping Done on the top left corner of the screen. Refer to Amazon Alexa Voice Commands on page 81 for tasks that you can ask your Amazon Alexa to perform. D-Link COVR-X1860 || COVR-X1862 || COVR-X1863 || COVR-X1864 User Manual - D-Link COVR-X1862 | Product Manual 1 - Page 85
zone." "Alexa, ask D-Link Wi-Fi to disable my guest zone." "Alexa, ask D-Link Wi-Fi what are my guest network credentials." "Alexa, ask D-Link Wi-Fi to reboot the router." "Alexa, ask D-Link Wi-Fi to upgrade my router." D-Link COVR-X1860 || COVR-X1862 || COVR-X1863 || COVR-X1864 User Manual 81 - D-Link COVR-X1862 | Product Manual 1 - Page 86
5 - Third Party Services The Google Assistant Setup You will need the Google Assistant app, a Google account and a D-Link Cloud Service account to use this Tell your Google Assistant to "Talk to D-Link Wi-Fi." Assistant D-Link COVR-X1860 || COVR-X1862 || COVR-X1863 || COVR-X1864 User Manual 82 - D-Link COVR-X1862 | Product Manual 1 - Page 87
Section 5 - Third Party Services Step 3 Tap Yes. Step 4 Sign in using your D-Link account details. D-Link COVR-X1860 || COVR-X1862 || COVR-X1863 || COVR-X1864 User Manual 83 - D-Link COVR-X1862 | Product Manual 1 - Page 88
continue setup.. Step 6 Congratulations! D-Link Wi-Fi has been successfully linked to your Google Assistant. Refer to The Google Assistant Voice Commands on page 85 for tasks that you can ask your Google Assistant to perform. D-Link COVR-X1860 || COVR-X1862 || COVR-X1863 || COVR-X1864 User Manual - D-Link COVR-X1862 | Product Manual 1 - Page 89
D-Link Wi-Fi to disable my guest zone." "OK Google, talk to D-Link Wi-Fi to tell me my guest zone credentials." "OK Google, talk to D-Link Wi-Fi to reboot the router." "OK Google, talk to D-Link Wi-Fi to upgrade my router." D-Link COVR-X1860 || COVR-X1862 || COVR-X1863 || COVR-X1864 User Manual 85 - D-Link COVR-X1862 | Product Manual 1 - Page 90
connect your wireless devices to your Covr Wi-Fi network is with WPS (Wi-Fi Protected Setup). Most wireless devices such as COVR LED stops blinking, you will be connected and your wireless connection will be encrypted with WPA2. D-Link COVR-X1860 || COVR-X1862 || COVR-X1863 || COVR-X1864 User Manual - D-Link COVR-X1862 | Product Manual 1 - Page 91
for mobile network devices to link to a conventional Ethernet LAN in order to use servers, printers or an Internet connection supplied through the wired LAN. A wireless router is a device used to provide this link. D-Link COVR-X1860 || COVR-X1862 || COVR-X1863 || COVR-X1864 User Manual 87 - D-Link COVR-X1862 | Product Manual 1 - Page 92
up to 30 miles to serve places like manufacturing plants, industrial locations, university and high school campuses, airports, golf courses, and many other outdoor venues. D-Link COVR-X1860 || COVR-X1862 || COVR-X1863 || COVR-X1864 User Manual 88 - D-Link COVR-X1862 | Product Manual 1 - Page 93
recent years that almost everyone is using it, whether it's for home, office, business, D-Link has a wireless solution for it. Home uses/benefits • Gives everyone at home broadband access • No need to dedicate office space D-Link COVR-X1860 || COVR-X1862 || COVR-X1863 || COVR-X1864 User Manual 89 - D-Link COVR-X1862 | Product Manual 1 - Page 94
a task not knowing where to start. That's why we've put together a few setup steps and tips to help you through the process of setting up a wireless network. the product manual for detail information on how to set it up. D-Link COVR-X1860 || COVR-X1862 || COVR-X1863 || COVR-X1864 User Manual 90 - D-Link COVR-X1862 | Product Manual 1 - Page 95
.11b IEEE 802.11k IEEE 802.11v IEEE 802.11ac IEEE 802.11a IEEE 802.11h Static IP Dynamic IP PPPoE PPTP L2TP DS-Lite Support 802.1p & 802.1q VLAN tagging and Priority bit Concurrent session: 30000 D-Link COVR-X1860 || COVR-X1862 || COVR-X1863 || COVR-X1864 User Manual 91 - D-Link COVR-X1862 | Product Manual 1 - Page 96
Temperature Storage Temperature Operating Humidity Storage Humidity Certifications Software D-Link Wi-Fi App Support Voice Control 230 sqm / 2500 sq. ft. WPA Google Assistance Voice Control 790 sqm / 8500 sq. ft. D-Link COVR-X1860 || COVR-X1862 || COVR-X1863 || COVR-X1864 User Manual 92 - D-Link COVR-X1862 | Product Manual 1 - Page 97
that may cause undesired operation. This equipment has been tested and found to comply with the limits for a Class installed and used in accordance with the instructions, may cause harmful interference to radio communications Link COVR-X1860 || COVR-X1862 || COVR-X1863 || COVR-X1864 User Manual 93 - D-Link COVR-X1862 | Product Manual 1 - Page 98
(i.e. priority users) of the bands 5250-5350 MHz and 56505850 MHz and that these radars could cause interference and/or damage to LE-LAN devices. D-Link COVR-X1860 || COVR-X1862 || COVR-X1863 || COVR-X1864 User Manual 94 - D-Link COVR-X1862 | Product Manual 1 - Page 99
C - Safety Statements Avertissement: Le guide d'utilisation des dispositifs pour réseaux locaux doit inclure des instructions précises sur les restrictions susmentionnées entre la source de rayonnement et votre corps. D-Link COVR-X1860 || COVR-X1862 || COVR-X1863 || COVR-X1864 User Manual 95 - D-Link COVR-X1862 | Product Manual 1 - Page 100
Appendix C - Safety Statements 1 MPE標準值1mW/cm2 22 cm」 D-Link COVR-X1860 || COVR-X1862 || COVR-X1863 || COVR-X1864 User Manual 96 - D-Link COVR-X1862 | Product Manual 1 - Page 101
. Output Power (EIRP) Max. Output Power Consommation d'énergie max. Potencia máxima de Salida Potenza max. Output Max. Output Power 200 mW 200 mW 1 W 100 mW D-Link COVR-X1860 || COVR-X1862 || COVR-X1863 || COVR-X1864 User Manual 97 - D-Link COVR-X1862 | Product Manual 1 - Page 102
EU a o firmwaru produktu lze stáhnout na stránkách k produktu www.dlink.com. D-Link Corporation erklærer herved, at dette produkt, tilbehør og software er i overensstemmelse med direktiv 2014/53 prodotto su www.dlink.com. D-Link COVR-X1860 || COVR-X1862 || COVR-X1863 || COVR-X1864 User Manual 98 - D-Link COVR-X1862 | Product Manual 1 - Page 103
żżel it-test sħiħ tad-dikjarazzjoni ta' konformità tal-UE u l-firmware tal-prodott mill-paġna talprodott fuq www.dlink.com. Magyar [Hungarian] Ezennel a D-Link Corporation kijelenti mtas från produktsidan på www.dlink.com. D-Link COVR-X1860 || COVR-X1862 || COVR-X1863 || COVR-X1864 User Manual 99 - D-Link COVR-X1862 | Product Manual 1 - Page 104
og fastbúnað vörunnar af vefsíðu vörunnar á www. dlink.com. Herved erklærer D-Link Corporation at dette produktet, tilbehøret og programvaren er i samsvar med direktivet 2014/53/EU. Den the device and easily accessible. D-Link COVR-X1860 || COVR-X1862 || COVR-X1863 || COVR-X1864 User Manual 100 - D-Link COVR-X1862 | Product Manual 1 - Page 105
communication between two client devices without an Access Point. • Access points will support DFS (Dynamic Frequency Selection) and TPC (Transmit Power Control) functionality as required und / oder 5 GHz Verbindung nutzt. D-Link COVR-X1860 || COVR-X1862 || COVR-X1863 || COVR-X1864 User Manual 101 - D-Link COVR-X1862 | Product Manual 1 - Page 106
au sein de l'UE. • Merci de vous référer au guide d'utilisation ou de la fiche technique afin de vérifier si manual o la ficha de producto para comprobar si el producto utiliza las bandas inalámbricas de 2.4 GHz y/o la de 5 GHz. D-Link COVR-X1860 || COVR-X1862 || COVR-X1863 || COVR-X1864 User Manual - D-Link COVR-X1862 | Product Manual 1 - Page 107
per operare a 5 Ghz nell'Unione europea. • Ti invitiamo a fare riferimento al manuale del prodotto o alla scheda tecnica per verificare se il tuo prodotto utilizza le frequenze gebruik maakt van 2.4 GHz en/of 5 GHz. D-Link COVR-X1860 || COVR-X1862 || COVR-X1863 || COVR-X1864 User Manual 103 - D-Link COVR-X1862 | Product Manual 1 - Page 108
attempt to service the product and never disassemble the product. For some products with a user replaceable battery, please read and follow the instructions in the user manual. • ßlich ein trockenes fusselfreies Tuch. D-Link COVR-X1860 || COVR-X1862 || COVR-X1863 || COVR-X1864 User Manual 104 - D-Link COVR-X1862 | Product Manual 1 - Page 109
Para algunos productos con batería reemplazable por el usuario, lea y siga las instrucciones del manual de usuario. • No derrame comida o líquidos sobre el producto y nunca deje y utilice solo un paño seco sin pelusa. D-Link COVR-X1860 || COVR-X1862 || COVR-X1863 || COVR-X1864 User Manual 105 - D-Link COVR-X1862 | Product Manual 1 - Page 110
dotati di batteria sostituibile dall'utente, leggere e seguire le istruzioni riportate nel manuale dell'utente. • Non versare cibi o liquidi sul prodotto e non spingere en gebruik uitsluitend een droge pluisvrije doek. D-Link COVR-X1860 || COVR-X1862 || COVR-X1863 || COVR-X1864 User Manual 106 - D-Link COVR-X1862 | Product Manual 1 - Page 111
CO2-Emissionen zu reduzieren. Wenn Sie mehr über unsere umweltgerechten Produkte und Verpackungen wissen möchten, finden Sie entsprechende Informationen im Internet unter www.dlinkgreen.com. D-Link COVR-X1860 || COVR-X1862 || COVR-X1863 || COVR-X1864 User Manual 107 - D-Link COVR-X1862 | Product Manual 1 - Page 112
hacerlo, contribuirá a ahorrar energía y a reducir las emisiones de CO2. Para obtener más información acerca de nuestros productos y embalajes ecológicos, visite el sitio www.dlinkgreen.com. D-Link COVR-X1860 || COVR-X1862 || COVR-X1863 || COVR-X1864 User Manual 108 - D-Link COVR-X1862 | Product Manual 1 - Page 113
te doen bespaart u energie en beperkt u de CO2-emissies. Breng een bezoek aan www.dlinkgreen.com voor meer informatie over onze milieuverantwoorde producten en verpakkingen. D-Link COVR-X1860 || COVR-X1862 || COVR-X1863 || COVR-X1864 User Manual 109 - D-Link COVR-X1862 | Product Manual 1 - Page 114
robky značky D-Link vypnuli nebo vytáhli ze zásuvky vždy, když je nepoužíváte. Pomůžete tak šetřit energii a snížit emise CO2. Více informací o našich ekologických výrobcích a obalech najdete na adrese www.dlinkgreen.com. D-Link COVR-X1860 || COVR-X1862 || COVR-X1863 || COVR-X1864 User Manual 110 - D-Link COVR-X1862 | Product Manual 1 - Page 115
D-Link-produkter når de ikke er i bruk. Ved å gjøre dette hjelper du å spare energi og å redusere CO2-utslipp. For mer informasjon angående våre miljøansvarlige produkter og forpakninger kan du gå til www.dlinkgreen.com. D-Link COVR-X1860 || COVR-X1862 || COVR-X1863 || COVR-X1864 User Manual 111 - D-Link COVR-X1862 | Product Manual 1 - Page 116
ne aina, kun ne eivät ole käytössä. Toimimalla näin autat säästämään energiaa ja vähentämään hiilidioksiidipäästöjä. Lue lisää ympäristöystävällisistä D-Link-tuotteista ja pakkauksistamme osoitteesta www.dlinkgreen.com. D-Link COVR-X1860 || COVR-X1862 || COVR-X1863 || COVR-X1864 User Manual 112 - D-Link COVR-X1862 | Product Manual 1 - Page 117
ção ajudará a poupar energia e reduzir as emissões de CO2. Para saber mais sobre os nossos produtos e embalagens responsáveis a nível ambiental visite www.dlinkgreen.com. D-Link COVR-X1860 || COVR-X1862 || COVR-X1863 || COVR-X1864 User Manual 113
-
 1
1 -
 2
2 -
 3
3 -
 4
4 -
 5
5 -
 6
6 -
 7
7 -
8
-
9
-
10
-
11
-
12
-
13
-
14
-
15
-
16
-
17
-
18
-
19
-
20
-
21
-
22
-
23
-
24
-
25
-
26
-
27
-
28
-
29
-
30
-
31
-
32
-
33
-
34
-
35
-
36
-
37
-
38
-
39
-
40
-
41
-
42
-
43
-
44
-
45
-
46
-
47
-
48
-
49
-
50
-
51
-
52
-
53
-
54
-
55
-
56
-
57
-
58
-
59
-
60
-
61
-
62
-
63
-
64
-
65
-
66
-
67
-
68
-
69
-
70
-
71
-
72
-
73
-
74
-
75
-
76
-
77
-
78
-
79
-
80
-
81
-
82
-
83
-
84
-
85
-
86
-
87
-
88
-
89
-
90
-
91
-
92
-
93
-
94
-
95
-
96
-
97
-
98
-
99
-
100
-
101
-
102
-
103
-
104
-
105
-
106
-
107
-
108
-
109
-
110
-
111
-
112
-
113
-
114
-
115
-
116
-
117
 |
 |

COVR-X1863