D-Link AC2600 User Manual
D-Link AC2600 Manual
 |
View all D-Link AC2600 manuals
Add to My Manuals
Save this manual to your list of manuals |
D-Link AC2600 manual content summary:
- D-Link AC2600 | User Manual - Page 1
Version 1.00(CA) | 2019/11/08 User Manual AC2600 High-Power Wi-Fi Router DIR-2640 - D-Link AC2600 | User Manual - Page 2
Manual Revisions Date 2019/11/08 Initial release Description Trademarks D-Link and the D-Link logo are trademarks or registered trademarks of D-Link Apple Inc., registered in the U.S. and other countries. App StoreSM is a service mark of Apple Inc. Chrome™ browser, Google Play™ and Android™ are - D-Link AC2600 | User Manual - Page 3
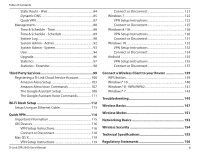
Setup 9 D-Link Wi-Fi App Setup 10 Hardware Setup 12 Setup Wizard 15 Configuration 22 Home 23 Internet 24 DIR-2640 25 Connected Clients 26 Extenders VLAN 58 Wireless 60 Guest Zone 65 Network 67 USB Sharing 69 D-Link Cloud 71 Features 72 QoS Engine 72 Firewall Settings - Advanced 74 - D-Link AC2600 | User Manual - Page 4
132 Connect or Disconnect 134 Android 135 VPN Setup Instructions 135 Connect or Disconnect 137 Connect a Wireless Client to your Router 139 WPS Button 139 Windows® 10 140 Windows® 8 - WPA/WPA2 141 Windows® 7 143 Troubleshooting 145 Wireless Basics 147 Wireless Modes 151 Networking - D-Link AC2600 | User Manual - Page 5
1 - Product Overview Product Overview Package Contents DIR-2640 Quick Install Guide Quick Installation Card Ethernet Cable (RJ45) Power Adapter DIR-2640 V voltage rating than the one included with the router will cause damage and void the warranty for this product. D-Link DIR-2640 User Manual 1 - D-Link AC2600 | User Manual - Page 6
or Linux-based operating system • An installed Ethernet adapter Web-based Configuration Utility Requirements D-Link Wi-Fi App Requirements Browser Requirements: • Internet Explorer 10 or higher • Firefox app's store page to check whether your device is compatible.) D-Link DIR-2640 User Manual 2 - D-Link AC2600 | User Manual - Page 7
instructions to set up your DIR-2640. You also have the option to use a web browser to access the setup wizard and to manage your router. Support for industry-standard Wi-Fi Protected Setup (WPS) lets you create encrypted connections to new devices by pressing a button. D-Link DIR-2640 User Manual - D-Link AC2600 | User Manual - Page 8
is enabled. The device is processing WPS. A USB storage device is connected to the USB 3.0 port. A USB storage device is connected to the USB 2.0 port. D-Link DIR-2640 User Manual 4 - D-Link AC2600 | User Manual - Page 9
Reset Button Insert a paperclip in the hole, wait for 10 seconds, and release to reset the router to default settings. 5 WPS Button Press to start the WPS process and automatically create an encrypted connection Press the power button to power the device on or off. D-Link DIR-2640 User Manual 5 - D-Link AC2600 | User Manual - Page 10
Section 1 - Product Overview Front Panel 1 1 USB 3.0 Port Connect a USB storage device to share files over the network. D-Link DIR-2640 User Manual 6 - D-Link AC2600 | User Manual - Page 11
router combo, you will need to set it to "bridge" mode so the router can work properly. Please contact your ISP or refer to the user manual for your modem/router router, and then turn the modem back on. In some cases, you may need to call your Internet Service of your existing setup before making any - D-Link AC2600 | User Manual - Page 12
Keep the number of walls and ceilings between the D-Link router and other network devices to a minimum - each wall or ceiling can reduce your adapter's range from 3-90 feet (1-30 meters.) Position your devices base transmits a signal even if the phone is not in use. D-Link DIR-2640 User Manual 8 - D-Link AC2600 | User Manual - Page 13
DIR-2640. Refer to Hardware Setup on page 12. • D-Link Setup Wizard - This wizard will launch when you log into the router by using your PC for the first time. Refer to Setup Wizard on page 15. • Manual Setup - Log in to the router to manually configure your router. Refer to Configuration on page - D-Link AC2600 | User Manual - Page 14
Link Wi-Fi App Setup The D-Link Wi-Fi app allows you to install and configure your DIR-2640 from your compatible Android or iOS device. Note: The screenshots may be different depending on your mobile device's OS version. The following steps show the iOS interface of the D-Link the free D-Link Wi-Fi - D-Link AC2600 | User Manual - Page 15
select DIR-2640 from the list of available devices. Tap Next to continue. Step 6 You will now be guided through a step-by-step process for setting up your router. Simply follow the on-screen instructions to continue the installation and the configuration process. D-Link DIR-2640 User Manual 11 - D-Link AC2600 | User Manual - Page 16
Setup Step 1 The DIR-2640 is designed to give you the fastest, most stable network connection possible. In order to maximize performance, fully extend the antennas into a 105 degree angle to provide optimal wireless coverage. Keep the router WPS WiFi 12V...1.5A POWER D-Link DIR-2640 User Manual 12 - D-Link AC2600 | User Manual - Page 17
Use the Ethernet cable to connect your modem to the port labelled INTERNET on the router. - •+ 4 3 2 1 INTERNET RESET WPS WiFi 12V...1.5A POWER Step 12V...1.5A POWER Step 6 Connect the supplied power adapter to the router and a power outlet, press the power button, and wait approximately one - D-Link AC2600 | User Manual - Page 18
labeled 1 on the back of the router, and the other end into the Ethernet service that uses a dynamic connection (not PPPoE), you may be online already. Try opening a web browser and connecting to a website. If the website does not load, proceed to Setup Wizard on page 15. D-Link DIR-2640 User Manual - D-Link AC2600 | User Manual - Page 19
Section 2 - Installation Setup Wizard The setup wizard is designed to guide you through a step-by-step process to configure your new DIR-2640 and connect to the Internet via a wireless setup process. If this is your first time installing the router, open your web browser and enter http://dlinkrouter - D-Link AC2600 | User Manual - Page 20
Section 2 - Installation Follow the on-screen instructions to configure your new D-Link router and connect to the Internet. Click Next to continue. Please wait while your router detects your Internet connection type. D-Link DIR-2640 User Manual 16 - D-Link AC2600 | User Manual - Page 21
Internet connection type (this information can be obtained from your Internet Service Provider). Click Next to continue. If the router detected or you selected PPPoE, enter your PPPoE username and password. is no longer needed and will not work through a router. D-Link DIR-2640 User Manual 17 - D-Link AC2600 | User Manual - Page 22
Fi Password to setup your Wi-Fi network. Your wireless clients will need to have this passphrase to be able to connect to your wireless network. Click Next to continue. Note: The router's Smart Connect 2.4 GHz and 5 GHz networks, refer to Wireless on page 60. D-Link DIR-2640 User Manual 18 - D-Link AC2600 | User Manual - Page 23
secure the router's configuration access, please enter a password. You will be prompted for this password every time you want to use the router's web configuration utility. Click Next to continue. Select your time zone from the drop-down menu. Click Next to continue. D-Link DIR-2640 User Manual 19 - D-Link AC2600 | User Manual - Page 24
Section 2 - Installation Keeping your router's firmware up-to-date provides you with the latest protection and new features over the air. Choose whether will be presented with a summary of your settings. Click Next to finalize the settings or Back to make changes. D-Link DIR-2640 User Manual 20 - D-Link AC2600 | User Manual - Page 25
during this time. Your new settings have been saved and your router is now configured. Click OK to close the Setup Wizard. Congratulations, your device has been successfully configured! You can log in to the configuration utility by inputting the Admin Password. D-Link DIR-2640 User Manual 21 - D-Link AC2600 | User Manual - Page 26
by typing the IP address of the router (by default this is http://192.168.0.1) in the address bar. Enter your password. If you previously followed the setup wizard, please use the admin password you The system will automatically log out after a period of inactivity. D-Link DIR-2640 User Manual 22 - D-Link AC2600 | User Manual - Page 27
you to quickly navigate to other pages. The Home page displays whether or not the router is currently connected to the Internet. If it is disconnected, click Click to repair to bring up the setup wizard, refer to the Setup Wizard on page 15 for more information. D-Link DIR-2640 User Manual 23 - D-Link AC2600 | User Manual - Page 28
from the Internet. If you do this and wish to reconnect, click Renew. To reconfigure the Internet settings, refer to Internet - IPv4 on page 33 D-Link DIR-2640 User Manual 24 - D-Link AC2600 | User Manual - Page 29
DIR-2640 icon to view details about the router and its wireless settings. Here you can see the router's current Wi-Fi network name and password, as well as the router's MAC address, IPv4 address, and IPv6 appears. Refer to Wireless on page 60 for more information. D-Link DIR-2640 User Manual 25 - D-Link AC2600 | User Manual - Page 30
Clients Click on the Connected Clients icon to view details about the connected clients to the router and their wireless settings. On this page you can see all the clients currently connected to the router, and their IP addresses. To edit each client's settings, click the pencil icon on the client - D-Link AC2600 | User Manual - Page 31
reserve an IP address for the client. IP Address (Reserved) Specify an IP address for the router's DHCP server to assign. Parental Control Enable Parental Control for the client to specify whether it is page 89 for more information. Click Save when you are done. D-Link DIR-2640 User Manual 27 - D-Link AC2600 | User Manual - Page 32
to the router, and configure them. To edit each extender's settings, click the pencil icon on the extender you want to edit. Edit Rule Name Enter a custom name for this extender. MAC Address Displays the MAC address of the extender. Click Save when you are done. D-Link DIR-2640 User Manual 28 - D-Link AC2600 | User Manual - Page 33
wish to configure to either Reboot the device or to Remove the device from the network. Click the arrow next to the Extenders icon to access information regarding your Mesh Network. For more information regarding your Mesh Network, refer to Mesh Network on page 30. D-Link DIR-2640 User Manual 29 - D-Link AC2600 | User Manual - Page 34
or office wireless AC network. Expand your Wi-Fi coverage by adding compatible D-Link access points. Mix and match suitable D-Link devices according to your budget and preferences to fit any floorplan. Setup is effortless; configuration of multiple access points can be done in minutes as settings - D-Link AC2600 | User Manual - Page 35
top of the page) and then USB Sharing on the drop down menu that appears. Refer to USB Sharing on page 69 for more information. D-Link DIR-2640 User Manual 31 - D-Link AC2600 | User Manual - Page 36
the top of the page, click Wizard to open the setup wizard. This is the same wizard that appears when you start the router for the first time. Refer to Setup Wizard on page 15 for details. Note: When the Wizard is opened, the router will disconnect from the internet. D-Link DIR-2640 User Manual 32 - D-Link AC2600 | User Manual - Page 37
the IPv6 Internet and network connection details, click the IPv6 link. Refer to Internet - IPv6 on page 43 To configure the VLAN connection details, click the VLAN link. Refer to Internet - VLAN on page 58 Click Save to page 40 For IPv4 - DS-Lite refer to page 42 D-Link DIR-2640 User Manual 33 - D-Link AC2600 | User Manual - Page 38
Dynamic IP (DHCP) to obtain IP address information automatically from your Internet Service Provider (ISP). Select this option if your ISP does not specify an Internet port's physical interface MAC address on the router. You can use the dropdown menu to replace the Internet port's MAC address with - D-Link AC2600 | User Manual - Page 39
IP Select Static IP if your IP information is provided by your Internet Service Provider (ISP). Click Save at any time to save the changes you to the Internet port's physical interface MAC address on the router. You can use the dropdown menu to replace the Internet port's MAC address with the - D-Link AC2600 | User Manual - Page 40
ISP. Enter the password provided by your ISP. Select either Always on, On Demand, or Manual. Configurable when On Demand is selected. Enter a maximum idle time during which the Internet connection gateway, and DNS server addresses. In most cases, select Dynamic IP. D-Link DIR-2640 User Manual 36 - D-Link AC2600 | User Manual - Page 41
chosen address mode. Service Name Enter the ISP service name (optional) port's physical interface MAC address on the router. You can use the dropdown menu provided by your ISP. Service Name Enter the ISP service name (optional) Primary address on the router. You can use the dropdown menu to - D-Link AC2600 | User Manual - Page 42
3 - Configuration IPv4 - PPTP Choose PPTP (Point-to-Point-Tunneling Protocol) if your Internet Service Provider (ISP) uses a PPTP connection. Your ISP will provide you with a username and mask, gateway, and DNS server addresses. In most cases, select Dynamic IP. D-Link DIR-2640 User Manual 38 - D-Link AC2600 | User Manual - Page 43
DNS server IP address assigned by your ISP. MTU Maximum Transmission Unit - you may need to change the MTU for optimal performance with your ISP. D-Link DIR-2640 User Manual 39 - D-Link AC2600 | User Manual - Page 44
3 - Configuration IPv4 - L2TP Choose L2TP (Layer 2 Tunneling Protocol) if your Internet Service Provider (ISP) uses a L2TP connection. Your ISP will provide you with a username and subnet mask, gateway, and DNS server addresses. In most cases, select Dynamic IP. D-Link DIR-2640 User Manual 40 - D-Link AC2600 | User Manual - Page 45
DNS server IP address assigned by your ISP. MTU Maximum Transmission Unit - you may need to change the MTU for optimal performance with your ISP. D-Link DIR-2640 User Manual 41 - D-Link AC2600 | User Manual - Page 46
DS-Lite DHCPv6 Option to let the router allocate the AFTR IPv6 address automatically. Select Manual Configuration to enter the AFTR IPv6 address manually. Advanced Settings... - DS-Lite DHCPv6 the IPv6 WAN default gateway address will Gateway be displayed here. D-Link DIR-2640 User Manual 42 - D-Link AC2600 | User Manual - Page 47
to see the Internet configuration options for the IPv4 connection details, then click the IPv6 link to access the configuration options for the IPv6 connection details. To configure the IPv4 Internet and page 55 For IPv6 - Local Connectivity Only refer to page 57 D-Link DIR-2640 User Manual 43 - D-Link AC2600 | User Manual - Page 48
the router's LAN link-local address. Address If Enable DHCP-PD is disabled, these additional parameters are available for configuration: LAN IPv6 Address Enter a valid LAN IPv6 address. LAN IPv6 Link-Local Displays the router's LAN link-local address. Address D-Link DIR-2640 User Manual 44 - D-Link AC2600 | User Manual - Page 49
feature. Enable Automatic Enable or disable DHCP-PD for other IPv6 routers connected DHCP-PD in LAN to the LAN interface. Autoconfiguration Select Range (Start) assignment. IPv6 Address Enter the ending IPv6 address for the DHCP server's IPv6 Range (End) assignment. D-Link DIR-2640 User Manual - D-Link AC2600 | User Manual - Page 50
Internet Service Provider (ISP). Click Save at any time to save the changes you have made on this page. Use Link-Local Address Link-Local Address LAN IPv6 Address Settings Enter the LAN (local) IPv6 address for the router. Displays the router's LAN link-local address. D-Link DIR-2640 User Manual - D-Link AC2600 | User Manual - Page 51
Type: Router Advertisement Lifetime Enter the router advertisement lifetime Range (Start) assignment. IPv6 Address Enter the ending IPv6 address for the DHCP server's IPv6 Range (End) assignment. IPv6 Address Lifetime Enter the IPv6 address lifetime (in minutes). D-Link DIR-2640 User Manual - D-Link AC2600 | User Manual - Page 52
, enter the secondary DNS server address. LAN IPv6 Address Settings Enable DHCP-PD Enable or disable prefix delegation services. LAN IPv6 Link-Local Displays the router's LAN link-local address. Address If Enable DHCP-PD is disabled, these additional parameters are available for configuration: LAN - D-Link AC2600 | User Manual - Page 53
Settings: Enable Automatic Enable or disable DHCP-PD for other IPv6 routers connected DHCP-PD in LAN to the LAN interface. Autoconfiguration Select Range (Start) assignment. IPv6 Address Enter the ending IPv6 address for the DHCP server's IPv6 Range (End) assignment. D-Link DIR-2640 User Manual - D-Link AC2600 | User Manual - Page 54
Type: Router Advertisement Lifetime Enter the router advertisement lifetime Range (Start) assignment. IPv6 Address Enter the ending IPv6 address for the DHCP server's IPv6 Range (End) assignment. IPv6 Address Lifetime Enter the IPv6 address lifetime (in minutes). D-Link DIR-2640 User Manual - D-Link AC2600 | User Manual - Page 55
made on this page. PPPoE Session Username Password Address Mode IP Address Service Name Reconnect Mode MTU Create a new PPPoE session. Enter the username provided by your ISP. Enter the ISP service name (optional). Select either Always On or Manual. Maximum Transmission Unit - you may need to change - D-Link AC2600 | User Manual - Page 56
, enter the secondary DNS server address. LAN IPv6 Address Settings Enable DHCP-PD Enable or disable prefix delegation services. LAN IPv6 Link-Local Displays the router's LAN link-local address. Address If Enable DHCP-PD is disabled, these additional parameters are available for configuration: LAN - D-Link AC2600 | User Manual - Page 57
Settings: Enable Automatic Enable or disable DHCP-PD for other IPv6 routers connected DHCP-PD in LAN to the LAN interface. Autoconfiguration Select Range (Start) assignment. IPv6 Address Enter the ending IPv6 address for the DHCP server's IPv6 Range (End) assignment. D-Link DIR-2640 User Manual - D-Link AC2600 | User Manual - Page 58
Type: Router Advertisement Lifetime Enter the router advertisement lifetime Range (Start) assignment. IPv6 Address Enter the ending IPv6 address for the DHCP server's IPv6 Range (End) assignment. IPv6 Address Lifetime Enter the IPv6 address lifetime (in minutes). D-Link DIR-2640 User Manual - D-Link AC2600 | User Manual - Page 59
as the 6rd Configuration: 6rd IPv6 Prefix Enter the 6rd IPv6 prefix and mask length supplied by your ISP. WAN IPv4 Address Displays the router's IPv4 address. 6rd Border Relay IPv4 Enter the 6rd border relay IPv4 address settings supplied by Address your ISP. D-Link DIR-2640 User Manual 55 - D-Link AC2600 | User Manual - Page 60
Type: Router Advertisement Lifetime Enter the router advertisement lifetime Range (Start) assignment. IPv6 Address Enter the ending IPv6 address for the DHCP server's IPv6 Range (End) assignment. IPv6 Address Lifetime Enter the IPv6 address lifetime (in minutes). D-Link DIR-2640 User Manual - D-Link AC2600 | User Manual - Page 61
own ULA prefix. Advanced Settings... - Current IPv6 ULA Settings Current ULA Prefix Displays the current ULA prefix. LAN IPv6 ULA Displays the LAN's IPv6 ULA. D-Link DIR-2640 User Manual 57 - D-Link AC2600 | User Manual - Page 62
connection details, then click the VLAN link to access the configuration options for the VLAN connection details. VLAN allows for services such as Triple-Play to be used configure the IPv6 Internet and network connection details, click the IPv6 link. Refer to Internet - IPv6 on page 43 Click Save at - D-Link AC2600 | User Manual - Page 63
your Internet connection, as provided by your ISP. IPTV VLAN ID Enter the VLAN ID for your IPTV service, as provided by your ISP. VOIP VLAN ID Enter the VLAN ID for your VoIP network, as provided IP) coming from the WAN connection to each interface on the router. D-Link DIR-2640 User Manual 59 - D-Link AC2600 | User Manual - Page 64
on this page. Status Wi-Fi Mesh Enable or disable the Wi-Fi Mesh feature. Refer to Mesh Network on page 30 for more information. D-Link DIR-2640 User Manual 60 - D-Link AC2600 | User Manual - Page 65
to Always Enable, or you can create your own schedules in the Schedules section. Refer to Time & Schedule - Schedule on page 89 for more information. D-Link DIR-2640 User Manual 61 - D-Link AC2600 | User Manual - Page 66
to 32 characters. Password Create a password to use for wireless security. Wireless clients will need to enter this password to successfully connect to the network. D-Link DIR-2640 User Manual 62 - D-Link AC2600 | User Manual - Page 67
to Always Enable, or you can create your own schedules in the Schedules section. Refer to Time & Schedule - Schedule on page 89 for more information. D-Link DIR-2640 User Manual 63 - D-Link AC2600 | User Manual - Page 68
Section 3 - Configuration Wi-Fi Protected Setup The easiest way to connect your wireless devices to the router is with Wi-Fi Protected Setup (WPS). WPS-PBC Status Enable or disable WPS-PBC (Push Button Configuration) functionality. D-Link DIR-2640 User Manual 64 - D-Link AC2600 | User Manual - Page 69
the page, click Wireless to see your wireless network settings for your DIR-2640. Then click the link to Guest Zone to configure your guest zone settings. The Guest Zone feature will allow you to Internet, preventing guests from accessing other local network devices. D-Link DIR-2640 User Manual 65 - D-Link AC2600 | User Manual - Page 70
more information. Internet Access Only Home Network Access Enabling this option will confine connectivity to the Internet, preventing guests from accessing other local network devices. D-Link DIR-2640 User Manual 66 - D-Link AC2600 | User Manual - Page 71
. Enter the domain name (optional). Disable to transfer the DNS server information from your ISP to your computers. If enabled, your computers will use the router for a DNS server. D-Link DIR-2640 User Manual 67 - D-Link AC2600 | User Manual - Page 72
Status DHCP IP Address Range DHCP Lease Time your computers or devices, make sure the IP addresses are outside of this range or you may have an IP conflict. Enter the length of time for to allow IPv4 multicast traffic to pass through the router from the Internet. This is enabled by default. Enable - D-Link AC2600 | User Manual - Page 73
, click USB Sharing to set up access to files on an external USB drive plugged into the router. You can access shared files such as photos, music, and movies through your local network or from , allowing connected clients access to shared files over the network. D-Link DIR-2640 User Manual 69 - D-Link AC2600 | User Manual - Page 74
Advanced Settings... Enable Remote Sharing If FTP server is enabled, enable or disable remote access to files stored on a USB device plugged into the router through a web browser. FTP Server Port Enter the port number of FTP server. Idle Time Enter the time (in minutes) before connected clients - D-Link AC2600 | User Manual - Page 75
top of the page, click D-Link Cloud to see your D-Link Cloud Service details. This page lists whether you are registered with D-Link Cloud Service and email address associated with the account. Use the D-Link Wi-Fi app to find out more about D-Link Cloud's features. D-Link DIR-2640 User Manual 71 - D-Link AC2600 | User Manual - Page 76
the values from the speedtest through the Check Speed button above and apply the results by clicking Apply to QoS after the speedtest is complete. D-Link DIR-2640 User Manual 72 - D-Link AC2600 | User Manual - Page 77
Section 3 - Configuration This Quality of Service (QoS) Engine will allow you to prioritize particular clients over others, so that those clients receive higher bandwidth. return it to the All Devices list, click the cross icon in the top right of the device card. D-Link DIR-2640 User Manual 73 - D-Link AC2600 | User Manual - Page 78
Features menu on the bar at the top of the page, click Firewall to configure the router's firewall settings. The firewall feature protects your network from malicious attacks over the Internet. disable IPv6 simple security. Enable or disable IPv6 ingress filtering. D-Link DIR-2640 User Manual 74 - D-Link AC2600 | User Manual - Page 79
multiple VPN clients to connect to their corporate network using IPSec. Some VPN clients support traversal of IPSec through NAT. This Application Level Gateway (ALG) may interfere with devices. If you are having trouble making VoIP calls, try turning this ALG off. D-Link DIR-2640 User Manual 75 - D-Link AC2600 | User Manual - Page 80
bar at the top of the page, click Firewall to configure the router's firewall settings, then click the IPv4 Rules link or the IPv6 Rules link to configure what kind of traffic is allowed to pass through the If you wish to create a new rule, click the Add Rule button. D-Link DIR-2640 User Manual 76 - D-Link AC2600 | User Manual - Page 81
, the following options will appear: Name Enter a name for the rule. Source IP Address Range Enter the source IP address range that the rule will apply to. Using the drop-down menu, specify whether it is Time & Schedule - Schedule on page 89 for more information. D-Link DIR-2640 User Manual 77 - D-Link AC2600 | User Manual - Page 82
range of ports to open for specific devices on the network. This might be necessary for certain applications to connect through the router. To configure the Virtual Server settings, click the Virtual Server link wish to create a new rule, click the Add Rule button. D-Link DIR-2640 User Manual 78 - D-Link AC2600 | User Manual - Page 83
computer on your local network that you want to allow the incoming service to. Alternatively, select the device from the drop-down menu. TCP that you want to open. You can enter a single port or a range of ports. Separate ports with a comma (for example: 24,1009,3000- Link DIR-2640 User Manual 79 - D-Link AC2600 | User Manual - Page 84
. This might be necessary for certain applications to connect through the router. To configure the Port Forwarding settings, click the Port Forwarding link. Refer to Port Forwarding on page 78 Click Save at any wish to create a new rule, click the Add Rule button. D-Link DIR-2640 User Manual 80 - D-Link AC2600 | User Manual - Page 85
Enter the IP address of the computer on your local network that you want to allow the incoming service to. Alternatively, select the device from the drop-down menu. Protocol Select the protocol of the traffic & Schedule - Schedule on page 89 for more information. D-Link DIR-2640 User Manual 81 - D-Link AC2600 | User Manual - Page 86
trash can icon in the Delete column. If you wish to list a new site to allow or deny access to, click the Add Rule button. D-Link DIR-2640 User Manual 82 - D-Link AC2600 | User Manual - Page 87
around your network. To configure the Static Route IPv6 settings, click the IPv6 link. Refer to Static Route - IPv6 on page 84 Click Save at any time to be taken when this route is used. Metric Enter a route metric value ranging from 0 to 15. This value indicates the cost of using this route. - D-Link AC2600 | User Manual - Page 88
the Static Route IPv4 settings, click the IPv4 link. Refer to Static Route - IPv4 on page . DestNetwork This is the IP address of the router used to reach the specified destination. PrefixLen Enter route is used. Metric Enter a route metric value ranging from 0 to 15. This value indicates the - D-Link AC2600 | User Manual - Page 89
allows your router to associate an easy-to-remember domain name such as [YourDomainName].com with the regularly changing IP address assigned by your Internet Service provider. that you registered with your dynamic DNS service provider. Enter your dynamic DNS username. Enter your dynamic DNS password. Enter a - D-Link AC2600 | User Manual - Page 90
wish to create a new record, click the Add Record button. Host Name IPv6 Address Enter the host name that you registered with your dynamic DNS service provider. Enter the IPv6 address of the dynamic DNS server. Alternatively, select the server device in the drop-down menu - D-Link AC2600 | User Manual - Page 91
configuring Dynamic DNS before proceeding with Quick VPN setup. If your router is assigned an IP address from your ISP and delete user accounts with user-defined access to certain router services, click the User link. Refer to User on page 94 Click Save at any . D-Link DIR-2640 User Manual 87 - D-Link AC2600 | User Manual - Page 92
time zone from the drop-down menu. Displays the current date and time of the router. Automatic Time Configuration NTP Server Select from the drop-down menu to either use the D-Link NTP Server to synchronize the time and date for your router, or choose Manual to set the NTP server's IP address - D-Link AC2600 | User Manual - Page 93
page, then click the Schedule link. The Schedule page allows you to control some of the router functions through a pre-configured schedule. To configure the Time settings, click the Time link. Refer to Time & Schedule on the cross icon. Click Apply when you are done. D-Link DIR-2640 User Manual 89 - D-Link AC2600 | User Manual - Page 94
on the bar at the top of the page, click System Log. The router keeps a running log of events. This log can be sent to a Syslog Syslog Server SysLog Server IP Address SysLog Settings Check this box to send the router logs to a SysLog Server. Configurable if Enable Logging to Syslog Server is enabled - D-Link AC2600 | User Manual - Page 95
Log Full If enabled, this option will set the router to send the log when it is full. Send on Schedule If enabled, this option will set the router to send according to a set schedule. Schedule If Refer to Time & Schedule - Schedule on page 89 for more information. D-Link DIR-2640 User Manual 91 - D-Link AC2600 | User Manual - Page 96
... - Administration Enable Remote Management Remote Admin Port Click the toggle to enable remote management for your router. Specify the port number for accessing the web configuration settings UI. LED Control Status LED Turn the LED status lights on or off. D-Link DIR-2640 User Manual 92 - D-Link AC2600 | User Manual - Page 97
router's current configuration, load a previously saved configuration, reset the router to its factory default settings, or reboot the router. To configure the Admin settings, click the Admin link the current router configuration settings, reboot the router immediately. You may set the router to - D-Link AC2600 | User Manual - Page 98
The User section is used to create, manage, and delete user accounts with user-defined access to certain router services. Click Save at any time to save the changes you have made on this page. If you wish you wish to create a new user, click the Create User button. D-Link DIR-2640 User Manual 94 - D-Link AC2600 | User Manual - Page 99
Read/ Write permission. Click Browse to select the folder you want to share. VPN Enable or disable Virtual Private Network (VPN) functionality for this user. D-Link DIR-2640 User Manual 95 - D-Link AC2600 | User Manual - Page 100
router's firmware, either automatically or manually. To manually upgrade the firmware, you must first download the relevant file from http://support.dlink enabled, the router will automatically check for set the router to automatically If you wish to upgrade manually, first download the firmware file - D-Link AC2600 | User Manual - Page 101
of packets that pass through the router on the Internet, LAN, Wi-Fi 2.4 GHz and Wi-Fi 5GHz networks. To view the Extender statistics, click the Extender link. Refer to Statistics - Extender on page 98 You can view counter will reset if the device is rebooted. D-Link DIR-2640 User Manual 97 - D-Link AC2600 | User Manual - Page 102
's statistics, click the Router link. Refer to Statistics on page 97 Click the tabs at the top of the graph to view different extenders if you have more than one connected. The graph will update in real time. The traffic counter will reset if the device is rebooted. D-Link DIR-2640 User Manual 98 - D-Link AC2600 | User Manual - Page 103
and disabling your Wi-Fi guest zone without having to go into the UI, rebooting the router and checking your router for firmware upgrades. In order to use third party services to control and manage your device, please register your device with D-Link Cloud Service. D-Link DIR-2640 User Manual 99 - D-Link AC2600 | User Manual - Page 104
need to register your device with D-Link Cloud Service. Follow the steps below if you do not have a D-Link Cloud Service account. Step 1 Launch the D-Link Wi-Fi app. Step 2 Tap the settings gear icon on the top right corner of the screen. D-Link Wi-Fi DIR-2640 D-Link DIR-2640 User Manual 100 - D-Link AC2600 | User Manual - Page 105
Section 4 - Third Party Services Step 3 Tap the Cloud Service icon. Step 4 Tap the Register button. D-Link DIR-2640 User Manual 101 - D-Link AC2600 | User Manual - Page 106
Section 4 - Third Party Services Step 5 In this menu, you can sign up for a D-Link account using Facebook, Google or an Email address. If you already have a D-Link account, you can tap the Log In link at the bottom of the screen to be redirected to the login page. D-Link DIR-2640 User Manual 102 - D-Link AC2600 | User Manual - Page 107
Section 4 - Third Party Services Amazon Alexa Setup You will need the Amazon Alexa app, an Amazon account, an Amazon Alexa device and a D-Link Cloud Service account to use this feature. Note: The on the top left-hand corner of the home screen. Amazon Alexa D-Link DIR-2640 User Manual 103 - D-Link AC2600 | User Manual - Page 108
Section 4 - Third Party Services Step 3 Tap on Skills & Games. Step 4 Search for "D-Link Wi-Fi". Tap on the search result. D-Link DIR-2640 User Manual 104 - D-Link AC2600 | User Manual - Page 109
Section 4 - Third Party Services Step 5 Tap Enable to link the skill. Step 6 Sign in using your D-Link account details. D-Link DIR-2640 User Manual 105 - D-Link AC2600 | User Manual - Page 110
Section 4 - Third Party Services Step 7 Congratulations! D-Link Wi-Fi has been successfully linked as a skill for your Amazon device. Close the window by tapping Done on the top left corner of the screen. Refer to Amazon Alexa Voice - D-Link AC2600 | User Manual - Page 111
"Alexa, ask D-Link Wi-Fi to enable my guest zone." "Alexa, ask D-Link Wi-Fi to disable my guest zone." "Alexa, ask D-Link Wi-Fi what are my guest network credentials." "Alexa, ask D-Link Wi-Fi to reboot the router." "Alexa, ask D-Link Wi-Fi to upgrade my router." D-Link DIR-2640 User Manual 107 - D-Link AC2600 | User Manual - Page 112
Section 4 - Third Party Services The Google Assistant Setup You will need the Google Assistant app, a Google account and a D-Link Cloud Service account to use this feature. Note: The app. Step 2 Tell your Google Assistant to "Talk to D-Link Wi-Fi." Assistant D-Link DIR-2640 User Manual 108 - D-Link AC2600 | User Manual - Page 113
Section 4 - Third Party Services Step 3 Tap Yes. Step 4 Sign in using your D-Link account details. D-Link DIR-2640 User Manual 109 - D-Link AC2600 | User Manual - Page 114
Party Services Step 5 Tap Allow to continue setup.. Step 6 Congratulations! D-Link Wi-Fi has been successfully linked to your Google Assistant. Refer to The Google Assistant Voice Commands on page 111 for tasks that you can ask your Google Assistant to perform. D-Link DIR-2640 User Manual 110 - D-Link AC2600 | User Manual - Page 115
enable my guest zone." "OK Google, talk to D-Link Wi-Fi to disable my guest zone." "OK Google, talk to D-Link Wi-Fi to tell me my guest zone credentials." "OK Google, talk to D-Link Wi-Fi to reboot the router." "OK Google, talk to D-Link Wi-Fi to upgrade my router." D-Link DIR-2640 User Manual 111 - D-Link AC2600 | User Manual - Page 116
or office wireless AC network. Expand your Wi-Fi coverage by adding compatible D-Link access points. Mix and match suitable D-Link devices according to your budget and preferences to fit any floorplan. Setup is effortless; configuration of multiple access points can be done in minutes as settings - D-Link AC2600 | User Manual - Page 117
Mesh Setup Setup Using an Ethernet Cable Step 1 Connect and plug in the Wi-Fi Mesh compatible device close to your DIR-2640 and wait for the device to be ready. Refer to the device's manual for behavioural anywhere in your home to extend your whole home Wi-Fi. D-Link DIR-2640 User Manual 113 - D-Link AC2600 | User Manual - Page 118
Quick VPN Quick VPN This router is equipped with D-Link's Quick VPN technology. Virtual traveling, Quick VPN lets you watch sports and use video streaming services without experiencing blackouts or filtering. You can surf the whole Link DIR-2640 User Manual Unencrypted Data Encrypted Data 114 - D-Link AC2600 | User Manual - Page 119
instructions explain and help you to configure your D-Link Quick VPN enabled router and devices to create a Virtual Private Network (VPN). This feature is provided for advanced users who wish to connect remotely and use their router some networks. If you have trouble using Quick VPN on some networks - D-Link AC2600 | User Manual - Page 120
This section provides Quick VPN setup instructions for iOS devices. Refer to Quick VPN on page 87 for your router setup instructions. Go into Settings on your compatible iOS device. Scroll to and tap General. Scroll to and tap VPN. Tap Add VPN Configuration... D-Link DIR-2640 User Manual 116 - D-Link AC2600 | User Manual - Page 121
the top right corner of the page to finish adding the configuration. Your iOS device is now configured to connect to your Quick VPN server. D-Link DIR-2640 User Manual 117 - D-Link AC2600 | User Manual - Page 122
icon will appear in the notification area at the top of your screen indicating that your device is currently connected to the Quick VPN server. D-Link DIR-2640 User Manual 118 - D-Link AC2600 | User Manual - Page 123
using the Export Profile function. Refer to Quick VPN on page 87 for your router setup instructions. Open the exported profile. The Install Profile dialogue will appear; click Continue Network and select the Quick VPN connection and click Authentication Settings. D-Link DIR-2640 User Manual 119 - D-Link AC2600 | User Manual - Page 124
Section 6 - Quick VPN Enter your Passkey in the Shared Secret text box and click OK, Apply, then OK. Your Mac is now configured to connect to your Quick VPN server. D-Link DIR-2640 User Manual 120 - D-Link AC2600 | User Manual - Page 125
Section 6 - Quick VPN Connect or Disconnect To connect to or disconnect from your Quick VPN server, go to > System Preferences... > Network. Select the Quick VPN connection and click on the Connect or Disconnect button. D-Link DIR-2640 User Manual 121 - D-Link AC2600 | User Manual - Page 126
- Quick VPN Windows 7 VPN Setup Instructions This section provides Quick VPN setup instructions for Windows 7. Refer to Quick VPN on page 87 for your router setup instructions. Click the Start button and type just set it up so I can connect later, and click Next. D-Link DIR-2640 User Manual 122 - D-Link AC2600 | User Manual - Page 127
Connect Now. Click Close. Click the Start button and type view network connections into the Search programs and files text box. Select View network connections. D-Link DIR-2640 User Manual 123 - D-Link AC2600 | User Manual - Page 128
close Advanced Properties and click OK to close Quick VPN Connection Properties. Your Windows 7 system is now configured to connect to your Quick VPN server. D-Link DIR-2640 User Manual 124 - D-Link AC2600 | User Manual - Page 129
the Windows taskbar and from the Dial Up and VPN section click on your Quick VPN connection and click on the Connect or Disconnect button. D-Link DIR-2640 User Manual 125 - D-Link AC2600 | User Manual - Page 130
Quick VPN on page 87 for your router setup instructions. This section provides Quick VPN setup instructions for Windows 8.1/8. Click the Start button and type vpn. Select Manage virtual private networks. From the Network Settings page, click Add a VPN Connection. D-Link DIR-2640 User Manual 126 - D-Link AC2600 | User Manual - Page 131
. 5 If you would like windows to remember your sign-in information, enter your User name, Password, and select Remember my sign-in info 6 Choose Save. D-Link DIR-2640 User Manual 127 - D-Link AC2600 | User Manual - Page 132
Section 6 - Quick VPN Right-click on the Quick VPN Connection you just created and left-click on Properties. Select the Security tab. For the Type of VPN, select Layer 2 Tunneling with IPsec (L2TP/IPSec). D-Link DIR-2640 User Manual 128 - D-Link AC2600 | User Manual - Page 133
-click your Quick VPN Connection and left-click Properties. Select the Security tab. For the Type of VPN, select Layer 2 Tunneling with IPsec (L2TP/IPSec). D-Link DIR-2640 User Manual 129 - D-Link AC2600 | User Manual - Page 134
to close Advanced Properties and click OK to close Quick VPN Properties. Your Windows 8.1/8 system is now configured to connect to your Quick VPN server. D-Link DIR-2640 User Manual 130 - D-Link AC2600 | User Manual - Page 135
Network Settings icon in the notification area of the Windows taskbar. Click on your Quick VPN connection and click on the Connect or Disconnect button. D-Link DIR-2640 User Manual 131 - D-Link AC2600 | User Manual - Page 136
setup instructions for Windows 7. Refer to Quick VPN on page 87 for your router setup instructions. This section provides Quick VPN setup instructions for Windows 10. Click Start > Settings > Network & Internet > Network and Sharing Center > VPN > Add a VPN Connection. D-Link DIR-2640 User Manual - D-Link AC2600 | User Manual - Page 137
name, Password, and select Remember my sign-in info 7 Choose Save. Your Windows 10 system is now configured to connect to your Quick VPN server. D-Link DIR-2640 User Manual 133 - D-Link AC2600 | User Manual - Page 138
of the Windows taskbar and click on your Quick VPN connection. The Network & Internet Settings page will open. Click on the Connect or Disconnect button. D-Link DIR-2640 User Manual 134 - D-Link AC2600 | User Manual - Page 139
Android VPN Setup Instructions This section provides Quick VPN setup instructions for Android devices. Your device's screens may vary. Refer to Quick VPN on page 87 for your router setup instructions. Go to Settings > More from the Wireless & networks > VPN > + D-Link DIR-2640 User Manual 135 - D-Link AC2600 | User Manual - Page 140
server. 4 Enter your Passkey in IPSec pre-shared key field. 5 Choose Save. Your Android device is now configured to connect to your Quick VPN server. D-Link DIR-2640 User Manual 136 - D-Link AC2600 | User Manual - Page 141
Section 6 - Quick VPN Connect or Disconnect To connect to or disconnect from your Quick VPN server, go to Settings > More from the Wireless & networks > VPN and select the Quick VPN connection you created. D-Link DIR-2640 User Manual 137 - D-Link AC2600 | User Manual - Page 142
Section 6 - Quick VPN To connect, enter your Username and Password and select CONNECT. To disconnect, select DISCONNECT. D-Link DIR-2640 User Manual 138 - D-Link AC2600 | User Manual - Page 143
Setup). Most wireless devices such as wireless adapters, media players, Blu-ray DVD players, wireless printers and cameras will have a WPS button (or a software utility with WPS) that you can press to connect to the router. Please refer to your user manual with WPA2. D-Link DIR-2640 User Manual 139 - D-Link AC2600 | User Manual - Page 144
networks which are within range of your computer. Select the desired network by clicking on the SSID. To connect to the SSID, click Connect. To automatically connect with the router when your device next to this wireless network when it is detected. Wireless Icon D-Link DIR-2640 User Manual 140 - D-Link AC2600 | User Manual - Page 145
Wi-Fi password) for the wireless network. Enter the password into the box and click Next. If you wish to use Wi-Fi Protected Setup (WPS) to connect to the router, you can also press the WPS button on your router at this point to enable the WPS function. dlink dlink D-Link DIR-2640 User Manual 141 - D-Link AC2600 | User Manual - Page 146
Section 7 - Connect a Wireless Client to your Router When you have established a successful connection with a wireless network, the word Connected will appear next to the name of the network to which you are connected. dlink D-Link DIR-2640 User Manual 142 - D-Link AC2600 | User Manual - Page 147
/WPA2 It is recommended that you enable wireless security (WPA/WPA2) on your wireless router or access point before configuring your wireless adapter. If you are joining an existing network Refer to Networking Basics on page 152 for more information. Wireless Icon D-Link DIR-2640 User Manual 143 - D-Link AC2600 | User Manual - Page 148
by pushing the WPS button on the router. It may take 20-30 seconds to connect to the wireless network. If the connection fails, please verify that the security settings are correct. The key or passphrase must be exactly the same as the one on the wireless router. D-Link DIR-2640 User Manual 144 - D-Link AC2600 | User Manual - Page 149
Troubleshooting This chapter provides solutions to problems that can occur during the installation and operation of the router. Read the following descriptions if you are having problems. 1. Why can't I access the web-based configuration utility? When entering the IP address of the D-Link router - D-Link AC2600 | User Manual - Page 150
Section 8 - Troubleshooting • Configure your Internet settings: • Go to Start > Settings > the router will go through its reboot process. Wait about 30 seconds to access the router. The default IP address is 192.168.0.1. When logging in, leave the password box empty. D-Link DIR-2640 User Manual - D-Link AC2600 | User Manual - Page 151
systems support the same protocols as Ethernet adapter cards. Under many circumstances, it may be desirable for mobile network devices to link to connection supplied through the wired LAN. A wireless router is a device used to provide this link. What is Wireless? Wireless or Wi-Fi technology - D-Link AC2600 | User Manual - Page 152
restrictions as to how you can access the network. You must be within the wireless network range area to be able to connect your computer. There are two different types of wireless it, whether it's for home, office, business, D-Link has a wireless solution for it. D-Link DIR-2640 User Manual 148 - D-Link AC2600 | User Manual - Page 153
connection in public places is usually called "hotspots". Using a D-Link USB adapter with your laptop, you can access the hotspot to , coffee shops, libraries, restaurants, and convention centers. Wireless network is easy to setup, but if you're installing it for the first time it could be quite - D-Link AC2600 | User Manual - Page 154
the signal to extend the range. Eliminate Interference Place home appliances such as cordless telephones, microwaves, and televisions as far away as possible from the router/ access point WPA or WEP security feature on the router. Refer to the product manual for detail information on how to set it up - D-Link AC2600 | User Manual - Page 155
- All wireless clients will connect to an access point or wireless router. • Ad-hoc - Directly connecting to another computer for peer-to network contains an access point or wireless router. All the wireless devices, or clients, will connect to the wireless router or access point. An Ad-hoc - D-Link AC2600 | User Manual - Page 156
address, subnet mask, and the default gateway of your adapter. If the address is 0.0.0.0, check your adapter installation, security settings, and the settings on your router. Some firewall software programs may block a DHCP request on newly installed adapters. D-Link DIR-2640 User Manual 152 - D-Link AC2600 | User Manual - Page 157
you are not using a DHCP capable gateway/router, or you need to assign a static IP network or the LAN IP address on your router. Example: If the router´s LAN IP address is 192.168.0.1, make of your router (I.E. 192.168.0.1). Set Primary DNS the same as the LAN IP address of your router (192.168 - D-Link AC2600 | User Manual - Page 158
levels of security you can use to protect your data from intruders. The router offers the following types of security: • WPA2 (Wi-Fi Protected Access This key must be the exact same key entered on your wireless router or access point. WPA/WPA2 incorporates user authentication through the Extensible - D-Link AC2600 | User Manual - Page 159
802.1p • IEEE 802.1q Security • WPA/WPA2-Personal • Wi-Fi Protected Setup (WPS) Power • Input: 100 to 240 V AC, 50 / 60 Hz range. 2 Frequency Range varies depending on country's regulation. 3 The router does not include 5.25-5.35 GHz & 5.47-5.725 GHz in some regions. D-Link DIR-2640 User Manual - D-Link AC2600 | User Manual - Page 160
non contrôlé. Cet équipement doit être installé et utilisé avec un minimum de 44 cm de distance entre la source de rayonnement et votre corps. D-Link DIR-2640 User Manual 156 - D-Link AC2600 | User Manual - Page 161
de l'antenne et les pires angles d'inclinaison nécessaires pour rester conforme à l'exigence de la p.i.r.e. applicable au masque d'élévation, énoncée à la section 6.2.2.3, doivent être clairement indiqués D-Link DIR-2640 User Manual 157 - D-Link AC2600 | User Manual - Page 162
radiate radio frequency energy and, if not installed and used in accordance with the instructions, may cause harmful interference to radio communications. However, there is no guarantee that WiFi product marketed in US must fixed to US operation channels only. D-Link DIR-2640 User Manual 158
-
 1
1 -
 2
2 -
 3
3 -
 4
4 -
 5
5 -
 6
6 -
 7
7 -
8
-
9
-
10
-
11
-
12
-
13
-
14
-
15
-
16
-
17
-
18
-
19
-
20
-
21
-
22
-
23
-
24
-
25
-
26
-
27
-
28
-
29
-
30
-
31
-
32
-
33
-
34
-
35
-
36
-
37
-
38
-
39
-
40
-
41
-
42
-
43
-
44
-
45
-
46
-
47
-
48
-
49
-
50
-
51
-
52
-
53
-
54
-
55
-
56
-
57
-
58
-
59
-
60
-
61
-
62
-
63
-
64
-
65
-
66
-
67
-
68
-
69
-
70
-
71
-
72
-
73
-
74
-
75
-
76
-
77
-
78
-
79
-
80
-
81
-
82
-
83
-
84
-
85
-
86
-
87
-
88
-
89
-
90
-
91
-
92
-
93
-
94
-
95
-
96
-
97
-
98
-
99
-
100
-
101
-
102
-
103
-
104
-
105
-
106
-
107
-
108
-
109
-
110
-
111
-
112
-
113
-
114
-
115
-
116
-
117
-
118
-
119
-
120
-
121
-
122
-
123
-
124
-
125
-
126
-
127
-
128
-
129
-
130
-
131
-
132
-
133
-
134
-
135
-
136
-
137
-
138
-
139
-
140
-
141
-
142
-
143
-
144
-
145
-
146
-
147
-
148
-
149
-
150
-
151
-
152
-
153
-
154
-
155
-
156
-
157
-
158
-
159
-
160
-
161
-
162
 |
 |

Version 1.00(CA) | 2019/11/08
DIR-2640
User Manual
AC2600 High-Power Wi-Fi Router