Celestron NexStar 4SE Computerized Telescope NexStar 4 SE Manual
Celestron NexStar 4SE Computerized Telescope Manual
 |
View all Celestron NexStar 4SE Computerized Telescope manuals
Add to My Manuals
Save this manual to your list of manuals |
Celestron NexStar 4SE Computerized Telescope manual content summary:
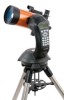
- Celestron NexStar 4SE Computerized Telescope | NexStar 4 SE Manual - Page 1
INSTRUCTION MANUAL - Celestron NexStar 4SE Computerized Telescope | NexStar 4 SE Manual - Page 2
INTRODUCTION...4 WARNING ...4 ASSEMBLY...6 ASSEMBLING THE NEXSTAR...6 Powering the NexStar...6 The Hand Control...6 The Eyepiece...7 The Star Pointer Finderscope ...7 HAND CONTROL...10 HAND CONTROL OPERATION...11 Alignment Procedure...11 Sky Align...12 Auto Two-Star - Celestron NexStar 4SE Computerized Telescope | NexStar 4 SE Manual - Page 3
TELESCOPE BASICS ...26 IMAGE NexStar 4...33 Finding the North Celestial Pole...34 CELESTIAL OBSERVING ...35 OBSERVING THE MOON ...35 OBSERVING THE PLANETS ...35 OBSERVING THE SUN...35 OBSERVING DEEP SKY OBJECTS...36 SEEING CONDITIONS...36 Transparency...36 Sky Illumination...36 Seeing ...36 TELESCOPE - Celestron NexStar 4SE Computerized Telescope | NexStar 4 SE Manual - Page 4
Celestron NexStar! The NexStar ushers in a whole new generation of computer automated technology. Simple and friendly to use, the NexStar NexStar, so you should keep this manual handy until you have fully mastered your telescope's operation. The NexStar hand control has built-in instructions to guide - Celestron NexStar 4SE Computerized Telescope | NexStar 4 SE Manual - Page 5
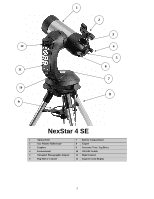
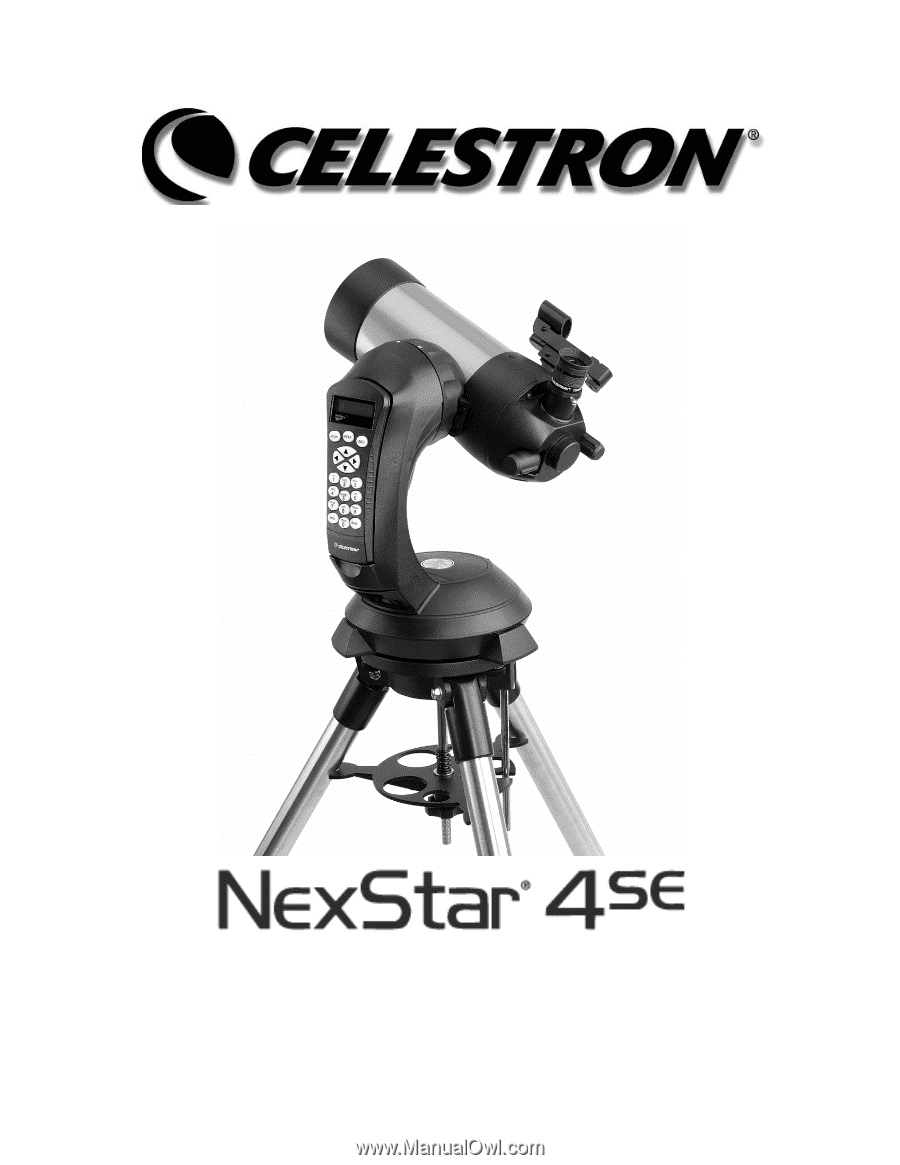
1 2 3 12 4 5 6 11 7 10 8 9 NexStar 4 SE 1 Optical Tube 7 Battery Compartment 2 Star Pointer Finderscope 8 Tripod 3 Eyepiece 9 Accessory Tray / Leg Brace 4 Focuser Knob 10 ON/OFF Switch 5 Threaded Photographic Adapter 11 Hand Control 6 - Celestron NexStar 4SE Computerized Telescope | NexStar 4 SE Manual - Page 6
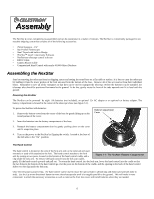
built-in Wedge • The Sky™ Level 1 Astronomy Software • NexRemote telescope control software • RS232 Cable • Camera Shutter Cable • Computerized Hand Control with nearly 40,000 Object Database Assembling the NexStar Start by removing the telescope from its shipping carton and setting the round base - Celestron NexStar 4SE Computerized Telescope | NexStar 4 SE Manual - Page 7
the image focused by the telescope. The NexStar 4 has an internal diagonal mirror that diverts light to the eyepiece barrel on top of the telescope's section of the manual). The Star Pointer Finderscope The Star Pointer is the quickest and easiest way to point your telescope exactly at a desired - Celestron NexStar 4SE Computerized Telescope | NexStar 4 SE Manual - Page 8
dot is relative to the bright star. 5. Without moving the main telescope, turn the Star Pointer's azimuth and altitude alignment controls until the red is now ready to be used. Removing the Optical Tube The NexStar 4 SE dovetailed quick release bracket that allows you to adjust the optical tube - Celestron NexStar 4SE Computerized Telescope | NexStar 4 SE Manual - Page 9
Celestron NexStar tripod is a sturdy, heavy duty mount on which to place your NexStar 4/5" telescope. This tripod can go anywhere, from your backyard to a remote observing site and can hold your NexStar Place the center leg brace over the center support rod so that the slotted cutout is directly - Celestron NexStar 4SE Computerized Telescope | NexStar 4 SE Manual - Page 10
Crystal Display (LCD) Window: Has a dual-line, 16 character display screen that is backlit for comfortable viewing of telescope information and scrolling text. 2. Align: Instructs the NexStar to use a selected star or object as an alignment position. 3. Direction Keys: Allows complete control of the - Celestron NexStar 4SE Computerized Telescope | NexStar 4 SE Manual - Page 11
will ask the user to choose and center the first alignment star, then the NexStar will automatically select and slew to a second star for alignment. Two-Star Alignment requires the user to identify and manually slew the telescope to the two alignment stars. One-Star Align is the same as Two-Star - Celestron NexStar 4SE Computerized Telescope | NexStar 4 SE Manual - Page 12
is leveled as described in the Assembly section of the manual. To begin Sky Align: 1. Power on the NexStar by flipping the switch located at the base of the arrow buttons on the hand control to slew (move) the telescope towards any bright celestial object in the sky. Align the object with the red - Celestron NexStar 4SE Computerized Telescope | NexStar 4 SE Manual - Page 13
information is entered, NexStar will prompt you to select and point the telescope at one known star in the sky. The NexStar now has all the the current information or press UNDO to manually edit the information (see Sky Align section for detailed instruction on entering time/site information). 4. - Celestron NexStar 4SE Computerized Telescope | NexStar 4 SE Manual - Page 14
Use the UP and DOWN scroll buttons to manually select any star you wish from the entire the finder, press ENTER. The display will then instruct you to center the star in the field of view NexStar requires the user to know the positions of two bright stars in order to accurately align the telescope - Celestron NexStar 4SE Computerized Telescope | NexStar 4 SE Manual - Page 15
the display reads "NexStar SE" 2. Press the MENU manual. EQ AutoAlign The EQ AutoAlign uses all the same time/site information as the Alt-Az alignments, however it also requires you to position the tube so that the altitude index markers are aligned (see figure 4-2), and then rotate the telescope - Celestron NexStar 4SE Computerized Telescope | NexStar 4 SE Manual - Page 16
using a solar system object follow steps 1 through 7 under the EQ Two-Star Align section. Improving Pointing Accuracy The NexStar SE telescope have several options that allow you to improve the pointing accuracy of your mount in a variety of ways. Alignment Stars: Alignment stars allows - Celestron NexStar 4SE Computerized Telescope | NexStar 4 SE Manual - Page 17
centered, press the UNDO button until you are at the main menu. 3. With NexStar SE displayed, press the ALIGN key on the hand control. 4. Use the Up/Down depending on the quality of the initial alignment, as well as where the telescope was pointing when the Sync was done. Undo Sync: Since doing a - Celestron NexStar 4SE Computerized Telescope | NexStar 4 SE Manual - Page 18
slew. The NexStar hand control will only display objects that are below the horizon if the Filter Limits are set below 0º in altitude. See Filter Limits in the Utility Feature section of the manual for more information on setting the filter limits. Caution: Never slew the telescope when someone is - Celestron NexStar 4SE Computerized Telescope | NexStar 4 SE Manual - Page 19
change the speed rate of the motors from high speed slew rate to precise guiding rate or anywhere in between. Each rate corresponds to a number on the hand that the telescope never moves. Tracking Rate - In addition to being able to move the telescope with the hand control buttons, the NexStar will - Celestron NexStar 4SE Computerized Telescope | NexStar 4 SE Manual - Page 20
in the sky. This way the same object can be found each time the telescope is aligned. Once a desired object is centered in the eyepiece, simply scroll a DSLR attached or piggyback mounted to your telescope, NexStar will automatically slew to the specified targets and take an exposure of each one - Celestron NexStar 4SE Computerized Telescope | NexStar 4 SE Manual - Page 21
description of how to attach a camera body to you NexStar mount, see Astronomy Basics section. To locate a firing Camera Wizard is the quickest way to build an imaging sequence of targets and exposure times. The Wizard will ask you to point the telescope/camera to up to 9 objects. After the user - Celestron NexStar 4SE Computerized Telescope | NexStar 4 SE Manual - Page 22
End option lets you select whether the imaging sequence should repeat indefinitely or stop once it are currently observing. For example, if your telescope is pointed at the brightest star in the two to return the closest object. Precise GoTo The NexStar has a precise goto function that can assist in - Celestron NexStar 4SE Computerized Telescope | NexStar 4 SE Manual - Page 23
ENTER after each one to save these values. NexStar will remember these values and use them each time confusion when guiding on a star using an off-axis guider versus a straight through guide scope. To lets the user define the direction that the telescope will approach when slewing to an object. This - Celestron NexStar 4SE Computerized Telescope | NexStar 4 SE Manual - Page 24
wedge. See the Astronomy Basics section of the manual for more information on the Wedge Align feature. GPS On/Off - Allows you to turn on\off the GPS module when using the optional CN16 GPS accessory. When aligning the telescope, the NexStar still receives information, such as current time, from - Celestron NexStar 4SE Computerized Telescope | NexStar 4 SE Manual - Page 25
used to recover an alignment in cases where the telescope or tripod has been manually moved. For instance, you might use this feature if the eyepiece, then select Set Mount Position from the Utilities menu. Since the telescope has been moved, the pointing accuracy will be diminished. But now you can - Celestron NexStar 4SE Computerized Telescope | NexStar 4 SE Manual - Page 26
NexStar SE MENU ALIGNMENT LIST TRACKING MODE ALT-AZ EQ NORTH EQ SOUTH OFF RATE SOLAR SYSTEM ALIGN Saved Site ENTER if OK UNDO to Edit Select Object Center Object NexStar Menu Tree: The following figure is a menu tree showing the sub-menus associated with the primary command functions 26 - Celestron NexStar 4SE Computerized Telescope | NexStar 4 SE Manual - Page 27
inserted into the telescope. The NexStar uses three reflective surfaces to bounce the light to the eyepiece. This produces an image that is right-side-up, but reversed from left-to-right (i.e., reversed). This is normal for the Maksutov-Cassegrain design. Fig 5-2a - Actual image orientation as seen - Celestron NexStar 4SE Computerized Telescope | NexStar 4 SE Manual - Page 28
image. To avoid this problem, your first astronomical target should be a bright object (like the Moon or a planet) so that the image 80 to 140 times for the NexStar telescope. Determining Field of View Determining the Celestron manufactures is found in the Celestron Accessory Catalog (#93685). 28 - Celestron NexStar 4SE Computerized Telescope | NexStar 4 SE Manual - Page 29
to the next. This inconsistency can and will affect the ability to focus your telescope. In most cases you will not be able to achieve a truly sharp image, while in some cases, you may actually see a double image. • Never look across or over objects that are producing heat waves. This includes - Celestron NexStar 4SE Computerized Telescope | NexStar 4 SE Manual - Page 30
Up to this point, this manual covered the assembly and basic operation of your NexStar telescope. However, to understand your telescope more thoroughly , you need to know a little about the night sky. This section deals with observational astronomy in general and includes information on the night - Celestron NexStar 4SE Computerized Telescope | NexStar 4 SE Manual - Page 31
Motion of the Stars The daily motion of the Sun across the sky is familiar to even the most casual observer. This daily trek is not the Sun moving as early astronomers thought, but the result of the Earth's rotation. The Earth's rotation also causes the stars to do the same, scribing out a large - Celestron NexStar 4SE Computerized Telescope | NexStar 4 SE Manual - Page 32
Polaris, refer to the Finding the North Celestial Pole section below. To polar align your NexStar: 1. Position the telescope tripod so that tilt plate hinge is facing towards north. 2. Gently rotate the telescope tube so that it is pointing straight up in the sky. 3. Loosen the Latitude Adjustment - Celestron NexStar 4SE Computerized Telescope | NexStar 4 SE Manual - Page 33
Latitude Adjustment Rod Second, the "B" or manual setting should NOT run off the battery. interchangeable lenses so you can attach it to the telescope and so you can use a variety of lenses body and twisting. Before attempting photography through your NexStar make sure that the flip mirror is in - Celestron NexStar 4SE Computerized Telescope | NexStar 4 SE Manual - Page 34
named for the hemisphere in which they reside. For example, in the northern hemisphere all stars move around the north celestial pole. When the telescope's polar axis is pointed at the celestial pole, it is parallel to the Earth's rotational axis. Figure 6-6 The position of the Big Dipper changes - Celestron NexStar 4SE Computerized Telescope | NexStar 4 SE Manual - Page 35
the lunar tracking rate from the NexStar's MENU tracking rate options to your telescope. Never project an image of the Sun through the telescope. telescope and/or any accessories attached to the telescope. For safe solar viewing, use a Celestron solar filter (see Optional Accessories section of manual - Celestron NexStar 4SE Computerized Telescope | NexStar 4 SE Manual - Page 36
looking into the eyepiece, watch the shadow of the telescope tube until it forms a circular shadow. • To greatly affect transparency. While not a problem for the brighter stars and planets, slightly displaced creating an imperfect or smeared image. These atmospheric disturbances vary from time- - Celestron NexStar 4SE Computerized Telescope | NexStar 4 SE Manual - Page 37
the opening when not in use. This will prevent contaminants from entering the optical tube. Internal adjustments and cleaning should be done only by the Celestron service department. If your telescope is in need of internal cleaning, please call the factory for a return authorization number and - Celestron NexStar 4SE Computerized Telescope | NexStar 4 SE Manual - Page 38
4 oz. It works very well with all Celestron eyepieces. Diagonal, 45 degree, erect image (#94116) - Threads on to the back of the NexStar 4. This design allows you to look into the telescope at a 45° angle, at images that are oriented properly, meaning the image is upright and correct from left to - Celestron NexStar 4SE Computerized Telescope | NexStar 4 SE Manual - Page 39
included. Sky Maps (#93722) - Celestron Sky Maps are the ideal teaching guide for learning the night sky. You that covers the front opening of the telescope. View sunspots and other solar features using the rear cell of your Celestron NexStar. This turns your NexStar into a 1300mm telephoto lens - Celestron NexStar 4SE Computerized Telescope | NexStar 4 SE Manual - Page 40
Field of View (at 1000 yds) Magnification: Standard Eyepiece : Camera Optical Tube Length Weight of Telescope Weight of Tripod Maksutov-Cassegrain Catadioptric 4 inches (102mm) 52 inches (1325mm) 13 102mm Multi-layer coating process 1.25" 34.4% by diameter; 11% by area BK-7 Optical Glass Starbright - Celestron NexStar 4SE Computerized Telescope | NexStar 4 SE Manual - Page 41
Earth, concentric with the Earth's center. The act of putting a telescope's optics into perfect alignment. The angular distance of a celestial body as "the apparent yearly path of the Sun against the stars". A telescope mounting in which the instrument is set upon an axis which is parallel to - Celestron NexStar 4SE Computerized Telescope | NexStar 4 SE Manual - Page 42
of eyepieces that all require the same distance from the focal plane of the telescope to be in focus. This means when you focus one parfocal eyepiece all within one parsec of us.) An object which cannot be resolved into an image because it to too far away or too small is considered a point source - Celestron NexStar 4SE Computerized Telescope | NexStar 4 SE Manual - Page 43
with the constellations. Appendix C - RS-232 Connection Using the included NexRemote software you can control your NexStar telescope with a computer via the RS-232 port located on the computerized hand control and using the RS-232 cable . For information about using NexRemote to control your - Celestron NexStar 4SE Computerized Telescope | NexStar 4 SE Manual - Page 44
Appendix D - Maps of Time Zones 44 - Celestron NexStar 4SE Computerized Telescope | NexStar 4 SE Manual - Page 45
- Celestron NexStar 4SE Computerized Telescope | NexStar 4 SE Manual - Page 46
- Celestron NexStar 4SE Computerized Telescope | NexStar 4 SE Manual - Page 47
- Celestron NexStar 4SE Computerized Telescope | NexStar 4 SE Manual - Page 48
- Celestron NexStar 4SE Computerized Telescope | NexStar 4 SE Manual - Page 49
- Celestron NexStar 4SE Computerized Telescope | NexStar 4 SE Manual - Page 50
- Celestron NexStar 4SE Computerized Telescope | NexStar 4 SE Manual - Page 51
- Celestron NexStar 4SE Computerized Telescope | NexStar 4 SE Manual - Page 52
the right to modify or discontinue, without prior notice to you, any model or style telescope. If warranty problems arise, or if you need assistance in using your telescope contact: Celestron Customer Service Department 2835 Columbia Street Torrance, CA 90503 Tel. (310) 328-9560 Fax. (310) 212 - Celestron NexStar 4SE Computerized Telescope | NexStar 4 SE Manual - Page 53
Fax. (310) 212-5835 Web site at http//www.celestron.com Copyright 2006 Celestron All rights reserved. (Products or instructions may change without notice or obligation.) This device complies with , including interference that may cause undesired operations. #11049-INST Printed in China $10.00 06-06
-
 1
1 -
 2
2 -
 3
3 -
 4
4 -
 5
5 -
 6
6 -
 7
7 -
8
-
9
-
10
-
11
-
12
-
13
-
14
-
15
-
16
-
17
-
18
-
19
-
20
-
21
-
22
-
23
-
24
-
25
-
26
-
27
-
28
-
29
-
30
-
31
-
32
-
33
-
34
-
35
-
36
-
37
-
38
-
39
-
40
-
41
-
42
-
43
-
44
-
45
-
46
-
47
-
48
-
49
-
50
-
51
-
52
-
53
 |
 |
INSTRUCTION MANUAL