Celestron NexImage Solar System Imager User Guide
Celestron NexImage Solar System Imager Manual
 |
View all Celestron NexImage Solar System Imager manuals
Add to My Manuals
Save this manual to your list of manuals |
Celestron NexImage Solar System Imager manual content summary:
- Celestron NexImage Solar System Imager | User Guide - Page 1
Table of Contents Quick-Start and Tutorial Imaging Basics Registax User's Guide Troubleshooting - Celestron NexImage Solar System Imager | User Guide - Page 2
Start Make sure your NexImage comes with all of the following: 1.25" Barrel USB Cable 1. Plug camera into the USB imager. Remove the eyepiece from the telescope and slide the barrel of the imager into the eyepiece barrel of your telescope. You should see bright light displayed in the imaging window - Celestron NexImage Solar System Imager | User Guide - Page 3
gain setting, deselect (uncheck) the Auto box under the Exposure group of controls. Once the desired image is focused and centered in the imaging window you are ready to capture a video image. Before taking the image you must first set the frame rate, time limit and resolution for the video. 8. From - Celestron NexImage Solar System Imager | User Guide - Page 4
ready to capture the image. 11. From the Capture menu select Start Capture • Select OK to begin image capture. The bottom of the imaging window will display the aligned and stacked using the included RegiStax software. Before you begin processing your image, take a moment to read and use the tutorial - Celestron NexImage Solar System Imager | User Guide - Page 5
of the included RegiStax software. This tutorial will guide you through the steps you need to align, stack and process video frames into a single high quality image. 1. Start RegiStax by clicking the icon on your desktop. Press the Select Input button to select the directory where the NexImage CD is - Celestron NexImage Solar System Imager | User Guide - Page 6
of the alignment box. Ideally this box will contain either the whole object you have imaged or a bright, high contrast feature. You can set this box to a square or 256 pixels in size. Select a size and move your cursor over the image. For this example choose 128 and move the square around one of the - Celestron NexImage Solar System Imager | User Guide - Page 7
Guide. For this tutorial we will only discuss the most important features. On this screen you should see two smaller windows that are on top of the RegiStax Aligning window and the rest of the frames in the sequence. Your initial image should show a multi-colored square with a red circular area in - Celestron NexImage Solar System Imager | User Guide - Page 8
7. Set the "start" quality filter to 10. This will position the two green lines so . Next is the optimization process where only frames with good image quality are optimized further. This is a more precise way of aligning the images. Once all the frames are aligned and stacked you will automatically - Celestron NexImage Solar System Imager | User Guide - Page 9
as a Registax file before processing. This will allow you maintain your pre-processed image without having to go through the Stack and Align process over again. 9 10 10. On the right side of this screen are the six wavelet sliders that are numbered from 1 to 6. Start by moving slider #1 to a value - Celestron NexImage Solar System Imager | User Guide - Page 10
there are two additional sliders called Contrast and Brightness, these can be used to prevent the image from becoming too bright. Notice that when you enhance the image with the layer-sliders the image contrast increases. You can control this by reducing the overall contrast with the contrast slider - Celestron NexImage Solar System Imager | User Guide - Page 11
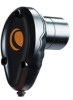
of the Celestron NexImage solar system imaging camera. Parts list Your NexImage comes with the following: • NexImage Camera with 1.25" adapter and USB cable attached • CD-ROM including: AmCap video capture software Registax image processing software NexImage drivers Complete operating instruction in - Celestron NexImage Solar System Imager | User Guide - Page 12
. Refer to your telescopes owner's manual for instruction in collimating the optics. Finding Objects At first it can be difficult to locate individual planets due to their relative brightness. To make it easier to initially find your object in the imaging window, increase the brightness and gain - Celestron NexImage Solar System Imager | User Guide - Page 13
the planets Since the NexImage will combine as many sharp frames as possible to achieve one high quality image, you don't want to take so many images that you start to For example, assume that you do not want to take a series of images long enough to detect .25 arc seconds of motion. Then by knowing - Celestron NexImage Solar System Imager | User Guide - Page 14
User's Guide 13 - Celestron NexImage Solar System Imager | User Guide - Page 15
14 15 11 12 18 1 2 3 16 17 5 6 4 7 8 9 10 Controls/Features 1. Select Input (Button) - Press this button to start selecting images (bmp, jpeg, fits, tiff) or video sequences (avi) for processing. After the button is pressed a standard windows file-dialog (#4) will open. You can select single - Celestron NexImage Solar System Imager | User Guide - Page 16
(default) in front of every frame. That means at startup all the images are selected (up to a maximum of 5000 frames). The user can now select/deselect images by stepping through them in the list. The image window (#3) will automatically display the frame selected from the framelist. To change their - Celestron NexImage Solar System Imager | User Guide - Page 17
manually deselect the low quality frames from your sequence. Registax has built-in features that will automatically filter out low quality images (See Aligning Screen in next section). 10. Frames-slider (control) - This allows the user to walk through the images and select/deselect them (using the - Celestron NexImage Solar System Imager | User Guide - Page 18
an area that shows considerable contrast and will be available on all images. Deselected images (or dropped frames in an avi) can not be used as to set a reference point. Note: when you have moving objects in the image sequence it is recommend to select the first frame or a low numbered frame - Celestron NexImage Solar System Imager | User Guide - Page 19
frame in your series. 1 11 7 2 3 15 4 5 6 8 9 10 12 13 14 1. Alignment Filter - The Alignment (FFT) filter is used to improve the initial alignment estimation. It reduces the noise from images that otherwise can be problematic during alignment. See Setting the FFT filter below) - Celestron NexImage Solar System Imager | User Guide - Page 20
object when it moves around. Steadily moving objects can be easily followed, unless they move too fast. The largest movement between images the program is able to adjust directly problems is about half the size (in pixels) of the alignment-box. When you enable the predict option, the program will be - Celestron NexImage Solar System Imager | User Guide - Page 21
images that still need (according to the settings) optimization. This feature is on by default. 10. Manual alignment camera at lower frame rates. 12. Optimize - This button is disabled at startup and can be used after aligning the images when auto-optimize is not set. The button optimizes all images - Celestron NexImage Solar System Imager | User Guide - Page 22
value will reposition the blue FFT filter line along the power spectrum. Press the "Recalc FFT" button and now look at the coloured FFT-spectrum image. The red area in the middle is where the program estimates the best alignment peak. During processing this area should be restricted to a small patch - Celestron NexImage Solar System Imager | User Guide - Page 23
When you have used Align & Stack on the Align Page you will automatically pass through the stacking page and advance directly to the Image Processing page. You can however return to this page from the processing page. 1 2 3 1. Stackgraph (dropdown panel) • Quality-cutoff: This slider sets the lower - Celestron NexImage Solar System Imager | User Guide - Page 24
When this checkbox is set, it will open a window that allows you to select/deselect images of a sequence at will. The images are ordered by image quality therefore limiting the de-selection process to the best images. Due to the fact that the image-estimation is not always effective this will allow - Celestron NexImage Solar System Imager | User Guide - Page 25
. Upon entry in this page you will see the previously stacked image.You can reach this page either by pressing Align & Stack in the Align Frames page or pressing the Stack in the Stack Frames page. 12 1 13 14 2 3 4 5 6 8 9 10 17 11 7 15 16 1. Wavelet Scheme - This control sets the - Celestron NexImage Solar System Imager | User Guide - Page 26
. Doing so can usually result in a noticeable improvement. 9. Reset button - This resets all the sliders to their default values (1) 10. Resize button - This launches the Resize window. You can resize the image that is being processed to a different size (larger/smaller) by changing the size of the - Celestron NexImage Solar System Imager | User Guide - Page 27
in the Resize window. Also you can go back to the original input image scale by pressing "original". The Resize window has an easy system to resize by channel vs the green-channel manually. The ShowRed, ShowGreen and ShowBlue (not available when using LRGB) make manual alignment easier. You can - Celestron NexImage Solar System Imager | User Guide - Page 28
noise just choose them and see what they do with your image. When you have found one you like then turn over to manual. Now play with the slider belonging to the layer to refine the settings. Anti-ringing (Noise reduction window) - when you set the checkmark it will already filter all values - Celestron NexImage Solar System Imager | User Guide - Page 29
Gamma thumbwheel control - In addition to the gamma-control this curve allows you to set the gamma-response yourself. By default the relation between image-intensity and output is set to 1 (straight line) equalling a gamma=1 setting. But you can change the shape of the curve by dragging the anchor - Celestron NexImage Solar System Imager | User Guide - Page 30
15 degrees and finally a large round button that allows you to set the rotation at steps of 10 degrees. Be aware that using the new advance hue-lookup feature will not work when the image is rotated, so do the rotation at a final stage. 3. Hue/Saturation/Lightness - These allow you to alter - Celestron NexImage Solar System Imager | User Guide - Page 31
obvious. The control is alike the gamma control and allows you to add/delete control points at will. You can hover the mouse over the image and see what hue's are under the cursor. This will make it easier to decide on which part of the color-band you want to - Celestron NexImage Solar System Imager | User Guide - Page 32
Troubleshooting The Registax screens are cutoff on the monitor display. Registax software is best viewed with you monitor set to 1024 x 768 screen resolution or higher. To check or change your screens resolution, select Display Properties from your computers Control Panel. Registax software can not - Celestron NexImage Solar System Imager | User Guide - Page 33
installing the software? If you experience any problems with audio devices maximum file size to a predetermined limit before capturing the image. Using AmCap, select File - set file size and support, contact the author at [email protected] or through the Product Support page of RegiStax software. 32
-
 1
1 -
 2
2 -
 3
3 -
 4
4 -
 5
5 -
 6
6 -
 7
7 -
8
-
9
-
10
-
11
-
12
-
13
-
14
-
15
-
16
-
17
-
18
-
19
-
20
-
21
-
22
-
23
-
24
-
25
-
26
-
27
-
28
-
29
-
30
-
31
-
32
-
33
 |
 |

Quick-Start and Tutorial
Imaging Basics
Registax User’s Guide
Troubleshooting
Table of Contents