BenQ RL2755HM Rl2755HM User Manual
BenQ RL2755HM Manual
 |
View all BenQ RL2755HM manuals
Add to My Manuals
Save this manual to your list of manuals |
BenQ RL2755HM manual content summary:
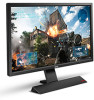
- BenQ RL2755HM | Rl2755HM User Manual - Page 1
RL Series User Manual - BenQ RL2755HM | Rl2755HM User Manual - Page 2
manual or otherwise, without the prior written permission of BenQ Corporation. Disclaimer BenQ follow these safety instructions for best performance, and long life for your monitor. • The AC If you are not sure of the type of power available, consult your dealer or local power company. • An approved - BenQ RL2755HM | Rl2755HM User Manual - Page 3
or other risks. If any of the above mentioned misuse or other accident such as dropping or mishandling occurs, contact qualified service personnel for servicing. BenQ ecoFACTS BenQ has been dedicated to the design and development of greener product as part of its aspiration to realize the ideal of - BenQ RL2755HM | Rl2755HM User Manual - Page 4
view...7 Back view ...7 Input and output ports ...8 How to assemble your monitor hardware 9 Rest your console controller on the monitor base 13 How to detach the stand base ...14 Using the monitor wall mounting kit 16 Getting the most from your BenQ monitor 17 How to install the monitor on a new - BenQ RL2755HM | Rl2755HM User Manual - Page 5
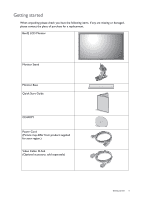
you have the following items. If any are missing or damaged, please contact the place of purchase for a replacement. BenQ LCD Monitor Monitor Stand Monitor Base Quick Start Guide CD-ROM Power Cord (Picture may differ from product supplied for your region.) Video Cable: D-Sub (Optional accessory - BenQ RL2755HM | Rl2755HM User Manual - Page 6
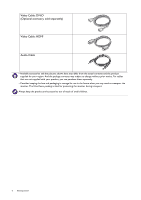
, sold separately) Video Cable: HDMI Audio Cable • Available accessories and the pictures shown here may differ from the in the future when you may need to transport the monitor. The fitted foam packing is ideal for protecting the monitor during transport. Always keep the product and accessories out - BenQ RL2755HM | Rl2755HM User Manual - Page 7
Getting to know your monitor Front view 1. Control buttons 2. Power button Back view 1 2 3. Cable clip 4. Input and output ports (vary by model, see Input and output 8 ports on page 8) 7 5. Kensington lock slot 6. Stand release 6 7. Wall mount holes 8. Headphone hook 3 45 • Above - BenQ RL2755HM | Rl2755HM User Manual - Page 8
output ports Available input and output ports may vary depending on your purchased model. Check the Specification document on the provided CD for details. 1 23 45 6 7 1. AC power input jack 2. Audio Line In 3. Headphone jack 4. HDMI socket 5. HDMI socket 6. DVI-D socket 7. D-Sub socket 8 Getting - BenQ RL2755HM | Rl2755HM User Manual - Page 9
• If the computer is turned on you must turn it off before continuing. Do not plug-in or turn-on the power to the monitor until instructed to do so. • The following illustrations are for your reference only. Available input and output jacks may vary depending on the purchased model. 1. Attach the - BenQ RL2755HM | Rl2755HM User Manual - Page 10
the PC video cable To Connect the D-Sub Cable Connect the plug of the D-Sub cable (at the end without the ferrite filter) to the monitor video socket. Connect the other end of the cable (at the end with the ferrite filter) to the computer video socket. Tighten all finger screws - BenQ RL2755HM | Rl2755HM User Manual - Page 11
the monitor. Connect the other end of the cable to the HDMI port of a digital output device. If there is more than one video transmission method available to Connect the audio cable between the socket on the rear of the monitor (Line In) and your computer audio outlet. You may connect headphones to the - BenQ RL2755HM | Rl2755HM User Manual - Page 12
product supplied for your region. Turn on the monitor by pressing the power button on the monitor. Turn on the computer too, and follow the instructions in Getting the most from your BenQ monitor on page 17 to install the monitor software. To extend the service life of the product, we recommend that - BenQ RL2755HM | Rl2755HM User Manual - Page 13
Rest your console controller on the monitor base The base is designed for holding the controller. You can put the controller on the base when it is not in use. How to assemble your monitor hardware 13 - BenQ RL2755HM | Rl2755HM User Manual - Page 14
warranty. Sliding or scraping the monitor around on your desk will scratch or damage the monitor surround and controls. 2. Remove the monitor stand. Use a cross-pointed screwdriver to release the screws that fixing the monitor stand to the monitor. Then pull the monitor stand backward away from the - BenQ RL2755HM | Rl2755HM User Manual - Page 15
3. Remove the monitor base. Release the thumbscrew on the bottom of the monitor base and detach the monitor base as illustrated. 1 2 How to assemble your monitor hardware 15 - BenQ RL2755HM | Rl2755HM User Manual - Page 16
the cables from the LCD monitor. 1. Remove the monitor stand. Lay the screen face down on a clean and well-padded surface. Detach the monitor base as instructed in How to detach the stand base on page 14. 2. Follow the instruction manuals of the wall mount bracket you purchased to complete - BenQ RL2755HM | Rl2755HM User Manual - Page 17
the most from your BenQ monitor To gain the most benefit from your new BenQ LCD monitor, you should install the custom BenQ LCD Monitor driver software as provided on the BenQ LCD Monitor CD-ROM. The circumstances under which you connect and install your BenQ LCD Monitor will determine which process - BenQ RL2755HM | Rl2755HM User Manual - Page 18
selecting and installing the BenQ LCD Monitor driver software on a new computer which has never had a monitor driver installed before. This instruction is only suitable for a computer which has never been used before, and for which the BenQ LCD Monitor is the first ever monitor to be connected to - BenQ RL2755HM | Rl2755HM User Manual - Page 19
an existing computer This instruction details the procedure for manually updating the existing monitor driver software on your Microsoft Windows computer. It is currently tested as compatible for Windows 8.1, Windows 8, and Windows 7 Operating System (OS). The BenQ LCD Monitor driver for your model - BenQ RL2755HM | Rl2755HM User Manual - Page 20
bar. Go to Settings, Control Panel, Devices and Printers and right-click the name of your monitor from the menu Monitor, and then the Properties button. 5. Click the Driver tab and the Update Driver button. 6. Insert the BenQ LCD Monitor CD-ROM into a CD drive on the computer. 7. In the Update Driver - BenQ RL2755HM | Rl2755HM User Manual - Page 21
menu. 3. Click the Hardware tab. 4. Click Generic PnP Monitor, and then the Properties button. 5. Click the Driver tab and the Update Driver button. 6. Insert the BenQ LCD Monitor CD-ROM into a CD drive on the computer. 7. In the Update Driver Software window, select the option Browse my computer - BenQ RL2755HM | Rl2755HM User Manual - Page 22
How to adjust your monitor The control panel 1 2 No. Name 1. Control keys 2. Power key Description Accesses the functions or menu items displayed on the screen, right next to each key. Turns the power on or off. 22 How to adjust your monitor - BenQ RL2755HM | Rl2755HM User Manual - Page 23
page 27 for details on the menu options. No. OSD in hot key menu OSD icon in main menu Function Custom Key 1 • By default, the key is the hot key for Input. To change the default settings, see Customizing the hot keys on page 25. • For Up/Increase adjustment. How to adjust your monitor - BenQ RL2755HM | Rl2755HM User Manual - Page 24
menu Function Custom Key 2 • By default, the key is the hot key for Picture Mode. To change the default settings, see Customizing the hot keys on page 25. • For Down/Decrease adjustment. Custom Key 3 MENU Exit • By default , press and hold any key for 10 seconds. 24 How to adjust your monitor - BenQ RL2755HM | Rl2755HM User Manual - Page 25
on your computer is set to the native resolution of the monitor when you use the Auto Adjustment function. If you wish, you can always adjust the screen geometric settings manually using geometry menu items. To assist you in this endeavour, BenQ has provided a screen test image utility which you - BenQ RL2755HM | Rl2755HM User Manual - Page 26
and Picture Mode, and select the game mode you saved in Step 2. Your preferred display settings will be applied all at once. Adjusting display mode To display images of aspect ratio other than 16:9 and size other than 27", you can adjust the display mode on the monitor. 1. Press any of the control - BenQ RL2755HM | Rl2755HM User Manual - Page 27
settings on your monitor. Press any of the control keys to bring up the hot key menu, and press Menu to access the main menu. See Basic menu operation on page 23 for details. Available menu options may vary depending on the input sources, functions and settings and OSD Settings for more details - BenQ RL2755HM | Rl2755HM User Manual - Page 28
may vary depending on the input sources, functions and settings. Menu options that are not available will become grayed out. And keys that are not available will be disabled and the corresponding OSD icons will disappear. For models without certain functions, their settings and related items will - BenQ RL2755HM | Rl2755HM User Manual - Page 29
Item Phase Function Adjusts the pixel clock phase timing to synchronize with the analog input video signal. See also: Picture optimization on page 25. Range 0 to 63 Not applicable to a digital input signal. Navigating the main menu 29 - BenQ RL2755HM | Rl2755HM User Manual - Page 30
may vary depending on the input sources, functions and settings. Menu options that are not available will become grayed out. And keys that are not available will be disabled and the corresponding OSD icons will disappear. For models without certain functions, their settings and related items will - BenQ RL2755HM | Rl2755HM User Manual - Page 31
change the settings. Decreasing one input lag. You can • ON have a real-time experience while playing games. • OFF AMA To optimize the picture quality, disable Instant Mode if the source is interlaced video. To check the resolution of the video source, go to System and Information on the monitor - BenQ RL2755HM | Rl2755HM User Manual - Page 32
Item Function Reset Color Resets the custom color settings to the factory defaults. Range • YES • NO 32 Navigating the main menu - BenQ RL2755HM | Rl2755HM User Manual - Page 33
may vary depending on the input sources, functions and settings. Menu options that are not available will become grayed out. And keys that are not available will be disabled and the corresponding OSD icons will disappear. For models without certain functions, their settings and related items will - BenQ RL2755HM | Rl2755HM User Manual - Page 34
RTS 1 For playing RTS (Real-time strategy) games. RTS 2 For playing DOTA2 games. Gamer 1 Applies customized display settings. Gamer 2 Gamer 3 For details on setting up a game mode, see Setting up your own game mode on page 25. Displays the preview of screen images under the selected mode from - BenQ RL2755HM | Rl2755HM User Manual - Page 35
23.6"W (16:9) Displays the input image as if on a 23.6"W monitor of 16:9 aspect ratio. 24"W (16:9) Displays the input image as if on a 24"W monitor of 16:9 aspect ratio. Adjusts the display size to best suit your needs. Range 0 ~ 100 Not available when the Display Mode is set to Full or Aspect - BenQ RL2755HM | Rl2755HM User Manual - Page 36
Item Smart Focus Function Range This feature provides a highlight area to focus on certain content, e.g. a YouTube video or an online game. Size Determines the size of the highlight area. • Small • Large • OFF H. Position V. Position Adjusts the horizontal position of the highlight area. - BenQ RL2755HM | Rl2755HM User Manual - Page 37
may vary depending on the input sources, functions and settings. Menu options that are not available will become grayed out. And keys that are not available will be disabled and the corresponding OSD icons will disappear. For models without certain functions, their settings and related items will - BenQ RL2755HM | Rl2755HM User Manual - Page 38
may vary depending on the input sources, functions and settings. Menu options that are not available will become grayed out. And keys that are not available will be disabled and the corresponding OSD icons will disappear. For models without certain functions, their settings and related items will - BenQ RL2755HM | Rl2755HM User Manual - Page 39
may vary depending on the input sources, functions and settings. Menu options that are not available will become grayed out. And keys that are not available will be disabled and the corresponding OSD icons will disappear. For models without certain functions, their settings and related items will - BenQ RL2755HM | Rl2755HM User Manual - Page 40
-croatia • Română • Nederlands Svenska • Português • 5 Sec. • 10 Sec. • 15 Sec. • 20 Sec. • 25 Sec. • 30 Sec. OSD Lock Prevents all the monitor settings from being accidentally changed. When this function is activated, the OSD controls and hotkey operations will be disabled. To unlock the - BenQ RL2755HM | Rl2755HM User Manual - Page 41
. • ON • OFF Sets whether to display the resolution notice of the recommended resolution when a new input source is detected by the monitor. • ON • OFF Displays the current monitor property settings. • Input • Current Resolution • Optimum Resolution (best with the monitor) • Model Name Resets - BenQ RL2755HM | Rl2755HM User Manual - Page 42
necessary support. The image is blurred. • Read the instructions on the link "Adjusting the Screen Resolution" on the CD, and then select the correct resolution, refresh rate and make adjustments based on these instructions. • If a VGA extension cable is used, remove the extension cable for the test - BenQ RL2755HM | Rl2755HM User Manual - Page 43
, and then select the correct resolution, refresh rate and make adjustments based on these instructions. You are running the monitor at its native resolution, but the image is still distorted. Images from different input sources may appear distorted or stretched on the monitor running at its native - BenQ RL2755HM | Rl2755HM User Manual - Page 44
speakers. • Remove your headphone (if the headphone is connected to the monitor). • Check whether the headphone jack is properly connected. • If the help? If your problems remain after checking this manual, please contact your place of purchase or e-mail us at: [email protected]. 44 Troubleshooting
-
 1
1 -
 2
2 -
 3
3 -
 4
4 -
 5
5 -
 6
6 -
 7
7 -
8
-
9
-
10
-
11
-
12
-
13
-
14
-
15
-
16
-
17
-
18
-
19
-
20
-
21
-
22
-
23
-
24
-
25
-
26
-
27
-
28
-
29
-
30
-
31
-
32
-
33
-
34
-
35
-
36
-
37
-
38
-
39
-
40
-
41
-
42
-
43
-
44
 |
 |

RL Series
User Manual