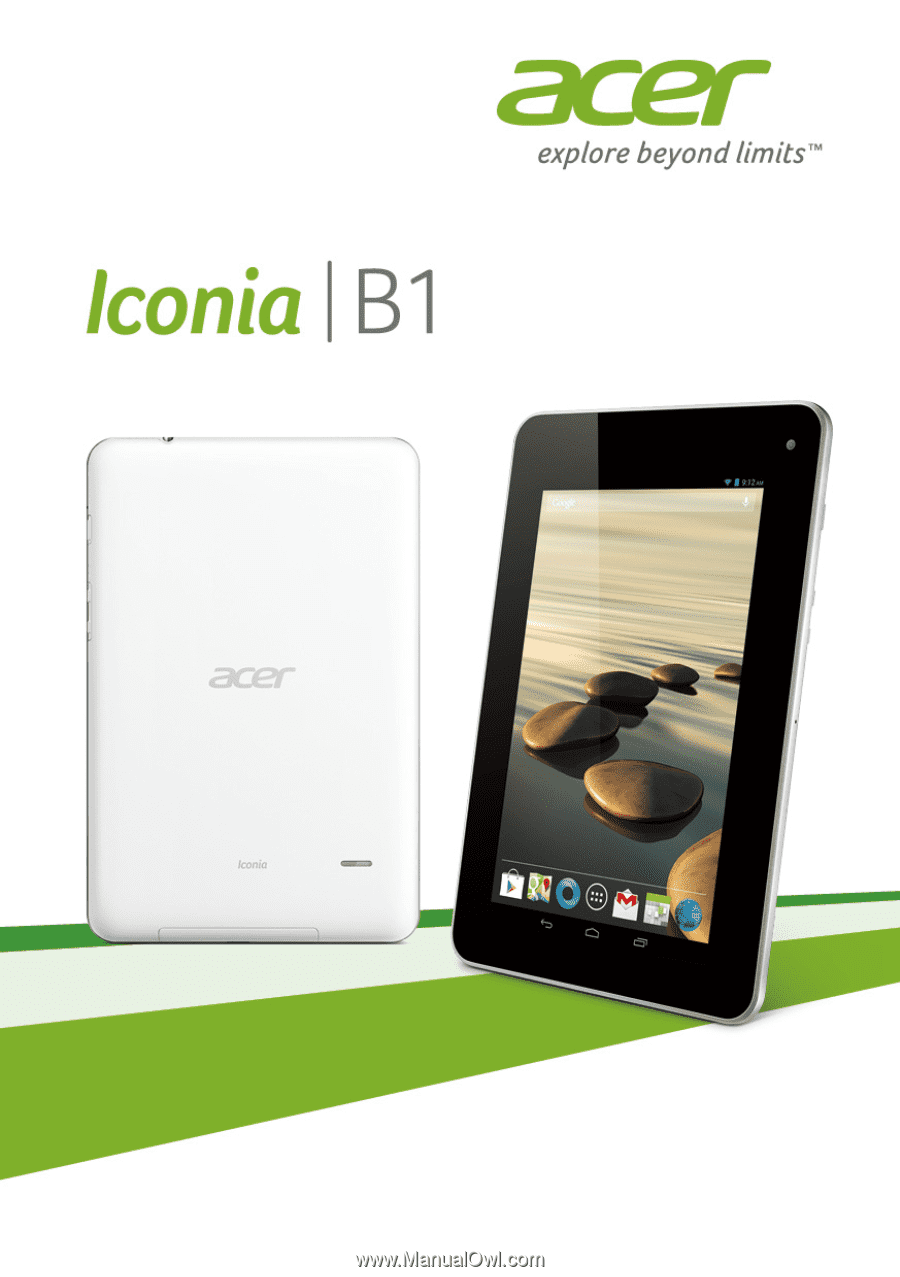
Acer B1-711 User Guide
Acer B1-711 Manual
 |
View all Acer B1-711 manuals
Add to My Manuals
Save this manual to your list of manuals |
Acer B1-711 manual content summary:
- Acer B1-711 | User Guide - Page 1
- Acer B1-711 | User Guide - Page 2
2 © 2013. All Rights Reserved. Acer Iconia User Guide Model: B1-711 This revision: 7/2013 Acer Iconia Model number: ...Serial number*:...Date of purchase: ...Place of purchase:...* Note: See "Where can I find my serial number ID?" on page 45.. - Acer B1-711 | User Guide - Page 3
microSD Card (optional 20 Transferring files between your tablet and a PC 20 Device 41 Personal 42 System 43 Updating your tablet's operating system.......... 44 Resetting your tablet 44 Connecting a Bluetooth device 21 FAQ and troubleshooting 45 Accessories 21 Other sources of help 46 - Acer B1-711 | User Guide - Page 4
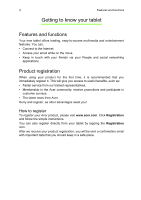
register, as other advantages await you! How to register To register your Acer product, please visit www.acer.com. Click Registration and follow the simple instructions. You can also register directly from your tablet by tapping the Registration icon. After we receive your product registration, you - Acer B1-711 | User Guide - Page 5
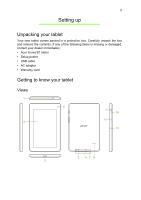
5 Setting up Unpacking your tablet Your new tablet comes packed in a protective box. Carefully unpack the box and remove the contents. If any of the following items is missing or damaged, contact your dealer immediately: • Acer Iconia B1 tablet • Setup poster • USB cable • AC adapter • Warranty - Acer B1-711 | User Guide - Page 6
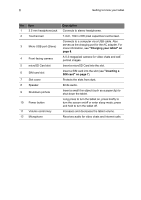
touchscreen. Connects to a computer via a USB cable. Also serves as the charging port for the AC adapter. For more information, see "Charging your tablet" on page 8. A 0.3-megapixel camera for video chats and selfportrait images. Insert a microSD Card into the slot. Insert a SIM card into the slot - Acer B1-711 | User Guide - Page 7
force the SIM into the slot when it is incorrectly oriented may damage the SIM and/ or your tablet. Your tablet is equipped with a standard SIM slot. To insert the SIM card, turn the tablet upside down and open the slot cover. Insert the SIM card with the gold-colored connectors facing downwards - Acer B1-711 | User Guide - Page 8
For first-time use, you need to charge your tablet for four hours. After that you can recharge the . Connecting power Connect the power connector to your tablet and plug the AC adapter side into any AC outlet. Note: It is normal for the tablet surface to become warm during charging or long periods - Acer B1-711 | User Guide - Page 9
until you see the Acer logo. Wait a moment for your tablet to bootup. You will then be asked some questions before you can use your tablet. To start, tap to select your language then tap Start. Follow the rest of the instructions as they are displayed. Note: If the tablet's screen turns off, it - Acer B1-711 | User Guide - Page 10
and simple controls with widgets or shortcuts. These display information such as the time and weather, or provide additional controls and direct access to applications. Some have been pre-installed on your tablet, while others may be downloaded from Google Play. The Home screen already features - Acer B1-711 | User Guide - Page 11
11 Search To search for applications, files or for information on the Internet, tap the Google icon in the top-left corner. Simply enter the text you want to find. Tap the arrow or Enter key to search the Internet, or tap one of the suggestions, applications or files shown in the list. Voice - Acer B1-711 | User Guide - Page 12
The application menu displays applications and widgets available on your tablet. Applications are displayed in alphabetical order. Note: All images are for reference only. The applications installed on your tablet can be different from the applications shown in illustrations. Adding an application - Acer B1-711 | User Guide - Page 13
13 From the notification area, swipe down to display the status ribbon. The status ribbon contains notifications such as current downloads and media controls such as "play/pause" and "next track" when music is playing. Icon Description Locks/unlocks screen rotation. Icon Description Opens the - Acer B1-711 | User Guide - Page 14
Syncing data SD card or USB storage is full Tablet is connected to PC via USB Application update available Sync is on Problem with sign-in or sync Uploading data System update available Virtual private network (VPN) status Downloading data Personalizing the Home screen You may personalize your - Acer B1-711 | User Guide - Page 15
applications and links (such as custom shortcuts, contacts or bookmarks) that you can add to a Home screen. Widgets are small applications that display constantly-updated information or quick shortcuts to applications or special functions. To move an App or Widget to the Home screen, tap and hold an - Acer B1-711 | User Guide - Page 16
16 The onscreen keyboard To move the item to a different Home screen, drag it to the side of the screen, the Home screen will switch to the screen in that direction. Release the item when it is positioned correctly. Resizing a Widget Most Widgets can be made larger, so you can give more space to - Acer B1-711 | User Guide - Page 17
The word list changes after every key press. If the word you need is displayed, you can tap on it to insert it into your text. To turn to a different application. Note: Certain applications may not support text selection, or only support it in certain areas. Other applications may offer specialized - Acer B1-711 | User Guide - Page 18
18 Editing text 2. Tap and hold the text or word you want to select. The selected text is highlighted, with a tab at each end of the selection. 3. Drag either tab to expand or reduce the amount of selected text, or tap Select all. 4. To cut or copy the text, tap the CUT or COPY button. Inserting - Acer B1-711 | User Guide - Page 19
been locked and is in sleep mode. To wake your tablet, press the power button. Your tablet will display the Lock screen. To unlock the screen, press the lock , you may set a code or number that must be entered to access the tablet, such as an unlock pattern (a set of dots that must be tapped in the - Acer B1-711 | User Guide - Page 20
latest USB driver on your computer before connecting your tablet to the computer. Visit www.acer.com for the latest drivers: Select Support > DRIVERS AND MANUALS. Select your tablet model, and then the Driver tab, select USB and accept the download. This allows you to transfer your personal data to - Acer B1-711 | User Guide - Page 21
. Select the Acer Iconia Tab icon to see your tablet's internal memory and any additional memory (microSD Card) available to your tablet. Connecting a Bluetooth device Only A2DP stereo headsets (playback only, no microphone) are supported. Please check for updates to the tablet's software which - Acer B1-711 | User Guide - Page 22
22 Managing Wi-Fi connections Going online Managing Wi-Fi connections If you did not connect to a Wi-Fi network when you first started your tablet, or want to connect to a new network, tap APPS > Settings > Wi-Fi to manage your connection settings. Alternatively, tap the Wi-Fi status icon in - Acer B1-711 | User Guide - Page 23
microphone on the Home screen for voice searches. When the Speak now prompt is displayed, state your command or query. Note: Voice Search is available only in selected regions. Setting up Gmail 1. Make sure your tablet is connected to the Internet. 2. From the Applications menu tap Gmail. If you did - Acer B1-711 | User Guide - Page 24
start setting up your email access. If necessary, enter your email address and tap Manual setup to enter the parameters manually. Tap Next to finish the setup process. The combined inbox feature of your tablet allows you to view emails from multiple accounts in a single inbox. Online applications - Acer B1-711 | User Guide - Page 25
account with this messenging service. Turn-by-turn navigation must read and accept the Terms of Service. Tap Play Store from the home screen enhance the functionality of your tablet. Note: The contents and design movies, books, magazines, or music. Updates may add new categories or change how - Acer B1-711 | User Guide - Page 26
information, wireless access, GPS, etc.) the application requires access in order to function correctly. If none of these services seem unusual, tap Accept & download to proceed with the installation. You may keep track of the download progress from both the app's page and the tablet's status area. - Acer B1-711 | User Guide - Page 27
App and widgets, or only provide a widget (with no application icon). See "Personalizing the Home screen" on page 14. Uninstalling downloaded applications Once you've downloaded and installed an application, you may uninstall the application from the APPS menu by pressing and holding the application - Acer B1-711 | User Guide - Page 28
28 Online applications Tap Talk from application menu to open Google Talk. Here you can see a list of your contacts connected to Google Talk services. Tap on a contact to open a chat session. After you have connected, you can open a video chat session. - Acer B1-711 | User Guide - Page 29
Your tablet comes supplied with a variety of programs that you can use to enjoy multimedia content. Play Music Use Play Music to listen to music and other audio files that you download or . To change how your music is displayed, swipe left or right. Depending on your selection, your music library is - Acer B1-711 | User Guide - Page 30
30 Multimedia playback Note: You can return to the Home page while playing music. The current track along with basic music control functions appear in the status ribbon. See "Status and notification area" on page 12. - Acer B1-711 | User Guide - Page 31
Google account. Tap People from the Home screen or the application menu to view your contacts. If you don't have any contacts stored on your tablet, you can sync with your Google account contacts, import contacts from a contact data file (vCard or csv) or add a new contact. If you have activated - Acer B1-711 | User Guide - Page 32
an entry. Tap Add another field for more categories. To assign an image to your contact, tap the silhouette and select an image from your tablet's picture gallery (select Gallery if requested). You may also take and crop a new photo. Tap Done (top-left corner) to finish and save the contact - Acer B1-711 | User Guide - Page 33
.google.com. Sign in to your account then select and edit contacts from the list; the next time your tablet synchronizes with your computer, these changes will also be made to your tablet's contact list. Warning: Back up your contacts before making any changes. Tap the Menu button and select Import - Acer B1-711 | User Guide - Page 34
features a front-facing digital camera. This section will take you through all the steps in taking photos and videos with your tablet. Note: It is recommended that you insert a microSD Card into the microSD slot before using the camera. Please note you can only save photos and - Acer B1-711 | User Guide - Page 35
35 Camera modes Panorama Camcorder mode Camera mode Settings Shutter button The panorama mode allows you to take multiple photos of a scene which are then "stitched" together to create a single photograph. - Acer B1-711 | User Guide - Page 36
, Incandescent, Daylight, Fluorescent or Cloudy. Taking a photo 1. Ensure the options described above are set to your preferences. 2. Frame your subject and steady your tablet. 3. Pinch to zoom in or out as needed. Note: When using zoom, the image on the screen does not represent the quality of the - Acer B1-711 | User Guide - Page 37
37 After taking a photo, swipe across the screen from right to left to view the gallery. Camcorder icons and indicators Camera mode Settings Record button Tap the camera mode icon and select camcorder to switch to camcorder mode. - Acer B1-711 | User Guide - Page 38
, Incandescent, Daylight, Fluorescent or Cloudy. Shooting a video 1. Ensure the options described above are set to your preferences. 2. Frame your subject and steady your tablet and zoom in or out as needed. 3. Tap the record icon to begin recording. 4. Tap the record icon again to stop recording. - Acer B1-711 | User Guide - Page 39
39 Supported formats Type Image Video Audio Formats JPEG H.264 BP, MPEG-4 SP, H.263 AAC-LC, AMR-WB, AMR- view (videos are marked with a small play symbol). From the Gallery you can share the file using various services. Tap Menu and then Share. Note: Share options vary depending on the file type. - Acer B1-711 | User Guide - Page 40
For all Bluetooth settings, tap APPS > Settings, then under WIRELESS & NETWORKS tap Bluetooth. Here you can switch Bluetooth on or off, set the tablet name and discoverability. Tap SEARCH FOR DEVICES to scan for nearby devices. To connect to a device, tap the device in the list of available devices - Acer B1-711 | User Guide - Page 41
check for updates to the tablet's software which may add support for additional Bluetooth devices. Data Usage The Data Usage section shows how much data has been transmitted to your tablet, either in total or for each App. This information is useful if you are using a metered service. Putting your - Acer B1-711 | User Guide - Page 42
You can adjust your tablet screen settings by tapping APPS > Settings > Display. Item Brightness Wallpaper Sleep Font Stop to close the program. Uninstalling an application You can remove programs installed on your tablet to free up extra storage memory. Tap and hold a program icon from the - Acer B1-711 | User Guide - Page 43
People, Gmail, and Calendar, can sync data from multiple accounts. Others sync data only from the first Google Account you sign in to on your tablet, or from an account associated specifically with that application. For some applications, such as People or Calendar, all changes that you make on your - Acer B1-711 | User Guide - Page 44
a name). Updating your tablet's operating system Your tablet can download and install system updates, adding support for new devices or expanding software options. To check for updates, tap APPS > Settings > About tablet > System updates > Check now. Note: Downloading new firmware can take up - Acer B1-711 | User Guide - Page 45
FAQ and troubleshooting This section lists frequently asked questions that may arise during the use of your tablet, and gives that is not supported. Refer to "Multimedia" on page 47 for more information. How do I check the OS version of my device? Tap APPS > Settings > About tablet to check the - Acer B1-711 | User Guide - Page 46
for the tablet to heat up during long periods of use, such as watching a video or playing a game. All Acer tablets are factory-tested before release. Other sources of help For information on: Up-to-date information regarding your tablet Service enquiries Refer to: www.acer.com support.acer.com - Acer B1-711 | User Guide - Page 47
RAM • 8 or 16 GB of flash memory Google Android™ operating system Display • 7" WSVGA TFT-LCD capacitive multi-touch screen • 1024 x 600 resolution Multimedia • Mono speaker • Built-in microphone Formats supported: Type Audio recording Audio playback Video recording Video playback Formats AAC-LC - Acer B1-711 | User Guide - Page 48
48 • UMTS 900 / 2100 MHz • HSUPA / HSDPA / GPRS / EDGE • GPS Camera • Front camera • 0.3-megapixel • Fixed focus Expansion • microSD Card slot (up to 32 GB) Battery • Rechargeable Li-ion battery: 10 W Note: Length of battery operation will depend on power consumption which is based on system - Acer B1-711 | User Guide - Page 49
Software available to third parties, except that you may, after prior written notification to Acer, transfer the Software as a whole to a third party so long as you of the United States. SUPPORT SERVICES Acer is not obligated to provide technical or other support for the Software. ACER LIVE UPDATE - Acer B1-711 | User Guide - Page 50
Acer Live Update service, which allows for updates for such software to be automatically downloaded and installed on your device. By installing the software, you hereby agree and consent that Acer , THE PROVISION OF OR FAILURE TO PROVIDE SUPPORT SERVICES, OR OTHERWISE UNDER OR IN CONNECTION WITH ANY - Acer B1-711 | User Guide - Page 51
Third Party Services is also subject to additional terms and conditions and policies which can be accessed through our global website. Privacy policy During registration you will be asked to submit some information to Acer. Please refer to Acer's privacy policy at www.acer.com/worldwide/support/swa
-
 1
1 -
 2
2 -
 3
3 -
 4
4 -
 5
5 -
 6
6 -
 7
7 -
8
-
9
-
10
-
11
-
12
-
13
-
14
-
15
-
16
-
17
-
18
-
19
-
20
-
21
-
22
-
23
-
24
-
25
-
26
-
27
-
28
-
29
-
30
-
31
-
32
-
33
-
34
-
35
-
36
-
37
-
38
-
39
-
40
-
41
-
42
-
43
-
44
-
45
-
46
-
47
-
48
-
49
-
50
-
51
 |
 |