AEG AWUS018B7B User Manual
AEG AWUS018B7B Manual
 |
View all AEG AWUS018B7B manuals
Add to My Manuals
Save this manual to your list of manuals |
AEG AWUS018B7B manual content summary:
- AEG AWUS018B7B | User Manual - Page 1
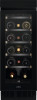
AWUS018B7B EN User Manual Wine Cabinet USER MANUAL - AEG AWUS018B7B | User Manual - Page 2
INSTRUCTIONS 4 3. INSTALLATION...6 4. PRODUCT DESCRIPTION 9 5. OPERATION...9 6. DAILY USE...12 7. HINTS AND TIPS 14 8. CARE AND CLEANING 14 9. TROUBLESHOOTING brochures, trouble shooter, service and repair information: www.aeg.com/support Register your product for better service: www.registeraeg - AEG AWUS018B7B | User Manual - Page 3
above and persons with reduced physical, sensory or mental capabilities or lack of experience and knowledge if they have been given supervision or instruction concerning the use of the appliance in a safe way and understand the hazards involved. • Children aged from 3 to 8 years are allowed to load - AEG AWUS018B7B | User Manual - Page 4
• If the supply cord is damaged, it must be replaced by the manufacturer, its Authorised Service Centre or similarly qualified persons in order to avoid a hazard. 2. SAFETY INSTRUCTIONS 2.1 Installation WARNING! Only a qualified person must install this appliance. • Remove all the packaging. • Do - AEG AWUS018B7B | User Manual - Page 5
installed shockproof socket. • Make sure not to cause damage to the electrical components (e.g. mains plug, mains cable, compressor). Contact the Authorised Service Centre or an electrician to change the electrical components. • The mains cable must stay below the level of the mains plug. • Connect - AEG AWUS018B7B | User Manual - Page 6
if necessary, clean it. If the drain is blocked, defrosted water collects in the bottom of the appliance. 2.6 Service • To repair the appliance contact the Authorised Service Centre. Use original spare parts only. • Please note that self-repair or nonprofessional repair can have safety consequences - AEG AWUS018B7B | User Manual - Page 7
3.1 Dimensions ENGLISH 7 W1 W2 H1 H2 D1 D2 D3 90° W3 Overall dimensions ¹ H1 mm 818 W1 mm 295 D1 mm 577 ¹ the height, width and depth of the appliance without the handle Space required in use ² H2 mm 820 W2 mm 300 D2 mm 580 ² the height, width and depth of the appliance - AEG AWUS018B7B | User Manual - Page 8
please turn to the vendor, to our customer service or to the nearest Authorised Service Centre. It must be possible to disconnect the front. 3.5 Door reversibility Please refer to the separate document with instructions on installation and door reversal. CAUTION! At every stage of reversing - AEG AWUS018B7B | User Manual - Page 9
4. PRODUCT DESCRIPTION 4.1 Product overview ENGLISH 9 6 2 5 7 1 4 3 1 Control panel 2 Shelf 3 Foot 4 Decorative frame 5 Triple-glazed glass door 6 Handle 7 Gasket 5. OPERATION WARNING! Do not spill any liquids on the control panel. This may damage the equipment and increase the risk of - AEG AWUS018B7B | User Manual - Page 10
10 www.aeg.com 5.2 Display A A. Temperature indicator 5.3 Switching on and off To switch on the appliance: 1. Insert the plug into the wall socket. 2. If the display is off, tap and hold the Temperature decrease key and Light key for 3 seconds. The display shows the default set temperature 12°C. - AEG AWUS018B7B | User Manual - Page 11
ENGLISH 11 • 2A door open - lights on at the highest dimming level, door closed - lights on at the selected dimming level, • 3A door open and closed - lights on at the selected dimming level, • 4A door open - lights on at the selected dimming level, door closed lights on at the highest dimming - AEG AWUS018B7B | User Manual - Page 12
12 www.aeg.com The alarm activates when the compartment's temperature is 5°C higher than the set temperature for more than 60 minutes. During the alarm: • the display shows blinking Hº Low temperature alarm The alarm activates when the compartment's temperature is 2°C lower than the set temperature - AEG AWUS018B7B | User Manual - Page 13
shelves Removing shelves The bottom part of the shelf is equipped with a pair of guides in the middle and a pair of hooks in the back. To remove the they stop. 2. Insert the shelf diagonally to the appliance. 3. Position the guides on the rails. To detach the shelf, it is enough to unhook only - AEG AWUS018B7B | User Manual - Page 14
14 www.aeg.com 6. Push the shelf back into the appliance. CAUTION! Before placing any wine bottles on the shelves, make sure they are properly hooked. Use the wooden shelves only to store bottles. 7. HINTS AND TIPS 7.1 Hints for energy saving • The internal configuration of the appliance is the - AEG AWUS018B7B | User Manual - Page 15
cleaner. Refer to the "Removing and installing shelves" chapter for instructions on how to remove and install the shelves. 8.5 Periods of proper steps described above. 9. TROUBLESHOOTING WARNING! Refer to Safety chapters. 9.1 What to do if... Problem Possible cause Solution The appliance - AEG AWUS018B7B | User Manual - Page 16
16 www.aeg.com Problem Possible cause Solution The circuit breaker tripped Turn on the circuit breaker or or a blown fuse. change the fuse. The compressor operates continually. Temperature is - AEG AWUS018B7B | User Manual - Page 17
Installation" chapter. 3. If necessary, replace the defective door gaskets. Contact the Authorised Service Centre. SSSRRR! BRRR! CLICK! BLUBB! HISSS! 11. TECHNICAL DATA The technical information for reference together with the user manual and all other documents provided with this appliance. - AEG AWUS018B7B | User Manual - Page 18
be compliant with BS EN 62552. Ventilation requirements, recess dimensions and minimum rear clearances shall be as stated in this User Manual at Chapter 3. Please contact the manufacturer for any other further information, including loading plans. 13. ENVIRONMENTAL CONCERNS Recycle materials with - AEG AWUS018B7B | User Manual - Page 19
- AEG AWUS018B7B | User Manual - Page 20
www.aeg.com/shop 212002789-8121004-01
-
 1
1 -
 2
2 -
 3
3 -
 4
4 -
 5
5 -
 6
6 -
 7
7 -
8
-
9
-
10
-
11
-
12
-
13
-
14
-
15
-
16
-
17
-
18
-
19
-
20
 |
 |

USER
MANUAL
EN
User Manual
Wine Cabinet
AWUS018B7B